
10 Whimsical Celestial Moon Phase Embroidery Ideas
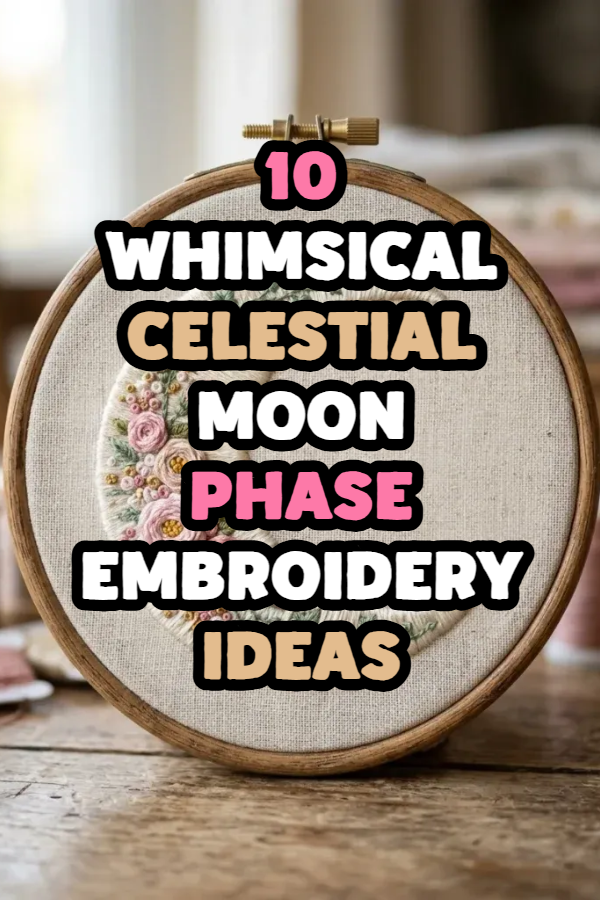
Hand embroidery featuring celestial moon phases offers a versatile and rewarding way to create bespoke textile art for modern interior settings. This comprehensive tutorial details ten distinct artistic approaches for designing and stitching whimsical lunar motifs onto natural fabric foundations. Readers will learn the practical steps needed to master core embroidery stitches, transfer intricate cosmic patterns, integrate mixed-media elements, and balance metallic threads across varying fabric tensions. Stitching celestial patterns allows crafters to explore textured gradients, delicate botanical borders, raw crystal highlights, and minimalist geometric line work with approachable techniques. This guide covers the complete creative process, from selecting suitable background fabrics and organizing stranded embroidery floss to mounting finished hoops securely for wall presentation. By understanding how to control thread density and coordinate stitch styles, beginners and experienced artisans alike can produce durable, visually refined needlework. These celestial embroidery projects function as personalized handmade gifts, decorative wall accents, or customizable design elements for garments and accessories.
Why This Idea Is Trending or Useful
The sustained popularity of celestial moon phase embroidery across modern DIY communities and Pinterest ideas stems from its blend of timeless astronomical imagery and tactile craftwork. Modern interior design frequently incorporates celestial elements to introduce a calm, reflective ambiance into living rooms, home offices, and bedrooms. Hand embroidery provides practical value as a low-cost, space-conscious hobby that requires minimal equipment while delivering high-impact decorative pieces. The cyclical nature of the lunar phases provides a natural framework for structured linear designs, radial mandalas, and mixed botanical compositions. Beginners appreciate this topic because fundamental stitches, such as backstitches, satin stitches, and French knots, can quickly yield intricate, professional-looking surfaces. Furthermore, combining traditional matte cotton floss with shimmering metallic threads, seed beads, or raw gemstones satisfies the current desire for rich, multi-layered textures in contemporary fiber art. This accessible medium allows makers of all experience levels to build confidence while creating enduring, custom home decor.
Materials and Preparation
Proper preparation and quality materials form the foundation of a neat, long-lasting celestial embroidery project. The fundamental workspace requires natural, tightly woven fabrics such as unbleached cotton calico, medium-weight linen, or deep navy and black cotton canvas. Sturdy bamboo or beechwood embroidery hoops ranging from five to nine inches provide necessary tension, while size five to nine embroidery needles accommodate various thread thicknesses. Crafters will need standard six-strand cotton embroidery floss in neutral, deep nocturnal, and soft pastel shades, complemented by specialized metallic threads in gold, silver, and copper. Essential auxiliary tools include water-soluble transfer pens, sharp micro-tip embroidery shears, a needle threader, and iron-on tear-away stabilizer to prevent fabric puckering on thin textiles. Prepare the fabric by pre-washing and steam-pressing to eliminate wrinkles and prevent post-stitching shrinkage. Secure the fabric tightly into the hoop until the surface is as taut as a drumhead before transferring your lunar pattern lines.
1. Botanical Crescent Wildflower Wreath
Step-by-Step Guide
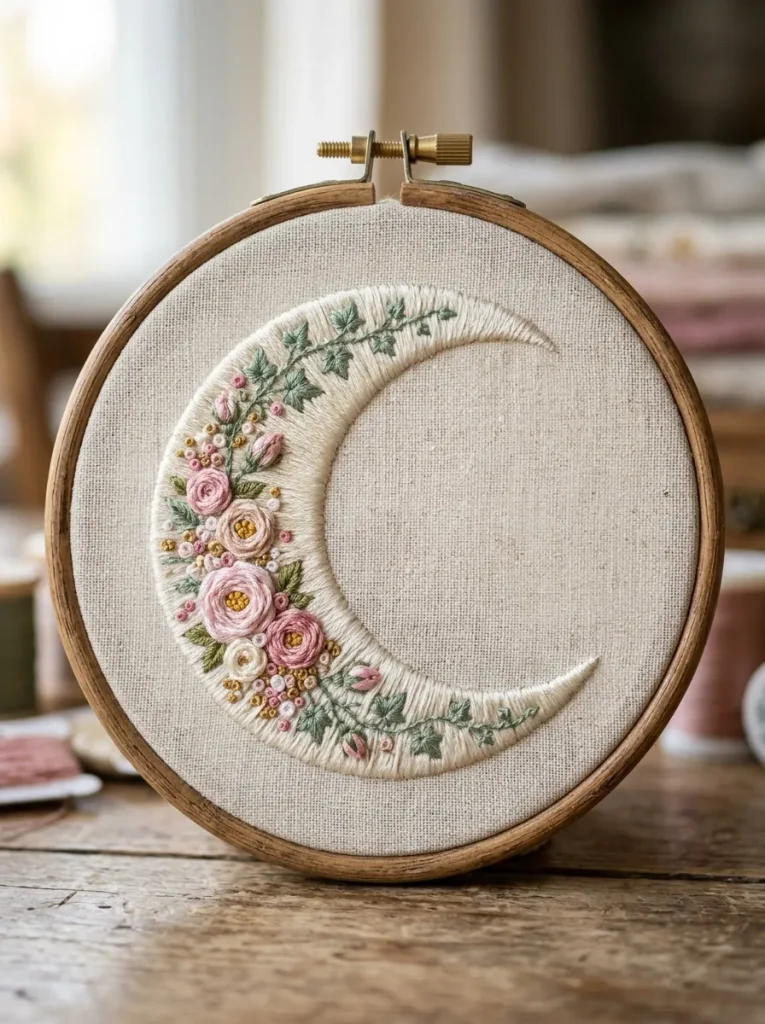
The botanical crescent wildflower wreath balances crisp astronomical geometry with organic floral details. In this concept, a slender waxing or waning crescent moon acts as a structural anchor, with blooming meadow flowers, miniature wild roses, and trailing ivy vines winding across its curved surface. The contrast between the smooth, opaque surface of the embroidered moon and the varied textures of the flowers creates visual depth. A color palette of cream, sage green, blush pink, and muted terracotta provides a soft, vintage garden feel against natural linen fabric. This design works exceptionally well as a standalone decorative hoop or as the centerpiece for an embroidered linen pillow cover.
+-------------------------------------------------------------+
|                  [Round Embroidery Hoop]                    |
|                                                             |
|             . - ~ ~ ~ - .                                   |
|         . '   ( * * * )   ' .      <-- Crescent Arc         |
|       /     ( * Daisy * )     \                               |
|      /     ( * Cluster * )     \   <-- French Knot Centers  |
|     |     ( * * * * * * * )     |                           |
|     |    ( Fern & Ivy Stems )   |  <-- Stem Stitch Vines    |
|      \    ( Satin Rosebuds )   /                            |
|       \     ( * * * * * )     /                             |
|         . '   ( * * * )   ' .                               |
|             ' - _ _ _ - '                                   |
|                                                             |
|  ==================== Base Fabric ========================  |
|  [ Natural Medium-Weight Linen with Stabilizer Backing    ]  |
+-------------------------------------------------------------+
Begin by tracing the crescent moon outline and connecting floral vine sketches onto your taut linen using a fine-tipped water-soluble blue marker. Thread your needle with two strands of cream cotton floss and outline the outer moon crescent using a fine split stitch, then fill the interior with parallel rows of horizontal satin stitches to establish a smooth base. Transition to floral details using three strands of olive green floss to work the trailing stems using overlapping stem stitches. Stitch small leaves with angled fishbone stitches to create natural centerline ridges. Form miniature wild roses by working woven wheel stitches in blush pink floss, wrapping the thread gently around five base spokes until the center is full. Add micro-texture across the inner curve of the crescent by placing clusters of tight, double-wrapped French knots in pale mustard floss to represent golden pollen, and mist lightly with distilled water when finished to dissolve the remaining blue guide lines.
2. Metallic Gold Midnight Constellation Map
How to Create
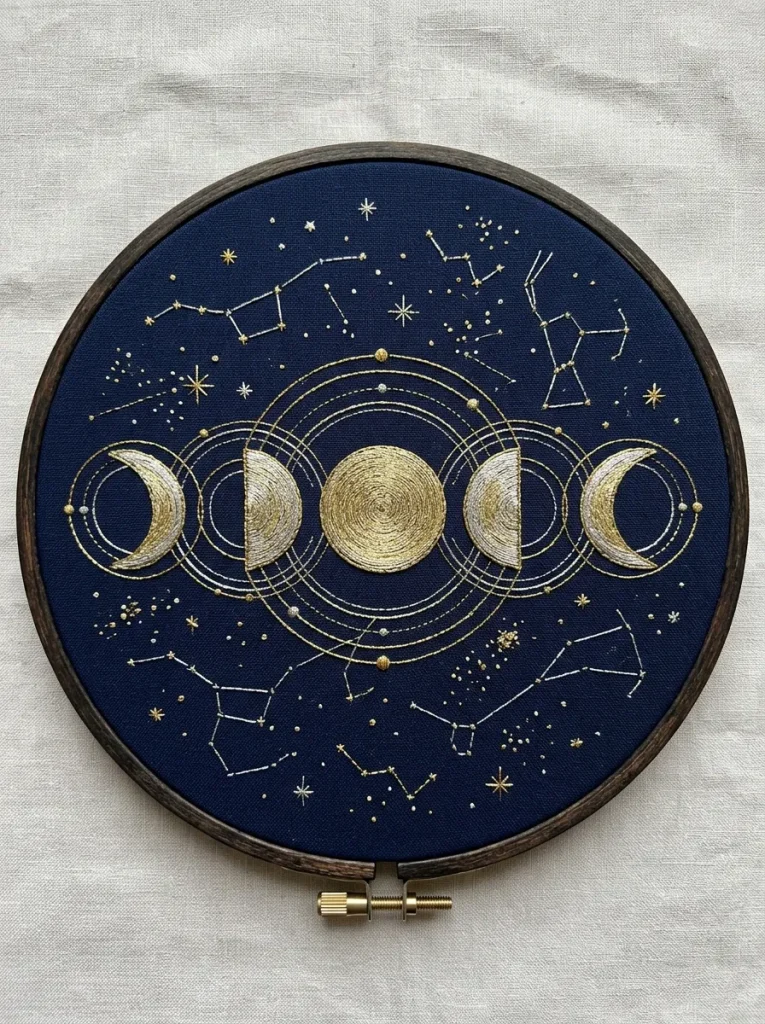
The metallic gold midnight constellation map pairs crisp lunar phases with precise astronomical star charts on a deep midnight navy or black cotton canvas background. This design arranges five distinct moon phases in a horizontal alignment, framed by delicate geometric orbit rings, star clusters, and accurate constellation lines. The high contrast between deep nocturnal fabric and reflective metallic gold thread produces a clean, modern aesthetic that catches ambient light. The simplicity of fine line work makes this layout approachable for beginners while delivering a sophisticated, museum-quality finish suitable for modern minimalist interiors.
Secure a piece of midnight navy cotton canvas into an eight-inch wooden hoop, ensuring the fabric weave remains perfectly straight and taut. Using a white water-erasable chalk pencil, draw a horizontal line across the center, marking the positions for five consecutive moon phases: waxing crescent, first quarter, full moon, third quarter, and waning crescent. Thread a size seven needle with two strands of metallic gold thread, conditioning the strand with thread wax to prevent twisting and fraying during stitching. Outline the moons using a short, consistent backstitch, keeping each stitch approximately two millimeters long for smooth curves. Fill the full moon using a dense brick stitch to mimic the textured surface of lunar craters. Connect the moon phases with fine running stitches to represent orbital pathways, and embroider surrounding constellation stars using sharp cross-stitches topped with single-wrapped metallic French knots at each major coordinate intersection.
3. Celestial Moth with Radiant Moon Phases
How to Make
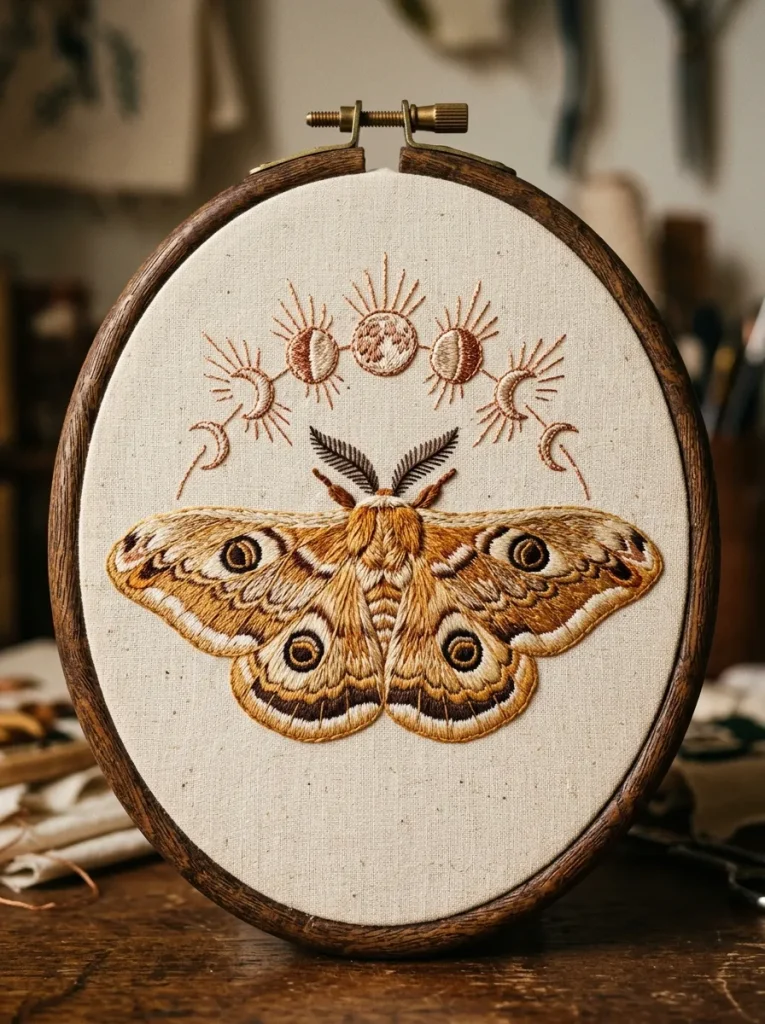
The celestial moth design combines the symmetrical silhouette of a night-flying silk moth with an arched crown of delicate lunar phases floating between its antennae. Positioned on warm charcoal or unbleached calico fabric, the moth features detailed wing segments filled with geometric line art, stippled dots, and contrasting thread textures. The arch of lunar phases above the moth draws the eye upward, establishing a vertical visual axis that fills an oval or round hoop naturally. The rich combination of soft taupe, ivory, ochre, and shimmering copper threads gives this project an artisanal feel inspired by vintage natural history illustrations.
+-------------------------------------------------------------+
|                   [Oval Hoop Arrangement]                   |
|                                                             |
|          ( )    ( (    ( O )    ) )    ( )                  |
|          Waxing       Full Moon       Waning  <-- Moon Arch |
|                                                             |
|                    /|  /\  |\                               |
|                   / | /  \ | \                              |
|                  (  |/ /\ \|  )   <-- Silk Moth Wings       |
|                 / \ ( /  \ ) / \      (Satin & Long-Short)  |
|                (   \ V    V /   )                           |
|                 \   )      (   /                            |
|                  \ /        \ /   <-- Feathered Wing Tips   |
|                                                             |
|  ==================== Substrate ==========================  |
|  [ Heavyweight Calico with Iron-On Backing Stabilizer     ]  |
+-------------------------------------------------------------+
Transfer the moth outline and the overhead arched moon phases onto your fabric using an iron-on transfer pencil or carbon tracing paper. Secure the fabric in an oval hoop, backing it with lightweight tear-away stabilizer to prevent tension distortion around the dense wing stitches. Fill the main body of the moth using vertical satin stitches in dark espresso brown floss, then build the furry thorax texture by layering short, staggered straight stitches in warm cream. For the upper wings, use long-and-short stitch gradients transitioning smoothly from deep ochre at the body to pale ivory along the scalloped outer margins. Outline the arched moon phases floating overhead with fine whipped backstitches using two strands of copper thread. Add radial ray lines extending outward from the central full moon using single straight stitches, and finish by adding tiny single-strand seed stitches across the moth’s lower wings to create soft, speckled insect scales.
4. Velvet Appliqué Lunar Eclipse Sequence
Execution Process
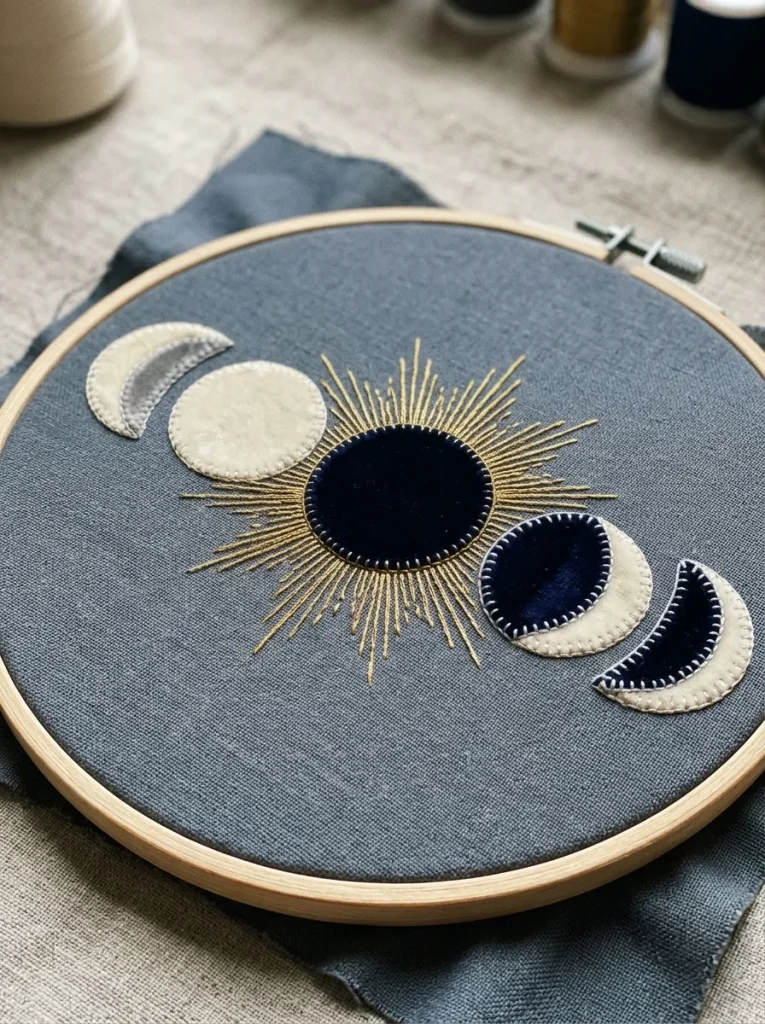
The velvet appliqué lunar eclipse sequence introduces multi-dimensional tactile contrast by combining smooth plush velvet fabric cutouts with detailed boundary embroidery. Set against a matte slate-gray cotton background, circular appliqué patches made of ivory and midnight-blue silk velvet represent the progression of an eclipse. The plush texture of the velvet catches ambient light differently from every angle, contrasting with the crisp, defined perimeter stitches that secure the cutouts. This mixed-media approach speeds up the creation process by using fabric surfaces to cover large areas while reserving fine hand-stitching for borders, glowing halos, and corona details.
Begin by cutting circular pieces of ivory and dark navy velvet to match the dimensions of your five-phase eclipse pattern, applying a thin layer of fusible web to the back of each piece before cutting to eliminate edge fraying. Arrange the velvet cutouts in a horizontal sequence across your stretched base fabric and press them into place using a warm iron and a protective pressing cloth. Secure the perimeter of each velvet moon using a closely spaced blanket stitch or decorative buttonhole stitch with two strands of matching mercerized cotton floss. Switch to a shimmering pale gold metallic thread and stitch radiating corona rays extending outward from the eclipsed phases using varied lengths of straight stitches. Surround the sequence with a scattering of tiny starbursts created by overlapping four-point star stitches, ensuring all thread knots are secured flat against the backside to preserve the smooth lay of the surrounding velvet.
5. Ethereal Cloudscape and Crescent Moon Nursery Hoop
Setup Method
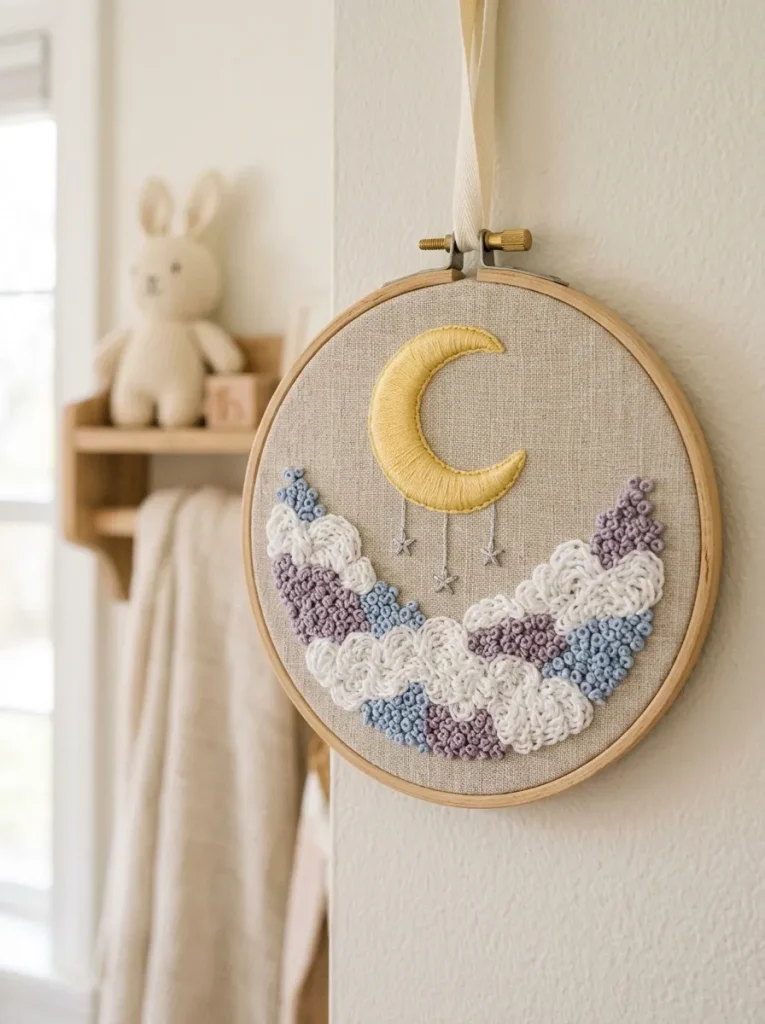
The ethereal cloudscape and crescent moon nursery concept blends soft, pillowy pastel clouds with a glowing golden crescent moon, creating a calming visual for children’s bedrooms or nursery walls. Styled on soft oatmeal linen or pale sky-blue cotton, this design uses varying thread weights to establish clear atmospheric depth. The central crescent moon features smooth, flat satin stitching, while the billowed clouds beneath use layered rows of textured chain stitches, French knots, and couching. Soft tones of butter yellow, dusty lavender, powder blue, and warm white create a tranquil, dreamy aesthetic that works well with modern Scandinavian and minimalist nursery decor.
+-------------------------------------------------------------+
|                 [Soft Nursery Hoop Layout]                  |
|                                                             |
|                   . - ~ ~ ~ - .                             |
|               . '     . - .     ' .                         |
|             /       /       \       \   <-- Crescent Moon   |
|            |       |         |       |      (Padded Satin)  |
|             \       \       /       /                       |
|               . '     ' - '     ' .                         |
|             ( ~ ~ ~ ~ ~ ~ ~ ~ ~ ~ ~ ~ )                     |
|           (   Layered Cloud Formations  ) <-- French Knots  |
|          (  Pastel Blue, White, Lavender )    & Chain Loops |
|                                                             |
|  ==================== Base Textile =======================  |
|  [ Oatmeal Linen with Soft Cotton Interfacing             ]  |
+-------------------------------------------------------------+
Trace the crescent moon and overlapping curved cloud formations onto your fabric using an air-erasable fabric marker. Hoop the fabric securely and begin stitching the crescent moon using padded satin stitch: first, lay down a foundation of horizontal running stitches across the interior, then cover them completely with perpendicular vertical satin stitches in pale buttercup yellow to create an elevated, three-dimensional surface. Shift to the lower cloud banks, using four strands of pure white floss to build the top cloud rims with tight, concentric rows of reverse chain stitches. Fill the lower, shadowed areas of the clouds by blending dusty lavender and soft blue floss using a textured seeding stitch and scattered French knots. Add three or four delicate hanging stars suspended from the moon tip using single strands of metallic silver thread anchored with small diamond eyelet stitches at the bottom.
6. Raw Amethyst and Quartz Crystal Moon Garden
How to Create
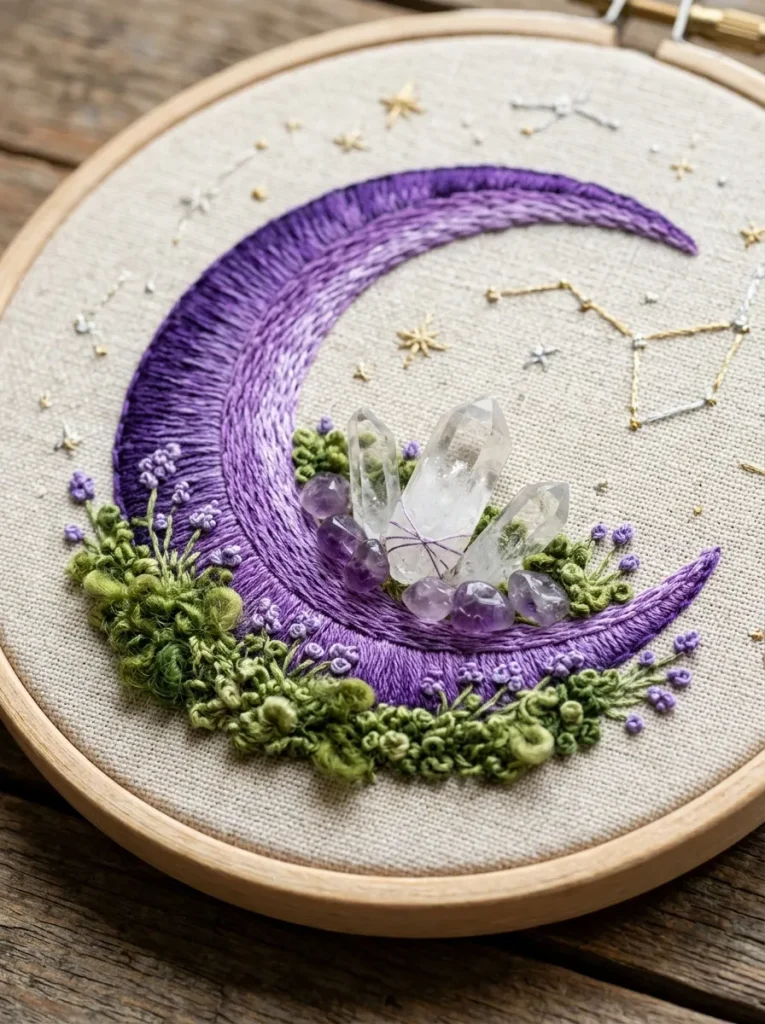
The raw amethyst and quartz crystal moon garden integrates genuine mineral chips into hand-stitched botanical and lunar designs. This tactile mixed-media project positions an embroidered waxing crescent moon alongside clusters of natural tumbled amethyst, raw clear quartz points, and fine green moss foliage. The hard, reflective surfaces of the gemstones create dynamic contrast against soft matte cotton thread and rough natural linen. The theme suggests an enchanted crystal cavern where lunar energy nurtures subterranean flora, making it an engaging conversation piece for living room gallery walls or personal altar spaces.
+-------------------------------------------------------------+
|               [Crystal Garden Hoop Display]                 |
|                                                             |
|                 . - ~ ~ ~ - .                               |
|             . '     . - .     ' .                           |
|           /       /       \       \                         |
|          |       |  [Amethyst Chip]|  <-- Wire-Beaded Stone |
|          |       |   [Quartz Point]|  <-- Direct Tack Stitch|
|           \       \       /       /                         |
|             . '     ' - '     ' .                           |
|            (### Micro-Moss Patch ###) <-- Turkey Rug Loops  |
|            ( * Lavender & Sedum Pups) <-- Bullion Knots     |
|                                                             |
|  ==================== Substrate ==========================  |
|  [ Heavyweight Natural Linen with Canvas Support Layer    ]  |
+-------------------------------------------------------------+
Prepare a double-layered foundation by hooping a piece of heavyweight natural linen together with an underlying sheet of plain cotton muslin for extra weight support. Outline the crescent moon using dark violet floss, filling the shape with a blend of long-and-short stitches that transition from deep plum along the outer edge to lilac on the interior curve. Secure three to four small pre-drilled amethyst and quartz chips into the lower crook of the crescent using fine twenty-eight-gauge craft wire or heavy-duty transparent nylon thread, anchoring the wire through the back of the hoop. Surround the base of the crystals with dense patches of green moss stitched in Turkey work loops, shearing the loops with sharp scissors to create a velvety pile. Complete the garden with small succulent rosettes and lavender buds using raised bullion knots in muted sage and soft rosewood floss.
7. Minimalist Monoline Geometric Orbit Phase
Step-by-Step Guide
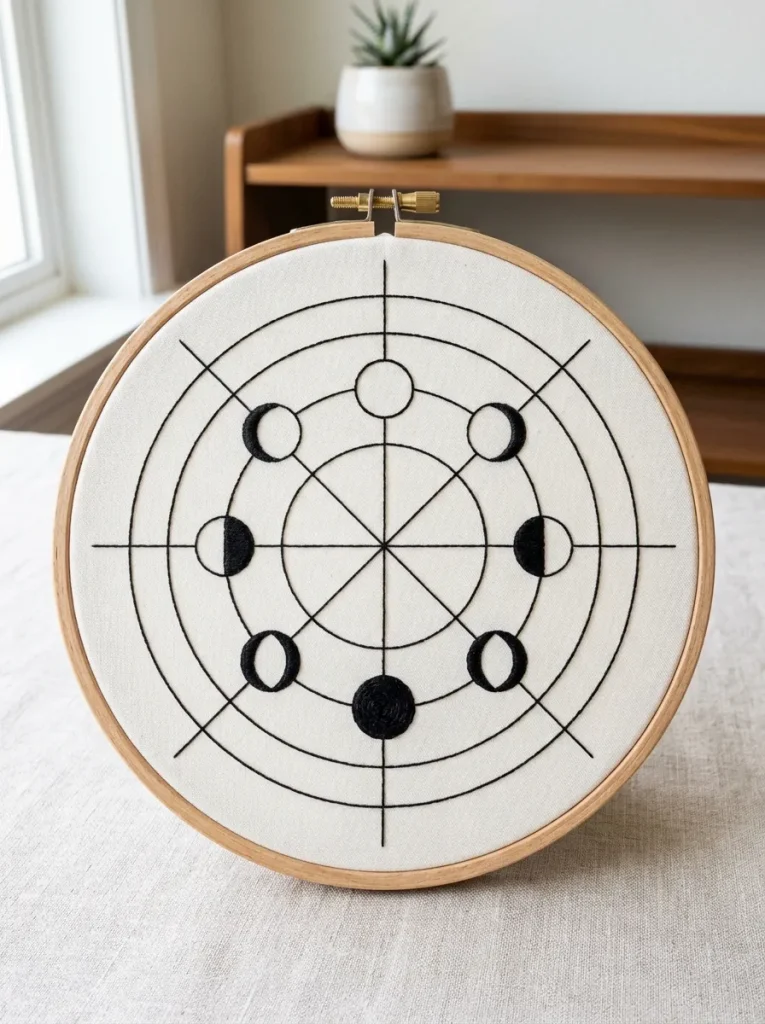
The minimalist monoline geometric orbit phase uses precise continuous lines, uniform spacing, and understated geometric accents. Set against an off-white cotton fabric, this design features seven moon phases arranged along an intersecting series of concentric orbital circles and clean vertical guide axes. The visual style relies on consistent stitch lengths and controlled tension rather than dense color fills, producing a clean, architectural piece. This modern minimalist look complements mid-century modern furniture, neutral home accents, and organized gallery wall arrangements that favor simplicity over heavy ornamentation.
+-------------------------------------------------------------+
|               [Monoline Geometric Matrix]                   |
|                                                             |
|                     |   ( O )   |      <-- Top Apex Phase   |
|                     |     |     |                           |
|            . - - - -|- - -|- - -|- - - - .                  |
|        . '          |     |     |          ' .              |
|       /    ( (      |   ( O )   |      ) )    \             |
|      |  Waxing Half |  Full Moon|  Waning Half |            |
|       \             |     |     |             /  <-- Orbit  |
|        . '          |     |     |          ' .       Circles|
|            . - - - -|- - -|- - -|- - - - .                  |
|                     |   ( O )   |      <-- Base Axis Marker |
|                                                             |
|  ==================== Base Textile =======================  |
|  [ Pure Off-White Cotton Drill with Tight Plain Weave     ]  |
+-------------------------------------------------------------+
Mount a square of pure off-white cotton drill fabric into an eight-inch wooden hoop, tightening the tension screw firmly with a small screwdriver. Use a hard 2H pencil or fine heat-erasable pen and a circle compass to lightly draw three concentric orbital circles, intersected by a single vertical center axis line. Thread a sharp size nine embroidery needle with a single strand of matte black cotton embroidery floss. Stitch all continuous orbital lines and axes using an ultra-fine backstitch, maintaining a uniform stitch length of one and a half millimeters. For the moon phases along the rings, outline the perimeters with the same single-strand backstitch, filling only the shadowed segments with clean, parallel straight hatching lines spaced one millimeter apart. Press the finished piece from the reverse side with a dry iron over a terry cloth towel to smooth the fabric without flattening the delicate line work.
8. Thread-Painted Moody Watercolor Moon Halo
How to Make
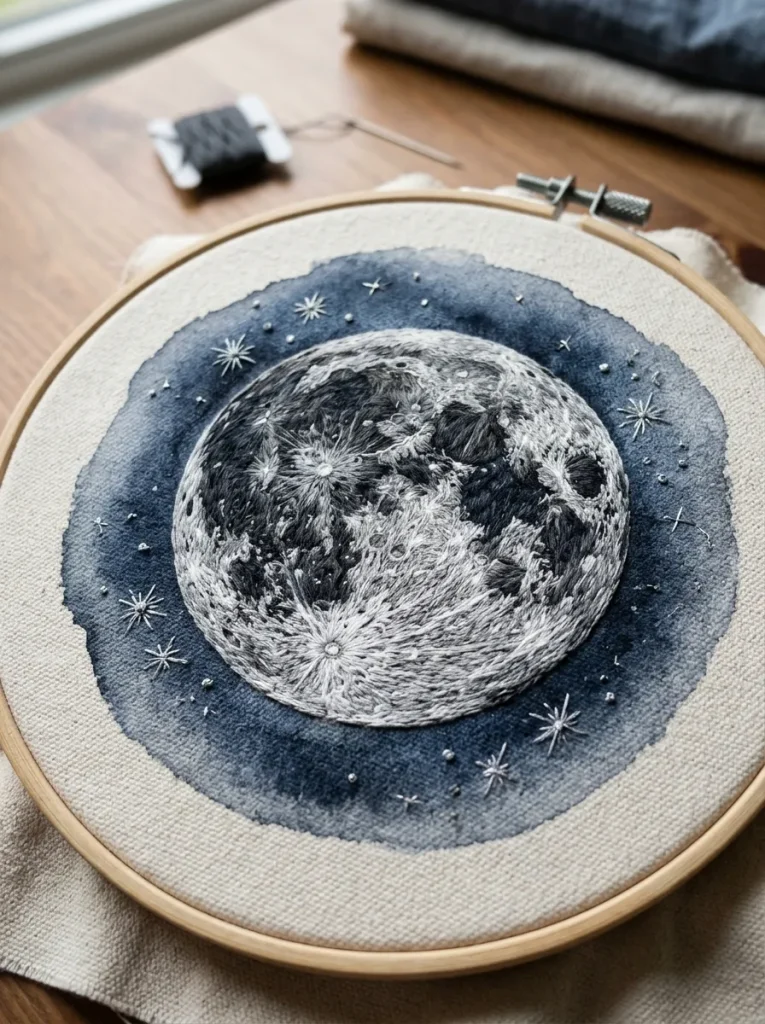
The thread-painted moody watercolor moon halo combines fabric dyeing techniques with fine needle thread painting. Before stitching begins, the central circular area of a white cotton canvas is washed with soft, circular blooms of diluted gray, indigo, and dusty rose watercolor paints. Once dry, fine embroidery stitches define the moon’s crater topography, surface mares, and glowing corona directly over the painted base. This hybrid technique creates atmospheric softness, blending watercolor gradients with the crisp texture of fine thread work. The finished piece offers an artistic, painterly interpretation of the moon that pairs well with contemporary bohemian and moody interior palettes.
Begin by dampening a piece of stretched 100% cotton canvas with a wet watercolor brush, then apply diluted indigo, payne’s gray, and rose watercolor pigments in a soft circular halo, allowing the edges to bleed outward naturally. Let the fabric dry completely for twenty-four hours before hooping it firmly over an inner ring. Transfer the detailed outlines of major lunar impact craters and dark surface mares onto the painted canvas using a light-gray watercolor pencil. Thread your needle with a single strand of light-gray cotton floss and work the crater walls using delicate long-and-short thread painting stitches, angling the needle to follow the curvature of each feature. Blend three distinct shades of charcoal, slate, and pearl gray across the surface to mimic lunar topography. Add outer halo accents with two strands of glistening white silk floss, working delicate seed stitches that feather outward into the unpainted canvas.
9. Mystical Tarot Card Lunar Frame
Setup Method
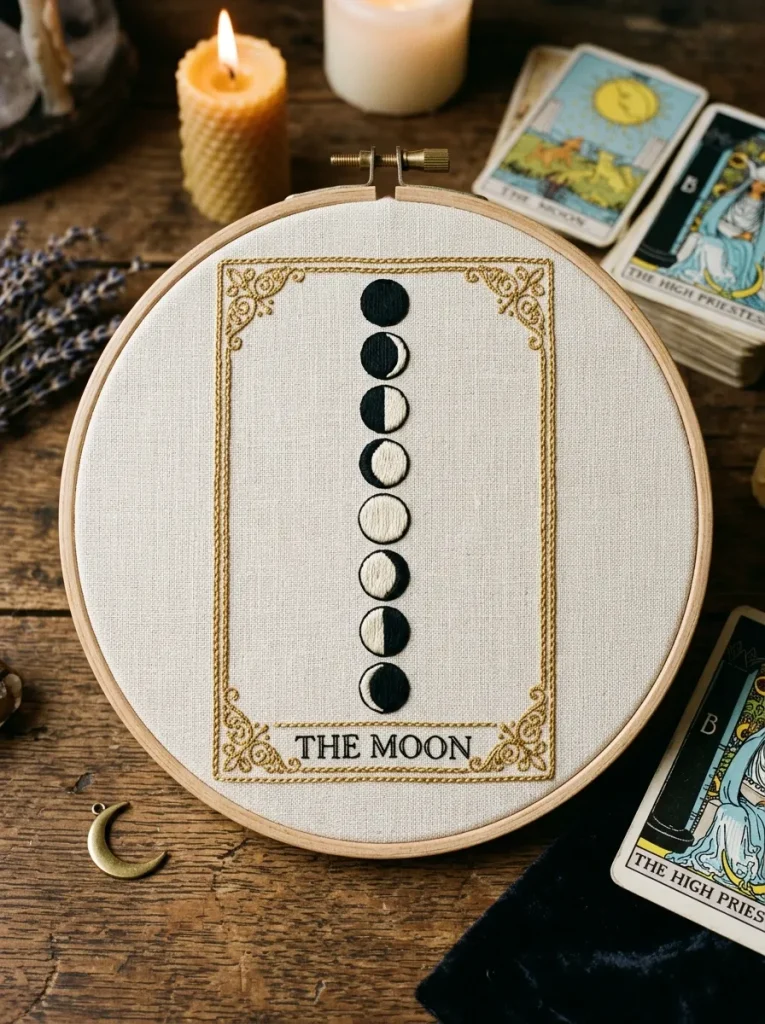
The mystical tarot card lunar frame presents the complete cycle of moon phases within a structured rectangular border inspired by traditional tarot card decks. Set on natural flax linen, the design features a double-line rectangular border accented with decorative corner brackets, sunburst flourishes, and a vertically stacked progression of the eight classic lunar phases. Below the central full moon, the design includes typographic banner text reading “The Moon” stitched in a vintage serif script. The balance of geometric framing, clean lettering, and central celestial motifs creates an engaging, occult-inspired design that displays handsomely in modern vintage, eclectic, and dark academia-themed spaces.
+-------------------------------------------------------------+
|                [Tarot Card Border Structure]                |
|                                                             |
|   +=====================================================+   |
|   | [*] Decorative Filigree Corner Bracket          [*] |   |
|   |                                                     |   |
|   |                     ( O ) New Moon                  |   |
|   |                     ( ( ) Crescent                  |   |
|   |                    ( ( ( ) Half Phase               |   |
|   |                   ( ( O ) ) Full Radiant            |   |
|   |                    ( ) ) ) Disseminating            |   |
|   |                     ( ) ) Waning                    |   |
|   |                                                     |   |
|   |   +---------------------------------------------+   |   |
|   |   |        T H E   M O O N   (Serif Text)       |   |   |
|   |   +---------------------------------------------+   |   |
|   | [*]                                             [*] |   |
|   +=====================================================+   |
|                                                             |
|  ==================== Base Textile =======================  |
|  [ Natural Flax Linen Backed with Tear-Away Stabilizer    ]  |
+-------------------------------------------------------------+
Draw a clean four-by-six-inch rectangle onto your linen using a clear grid ruler and a water-soluble marker, adding small diagonal corner bracket flourishes. Space the eight moon phases evenly along the vertical centerline inside the box, placing the large full moon directly in the center. Stitch the outer rectangular double border using two strands of rich antique gold floss in a firm coral stitch or heavy chain stitch for a substantial frame. Fill the moon phases using satin stitches in deep midnight black and warm ivory floss, taking care to keep the outer edges smooth. Embroider the decorative corner accents with delicate fern stitches and tiny metallic French knots. Finish the bottom label banner by stitching the serif letters with a single strand of black floss using a fine backstitch, working slowly through curves to keep the letterforms sharp and legible.
10. Floating Organza Transparent Phase Ring
Execution Process
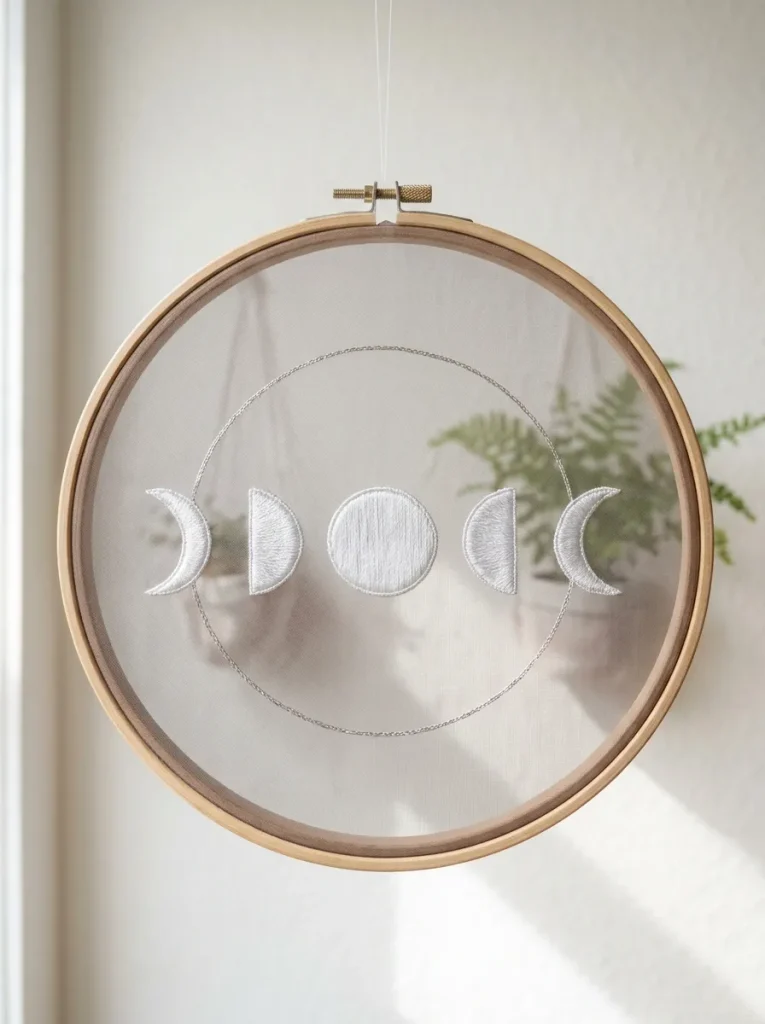
The floating organza transparent phase ring uses sheer synthetic or silk organza fabric to produce an ethereal display where the embroidered moon phases appear suspended in mid-air. When secured within a polished wooden hoop and hung against a light wall, the translucent background recedes, leaving only the textured thread forms and metallic orbit rings visible. This modern approach demands careful back-stitch management, as every carried thread and knot remains visible through the sheer textile. The finished piece is remarkably lightweight and luminous, casting soft shadows through the hoop onto the wall surface behind it.
+-------------------------------------------------------------+
|               [Sheer Organza Floating Hoop]                 |
|                                                             |
|             . - ~ ~ ~ - .                                   |
|         . '   ( O )   ( O ) ' .    <-- Floating Moons       |
|       /     Waxing     Full     \      (Dense Satin Fill)   |
|      /                           \                          |
|     |  ( ( )               ( ) )  | <-- No Carried Threads! |
|     |  Crescent             Waning|     (Clean Hidden Knots)|
|      \                           /                          |
|       \     ( O )     ( O )     /                           |
|         . '  Gibbous    New   ' .                           |
|             ' - _ _ _ - '                                   |
|                                                             |
|  ==================== Base Textile =======================  |
|  [ Translucent Silk or Synthetic Organza (No Interfacing) ]  |
+-------------------------------------------------------------+
Mount a piece of crisp, translucent white or smoky charcoal organza into a high-quality beechwood hoop, pulling the fabric taut without stretching the delicate grid weave out of square. Pin your paper pattern directly behind the sheer fabric, tracing the circular moon phase ring directly onto the organza using an ultra-fine vanishing ink pen. Thread a fine size nine needle with two strands of white stranded cotton, anchoring each thread section with invisible micro-waste knots placed within the body of each moon shape. Work the moon phases in compact satin stitches, ensuring no thread is carried across the open spaces between individual motifs. Connect the floating moons with a continuous, delicate circle stitched in single-strand metallic silver thread using an outline stitch. Once complete, trim excess organza along the back rim, secure the raw edge with a clear textile craft adhesive, and display the hoop near natural light to highlight its floating quality.
Common Beginner Mistakes and How to Avoid Them
One of the most frequent mistakes in celestial moon phase embroidery is improper fabric tension, which leads to rippled, puckered circles rather than smooth, round lunar silhouettes. When hoop tension is too loose, the pulling force of satin and fill stitches draws the fabric inward, distorting circular shapes into irregular ovals. To prevent this, stretch your base fabric until it produces a drum-like sound when tapped, and retighten the tension screw periodically during long stitching sessions. Another widespread issue involves pulling metallic threads too quickly through heavy fabric; metallic threads are composed of a thin foil wrap around a synthetic core, making them prone to fraying, snagging, and splitting under friction. Minimize this by working with shorter thread lengths of no more than twelve inches, using specialized thread conditioner wax, and sizing up your needle to clear an adequate path through the weave. Additionally, beginners often carry dark threads across the back of light-colored linen between distant shapes, causing unsightly shadow lines on the front face. Always terminate your thread neatly behind each individual moon phase before starting the next.
| Common Mistake | Primary Root Cause | Practical Preventive Action |
|---|---|---|
| Puckered Moon Outlines | Loose hoop tension; excessive pull on satin stitches | Stretch fabric drum-tight; support light fabrics with tear-away stabilizer. |
| Frayed Metallic Thread | Working with long strands; small needle eye friction | Cut metallic strands to 12″ max; use thread conditioner wax and larger needles. |
| Visible Back Shadow Lines | Carrying dark thread across the back between distant shapes | Fasten off thread at each motif; never bridge empty fabric spans on sheer linen. |
| Distorted Circles | Inconsistent stitch direction across round fills | Lay down split-stitch outlines first; keep satin stitches strictly parallel. |
| Stiff, Bulky Knots | Over-knotting thread ends on the hoop reverse | Anchor working thread with small waste stitches hidden within dense design areas. |
Practical Tips for Better Results
Achieving clean, professional results in celestial hand embroidery relies on consistent stitch tension, sharp tools, and careful design execution. Always outline circular moon shapes with a fine split stitch using a single strand of floss before filling them with satin stitches; this split-stitch foundation acts as a raised border that prevents uneven edges and keeps your satin stitches aligned. When working with stranded cotton, separate each six-strand bundle into individual threads and recombine them before threading; this simple step untwists the fibers, allowing them to lay flatter on the fabric for smoother surface coverage. Keep a damp sponge nearby when transferring designs with water-soluble markers to spot-clean small pattern adjustments without soaking the entire fabric panel. For projects featuring metallic highlights, reserve the metallic stitching for the final stage to protect the delicate metallic fibers from being abraded by hand movement while working standard cotton stitches. Finally, store in-progress hoops in clean cotton project bags to protect the background fabric from airborne dust and household oils.
Styling, Presentation, or Organization Ideas
Presenting your completed celestial moon phase embroidery effectively enhances its decorative impact within your home. For a classic gallery-style presentation, frame the finished textile within its working wooden hoop: trim the excess fabric backing to one inch, gather it tightly with a strong running stitch, and glue a protective backing disc of acid-free felt over the rear opening. To complement mid-century or modern minimalist decor, mount the embroidered fabric inside a square floating glass frame or an unglazed shadow box, allowing the natural textile margins and frayed linen edges to show. Grouping three complementary lunar hoops of varying diameters on a wall creates a balanced celestial installation above headboards, desks, or credenzas. In dark academia or vintage interior settings, stain the wooden embroidery hoops with dark walnut wood dye and top them with antiqued brass hanging rings for added depth. You can also sew finished lunar patches directly onto the backs of denim jackets, canvas tote bags, or custom throw pillow covers to integrate your needlework into everyday personal items.
+-------------------------------------------------------------+
|                [Three-Hoop Gallery Wall Setup]              |
|                                                             |
|   +----------------- Centerpiece Hoop (9") ---------------+ |
|   |                                                       | |
|   |         [Celestial Moth with Moon Phase Arch]         | |
|   |                                                       | |
|   +-------------------------------------------------------+ |
|             /                                   \           |
|   +-- Left Hoop (6") --+             +-- Right Hoop (6") -+ |
|   |                    |             |                    | |
|   |  [Botanical Wreath]|             | [Monoline Orbit]   | |
|   |                    |             |                    | |
|   +--------------------+             +--------------------+ |
|                                                             |
|  ==================== Display Space ======================  |
|  [ Symmetrical Wall Layout Above Headboard or Credenza     ]  |
+-------------------------------------------------------------+
Budget and Time Planning
Celestial moon phase embroidery is an economical and time-efficient craft that delivers lasting creative value on a modest budget. A beginner can assemble a complete toolkit—including two beechwood hoops, an assortment of ten cotton floss skeins, two spools of metallic thread, a pack of embroidery needles, and a yard of cotton calico—for fifteen to thirty dollars. Sourcing natural linen remnants, repurposing vintage fabric scraps, and utilizing thrifted frames can reduce project costs even further without compromising the quality of the finished piece. In terms of time investment, small five-inch minimalist geometric hoops can be completed in two to three hours of focused stitching, making them ideal single-evening projects. Larger, more complex mixed-media pieces—such as the beaded crystal garden or thread-painted watercolor halos—typically require six to ten hours of work spread over several relaxing sessions. Plan your project by dedicating the first session to pattern transfer, hoop preparation, and foundational split stitching, leaving subsequent sessions for detailed fill work, bead attachment, and final mounting.
Creative Expansion and Advanced Inspiration
Once you master the foundational techniques of celestial embroidery, you can expand your work with advanced textures and mixed-media elements. Experiment with traditional stumpwork techniques to craft three-dimensional moon shapes, using wire foundations and raised padding to elevate the lunar phases several millimeters off the fabric plane. Incorporate micro-scale LED copper fairy lights between the base fabric and an underlying backing felt, piercing tiny pinholes through the canvas to produce softly illuminated star constellations for evening display. Advanced artisans can also explore metal thread work, using vintage gold bullion, purl wires, and kid leather padding to create heirloom-quality goldwork moons inspired by historical ceremonial textiles. You can also combine cyanotype sun-printing on cotton fabric with celestial embroidery, using real botanicals and sun-exposed Prussian blue backgrounds as a base for metallic needlework. These creative expansions offer endless avenues to broaden your fiber art skills, transforming simple embroidery hoops into intricate, multi-layered works of art.