
10 Cozy Cottagecore Mushroom Forest Embroidery Ideas
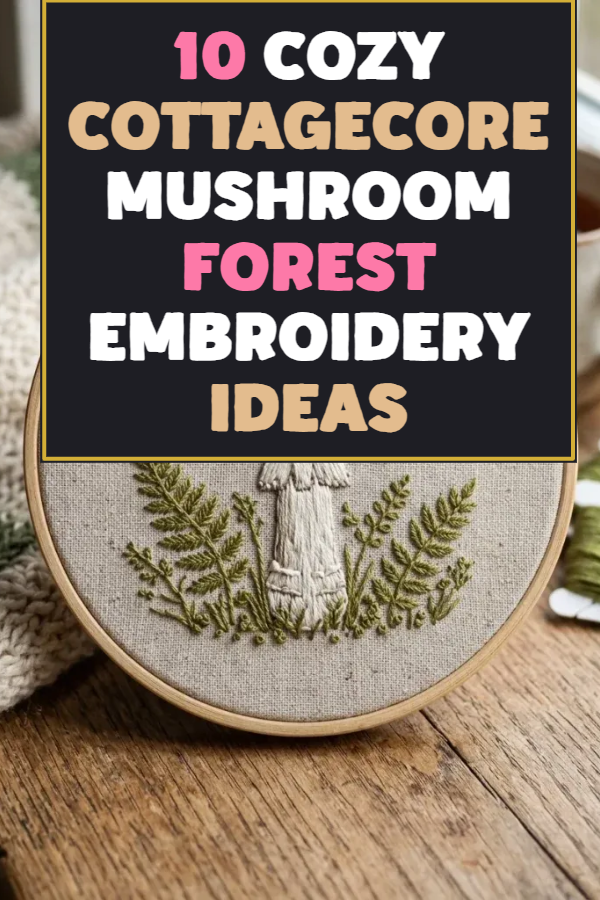
Hand embroidery rooted in cozy cottagecore aesthetics provides a soothing, tactile avenue for bringing the quiet enchantment of woodland forests into modern living spaces. Exploring natural botanical motifs—such as speckled toadstools, creeping emerald mosses, delicate ferns, and foraging wildlife—allows crafters to construct textured textile art with timeless heirloom charm. In this comprehensive long-form guide, you will learn ten distinct hand embroidery concepts that combine classic needlework stitches with organic forest themes to elevate wall decor, custom apparel, and home textiles. Readers will gain clear, step-by-step instructions on foundational stitch mechanics, thread strand selection, fabric tensioning, and color blending techniques tailored for woodland palettes. Mastering these cottagecore embroidery ideas offers an accessible, therapeutic creative practice that requires minimal storage space while producing versatile, finished textile pieces. By following the structured methods detailed below, you will acquire the practical skills needed to transform plain cotton, linen, and felt into dimensional, botanical art pieces that enhance your home decor or wardrobe with artisanal warmth.
Woodland mushroom and forest floor themes remain a dominant craft trend across social curation platforms and online DIY communities due to their gentle nostalgic appeal, grounding color harmony, and flexible technical accessibility. In modern aesthetic inspiration spaces, cottagecore needlework represents an intentional return to slow, tactile crafting that counteracts fast-paced digital lifestyles. The visual warmth generated by blending earthy umber, forest green, warm ochre, and deep crimson threads creates an immediate sense of cozy domestic comfort. For beginners, botanical embroidery offers a forgiving entry point into the textile arts, as natural elements like wild fungi, tree bark, and woodland moss require organic, irregular shapes rather than rigid geometric precision. The DIY value extends well beyond framed display hoops, enabling makers to personalize denim jackets, linen tote bags, pillowcases, and kitchen towels with durable, washable thread art. By engaging with these woodland motifs, crafters blend traditional folk art traditions with modern decorative styling, creating sustainable, handmade pieces that celebrate natural biodiversity.
Meticulous preparation, appropriate tool selection, and careful fabric handling form the essential foundation for executing clean, puckering-free embroidery projects. Essential materials include natural woven fabrics such as medium-weight unbleached linen or tightly woven cotton calico, stranded cotton embroidery floss, water-soluble transfer pens, and wooden or faux-wood display hoops. Key implements comprise sharp embroidery needles (sizes 5 through 9), precision thread snips, a craft iron, and lightweight non-woven tear-away stabilizer. Preparation begins by pre-washing and ironing the base fabric to eliminate sizing chemicals and prevent future shrinkage from distorting finished stitches. Secure the smoothed textile inside an adjustable hoop, tightening the tension screw until the fabric surface sounds taut like a drum when tapped with a fingertip. Planning involves sketching or tracing botanical linework onto the fabric using a water-erasable pen, accounting for composition margins and natural stitch directionality before threading the needle with your chosen strand counts.
Crimson Fly Agaric French Knot Texture
Step-by-Step Guide
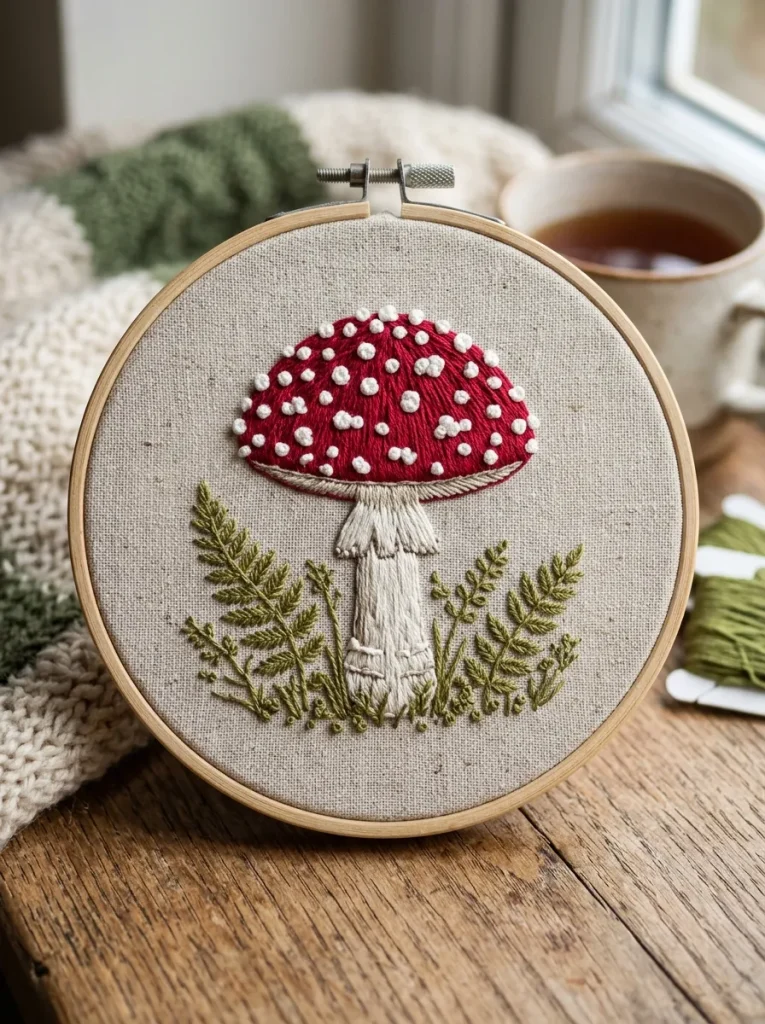
The crimson fly agaric design focuses on capturing the iconic red-and-white woodland mushroom using dense, dimensional thread textures that elevate standard satin stitching. This concept relies on building a smooth, domed mushroom cap rendered in deep scarlet or rust-red stranded cotton, layered with clustered French knots in crisp cream or off-white. The dimensional contrast between the flat satin-stitched base and the raised, pebbled French knots produces a tactile, sensory surface reminiscent of real forest fungi. Surrounding the base with soft, fern-like stem stitches and delicate grass blades grounds the mushroom within a miniature forest clearing, creating a classic cottagecore focal point suitable for circular wooden display hoops or tote bag embellishments.
Begin by transferring the outline of a domed mushroom cap and thick stalk onto stretched linen using a water-soluble marker. Thread a size 7 embroidery needle with three strands of deep crimson floss, filling the cap outline with horizontal satin stitches worked from the center outward to maintain clean, curved edges. Use two strands of warm ecru floss to fill the underlying stalk with vertical split stitches, establishing a fibrous, woody bark texture. Once the red base is completely filled, switch to two strands of antique white thread to place scattered French knots across the cap, wrapping the thread around the needle twice before pulling the knot securely down against the crimson fabric. Finish by stitching delicate blade clusters along the bottom perimeter using two strands of olive green floss worked in straight and fly stitches.
Golden Chanterelle Cluster with Mossy Undergrowth
Execution Process
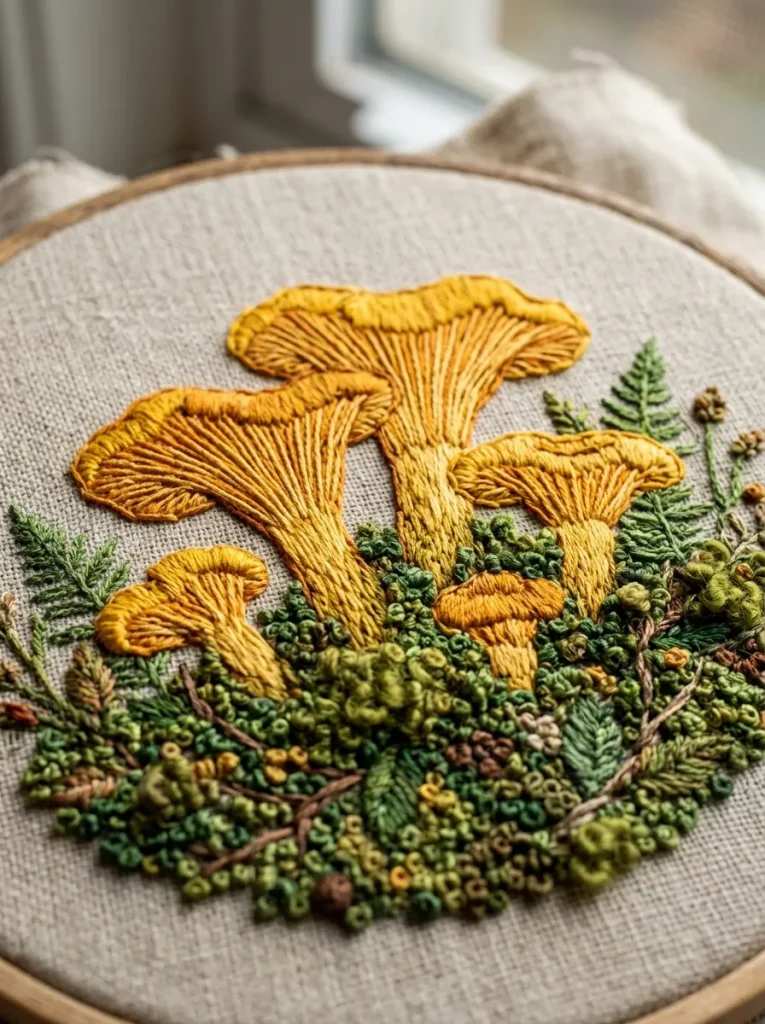
The golden chanterelle cluster design showcases the trumpet-shaped contours and fluted ridges of edible woodland mushrooms growing amid textured forest moss. This concept utilizes a rich palette of warm saffron, marigold, mustard, and pale honey threads to illustrate the subtle tonal gradients found on sunlit forest mushrooms. Beneath the mushrooms, a dense carpet of varied green textures mimics forest decay and living ground cover, constructed using raised stitch techniques like turkey work and woven picot leaves. The resulting piece delivers rich visual depth and warm earthy contrast, making it an exceptional candidate for framed botanical wall decor, decorative tea towels, or patch embellishments on corduroy jackets.
Trace a cluster of three overlapping trumpet-shaped mushrooms onto tightly woven cotton fabric secured in a six-inch hoop. Using two strands of mustard-yellow floss, outline the flared mushroom rims with fine stem stitching before filling the inner cap contours with long-and-short satin stitches in alternating shades of saffron and pale gold. Emphasize the distinctive underside gills by working straight, delicate lines using a single strand of deep ochre thread extending downward along the tapered stem. Build the forest floor beneath the chanterelle cluster by working clustered French knots, bullion loops, and short seed stitches using three distinct shades of moss green, chartreuse, and warm umber floss. Steam the finished hoop lightly from the reverse side using a pressing cloth to set the dimensional stitches without flattening the raised mossy textures.
Bioluminescent Woodland Cap Night Scene
Setup Method
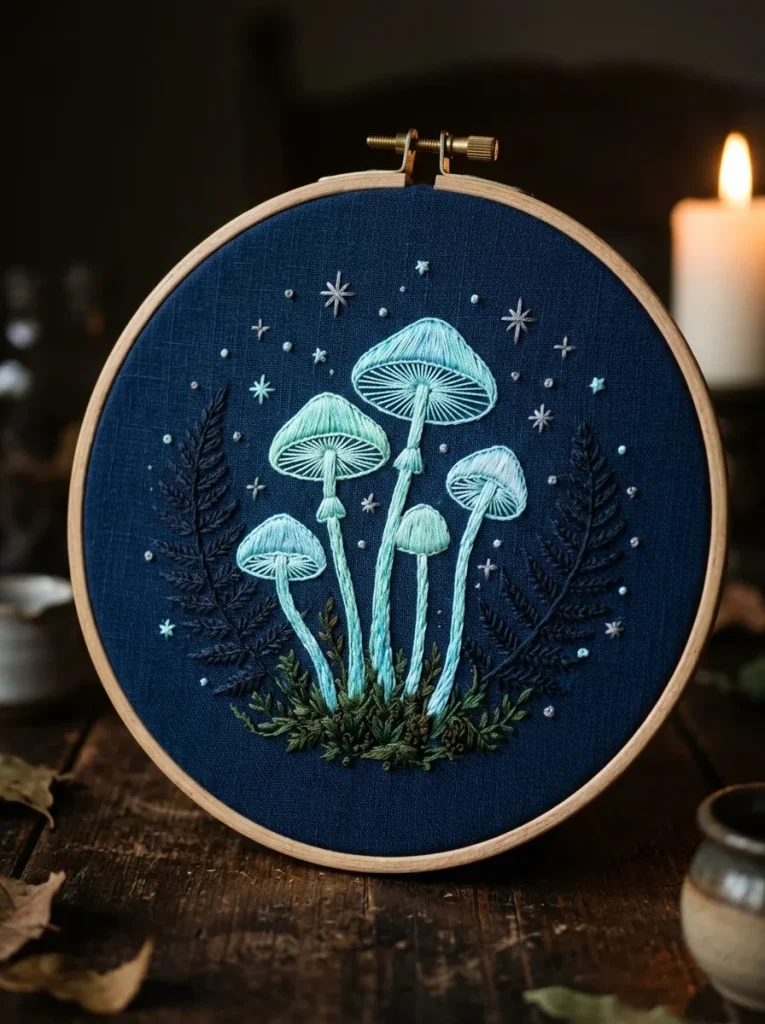
The bioluminescent mushroom night scene explores a moody, twilight forest aesthetic by contrasting glowing pale cyan and seafoam green mushrooms against a dark navy or charcoal fabric background. This design concept captures the mystical atmosphere of old-growth temperate rainforests where luminous fungi illuminate the damp woodland floor after dusk. Utilizing stranded glow-in-the-dark or high-sheen satin threads alongside muted slate-blue and charcoal cotton floss creates an ethereal glowing effect that shifts under different lighting conditions. The composition balances luminous umbrella-like caps with subtle starry accents and dark fern silhouettes, producing a modern dark cottagecore art piece that brings a sense of quiet wonder to evening room decor.
Mount a square of dark navy blue linen into an embroidery hoop, ensuring the dark fibers are kept free of lint and surface dust. Trace the minimalist silhouette of two slender, long-stemmed mushrooms using a white chalk pencil or water-erasable fabric pencil. Fill the underside of the caps using two strands of pale mint green floss worked in tight satin stitches to establish the primary light source of the composition. Work the slender curved stalks with split backstitches in charcoal-gray thread, highlighting one side of each stem with a single strand of pale cyan floss to simulate reflected ambient light. Add radiating celestial accents around the glowing caps by stitching tiny four-point stars and isolated seed stitches in silver-gray and luminous pale blue threads. Fasten off all loose thread tails securely on the reverse side to prevent dark threads from showing through the lighter stitch work.
Morchella Sponge Texture Honeycomb Relief
How to Create
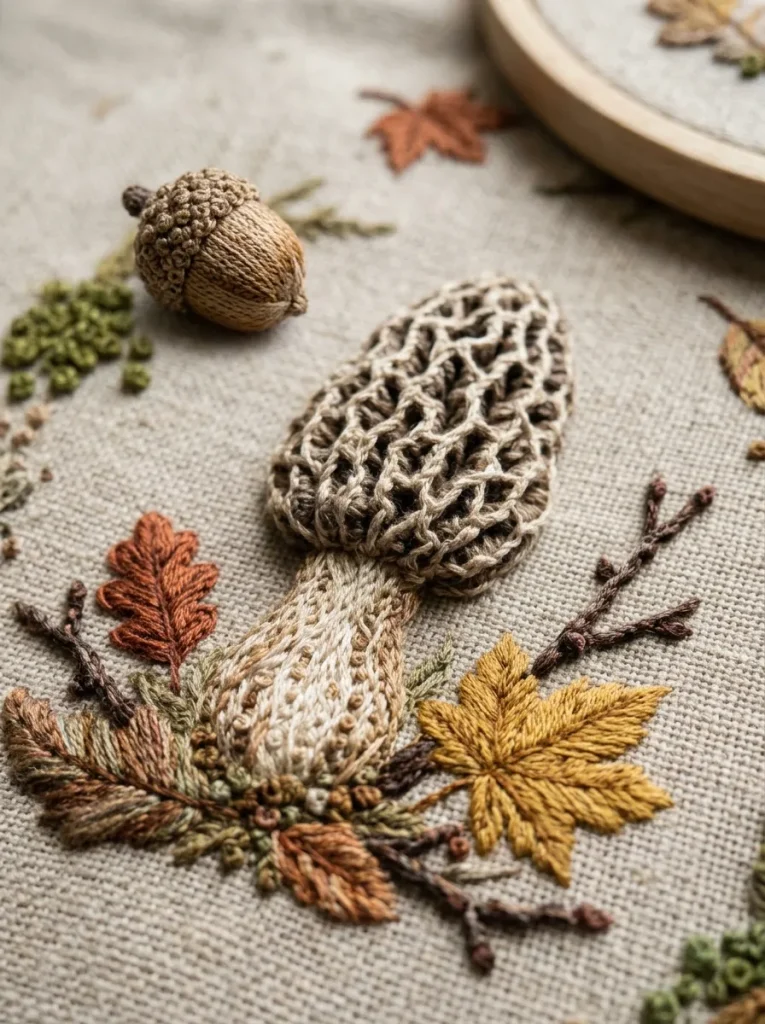
The morel mushroom honeycomb design highlights the complex, brain-like pitted ridges of wild spring morels through structural relief embroidery. This concept avoids smooth flat surfaces entirely, instead utilizing open and closed blanket stitches, cast-on stitches, and layered backstitch grids in shades of driftwood brown, fawn, and charcoal. The visual appeal lies in the realistic tactile recreation of the morel’s hollow, networked sponge cap, which catches natural light at different angles to create organic shadow patterns across the textile. Grounded by a pale ecru stalk and dried forest leaf debris, this technical piece celebrates the rugged, wild textures of early spring woodland foraging.
Transfer the conical outline of a morel cap and wide base onto unbleached oatmeal linen fabric stretched firmly in an oval hoop. Thread your needle with two strands of deep taupe floss, outlining the intricate, irregular honeycomb cells across the cap using crisp backstitches. Fill the interior depression of each cell with short, dark brown straight stitches to create visual depth, then work light beige detached buttonhole or bullion stitches over the cell borders to build raised, textured ridges. Fill the wide lower stem using vertical long-and-short stitches in alternating tones of cream and pale sand floss, leaving the texture slightly matte and unpolished. Add scattered autumn leaves and tiny fallen twigs along the base using straight stitches in russet, burnt orange, and chocolate-brown floss to anchor the textured morel within its natural habitat.
Fern Frond and Bracket Fungi Tree Trunk
Step-by-Step Guide
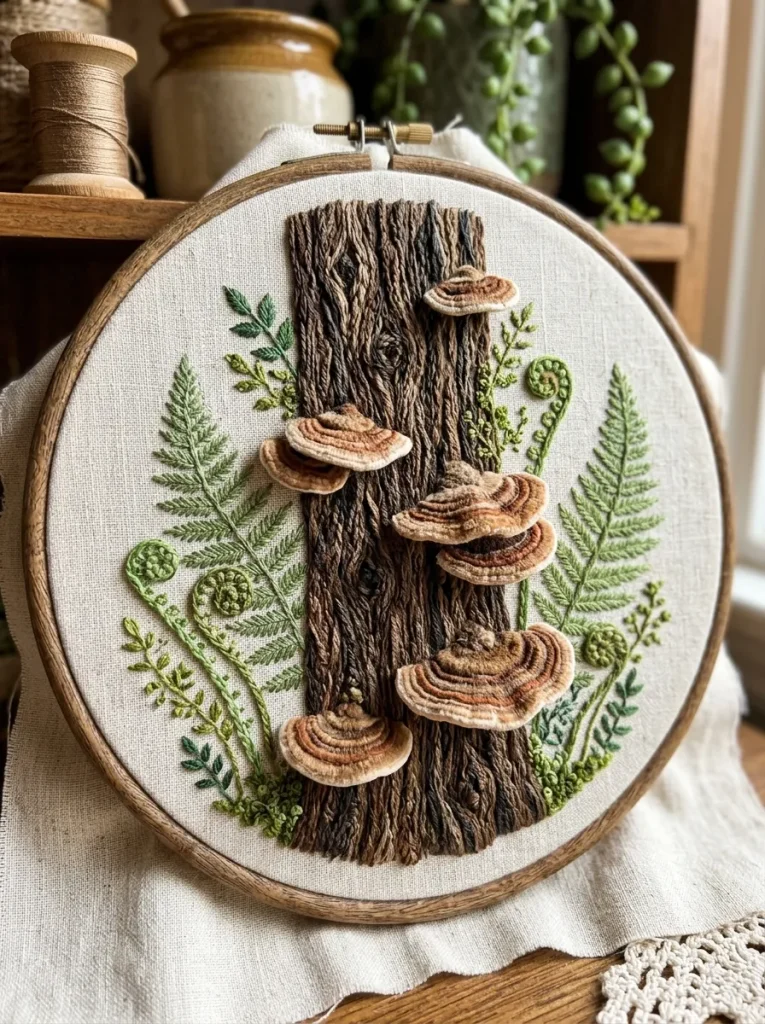
The fern frond and shelf fungi embroidery combines the textured bark of a woodland tree with sculptural bracket mushrooms projecting horizontally from the trunk. This design concept uses layered felt applique or raised ribbed spiderweb stitches to construct stiff, semi-dimensional mushroom ledges that extend slightly beyond the flat fabric plane. Surrounding the wooden trunk with delicate, feathery fern fronds worked in soft sage and forest green adds botanical movement and balance to the sturdy vertical composition. This arrangement provides a detailed representation of forest ecosystem interactions, making it an ideal choice for multi-hoop gallery walls, botanical study displays, or custom pillow covers.
Begin by tracing a vertical tree trunk segment bordered by curling fern fronds onto a natural cotton twill foundation fabric. Use three strands of dark walnut brown floss to stitch the rough vertical grain of the tree trunk using irregular split stitches, stem stitches, and couched threads. To build the bracket fungi, cut small semicircles of stiff tan wool felt and tack them to the tree trunk with tiny catch stitches along the straight edge. Embroider concentric curved bands of satin stitch in alternating shades of chestnut, fawn, and cream directly over the felt bases, creating firm, layered fungal shelves that project outward from the trunk. Complete the surrounding greenery by working unfurling fiddleheads and mature fern fronds using fishbone and feather stitches in three shades of spring green and muted olive floss.
Inky Cap Ombré Dissolve Detail
Execution Process
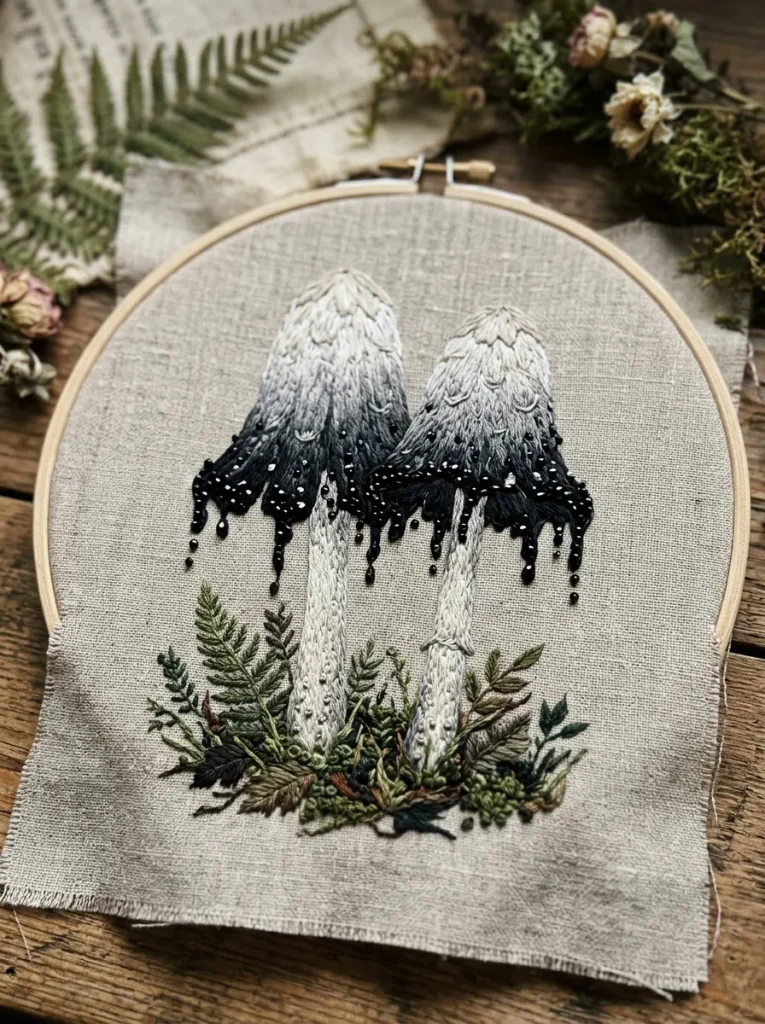
The inky cap ombré dissolve design captures the natural deliquescence of Coprinus mushrooms, where the cap edges dissolve into rich black fluid droplets as they mature. This concept transitions from a smooth, pale cream cap apex through soft charcoal mid-tones, ending in deep obsidian black drips along the lower ragged margin. Utilizing delicate thread painting techniques with single-strand floss allows for seamless color blending that mimics the watercolor-like bleeding of natural fungal ink. The addition of glistening black glass seed beads or tight French knots at the tips of the dripping edges enhances the visual story, creating a sophisticated gothic cottagecore aesthetic that pairs beautifully with dark wood frames and vintage textiles.
Transfer the bell-shaped silhouette of two tall inky cap mushrooms onto unbleached linen, clearly marking the color transition zones across the caps. Thread a size 9 embroidery needle with a single strand of off-white floss, working fine long-and-short stitches vertically from the pointed cap peak downward into the upper third of the mushroom. Transition into the midsection by blending single strands of pale slate and medium charcoal gray, overlapping the stitch ends into the cream row above to eliminate harsh dividing lines. Fill the bottom scalloped rim with single-strand jet black floss, extending delicate straight stitches downward to form dripping liquid droplets. Secure a tiny black glass seed bead to the bottom tip of each descending droplet with clear nylon thread, then finish the slender pale stems with vertical satin stitches in cream and light silver.
Foraging Basket and Woodland Harvest Scene
How to Make
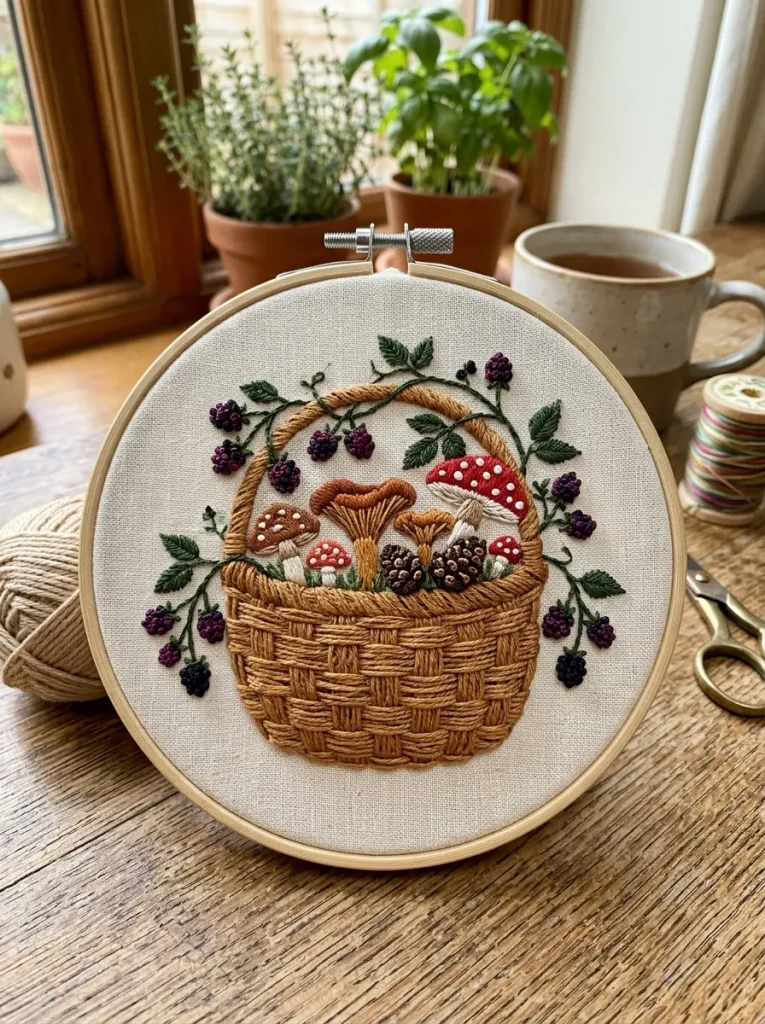
The foraging basket and woodland harvest scene depicts a traditional handwoven wicker basket overflowing with freshly harvested wild forest mushrooms, pinecones, and botanical greenery. This design celebrates the rustic, lifestyle aspect of cottagecore culture, focusing on the interplay between woven human crafts and wild forest treasures. The basket structure is constructed using dimensional woven wheel or lattice weaving stitches in warm honey-brown threads, providing a raised geometric foundation that holds the embroidered flora above it. This dynamic, multi-element piece delivers a storybook aesthetic that functions exceptionally well as a decorative kitchen wall hanging, bread basket liner, or embroidered apron panel.
Draw the outline of a curved wicker gathering basket filled with assorted mushroom caps, pine needles, and wild berries onto light linen fabric. Using three strands of warm caramel floss, lay down vertical warp straight stitches across the basket body, then weave a horizontal thread over and under the vertical strands using an upholstery needle to create a realistic wicker lattice texture. Switch to two strands of terracotta, cream, and olive floss to fill the individual mushroom caps emerging from the basket rim, employing smooth satin stitches and French knot details. Stitch tiny pinecone accents near the basket handle using overlapping satin-stitched scales in deep espresso brown thread. Frame the entire harvest display with trailing wild blackberry vines worked in stem stitches, complete with french knot berries in rich blackberry purple and bright cranberry red.
Snail and Toadstool Forest Clearing
Setup Method
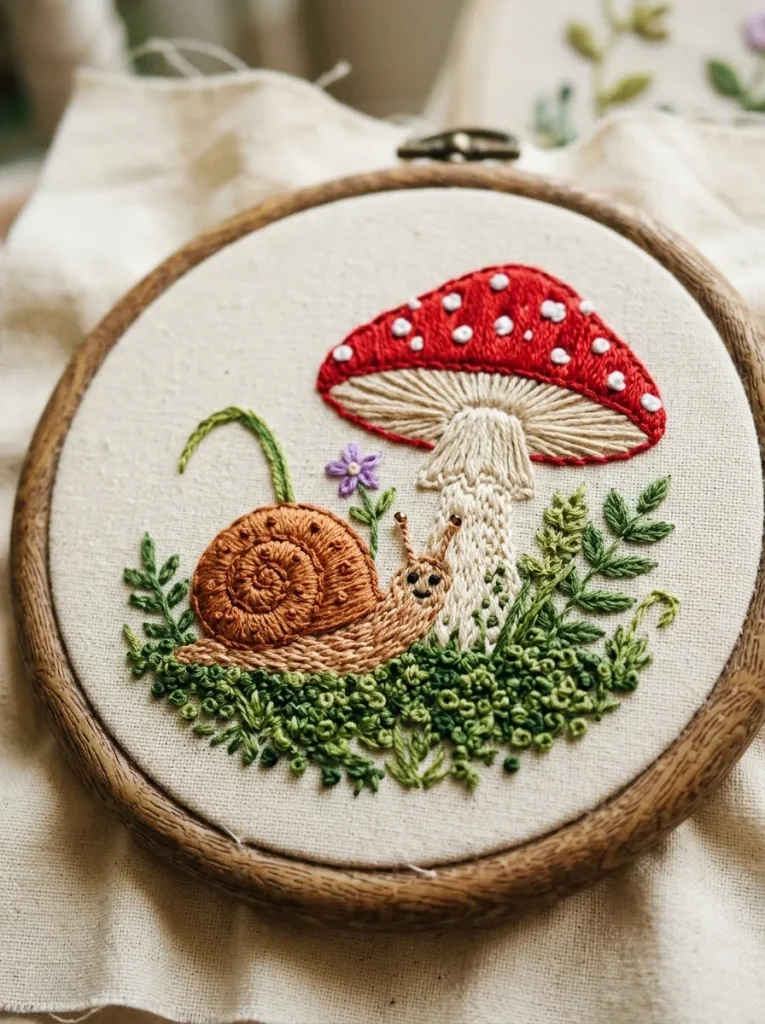
The snail and toadstool clearing combines animal illustration with botanical flora, featuring a tiny spiral-shelled garden snail resting on a soft bed of moss beneath an arching mushroom cap. This narrative design introduces gentle charm and slow movement into the woodland scene, evoking classic children’s book illustrations and pastoral folklore. The snail’s shell is rendered using concentric backstitches or woven wheel techniques in warm ochre, contrasting with the smooth crimson cap and pale translucent stem of the mushroom overhead. The balanced composition creates a peaceful, whimsical focal point that works effortlessly in nursery spaces, reading nooks, or framed on a cozy bedside table.
Trace the linework of a curved mushroom sheltering a small garden snail on a bed of forest soil onto stretched cotton calico fabric. Thread your needle with two strands of warm cinnamon brown floss and fill the snail’s shell using concentric chain stitches worked in a tight inward spiral to emphasize its natural geometry. Stitch the soft body of the snail using pale taupe satin stitches, adding two tiny straight stitches with single-strand black French knots at the tips for the delicate eye tentacles. Fill the sheltering toadstool cap above the snail using two strands of rich terracotta floss in horizontal satin stitches, adding small white lazy daisy stitches across the red surface for spots. Complete the forest floor beneath them with a thick carpet of short seed stitches and tiny fly stitches in moss green, golden olive, and warm earth brown.
Amanita and Delicate Spiderweb Canopy
Step-by-Step Guide
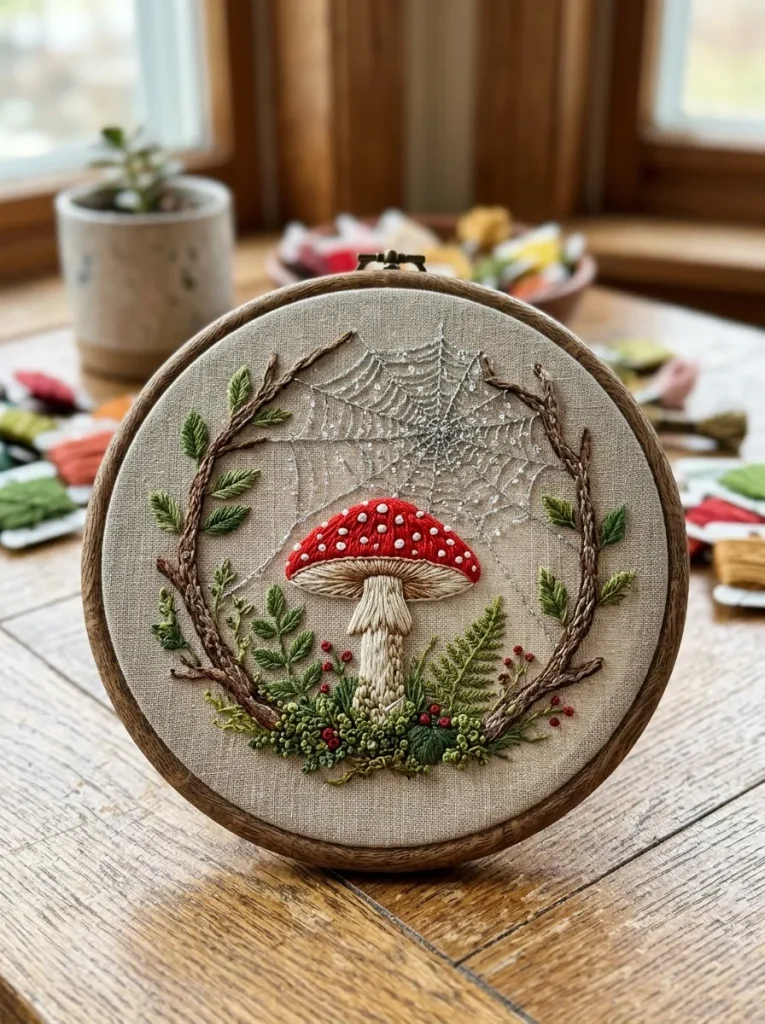
The Amanita and delicate spiderweb canopy design features a vibrant red-and-white spotted mushroom anchored beneath an intricate, dew-dropped cobweb suspended between woodland twigs. This concept emphasizes the delicate, ephemeral beauty of early morning forest walks, where mist clings to gossamer webs and vibrant mushrooms emerge through damp pine needles. The spiderweb is rendered using ultra-fine single-strand metallic silver or pale gray silk floss, creating a luminous, airy contrast against the dense, solid embroidery of the mushroom and ground foliage below. This high-contrast piece delivers an elegant, artisanal balance of bold color and intricate linework suitable for modern botanical art collections.
Transfer the outline of a sturdy forest mushroom flanked by two slender dried twigs onto a neutral linen background, marking light anchor points for the web canopy above. Embroider the twin twigs using three strands of chocolate-brown floss worked in rough stem stitches with occasional French knot bark nodes. Fill the vibrant mushroom cap beneath the twigs using two strands of bright poppy-red floss in smooth satin stitch, topping the red layer with tiny white French knots. Thread a fine size 10 needle with a single strand of silver-gray or metallic blending filament, stretching straight guide lines between the twigs to form the structural web spokes. Complete the web by working delicate backstitches in concentric drooping curves across the spokes, anchoring each intersection with a micro-sized French knot to simulate glistening morning dew drops.
Woodland Stump with Sprouting Fungi Community
Execution Process
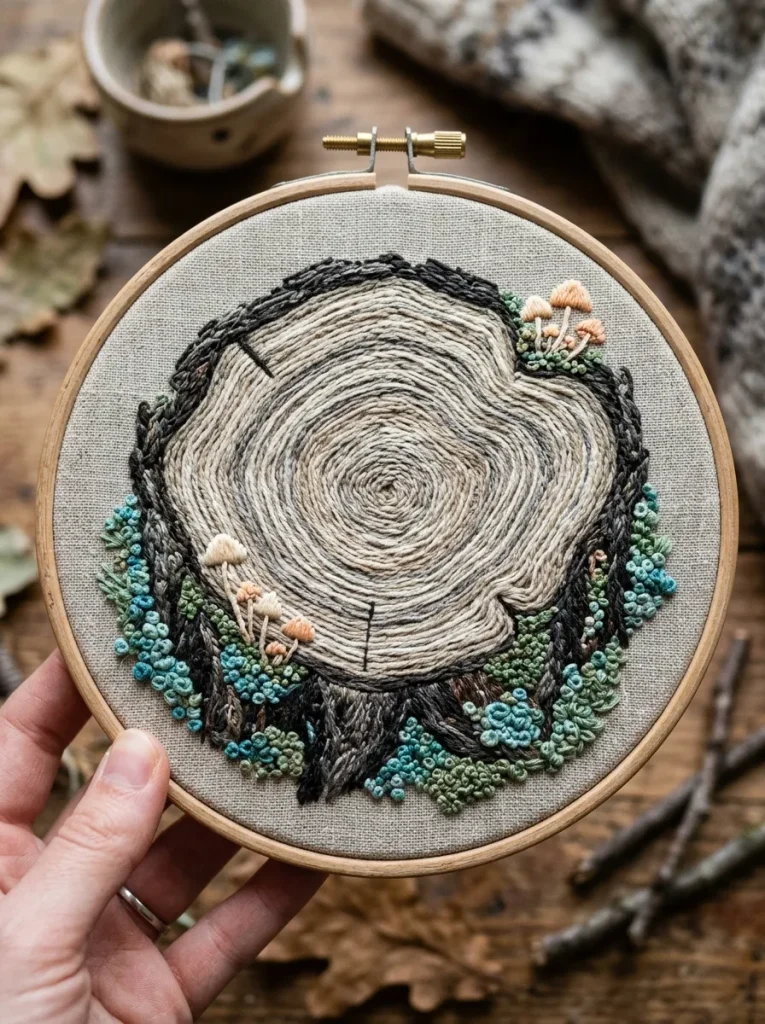
The woodland stump with sprouting fungi community portrays a weathered, decaying tree round providing life to a diverse family of tiny shelf mushrooms, lichen patches, and sprouting fungal pins. This design concept explores the rich biodiversity of natural forest cycles, utilizing circular cross-grain wood textures paired with tiny micro-embroidery details. The tree stump surface is built using concentric running stitches and textured split stitches in ash-gray, driftwood, and pale beige tones, framed by rough outer bark. Tiny mushrooms sprout in organic colonies from the crevices, creating a layered, multi-dimensional textile ecosystem that celebrates natural decay and renewal within a rustic cottagecore framework.
Trace the circular profile of a cut tree stump with small clusters of sprouting mushrooms onto unbleached linen stretched in a seven-inch wooden hoop. Embroider the concentric annual growth rings of the stump face using single-strand running stitches in alternating tones of cream, light sand, and pale gray floss. Work the rough outer perimeter bark using heavy three-strand chain stitches and couched threads in dark charcoal and deep walnut brown to create a rugged boundary. Stitch tiny sprouting mushroom pins emerging from the bark crevices using two strands of ivory floss for the slender stems and pale peach satin stitches for the tiny rounded caps. Complete the composition by adding patches of pale turquoise and chartreuse French knots across the stump face to represent velvety lichen colonies and living forest moss.
Common Beginner Mistakes and How to Avoid Them
A frequent mistake made by beginners when stitching botanical embroidery is applying excessive physical tension when pulling threads, which causes delicate linen and cotton fabrics to pucker and buckle irreversibly around dense satin stitches. To prevent puckering, always maintain consistent, gentle tension, pulling the floss until it rests flush against the fabric plane without warping the weave of the base textile. Another common error is using too many thread strands for intricate details, which results in clunky, undefined stitches that obscure the delicate linework of mushroom gills and slender ferns; utilize single-strand or two-strand floss for intricate areas to preserve crisp definitions. Additionally, transferring patterns with permanent ink or standard graphite pencils can ruin finished projects, as graphite smudges into light-colored threads and cannot be washed away; always use dedicated water-soluble or heat-erasable textile markers that rinse away cleanly upon completion without leaving chemical residues or marks on light linen.
Practical Tips for Better Results
Achieving professional-quality, gallery-worthy embroidery results requires disciplined fabric preparation, needle management, and hoop tension control. Always use a high-quality wooden or screw-tightened plastic hoop that holds the fabric drum-tight throughout your entire stitching session, retightening the perimeter tension periodically as you work across different design sections. Keep your embroidery floss organized on marked bobbins, separating individual six-strand skeins slowly to prevent internal knotting and friction fuzz before threading your needle. When executing long-and-short thread painting across mushroom caps, vary your stitch lengths dynamically and angle the needle in the natural direction of the mushroom’s growth to achieve seamless, painted gradients. Finally, always press completed embroidery projects from the reverse side over a soft, folded terrycloth towel using a steam iron on a medium setting; this method smooths out background fabric wrinkles without crushing the raised, dimensional texture of French knots and mossy relief stitches.
Styling, Presentation, or Organization Ideas
Presenting your completed cottagecore forest embroidery effectively enhances its handmade warmth and integrates the textile art into your broader home decor aesthetic. Finish circular hoop projects by trimming excess backing fabric and cinching the reverse closed with a durable running stitch, covering the back with a circle of natural wool felt to protect the interior threads from dust and wall friction. Display finished hoops in asymmetrical gallery wall clusters alongside pressed botanical frames, dried flower bundles, and vintage brass wall sconces to create an inviting, storybook interior vignette. You can also frame rectangular embroidery panels inside deep wooden shadow boxes with unvarnished oak or walnut frames, which protects delicate thread surfaces while emphasizing the organic wood tones of forest themes. For wearable styling, transfer smaller mushroom motifs onto the collars of oversized linen shirts, denim jacket yokes, or canvas tote bags, using water-resistant thread-locking knots to ensure long-term durability through gentle laundry cycles.
Budget or Time Planning
Cottagecore mushroom embroidery is an exceptionally economical, time-accessible craft project that delivers high decorative impact with minimal financial overhead. A starter kit of essential supplies—including an assortment of earth-toned embroidery floss skeins, two wooden hoops, a pack of crewel needles, and half a yard of unbleached linen—typically costs between fifteen and thirty dollars, providing enough raw materials for multiple finished hoop projects. In terms of scheduling, a standard six-inch botanical mushroom design requires between four and eight hours of active stitching time, depending on the complexity of thread painting and raised French knot textures. To maintain steady progress without fatigue, break the project down into three manageable sessions: spend the first hour preparing fabric and transferring linework, three to four hours completing core satin stitches and stem details, and two final hours adding fine textures, French knots, and hoop backing finishes.
Creative Expansion and Advanced Inspiration
Once you have mastered foundational mushroom and forest floor embroidery stitches, you can expand your textile craft into advanced multi-media projects and functional home accessories. Experiment with incorporating soft watercolor or fabric-dye washes onto your linen background prior to stitching, creating soft, atmospheric misty forest backdrops that blend with your foreground thread art. Advanced needleworkers can integrate raised stumpwork techniques—using fine wire armatures to build freestanding three-dimensional mushroom caps and fern leaves that literally rise up off the fabric plane. You can also explore functional heirloom applications by stitching complete botanical foraging borders around the edges of pure linen tablecloths, cloth napkins, and canvas market totes. Furthermore, pairing hand-stitched mushroom motifs with custom wooden hoop stands, hand-dyed silk ribbons, or ceramic display bases elevates simple needlework into sophisticated, one-of-a-kind art pieces that celebrate forest beauty throughout your living space.