
10 Intricate Pet Portrait Felt Backing Embroidery Ideas
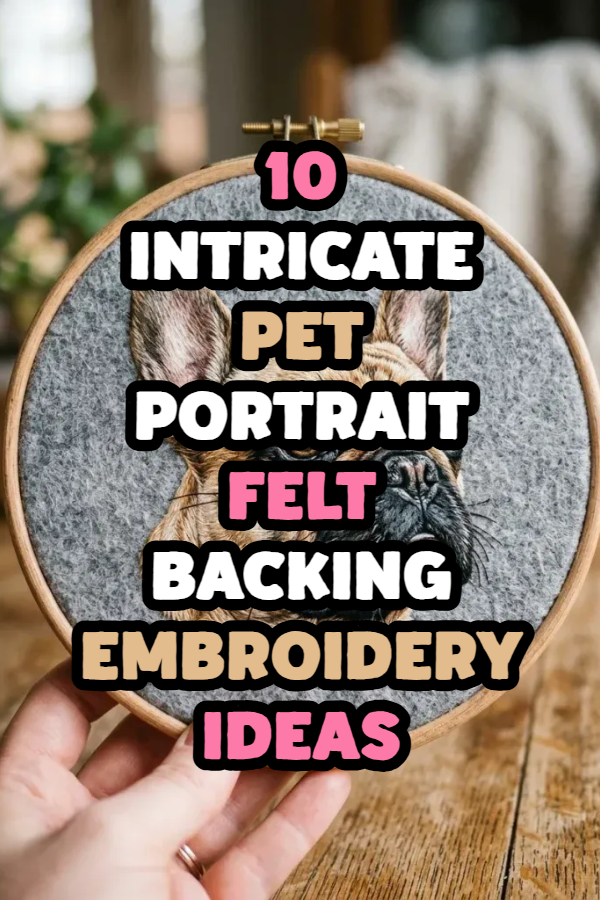
Handcrafted textile art has evolved into a sophisticated medium for capturing the lifelike personality and fine facial features of beloved domestic animals. Intricate pet portrait felt backing embroidery represents a specialized thread painting technique where dense, layered floss stitches are anchored directly onto wool or synthetic felt fabric. The dense, non-fraying structure of felt provides a stable, cushioned base that prevents delicate foundational fabrics from puckering under heavy needlework. In this comprehensive guide, you will explore ten distinct embroidery design ideas, complete preparation strategies, step by step needlework methods, and professional finishing techniques. You will learn how to map animal facial anatomy, blend realistic fur tones using long-and-short thread painting, anchor three-dimensional whiskers, and enclose finished hoops cleanly with felt backing discs. Mastering these needlecraft methods allows fiber artists and DIY crafters of all skill levels to translate reference photographs into tactile, heirloom-quality home decor displays. Whether you are stitching a dedicated memorial portrait, creating custom holiday gifts, or personalizing living room gallery walls, learning these structured embroidery techniques equips you with actionable skills to execute professional, long-lasting textile art projects at home.
Why This Idea Is Trending or Useful
The surge in popularity of felt-backed pet embroidery across contemporary Pinterest ideas stems from its balance of emotional storytelling, tactile warmth, and accessible craft execution. Modern home decor trends increasingly emphasize personalized, artisanal accents over mass-produced wall art, making custom pet thread paintings highly sought after for modern minimalist and rustic interiors. Using felt as both a primary stitching substrate and a protective backing disc delivers immense practical value for needlecrafters. Unlike loose cotton weave or linen, dense wool blend felt absorbs high stitch counts without puckering, pulling, or distorting complex facial features. This structural stability makes pet portraiture beginner friendly, as novice stitchers can layer dense color gradients without fighting fabric tension issues. Furthermore, the tactile quality of thread painting closely mimics the natural softness of animal fur, providing a level of depth that flat printed illustrations cannot replicate. Because standard embroidery hoops, stranded cotton floss, and felt sheets are economical and widely available, this creative project offers budget ideas that allow crafters to produce bespoke artwork without needing commercial embroidery machinery or costly studio setups.
Materials and Preparation
Proper preparation and material selection establish the foundation for structural stability and color accuracy in thread-painted pet portraits. Essential materials include pure wool or wool-blend craft felt sheets measuring one to two millimeters in thickness, six-strand cotton embroidery floss in varied natural gradients, high-density wooden display hoops, water-soluble fabric transfer pens, and sharp embroidery needles ranging from size seven to ten. Key preparation tools include micro-tip embroidery scissors, a desktop daylight crafting lamp, an iron-on stabilizer or water-soluble stabilizer sheet, and fabric craft glue for final hoop closure. Begin by selecting a high-resolution pet reference photo that displays clear directional fur flow, defined eye catchlights, and distinct facial contours. Print the image scaled to the exact diameter of your embroidery hoop and trace the primary contour lines onto your stabilizer sheet. Secure the felt firmly inside the inner ring of the hoop, tightening the outer screw with small craft pliers to maintain drum-tight surface tension. Planning your color palette in advance by grouping floss skeins into highlight, mid-tone, and deep shadow categories ensures seamless, realistic blending throughout the entire stitching process.
1. Dimensional Long-and-Short Fur Painting on Neutral Felt
Step-by-Step Guide
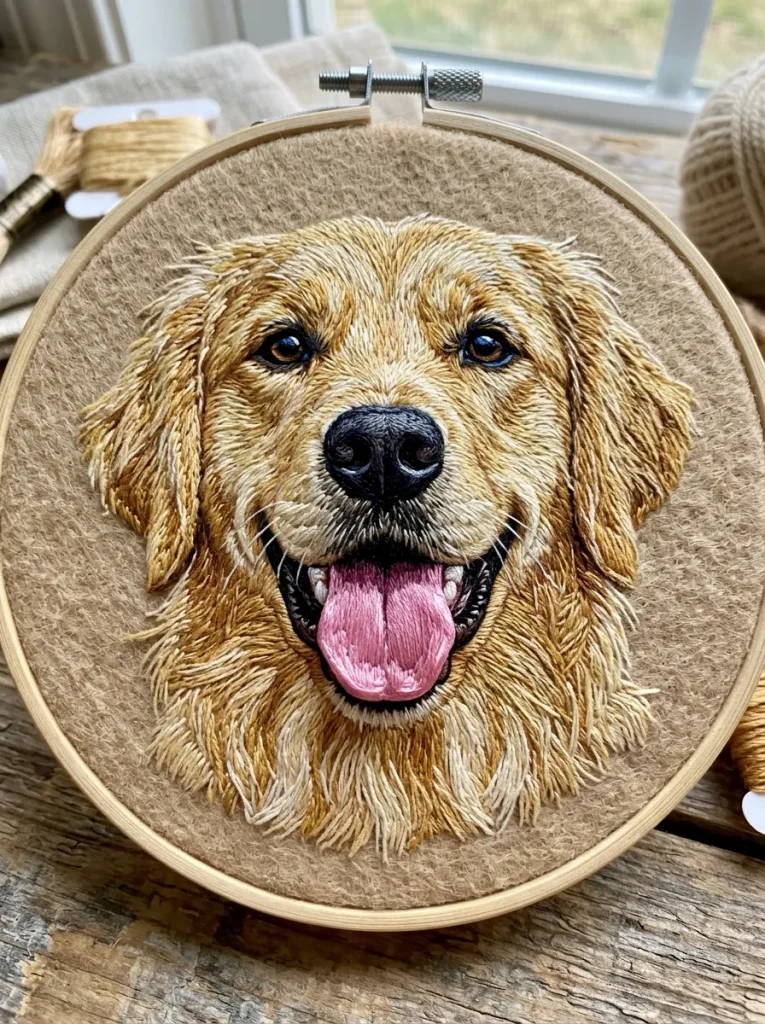
The dimensional long-and-short fur painting technique utilizes single strands of cotton floss to replicate the fine texture, direction, and multi-tonal depth of natural animal coats. Neutral wool felt, such as heather grey, sand beige, or soft oatmeal, provides a stable, muted base that allows realistic thread colors to stand out without background competition. This design focuses on overlapping irregular stitches in alternating lengths, creating a seamless visual gradient that eliminates harsh transitions between light and shadow. By following the natural anatomical growth lines radiating outward from the animal’s nose, muzzle, and forehead, the embroidery takes on a lifelike three-dimensional quality. This method is particularly effective for rendering smooth short-haired breeds like French bulldogs, pointers, and domestic shorthair cats.
Begin by tracing the simplified facial contours of the pet onto the neutral felt using a fine-point water-soluble pen. Mount the felt into a six-inch wooden hoop and thread a size nine embroidery needle with a single strand of deep shadow floss. Stitch the initial foundational row along the outermost edges of the pet’s face, working from the background toward the center using alternating short and long straight stitches. Work the next row of mid-tone stitches so that the needle pierces directly up through the center of the previous stitches, blending the color boundaries smoothly without leaving exposed felt gaps. Gradually introduce lighter highlight strands around the muzzle, brow ridge, and cheek contours. Complete the face by stitching the black nose leather with tight satin stitches, leaving the back felt flat and neat before finishing.
2. Realistic Glass Eye Depth with Multi-Layered Thread Glaze
How to Create
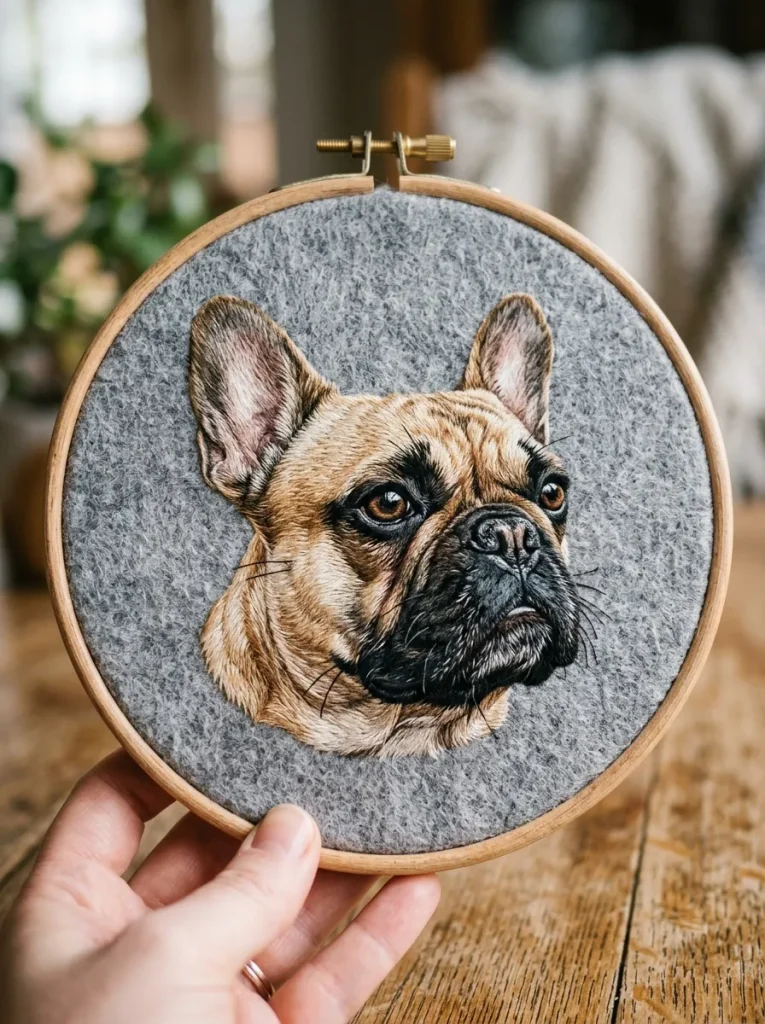
Rendering lifelike eyes is the most critical element of pet portraiture, as accurate eye catchlights and iris gradients convey the animal’s distinct spirit and vitality. This technique relies on layering micro-stitches of deep amber, emerald, or sapphire floss beneath delicate white and pale blue highlight points. Dense wool felt serves as a firm foundation that holds the heavy, circular stitch clusters securely in place without tearing or stretching. By framing the iris with tight black contour stitches and adding crescent-shaped light reflections across the upper pupil, the finished eye captures the glossy, translucent quality of natural glass. This focused approach provides an engaging starting project for intermediate stitchers seeking to elevate the realism of their animal embroidery.
To execute this design, outline the almond or circular eye boundaries onto light grey felt with a water-soluble marker. Using a single strand of black floss, stitch the central pupil and outer eyelid rim with tiny split stitches to establish crisp anatomical borders. Fill the iris area with radial straight stitches using three blending shades of the base eye color, placing the darkest tones along the upper lid shadow and the brightest tones along the lower curve. Add a tiny crescent of pale blue or warm cream directly below the pupil to simulate secondary light bounce. Finish the eye by placing a single, crisp French knot or vertical straight stitch of pure white floss at the two o’clock position across the pupil and iris boundary to create the definitive primary catchlight reflection.
3. High-Contrast Monochrome Silhouette with Felt Base Framing
Execution Process
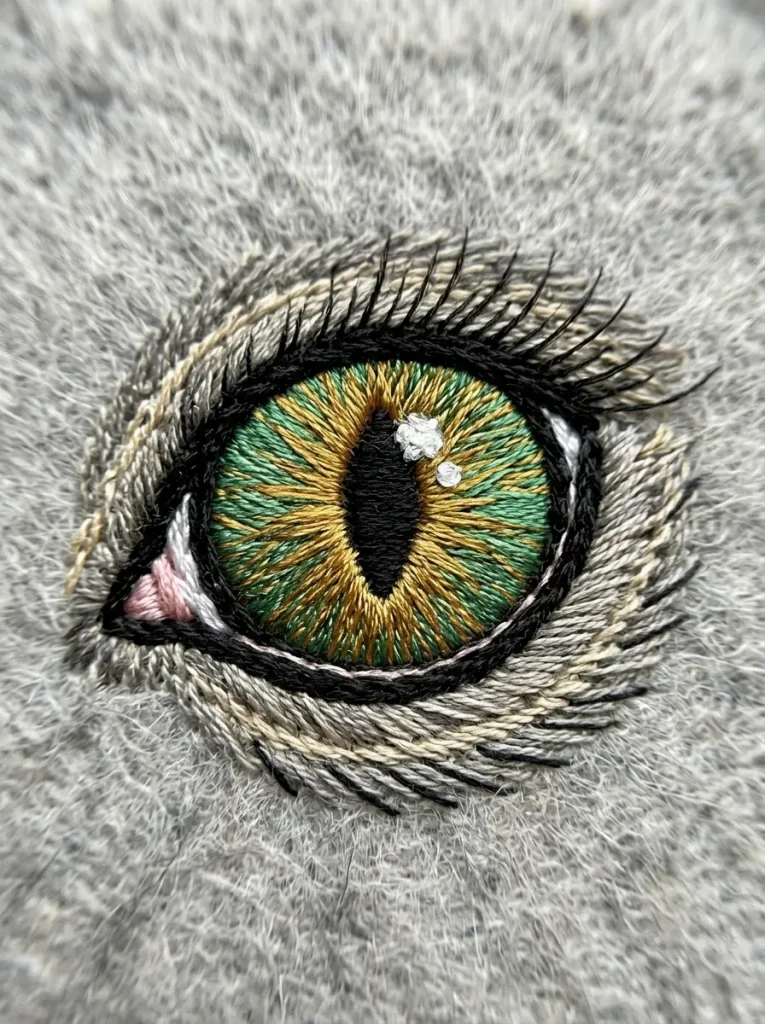
The monochrome silhouette approach combines modern minimalist design with high-contrast graphic impact by rendering the pet using black, grey, and white floss on a stark, solid-colored felt backdrop. This style abstracts fine multi-colored fur patterns into clean zones of pure light and deep shadow, resembling classic woodblock prints or high-contrast film photography. A brightly colored or deep charcoal wool felt backing frames the monochrome stitched silhouette, providing bold perimeter contrast that complements contemporary interior wall galleries. The clean, defined edges and reduced color palette make this an accessible, easy project for beginners learning value scales and structural facial anatomy without managing complex color matching.
Trace a high-contrast posterized outline of the pet onto black or deep navy wool felt using white water-soluble pencil. Fasten the felt tightly inside a circular or oval wooden embroidery hoop. Thread your needle with two strands of white embroidery floss to establish the primary highlight zones along the bridge of the nose, ear tips, and chin rim using dense satin stitches or directional stem stitches. Transition into light grey single-strand floss to stitch intermediate half-tones, feathering the thread ends into the unstitched dark felt areas. Leave the darkest shadow regions completely unstitched, allowing the natural black felt to act as the deepest shadow value. Trim excess backing felt along the outer hoop rim and secure the edges with clear craft adhesive for display.
4. Botanical Floral Crown and Golden Thread Accents
Setup Method
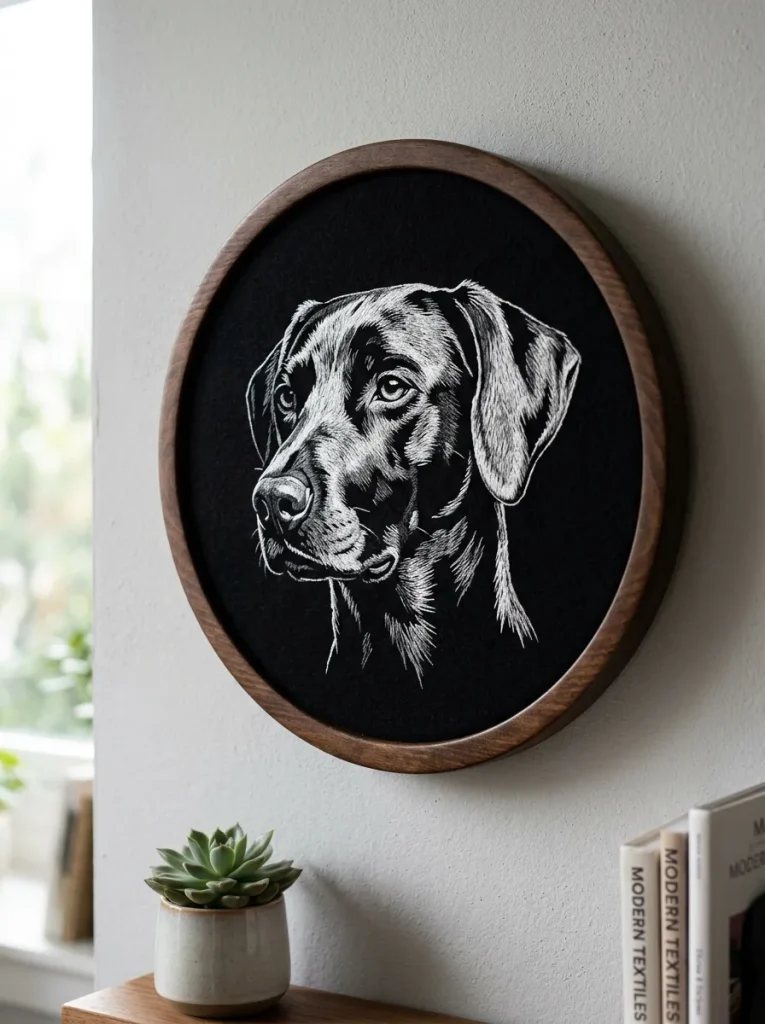
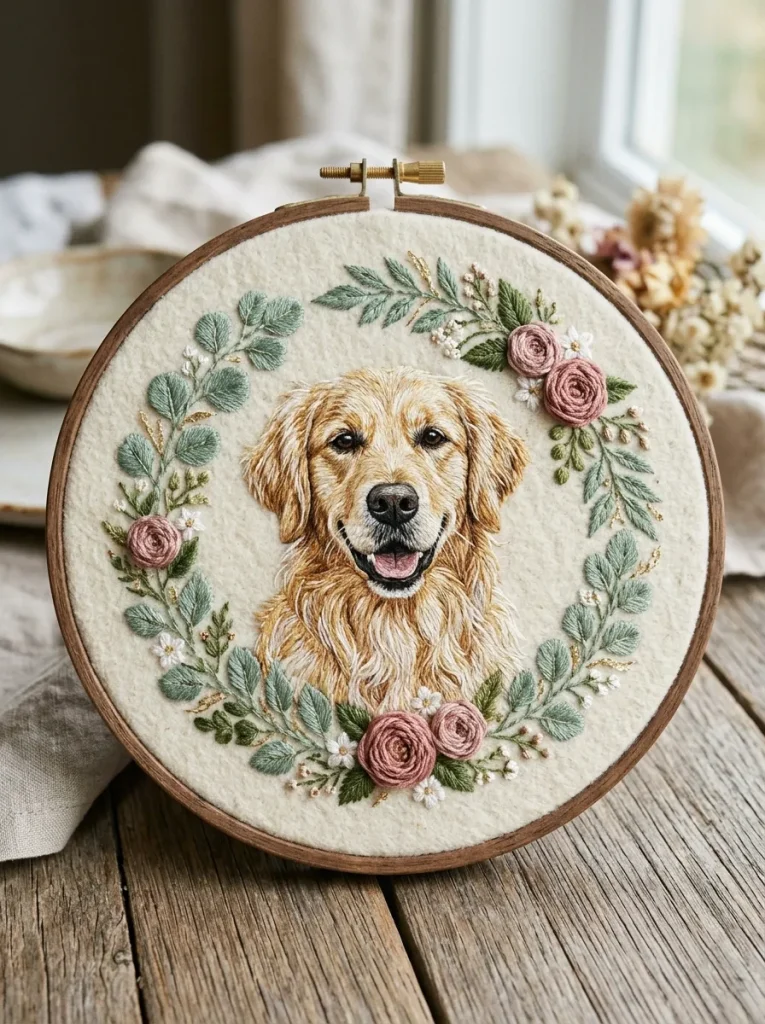
Integrating decorative botanical elements and metallic thread accents around an embroidered pet portrait creates an ornate, whimsical frame that celebrates the animal with illustrative elegance. This design nests a detailed thread-painted pet head within a lush wreath of embroidered eucalyptus leaves, delicate rosebuds, and daisies stitched directly into the surrounding felt background. Introducing fine metallic gold or copper thread into the floral vines and whiskers adds a subtle shimmer that catches ambient light in living spaces. The dense wool felt backing easily supports the diverse stitch types required for petals, French knot flower centers, and woven wheel roses without pulling out of shape.
Position the central pet portrait outline within a seven-inch hoop, leaving a two-inch perimeter margin on all sides of the light cream wool felt base. Complete the realistic pet face first using single-strand thread painting techniques. Once the central portrait is finished, use two strands of sage green floss to stitch trailing stem-stitch vines and lazy daisy leaves encircling the animal’s head. Add dimensional woven wheel roses around the ears using three strands of dusty rose floss, wrapping the thread tightly over a five-point base star. Interweave strands of metallic gold blending filament into the floral stems and add delicate gold French knots throughout the garland. Sponge away water-soluble guide marks with a damp cotton swab and allow the felt to dry fully.
5. Velvet-Soft Cat Whisker and Ear Tuft Thread Sculpting
How to Create
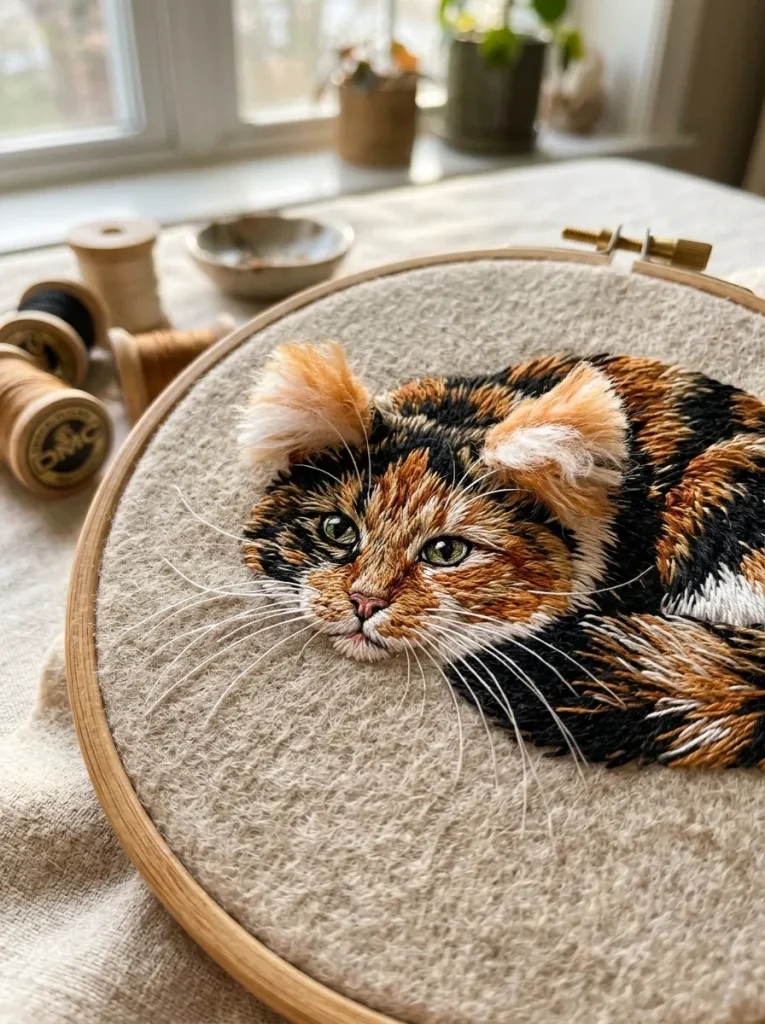
Feline portraits require specialized thread manipulation techniques to replicate the ultra-fine transparency of whiskers, delicate ear tufts, and soft muzzle contours. This design concept utilizes detached straight stitches, fine monofilament nylon, and single-strand metallic white floss anchored securely into dense felt. Ear tufts are constructed using slightly raised, feathered turkey rug stitches or loose straight stitches trimmed to precise lengths, creating a dynamic, tactile texture that projects slightly forward from the hoop surface. The structural stability of the felt backing prevents tension slippage, ensuring that free-floating whisker threads remain taut, straight, and properly elevated above the underlying muzzle embroidery.
Transfer the cat face outline onto soft heather-grey felt and complete the underlying base fur, eyes, and nose leather using standard flat long-and-short thread painting. For the interior ear tufts, work five to eight loose loop stitches using a single strand of off-white silk or cotton floss, securing the base of each loop with a tiny locking stitch on the reverse side of the felt. Snip the top of each loop with fine-tipped precision scissors and gently separate the thread plies with a sewing pin to produce soft, feathery fur tufts. To attach the whiskers, thread a fine beading needle with a single strand of stiff white nylon or glazed cotton thread. Pass the needle up through the muzzle pad and carry the thread across the face in a smooth, sweeping curve, securing the outer whisker tip with a microscopic anchoring stitch through the felt.
6. Split-Stitch Vintage Memorial Crest with Wool Felt Medallion
Step-by-Step Guide
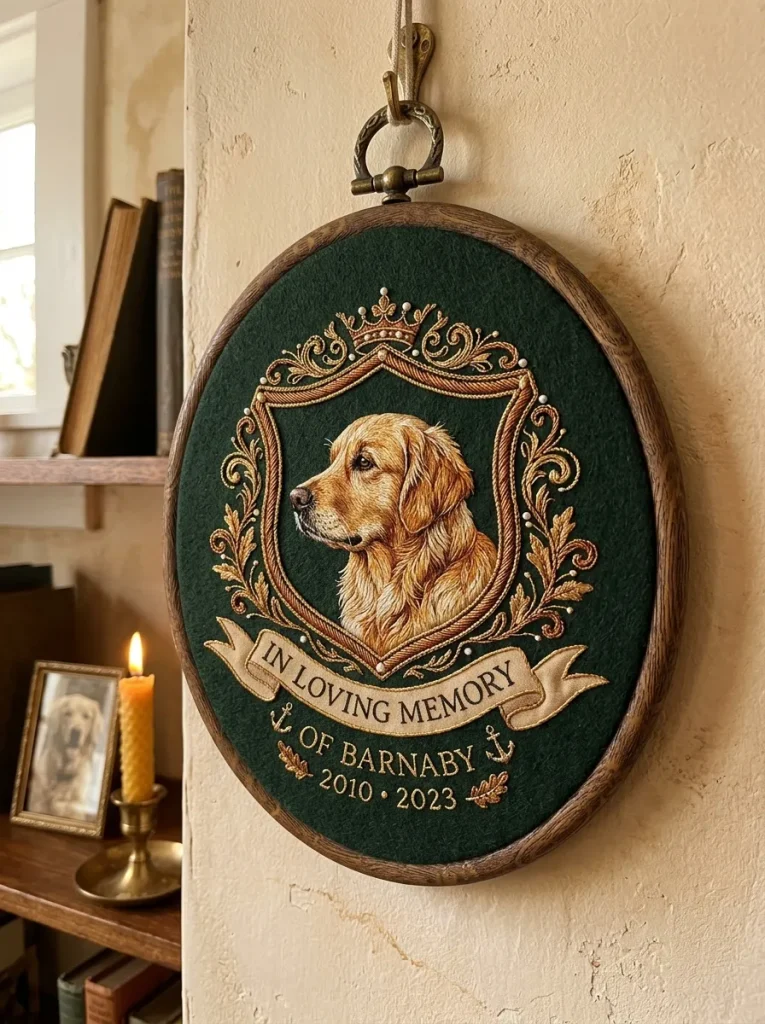
The vintage memorial crest style organizes pet embroidery into an heirloom-style heraldic medallion, featuring structured borders, personalized name banners, and classic split-stitch shading. This design encases the animal’s profile within a symmetrical oval frame surrounded by embroidered ivy leaves and Roman-style lettering. Utilizing two-millimeter thick dark forest green or royal navy wool felt provides a substantial, banner-like rigidity that mimics vintage embroidered patches and historical family crests. The split stitch technique creates a solid, braid-like line that maintains clean geometric edges, making it ideal for rendering smooth lettering, clean scroll banners, and structured frame boundaries.
Draft an oval crest outline containing a central pet profile and an arching lower ribbon banner on paper, transferring the complete template onto dark green wool felt with a white chalk pencil. Hoop the felt securely, checking that the woven grain remains completely straight across the oval axis. Using two strands of rich gold or copper embroidery floss, outline the crest border and banner edges using tight, uniform split stitches where each new needle pass pierces the center of the previous stitch. Fill the inner pet portrait with directional shading, keeping the color transitions smooth. Switch to a single strand of cream floss to back-stitch the pet’s name into the lower banner, spacing letters evenly. Cut a second piece of matching felt into an oval scalloped medallion to back the completed piece after removal from the hoop.
7. Dual-Tone Textured Corduroy and Felt Applique Combination
Execution Process
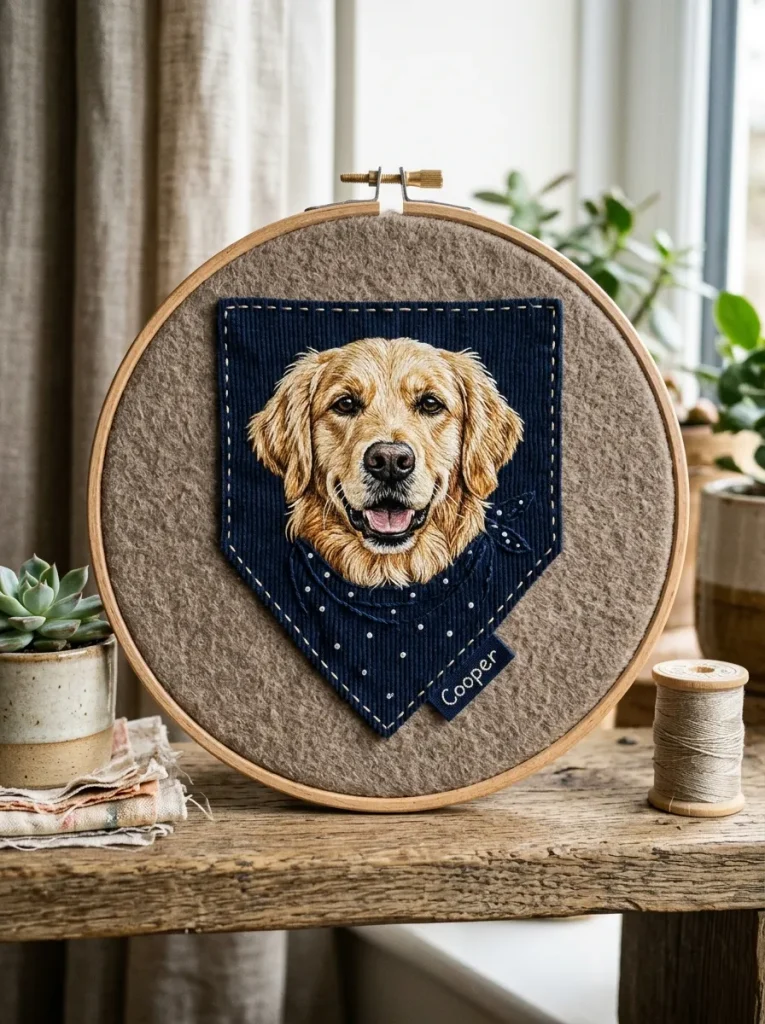
Combining layered felt appliques with dynamic embroidery stitches introduces architectural depth and reduces stitching time while preserving rich visual texture. This mixed-media design utilizes cut pieces of textured fabric, such as ribbed corduroy or patterned tweed, precisely shaped to match the animal’s body or clothing accessories, stitched onto a flat wool felt background. The pet’s facial features and fur edges are then embroidered over the top of the applique seam, seamlessly blending the hand-stitched thread with the woven fabric base. This approach creates an engaging tactile contrast between the smooth embroidery floss, the textured fabric patches, and the matte felt backing, perfect for playful, modern nursery or living room decor.
Cut the body, collar, or bandana silhouette of the pet from a scrap piece of fine-wale corduroy or vintage cotton plaid using sharp fabric shears. Apply a thin layer of repositionable fabric glue stick to the back of the fabric cutout and press it firmly onto the center of a neutral wool felt base sheet. Secure the felt and fabric sandwich tightly inside an embroidery hoop. Stitch around the outer perimeter of the fabric applique using a clean blanket stitch or close satin stitch with two strands of matching embroidery floss. Transition to the animal’s head, thread-painting the fur so that the lowest layer of neck stitches extends directly over the top raw edge of the corduroy applique, locking the fabric securely while creating a natural, overlapping fur collar effect.
8. Expressive Muzzle and Exposed Tongue Thread Layering
Setup Method
Capturing joyful canine expressions often involves stitching an open-mouth smile, detailed tooth structures, and a glossy, textured pink tongue extending past the lower lip. This design relies on micro-satin stitching layered over padded foundational stitches to give the tongue a raised, realistic contour. The surrounding felt backing absorbs the heavy needle passes required to build this dimensional mouth cavity without puckering around the chin. Subtle tonal variations of rose pink, coral, and deep burgundy floss create realistic mouth shadows and wet highlights, producing a lively, dynamic pet portrait that captures cheerful animal personality.
Mark the open-mouth contour clearly on a warm taupe wool felt base, mounting the fabric drum-tight into an embroidery hoop. Begin by stitching the deep interior mouth cavity with a single strand of charcoal or dark burgundy floss using flat horizontal satin stitches. Next, build padding for the tongue by laying three horizontal straight stitches across the center of the tongue area in light pink floss. Embroider the final tongue layer directly over the padding using vertical satin stitches with two strands of bright salmon pink floss, pulling gently to form a smooth, rounded surface. Add a thin line of pale white-pink along the side edge of the tongue to represent light reflection. Finish the surrounding lips, black jowls, and white teeth with sharp straight stitches, ensuring all edges meet cleanly.
9. Geometric Abstract Color-Blocked Background on Felt
How to Create
The geometric abstract color-blocked style merges classical realistic pet thread painting with bold, contemporary background shapes. This modern aesthetic places a lifelike, finely detailed pet face in the center, framed by intersecting arcs, semicircles, and clean diagonal blocks of solid pastel embroidery stitches on a heavy felt base. The juxtaposition of hyper-detailed, organic animal fur against flat, hard-edged geometric shapes creates a sophisticated art-gallery aesthetic. Using a thick, stiff wool felt backing ensures that the large blocks of flat background stitching do not distort or warp the surrounding unstitched felt surface.
Draw a crisp geometric background composition—such as an offset arch and overlapping circle—behind the pet outline on a sheet of off-white felt using a fine ruler and pencil. Hoop the felt and complete the large geometric color zones first, using two strands of muted sage, terracotta, or mustard floss worked in long horizontal satin stitches or clean brick stitches. Keep the stitch tension consistent along the outer geometric boundaries to maintain razor-sharp straight lines. Once the modern background is fully established, embroider the realistic pet portrait over the central intersection of the shapes using single-strand long-and-short thread painting. The overlapping fur strands break across the geometric color lines, producing a dynamic sense of foreground depth and modern artistic contrast.
10. Clean-Edge Felt Backing Disc Enclosure for Open Hoops
Step-by-Step Guide
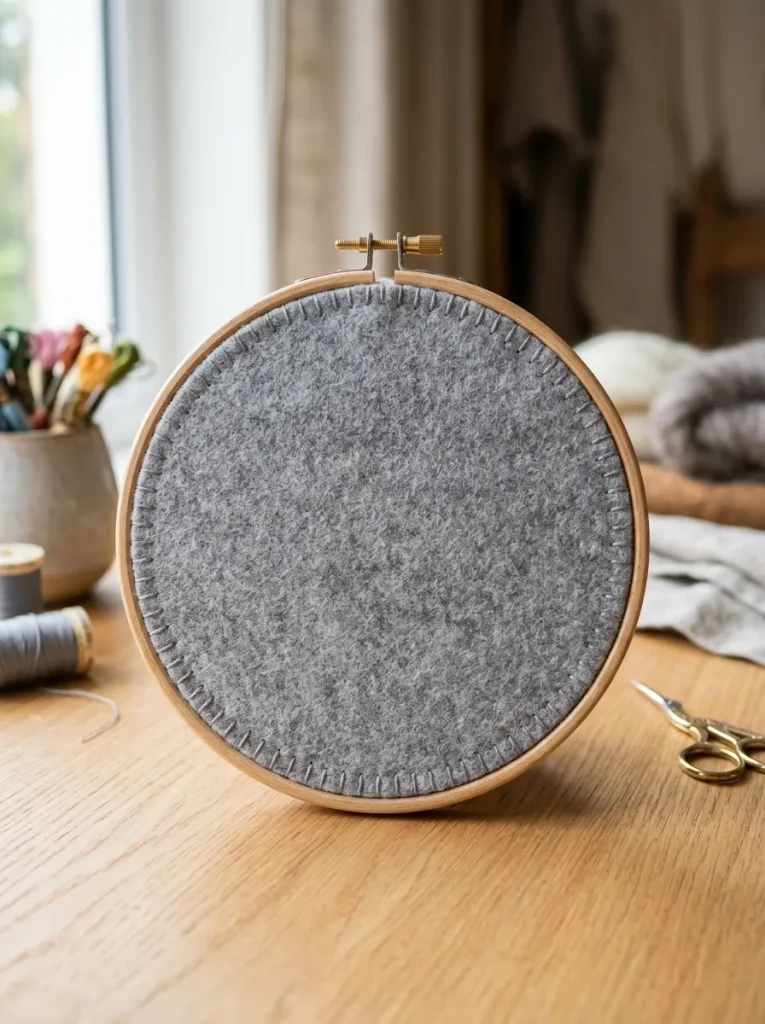
The clean-edge felt backing disc closure is the definitive professional framing technique used to seal, protect, and display finished embroidery hoop art. Leaving the messy reverse side of an embroidered portrait exposed can lead to snagged threads, dust accumulation, and loose tension over time. This finishing method wraps excess front fabric neatly around the inner wooden ring, securing it beneath a precisely cut disc of matching wool felt stitched around the outer wooden rim. The resulting piece features a flat, smooth, dust-resistant back that hangs flush against walls or rests securely on tabletop display easels, giving the completed handmade artwork a gallery-ready presentation.
After completing your pet portrait embroidery, trim the excess felt extending outside the hoop to an even one-inch border all the way around. Thread a sturdy needle with two strands of heavy-duty sewing thread and sew a wide running stitch around the entire perimeter of the excess fabric border. Pull the thread ends tightly to gather the excess felt smoothly over the inner wooden hoop on the reverse side, and tie a secure double knot. Trace the outer diameter of the wooden hoop onto a separate sheet of matching one-millimeter wool felt and cut out the disc with sharp shears. Place the felt disc over the gathered back and hand-sew it to the gathered fabric edge using an invisible ladder stitch or a decorative blanket stitch around the entire hoop circumference.
Common Beginner Mistakes and How to Avoid Them
Creating intricate pet portraits on felt requires precision, as common technical oversights can compromise the realism and structural integrity of the final piece. A frequent mistake among beginners is using all six strands of embroidery floss at once, which produces bulky, rope-like lines that obliterate fine facial details and make fur look coarse and artificial. Always separate your floss and stitch animal fur using only one or two individual strands for smooth, realistic blending. Another common error is failing to maintain consistent fabric tension in the hoop; loose felt will sag under heavy thread density, causing permanent puckering once the hoop is removed. Tighten your hoop screw securely with small pliers and periodically check that the felt remains drum-tight throughout your stitching sessions. Additionally, beginners often use pure black and bright white too aggressively across the entire coat, creating harsh, flat cartoonish boundaries. Avoid pure black shadows by blending deep espresso browns, slate blues, and charcoal tones, reserving pure white floss strictly for the most intense light reflections on eye pupils, nose bridges, and whisker highlights.
Practical Tips for Better Results
Implementing smart finishing strategies and disciplined workflow habits will substantially elevate the visual quality and longevity of your handmade pet portraits. Always follow the natural growth direction of the animal’s fur, drawing light pencil guide arrows directly onto the felt before you begin stitching to keep your needle passes properly aligned. When blending colors with the long-and-short stitch, stagger your stitch lengths irregularly and allow new rows to overlap deeply into previous thread rows, which prevents noticeable horizontal bands from forming across the coat. Work under bright, color-balanced daylight craft lamps to ensure accurate color matching between your floss skeins and reference photograph. Keep the backside of your work tidy by avoiding long thread jumps across open spaces, as dark traveling threads can create faint shadows that show through lighter felt backings. Finally, treat finished wool portraits with a light spritz of fabric protectant spray or display them inside UV-filtering glass shadow boxes to safeguard delicate cotton fibers from sunlight fading, dust accumulation, and airborne moisture over time.
Styling, Presentation, or Organization Ideas
Displaying and organizing handmade pet portrait embroidery effectively involves thoughtful curation of display heights, framing materials, and surrounding interior decor elements. Mount finished portraits inside high-grade round or oval beechwood hoops, treating the outer wooden rims with natural walnut wood stain or bees-wax polish to add refined warmth. Arrange multiple pet hoops in odd-numbered clusters of three or five along an entryway gallery wall, combining various hoop diameters between four and eight inches to establish visual balance and rhythmic movement. Integrate embroidered hoops into living room shelving displays by resting them on miniature dark wood or brass tabletop easels next to framed family photographs, trailing potted houseplants, and ceramic vases. For holiday decorating, stitch small three-inch pet portrait medallions, finish the reverse with festive plaid felt backings, and attach velvet ribbon hanging loops to transform your needlework into personalized heirloom Christmas tree ornaments. Keep your working floss skeins organized by numeric shade codes in clear compartment storage boxes, cataloging leftover color palettes for future pet portrait commissions.
Budget or Time Planning
Crafting detailed pet portrait embroidery is an economical, high-reward creative project that requires minimal financial outlay but demands dedicated, patient time allocation. Foundational supplies, including basic wooden hoops, assorted wool-blend felt sheets, and multi-color packs of stranded cotton floss, can be gathered for a very modest upfront investment. A single skein of embroidery floss provides several hundred yards of single-strand thread, making the cost per finished portrait exceptionally low compared to purchasing custom fine art. In terms of time commitment, an intricate, highly detailed four-inch pet portrait typically requires between eight and fifteen hours of focused stitching, depending on the complexity of the coat pattern and thread density. Divide the project into manageable phases: spend the first hour preparing the reference photo, tracing contours, and selecting thread palettes; allocate six to ten hours across several evening sessions for progressive fur layering and facial feature embroidery; and reserve the final hour for hoop finishing, felt backing attachment, and edge cleaning.
Creative Expansion and Advanced Inspiration
Once you have mastered foundational pet thread painting techniques on felt, explore advanced creative variations to expand your fiber art portfolio into new expressive dimensions. Experiment with mixed-media techniques by combining delicate watercolor paint washes directly onto light-toned wool felt before stitching, creating soft, artistic background gradients that complement the realistic foreground thread painting. Incorporate miniature stumpwork methods by crafting three-dimensional, detached embroidered animal ears or protruding fabric bandanas that extend outward from the flat hoop surface. You can also explore customized pet memorial keepsakes by integrating a small, discreet pocket into the rear felt backing disc to securely hold a lock of the pet’s actual fur or an engraved brass nameplate. Scale your embroidery work up to larger ten-inch statement hoops, or translate finished felt-backed portraits into functional everyday accessories by converting small embroidered medallions into wearable brooch pins, denim jacket patches, or custom tote bag embellishments that showcase your artisanal handiwork wherever you go.