
10 Open-Concept Studio Living Room Layouts on a Budget
Designing an open-concept studio living room requires balancing functional space allocation with visual harmony while staying within a practical financial framework. In modern urban housing, studio apartments present unique spatial challenges due to the absence of permanent interior walls separating the lounging, dining, and sleeping environments. Readers will learn how to systematically divide floor space, select multi-functional furniture, position accent lighting, and apply visual anchors to establish distinct functional zones without structural renovations. Utilizing low-cost spatial planning techniques allows renters and homeowners to maximize square footage, improve traffic flow, and craft an aesthetically pleasing environment. The practical utility of open-concept planning lies in its ability to transform a single open square or rectangular floor footprint into a comfortable, cohesive living zone that accommodates daily activities smoothly. By mastering layout strategies, readers can curate a personalized, organized home that balances aesthetic appeal with strict budget constraints.
Why Open-Concept Studio Layouts Are Trending
The popularity of open-concept studio layouts on platforms like Pinterest stems from the growing cultural shift toward compact urban living and minimalist lifestyle principles. Contemporary design trends favor open, bright, and uncluttered environments that emphasize light distribution and flexible spatial utility over rigid structural compartmentalization. For renters and budget-conscious homeowners, open-concept planning offers significant practical value because it eliminates the need for costly drywall construction, structural modifications, or expensive custom architecture. The DIY appeal of studio layout planning allows individuals to experiment with furniture arrangements, modular shelving units, and strategic textile placements to achieve a customized look affordably. Furthermore, these layouts are inherently beginner friendly, requiring no specialized construction skills—only thoughtful spatial planning, accurate measurement, and intentional decor choices. By focusing on smart visual separation rather than physical barriers, open studio designs maintain an airy, expansive feeling while providing designated zones for relaxation, working, and dining.
Preparation and Planning Guidelines
Before purchasing furniture or shifting heavy items, executing thorough preparation steps guarantees a smooth studio transformation. Begin by calculating the total square footage of the studio using a standard measuring tape, recording exact dimensions for length, width, ceiling height, and window placement. Map out immovable architectural elements such as radiators, entry doors, electrical outlets, and built-in closet doors on a simple floor plan diagram to avoid obstructing functional path ways. Next, list essential daily activities to prioritize spatial real estate based on personal lifestyle needs, ensuring that primary living furniture does not impede natural light or physical movement. Gather basic layout planning tools, including measuring tapes, painter tape for floor mapping, paper notebooks, and digital drafting software or layout apps. Budget planning requires setting explicit spending caps for core foundational items like sofas, rugs, and room dividers while reserving funds for affordable thrifted or upcycled accessory pieces. Establishing clear spatial parameters and financial boundaries early prevents costly spatial mistakes and ensures a harmonious final execution.
The Glass-Partitioned Zoning Strategy
Execution Process
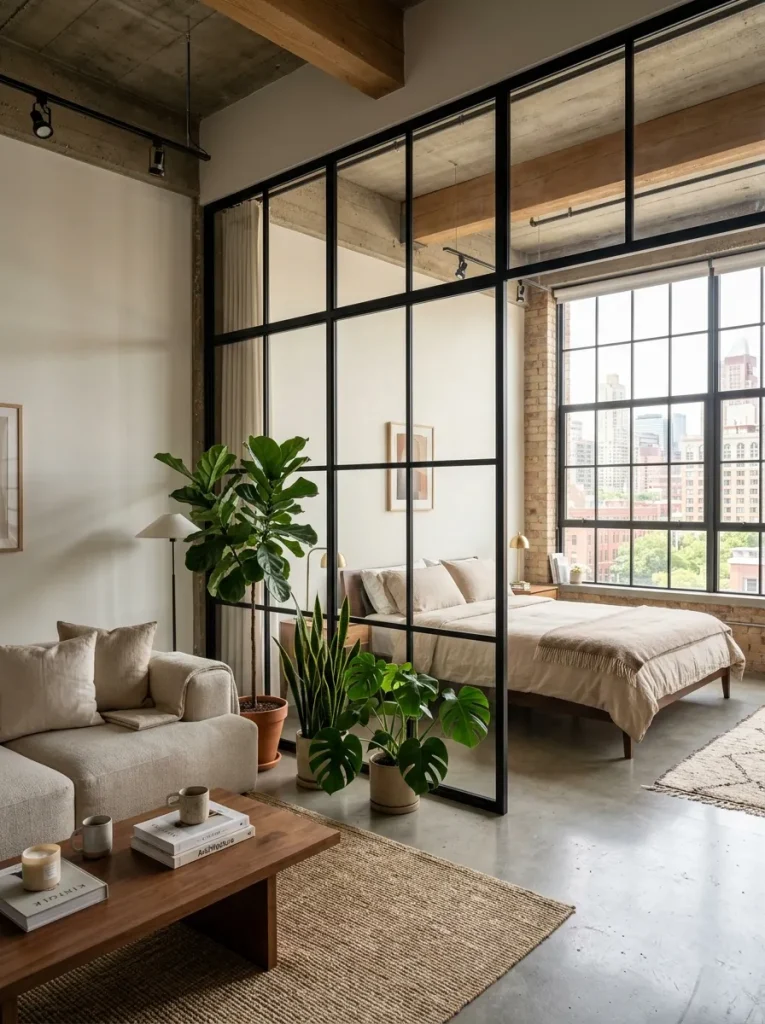
The glass-partitioned zoning strategy uses transparent or semi-transparent framed panels to construct clear spatial boundaries without blocking natural daylight distribution across an open studio. In compact apartments, physical solid walls often darken interior zones and create an uncomfortably cramped atmosphere, whereas framed glass or plexiglass partitions maintain continuous line-of-sight visual openness. This layout concept relies on establishing a dedicated living room core adjacent to a major window source while placing the partition panel parallel to the primary seating arrangement. The visual frame of the glass partition creates a psychological sense of enclosure, effectively separating the lounge territory from adjacent sleeping or kitchen areas. By utilizing lightweight aluminum frames or painted wood grid structures filled with acrylic panels, renters can replicate the luxurious look of industrial steel-framed glass windows at a fraction of the cost. The resulting design maintains high aesthetic appeal, ensures maximum ambient light penetration, and offers structured spatial organization ideal for small open-concept floor plans.
To build this layout affordably, map the prospective divider line on the floor using blue painter tape, ensuring at least thirty inches of clear walkway space around the partition. Purchase modular sliding acrylic panels, freestanding room divider screens, or light timber frames fitted with clear polycarbonate sheets from local home improvement stores. Position the partition directly behind the primary sofa or alongside the main living area boundary to establish an anchor point. Secure freestanding screens with weighted bases or ceiling-tension mounting poles that do not permanently damage rental floors or drywall. Arrange the living room furniture facing inward toward a central focus point, such as a television mount or wall art, keeping seating items close to the partition structure. Integrate sheer linen drapery panels alongside the frame if adjustable privacy is needed during evening hours. Finish the setup by placing low-profile floor plants along the base of the glass panel to soften the structural lines and enhance the organic layout flow.
The Low-Profile Sofa Anchor Arrangement
Step-by-Step Guide
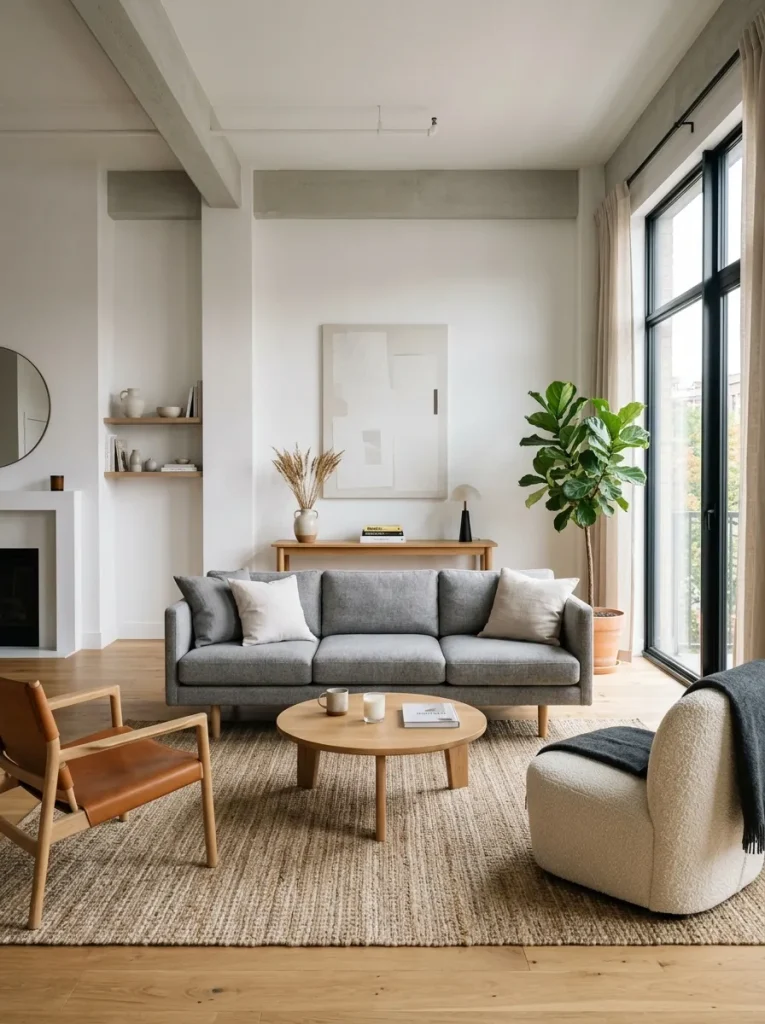
The low-profile sofa anchor arrangement focuses on utilizing low-slung, ground-adjacent furniture pieces to preserve open visual sightlines across the entire studio apartment. High-backed couches and bulky armchair silhouettes can visually break up a compact studio, making ceilings appear lower and floor plans feel constrained. By selecting a sofa with a total back height under thirty inches, the living room maintains an open, breezy atmosphere while clearly defining the primary lounging zone. This layout centers the low-profile sofa in the middle of the room or slightly off-center facing away from the sleeping area, effectively turning the back of the sofa into an implicit room divider. The surrounding space remains visually connected, allowing light to move freely across the room from opposing windows. This minimalist design philosophy emphasizes horizontal lines, making compact studio spaces feel significantly wider and more expansive while keeping furniture costs low through simple, streamlined upholstery designs.
Begin by determining the optimal orientation for the low-profile sofa relative to the main natural light source and structural entryways. Position the sofa so its back faces the bed or kitchen counter, establishing an immediate physical barrier between living and utility zones without erecting a tall physical wall. Place a slim, low console table directly against the back of the sofa to store books, lamps, or small decorative items, further emphasizing the transitional boundary. Position a flat-weave or low-pile area rug underneath the front legs of the sofa to ground the seating zone within the larger room footprint. Add two lightweight, armless accent chairs or floor cushions opposite or perpendicular to the sofa to complete a conversational circle without blocking physical pathways. Ensure that all secondary furniture pieces, such as coffee tables and side tables, maintain a low visual profile matching the sofa seat height. Complete the setup by hanging artwork at eye level when seated, keeping wall decor proportions balanced with the low-slung furniture alignment.
The Floating Bookcase Room Divider Floor Plan
How to Create
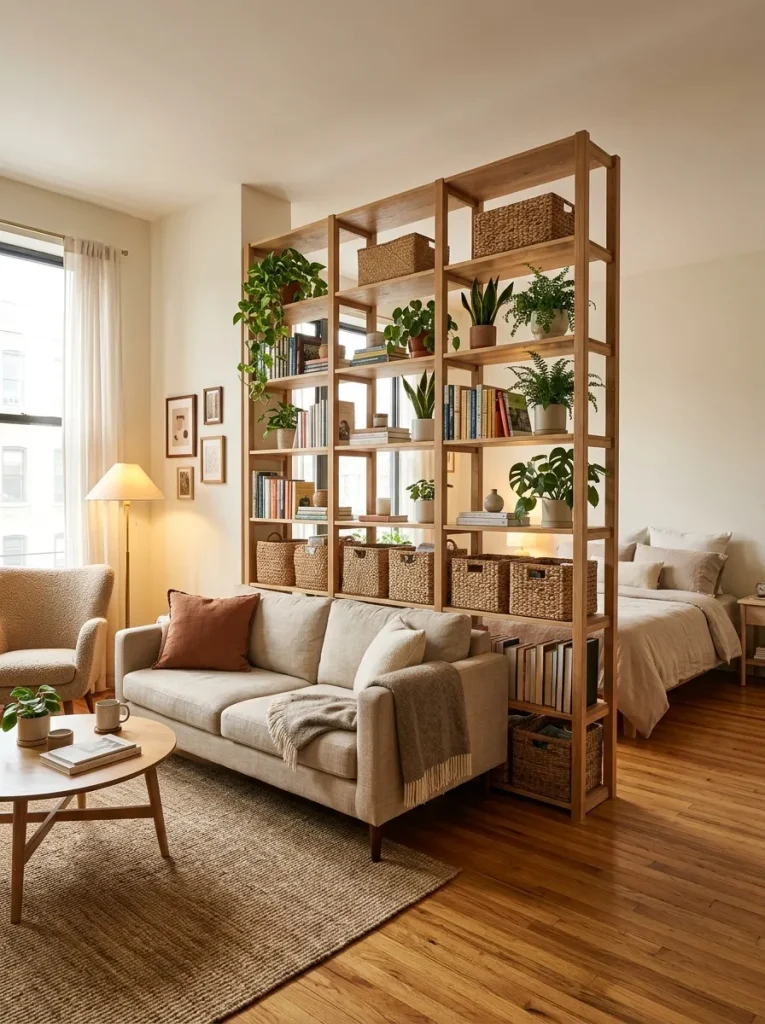
The floating bookcase floor plan utilizes open-backed double-sided shelving units as both functional storage solutions and dual-purpose structural room dividers within an open studio living room. Standard solid bookshelves block ambient light and cast heavy shadows, whereas open-frame cube organizers or ladder shelves allow natural light to filter through while offering extensive vertical storage capacity. Placing an open bookcase perpendicular to a primary perimeter wall physically divides the living room from the bedroom or home office zone without requiring permanent construction. The shelves serve as a double-sided display case, accessible from both sides of the studio, maximizing storage efficiency in tight quarters. This approach aligns perfectly with budget-conscious decorating goals, as mass-produced flat-pack shelving units are inexpensive, widely available, and simple to assemble. The resulting layout feels customized, organized, and structurally defined while providing essential storage for books, decorative baskets, plants, and media devices.
Start by assembling an open-backed shelving unit with dimensions suited to your studio ceiling height, ensuring the width does not block primary traffic corridors. Position the shelving unit extending outward from a main wall, positioning it at a right angle to separate the main living room seating area from the adjacent functional zone. Anchor the bookshelf securely to the wall stud using heavy-duty L-brackets or tension hardware to prevent tipping and ensure safety. Arrange your main living room furniture facing away from or adjacent to the shelving unit, using the bookshelf wall as an architectural backdrop for a sofa or accent chair. Populate the shelves intentionally, alternating between solid storage bins at the lower levels to hide clutter and open decorative objects, books, and trailing house plants on the upper eye-level shelves. Keep approximately thirty percent of the shelf volume open and empty to preserve light transmission across the room divide. Complete the look by coiling hidden cords along the frame to power small table lamps or electronic displays placed on the shelves.
The Corner L-Shaped Conversational Hub
Setup Method
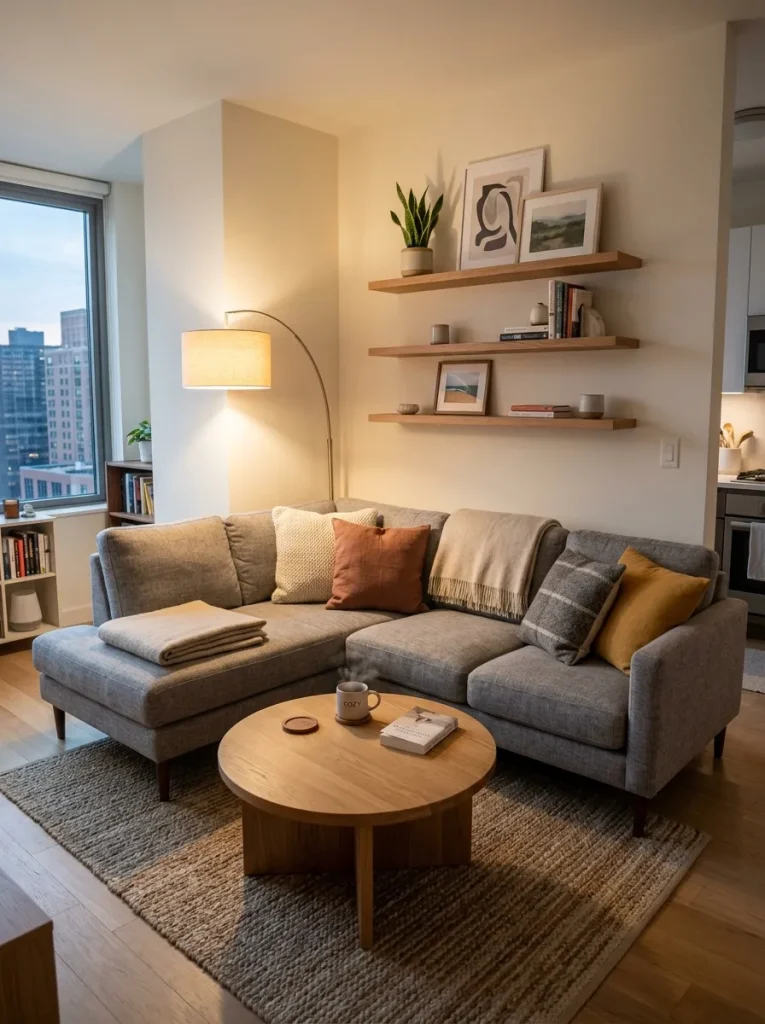
The corner L-shaped layout maximizes available floor space in open studio apartments by grouping primary seating along two intersecting walls to create a dedicated conversational hub. Pushing living room furniture outward toward unused corner spaces opens up the center of the studio floor, creating a clear, unobstructed path for walking between the entrance, kitchen, and sleeping areas. Utilizing an L-shaped sectional sofa or pairing a standard sofa with an orthogonal loveseat defines the lounge zone naturally through structural alignment with the corner walls. This configuration creates an intimate, cozy seating area that feels separate from the rest of the open floor plan while optimizing every square inch of corner real estate. It is particularly effective in smaller studios where central furniture placement would create tight, uncomfortable bottlenecks. The simplicity of aligning furniture with structural corners minimizes layout complexity and reduces the need for expensive spatial accessories or complex partition systems.
Begin by selecting the quietest, least obstructed corner of the studio floor plan, away from primary entry doors and kitchen appliances. Position an L-shaped sectional sofa or combine a mid-sized sofa with an accent chair placed at a ninety-degree angle against the chosen intersecting walls. Place a large square or rectangular area rug directly in the corner, sliding it beneath the full depth of the seating units to lock the conversational zone into place visually. Install wall-mounted floating shelves above the sofa along both corner walls to utilize vertical vertical space for decorative accents, art prints, and ambient lighting fixtures without taking up floor space. Center a compact coffee table or modular ottoman in the elbow of the L-shaped seating arrangement to provide a functional surface for drinks and decor. Position a floor lamp in the exact corner vertex behind the sofa to cast warm, indirect light upward across the ceiling, emphasizing spatial height. Ensure clear walking paths of at least three feet remain open along the outer edges of the seating hub.
The Dual-Purpose Breakfast Bar Living Zone
Execution Process
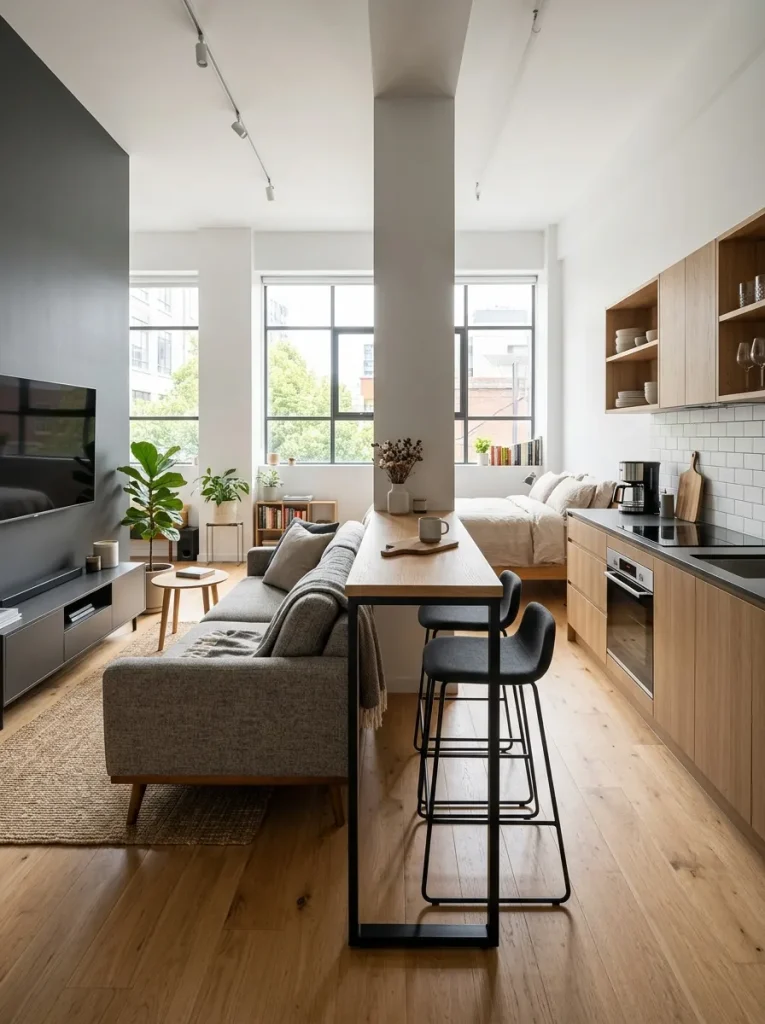
The dual-purpose breakfast bar living zone bridges the gap between kitchen functionality and living room relaxation by using high-top counter seating as an active spatial divider. In many studio apartments, the kitchen transitions abruptly into the primary living area without any structural transition or dining space. Placing a narrow, counter-height dining table or floating breakfast bar at the boundary of the kitchen creates a multi-functional hub for dining, remote work, and social gathering. The back of the bar stools or the table structure itself serves as a clear physical barrier that establishes where the kitchen ends and the living room lounge begins. This layout maximizes utility in tight footprints by combining the functions of a dining room, work desk, and room divider into a single compact footprint. Budget-friendly bar tables and counter stools are easily acquired and provide an elegant, modern aesthetic that enhances the overall studio flow without cluttering the room with single-use furniture items.
To implement this layout, measure the transition space between the kitchen cabinetry and the planned living room lounge area to determine maximum table length. Position a tall, slim bar table or wall-mounted drop-leaf counter perpendicular or parallel to the main kitchen counter edge. Slide two or three backless or low-profile bar stools under the table when not in use to keep the surrounding walkway clear of physical obstructions. Position your primary living room sofa parallel to the breakfast bar, facing outward toward the opposite wall to establish a distinct living room orientation. Place a television or main entertainment console on the wall opposite the sofa, ensuring comfortable viewing angles from both the couch and the raised bar stools. Add overhead pendant lighting or clamp-on task lights above the breakfast bar surface to define the zone visually during evening hours. Maintain a minimum path clearance of thirty-six inches between the back of the sofa and the bar stools to allow comfortable movement throughout the living space.
The Area Rug Boundary System
Step-by-Step Guide
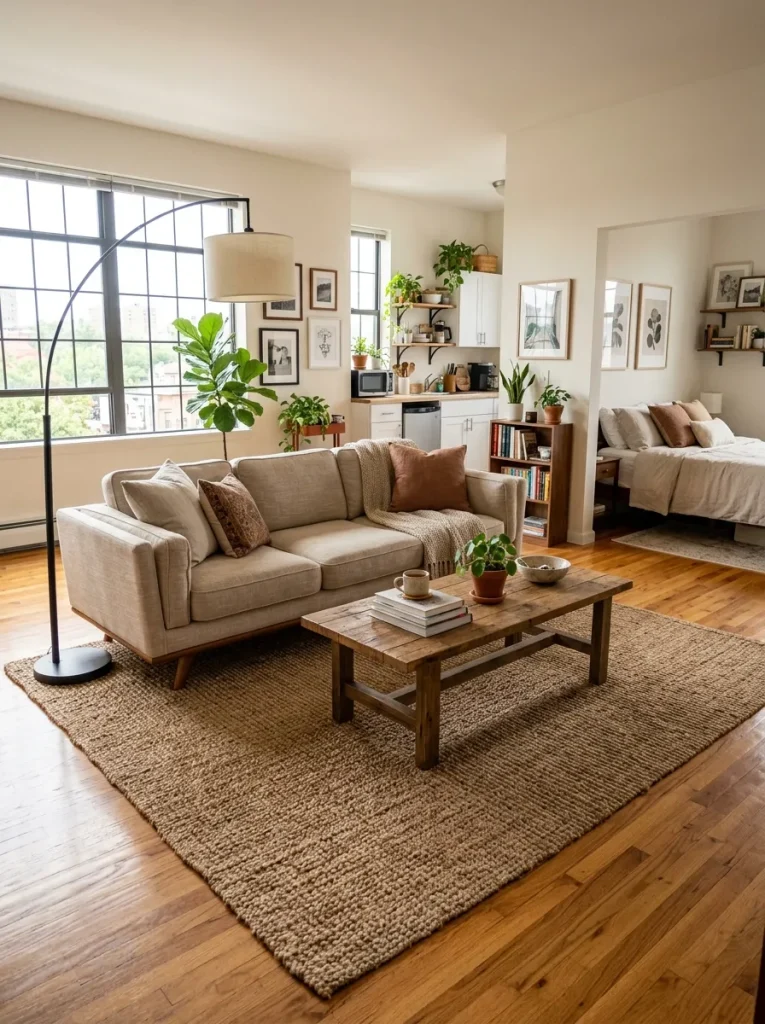
The area rug boundary system relies on texture, color, and textile positioning to define distinct functional zones within an open-concept studio floor plan without using physical barriers. In a completely open room, furniture placed without visual boundaries can appear scattered, unorganized, and visually disconnected. By placing a dedicated, large-scale area rug beneath a living room furniture grouping, you create a defined visual island that signals the purpose of that specific zone to the eye. The edges of the rug act as implicit walls, grounding the sofa, coffee table, and accent chairs within a neat frame. This technique allows for seamless transition between living, dining, and sleeping zones while maintaining an open, airy feeling across the studio floor. Utilizing affordable polypropylene, jute, or flat-weave cotton rugs enables budget-conscious decorators to achieve polished, professional spatial separation easily and without structural changes.
Start by measuring the designated living area footprint to select an appropriately sized area rug, typically measuring six-by-nine feet or eight-by-ten feet for average studio layouts. Select a rug design featuring colors or textures that contrast subtly with the underlying studio flooring while coordinating with your overall decor palette. Lay the rug flat on the floor in the intended living room location, securing the corners with non-slip rug pads or double-sided rug tape to prevent shifting. Position the front legs of the sofa, coffee table, and primary accent chairs on top of the rug surface, ensuring at least six inches of rug extends past the outer furniture edges. Leave the floor surrounding the rug bare to create clear visual pathways between the living zone and adjacent studio zones. Pair the rug with a dedicated overhead lighting fixture, such as a arching floor lamp rooted inside the rug perimeter, to reinforce the zone during night hours. Clean and vacuum the rug boundaries regularly to maintain sharp visual separation across the open studio layout.
The Wall-Mounted Foldaway Furniture Setup
How to Create
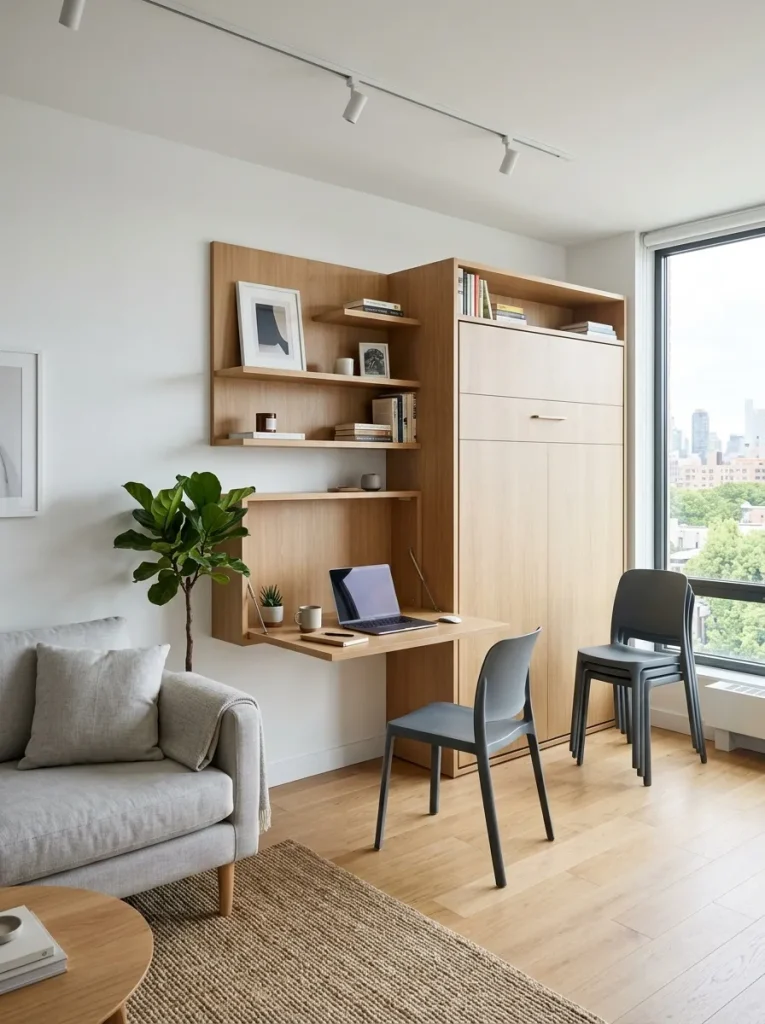
The wall-mounted foldaway furniture setup maximizes usable living room space by utilizing retractable, drop-leaf, and wall-anchored furniture components that fold flat when not in use. In small studio apartments, fixed furniture items like large coffee tables, dining tables, and desks can quickly consume valuable floor space, making the living area feel cramped. By mounting drop-down desks, fold-out dining tables, and floating wall shelves, the floor area beneath remains open and versatile for daily activities. When folded up against the wall, these dynamic elements disappear, turning a tight multifunctional area back into a spacious lounge zone. This spatial layout strategy is ideal for budget-conscious renters because wall-mounted foldaway furniture pieces are affordable, easy to install with standard hardware, and eliminate the need to purchase multiple bulky, standalone items. The resulting environment is flexible, highly efficient, and adaptable to shifting daily routines.
Begin by identifying an open interior wall segment within the living area that can accommodate fold-down hardware without blocking entryways or primary electrical paths. Install a heavy-duty wall-mounted drop-leaf table or drop-down desk using steel folding brackets anchored directly into solid wall studs for maximum weight support. Position the foldaway table at a standard desk or dining height, ensuring it folds flat against the wall surface when released. Arrange the main living room sofa and lightweight accent chairs around the foldaway wall zone, maintaining enough clearance for the furniture to extend fully without moving main seating pieces. Select stackable, lightweight folding chairs that can be hung on decorative wall hooks or tucked inside a closet when the table is stored away. Use floating wall shelves installed above the foldaway unit to hold office supplies, media devices, or decor, keeping the main foldaway surface clear of clutter. Adjust the room configuration effortlessly throughout the day, opening the furniture for work or dining and collapsing it down to enjoy an open living room layout.
The Symmetrical Floating Entertainment Layout
Setup Method
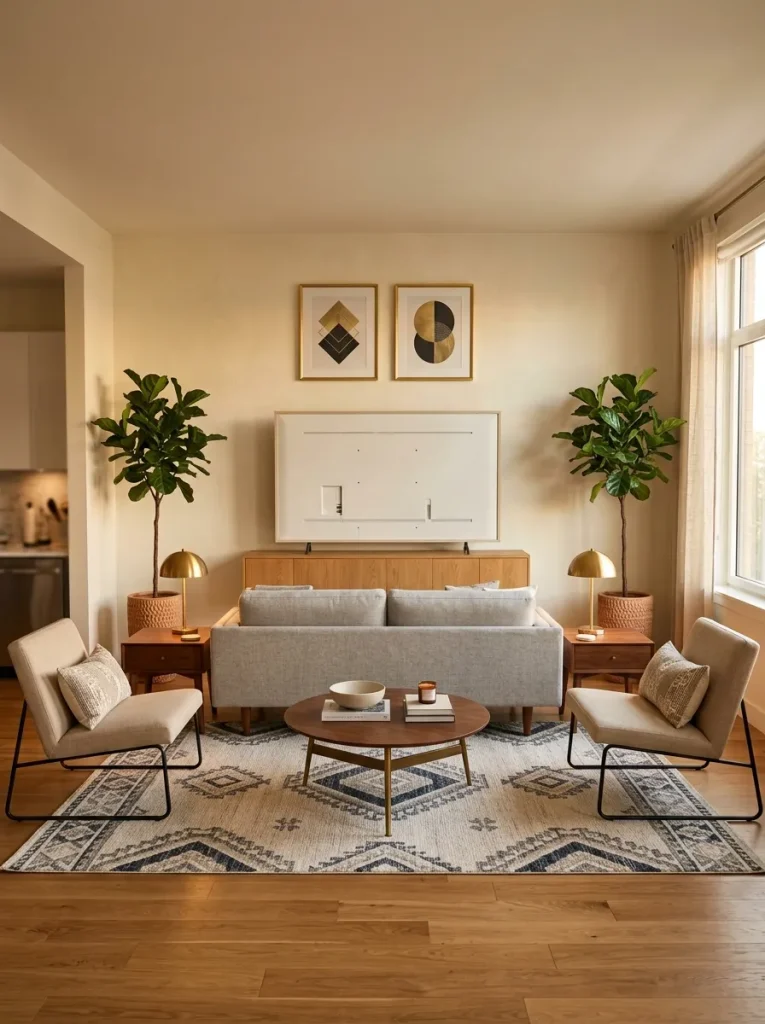
The symmetrical floating entertainment layout focuses on placing living room furniture away from perimeter walls toward the interior center of the studio to establish a balanced focal point. Standard studio decorating often pushes all furniture flush against exterior walls, leaving an awkward, empty space in the middle that highlights the small room dimensions. By floating a sofa and small accent chairs in a central, symmetrical configuration facing a wall-mounted entertainment center, the layout creates a structured living room environment. Symmetry naturally pleases the human eye, providing order and tranquility within a compact single-room studio layout. Floating the furniture also opens up the perimeter walls for tall storage cabinets, floating shelving, or passageways behind the seating area. This arrangement delivers a sophisticated, upscale look on a budget by leveraging basic balance principles and clever spatial proportioning rather than relying on expensive decorative items.
Determine the primary focal wall of the studio where a television, entertainment media console, or large piece of artwork will be positioned centrally. Mount the television or position a slim, low-profile media console directly at the horizontal midpoint of the focal wall to establish your central symmetry line. Position a mid-sized sofa directly opposite the media console, floating it two to three feet away from the back wall or adjacent furniture zones to create a rear walkway. Place two identical accent armchairs or matching side tables symmetrically on either side of the sofa, angled slightly inward toward the center coffee table. Position an area rug underneath the entire floating group to pull the symmetrical components together into a single unified living island. Ensure that distance between the seating and the entertainment console matches recommended viewing parameters for comfortable daily use. Complete the balanced layout by placing matching table lamps or tall floor plants on both sides of the media console to ground the visual frame.
The Window-Focused Daylight Living Configuration
Execution Process
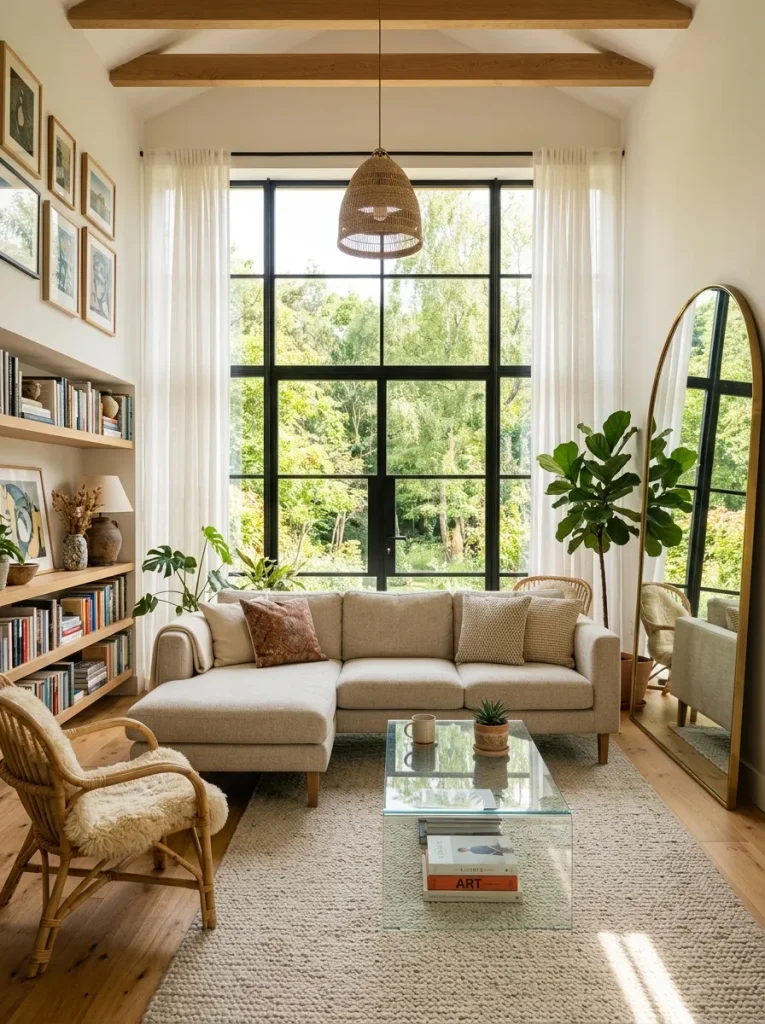
The window-focused daylight living configuration prioritizes natural light by arranging the primary living room seating around major exterior window openings within the studio layout. Natural daylight makes small studio apartments feel significantly larger, brighter, and more inviting, reducing reliance on artificial lighting during daytime hours. Position sofa seating facing toward or adjacent to large windows to draw attention outward to exterior views, expanding the perceived boundaries of the interior space. Avoid placing tall bookcases, dark heavy drapes, or high-back furniture pieces directly in front of window frames, as these impede sunlight distribution throughout the rest of the apartment. By framing natural light sources with low-profile seating and light-reflecting decor, this layout creates a warm, energizing atmosphere on a modest budget. The strategy leverages existing architectural features to elevate the aesthetic quality of the living space without requiring expensive structural changes.
Start by measuring the dimensions of the primary window wall in your studio apartment, identifying radiator placements or sill heights that affect furniture positioning. Place your main sofa parallel or perpendicular to the window wall, maintaining a gap of at least twelve to eighteen inches to allow access for window operation and curtain movement. Install sheer, light-filtering curtains on a ceiling-mounted or high-hung curtain rod extending beyond the window frame width to maximize light entry while providing soft privacy. Position a low coffee table made of clear acrylic, glass, or light-colored wood in front of the sofa to reflect natural light deeper into the studio floor plan. Add a large wall mirror on the interior wall directly opposite the window to bounce incoming sunlight into darker interior corners or kitchen areas. Incorporate indoor plants on window sills or hanging plant holders near the window frame to create a fresh, vibrant living backdrop. Keep surrounding wall colors light and neutral to enhance overall daylight reflection across the living zone.
The Multi-Functional Entryway Living Combination
Step-by-Step Guide
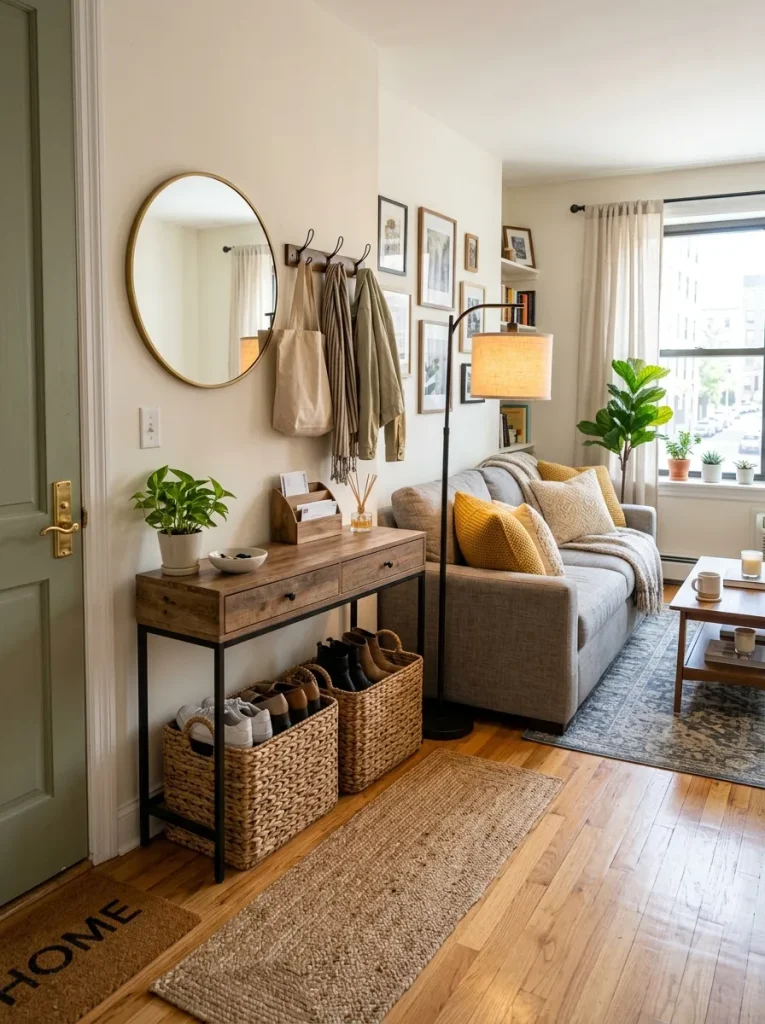
The multi-functional entryway living combination integrates the living room layout directly with the front entrance zone, creating a organized entry transition within open-concept studio apartments. Many studios open directly into the main living space without a dedicated hallway or foyer, causing shoes, coats, and mail to clutter the primary seating area. This layout establishes a dedicated entryway utility zone using slim console tables, coat hooks, and storage benches positioned immediately alongside the living room seating. By organizing entry drop-zone items along an entryway wall section, clutter is kept away from the primary lounge space. The back or side edge of an entryway bench or storage unit serves as a functional spatial divider, separating entry traffic from living room relaxation areas. This approach solves storage and spatial challenges simultaneously, creating an organized aesthetic on a small budget.
Measure the interior wall area immediately adjacent to your main studio entry door to determine available depth for entry furniture without blocking door swing path. Install a narrow entryway console table or a low shoe storage bench along the entry wall segment to establish a distinct landing zone. Mount a wall-mounted coat rack, key holder, and mirror directly above the console bench to capture daily items upon entering the apartment. Position your primary living room sofa perpendicular to the entry door, with its side or back facing the entryway console to physically block sightlines into the lounge area. Place a small accent rug at the entry door threshold to capture dirt and visually separate the entry floor from the living room area rug. Incorporate closed storage bins or woven baskets beneath the console table to keep shoes, bags, and accessories hidden from the main seating space. Ensure a minimum entry passage width of thirty-six inches remains clear to accommodate effortless entry and exit from the studio apartment.
Common Beginner Mistakes and How to Avoid Them
When designing an open-concept studio living room on a budget, beginners frequently make layout errors that lead to cramped, disorganized, or visually chaotic environments. A common mistake is selecting oversized, bulky furniture items designed for traditional multi-room houses, which quickly overwhelm compact studio floor plans. To prevent spatial overcrowding, always measure floor footprints carefully and choose low-profile, slim, or multi-functional furniture pieces proportioned for small spaces. Another frequent error is pushing all furniture flat against perimeter walls, which leaves an empty center space and fails to create distinct functional zones. Avoid this by floating key furniture pieces away from walls and using area rugs, open shelving, or console tables to define clear room boundaries. Additionally, blocking natural light paths with heavy drapes or tall physical partitions creates dark interior pockets that make small rooms feel significantly smaller. Maintain open daylight distribution by using sheer window coverings, glass or acrylic accents, and open-backed divider shelving. Finally, neglecting vertical storage leads to floor clutter; install floating wall shelves and vertical organizers to keep living surfaces clear, functional, and visually appealing.
Practical Tips for Better Results
Achieving professional layout results in a budget-conscious studio living room requires combining intentional spatial planning with simple visual styling techniques. Always prioritize multi-functional furniture items, such as storage ottomans, sofa beds, or extendable tables, to maximize utility without accumulating unnecessary furniture pieces. Use a unified color palette featuring neutral base tones on walls and major upholstery items to create visual continuity across all functional areas, applying accent colors sparingly through pillows, throw blankets, and art prints. Incorporate varied lighting sources, including floor lamps, table lamps, and under-shelf LED strip lighting, to create depth and establish distinct moods within individual living zones during evening hours. Use clear or reflective materials, such as glass coffee tables, acrylic chairs, and strategically placed wall mirrors, to bounce ambient light and create an illusion of expanded spatial depth. Maintain strict decluttering routines, storing daily items inside closed storage bins or drawers to preserve clean visual lines. Finally, regularly evaluate traffic pathways by walking through the studio layout, adjusting furniture placement to ensure at least thirty inches of clear walkway space remains open between all major zones.
Styling, Presentation, and Organization Ideas
Styling an open-concept studio living room effectively involves layering textures, managing visual density, and organizing daily essentials to maintain an uncluttered aesthetic. Group decorative objects in odd-numbered clusters on coffee tables, floating shelves, and console surfaces, blending organic elements like potted plants with structured items like books or ceramic vases. Utilize uniform, woven storage baskets or fabric bins inside open shelving units to hide loose electronics, cables, paper documents, and personal items cleanly out of sight. Establish visual balance across the living zone by matching the scale of wall art to underlying furniture dimensions, hanging primary canvas prints at standard eye level. Frame functional areas with distinct textile textures, pairing plush living room throw rugs with smooth woven textiles in adjacent dining or work zones to signal changes in spatial purpose. Keep cord clutter managed by utilizing adhesive cable clips, cable management boxes, and hollow furniture legs to conceal power cords running to televisions and lamps. By combining organized storage systems with curated decorative accents, your studio living room maintains a cohesive, stylish presentation that feels curated rather than crowded.
Budget and Time Planning
Executing a studio living room layout transformation efficiently requires establishing clear financial limits and managing project timelines effectively. Begin by breaking your overall budget down into critical spending tiers, allocating sixty percent of funds toward foundational furniture pieces like a comfortable sofa and supportive rug, thirty percent toward functional organizers and partitions, and ten percent toward decorative styling accents. To minimize costs, acquire furniture pieces through online second-hand marketplaces, thrift stores, or discount home outlets, selecting sturdy solid-wood or metal items that can be refreshed with paint or new hardware. Schedule the layout execution systematically across a weekend, dedicating the first day to room measurement, floor plan mapping with painter tape, furniture clearing, and deep cleaning. Use the second day for assembling modular furniture, hanging wall shelves, mounting entertainment units, and fine-tuning furniture placement within your designated layout zones. Avoid impulse purchases by maintaining a strict shopping list based on exact room measurements and structural priorities. Planning expenses and installation steps prevents overspending, reduces assembly frustration, and ensures a seamless transition into your newly organized studio living space.
Creative Expansion and Advanced Inspiration
Once your foundational studio living room layout is established, advanced design enhancements can further elevate the functional utility and aesthetic quality of the space. Consider building a custom modular furniture wall incorporating a fold-out Murphy bed or hidden drop-down desk system to free up massive floor areas during social gatherings. Integrate smart home automation devices, such as voice-controlled smart lighting, motorized window shades, and compact smart speakers, to adjust ambient light and entertainment settings effortlessly across different living zones. Experiment with architectural accent features, such as applying removable peel-and-stick wood slat paneling, textured wallpaper, or contrasting accent paint colors behind the living room sofa to accentuate functional zones visually. Enhance vertical greenery by installing ceiling-mounted hanging planters or a vertical plant wall along living room boundaries, introducing fresh natural textures that improve interior air quality. For growing spatial needs, utilize modular, expandable furniture systems that can be reconfigured or expanded easily as your lifestyle, living conditions, or budget evolve over time. These creative expansions transform a basic studio layout into a dynamic, highly personalized living environment.