
10 Multi-Functional Wall Mounted Storage Hooks for Small Garages
Small garage organization depends on maximizing vertical space to keep floors clear and items accessible. Wall-mounted storage hooks offer a practical method for organizing hand tools, sporting equipment, extension cords, and outdoor hardware. Utilizing vertical surfaces transforms cluttered garages into functional, structured workspaces without requiring expensive cabinetry or floor-consuming shelving units. Readers will learn how to select, install, and arrange various multi-functional storage hooks tailored to specific equipment types. Understanding the weight capacities, anchor mechanisms, and material compositions of heavy-duty hardware allows home storage planners to design custom layouts that match their daily workflow. Implementing a vertical storage plan increases safety by removing trip hazards while extending the lifespan of tools by keeping them elevated away from ground moisture. This step-by-step framework demonstrates how strategic placement, proper installation techniques, and modular hook systems create an efficient, aesthetic organization layout suited for compact utility areas.
The Growing Relevance of Vertical Garage Organization Systems
Vertical garage storage has become a focal point in modern home organization due to shrinking residential storage spaces and growing interest in streamlined, minimalist utility design. Modern homeowners seek functional home decor and storage solutions that combine utility with clean aesthetic principles. The popularity of DIY garage organization projects stems from the accessibility of versatile hardware that requires minimal technical expertise to install successfully. Budget ideas focused on utility hooks allow individuals to create custom hanging arrangements at a fraction of the cost of modular built-in furniture. Beginners can easily mount heavy-duty systems onto standard wall studs using basic hand tools. These trending ideas emphasize adaptiveness, allowing users to reconfigure hook positions as their storage requirements evolve over time. Utilizing wall space effectively protects valuable gear, optimizes small square footage, and maintains an orderly workspace that supports efficient household maintenance and hobby pursuits.
Hardware Selection and Installation Preparation
Proper preparation ensures wall-mounted hooks hold heavy loads securely while preventing wall damage. Essential materials include steel storage hooks, wall anchors, wood screws, a measuring tape, a bubble level, and painter’s tape for marking positions. Required tools encompass a cordless drill, appropriate drill bits, a stud finder, a screwdriver, and safety eyewear. Before installing any hardware, inspect the garage walls to identify the structural makeup, which typically consists of drywall over wood studs, exposed framing, or solid masonry. Locate the internal wood studs using an electronic stud finder, as mounting hardware directly into structural framing offers maximum weight support. Mark anchor points clearly on the wall using a pencil and level to maintain straight, professional alignments. For drywall installations lacking stud alignment, select heavy-duty toggle bolts or expandable hollow-wall anchors rated for high weight capacities. Planning the physical layout beforehand ensures adequate clearance between suspended items and garage door tracks.
1. Heavy-Duty J-Hook Systems for Heavy Equipment
Execution Process
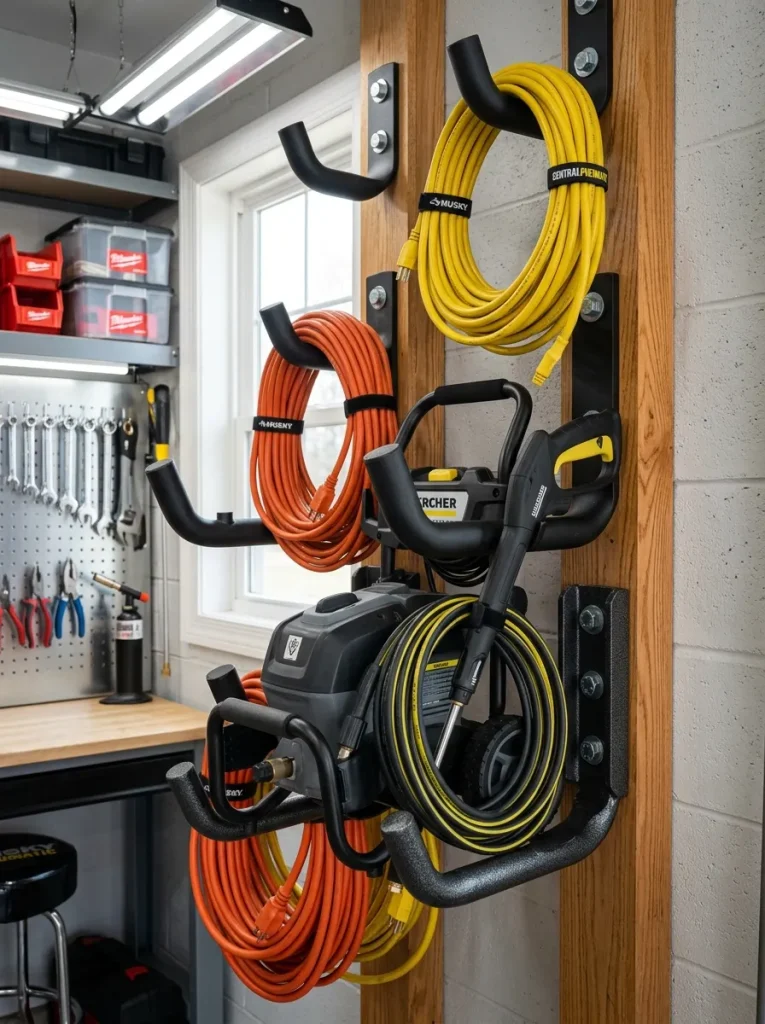
Heavy-duty J-hooks feature a deep curve designed to cradle thick, weighty items securely against structural walls. These steel brackets support significant weight loads, making them suitable for hanging power tools, heavy extension cords, and folded lawn furniture. The curved profile prevents items from slipping forward while providing a broad surface area that distributes pressure evenly. High-quality J-hooks often feature protective rubber or vinyl coatings that prevent metal-to-metal friction, reducing scratches on hanging equipment. Placing these hooks in linear sequences creates dedicated zones for bulkier garage items that normally consume floor space. Understanding load limits remains critical when planning J-hook layouts, as weight capacities vary based on anchor depth and structural backing. Incorporating heavy-duty J-hooks into garage walls elevates heavy gear safely while keeping essential maintenance equipment immediately visible and accessible for everyday tasks.
Step-by-Step Installation
Begin by mapping out the desired installation height using a tape measure and a bubble level to ensure horizontal precision. Locate a central wood stud using an electronic stud finder, and mark the pilot hole locations directly on the wall surface. Select a drill bit slightly smaller in diameter than the mounting screws to create clean pilot holes into the wood framing. Position the J-hook bracket over the pilot holes, aligning the mounting plate flush against the wall surface. Insert the heavy-duty wood screws through the bracket openings, tightening them securely with a power drill or manual screwdriver until the hook sits firm without movement. If mounting onto concrete or brick, drill mason holes and insert expansion anchors before securing the mounting screws. Test the installed J-hook by applying gradual downward pressure before hanging heavy machinery or equipment onto the frame.
2. Dual-Arm Utility Hooks for Lawn Care Tools
Step-by-Step Guide
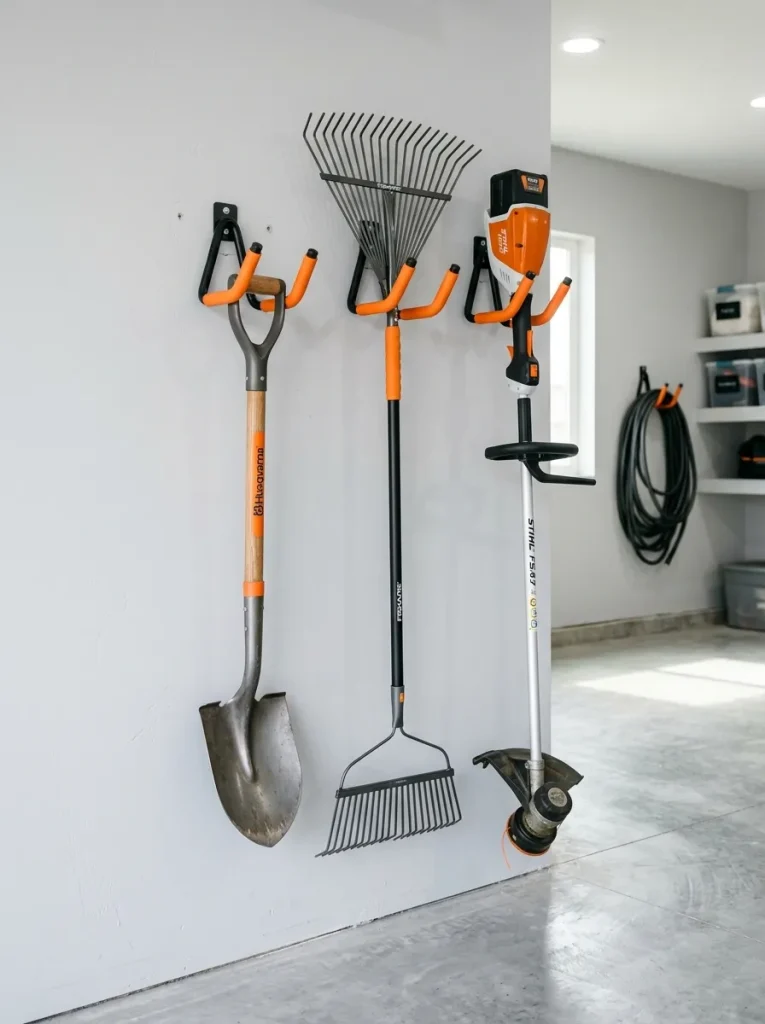
Dual-arm utility hooks consist of two parallel metal prongs extending horizontally from a single wall plate, creating a stable platform for long-handled lawn equipment. This configuration excels at holding shovels, rakes, hoes, and weed trimmers by supporting the tool head securely between or across the arms. The twin-arm design balances long objects, preventing them from twisting or falling off center. Many modern dual-arm hooks incorporate textured rubber sleeves that grip smooth fiberglass or wooden handles firmly. By arranging these hooks in structured vertical columns or horizontal rows, homeowners can consolidate an entire landscaping collection into a compact footprint. Elevating yard tools off the floor prevents moisture damage to metal blades and reduces handle deterioration over time. The structural symmetry of dual-arm hooks makes them a fundamental component for functional, beginner-friendly garage organization systems.
Setup Method
Determine the hanging height based on the length of the longest lawn tool, ensuring the bottom of the handle clears the floor surface by several inches. Hold the dual-arm bracket against the wall at the chosen spot, verifying alignment with a spirit level placed across the two prongs. Mark the screw hole positions onto the drywall directly over a structural stud location using a pencil. Drill pilot holes straight through the wall material into the wood stud behind it to guarantee maximal load-bearing capability. Align the bracket over the pre-drilled holes and drive structural wood screws through the top and bottom mounting holes until flush. For hollow drywall sections between studs, install heavy-duty toggle bolts through the wall board to distribute weight safely. Hang the lawn equipment across the dual arms, checking that the weight rests evenly across both prongs.
3. Padded Arm Hooks for Delicate Sporting Gear
How to Create
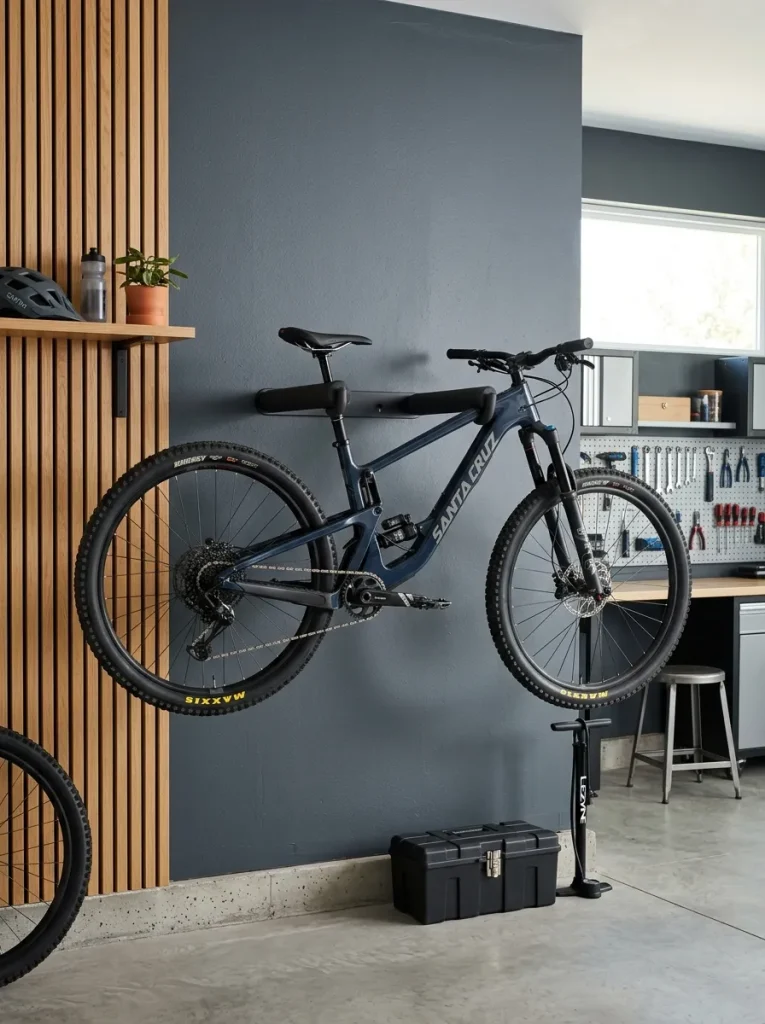
Padded arm storage hooks feature straight or slightly angled metal bars covered with dense foam or soft vinyl cushioning. This protective padding prevents scratches, dents, and surface wear on sensitive items like bicycles, kayaks, surfboards, and golf bags. The extended arm length allows users to slide broad items onto the hook without forcing them against rough wall surfaces. Padded hooks often incorporate angled end-caps that stop gear from sliding outward during storage or retrieval. Placing padded arm hooks in horizontal pairs creates an effective rack system for long sporting goods that require dual-point support. Utilizing soft-surface hardware protects high-value recreational gear from damage while utilizing upper wall zones that would otherwise remain empty. These specialized hooks provide an aesthetic, organized storage solution that maintains the physical condition of sports equipment season after season.
Installation Process
Space two padded arm hooks horizontally at a distance equal to roughly half the total length of the sporting equipment being mounted. Use a stud finder to locate two adjacent wall studs within this horizontal range, marking their centers carefully. Hold the first padded hook at the desired height, level it vertically, and mark the mounting points onto the stud center. Repeat the process for the second hook, using a long level or laser line to ensure both hooks sit on the exact same horizontal plane. Drill deep pilot holes into the marked stud locations to prevent the mounting wood from splitting. Fasten the padded hook plates tightly against the wall using heavy-duty lag screws designed to handle dynamic cantilever loads. Place the sporting equipment across both padded arms to confirm even weight distribution and stable positioning.
4. Multi-Prong Garden Hose and Extension Cord Holders
Execution Process
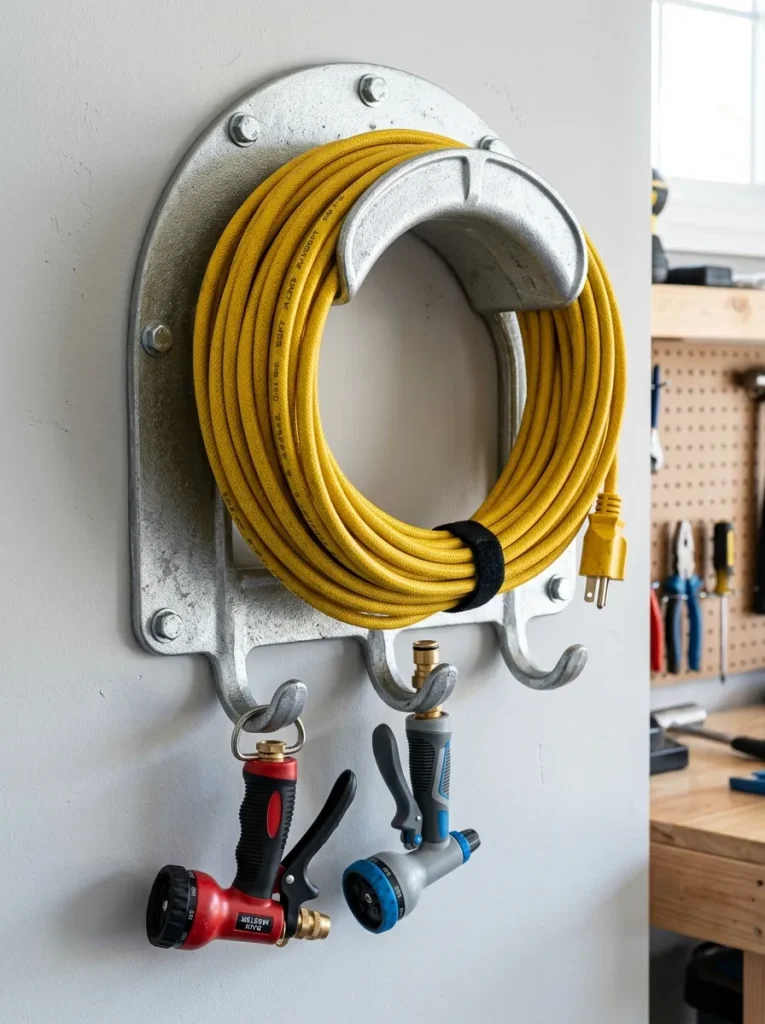
Multi-prong storage holders feature wide curved cradles or multiple staggered hooks engineered specifically to support coiled lines, hoses, and electrical cables. Standard single hooks often cause tight bends or crimps in flexible hoses, which can lead to material fatigue, cracking, or flow restriction over time. The broad arc of a specialized hose holder maintains the natural loop diameter of rubber hoses and heavy-gauge extension cords. Additional integrated lower prongs provide dedicated hanging points for hose nozzles, spray attachments, or electrical adapters. Wall mounting these specialized holders near entry points or electrical outlets improves daily workflow and keeps long cords neatly organized. Eliminating tangled coils on the garage floor improves overall safety, prevents trip hazards, and protects electrical insulation from foot traffic and vehicle damage.
How to Make
Select a wall location near an electrical outlet or water faucet to minimize the effort required to coil and store lines. Position the multi-prong holder on the wall, using a level to keep the wide mounting plate perfectly straight. Mark the upper and lower screw mounting points onto the wall surface, ensuring at least one central screw drives directly into a wood stud. Drill pilot holes into the wall studs, or install heavy-duty drywall anchors if stud alignment is not available for all holes. Line up the mounting plate over the prepared holes and secure it using corrosion-resistant stainless steel screws to prevent rust in humid conditions. Tighten all fasteners until the unit sits firmly against the wall without wobble. Loop the extension cord or hose in uniform coils and place the bundle over the main curved support, utilizing lower prongs for small accessories.
5. Overhead Rail-Mounted Sliding Hook Systems
Setup Method
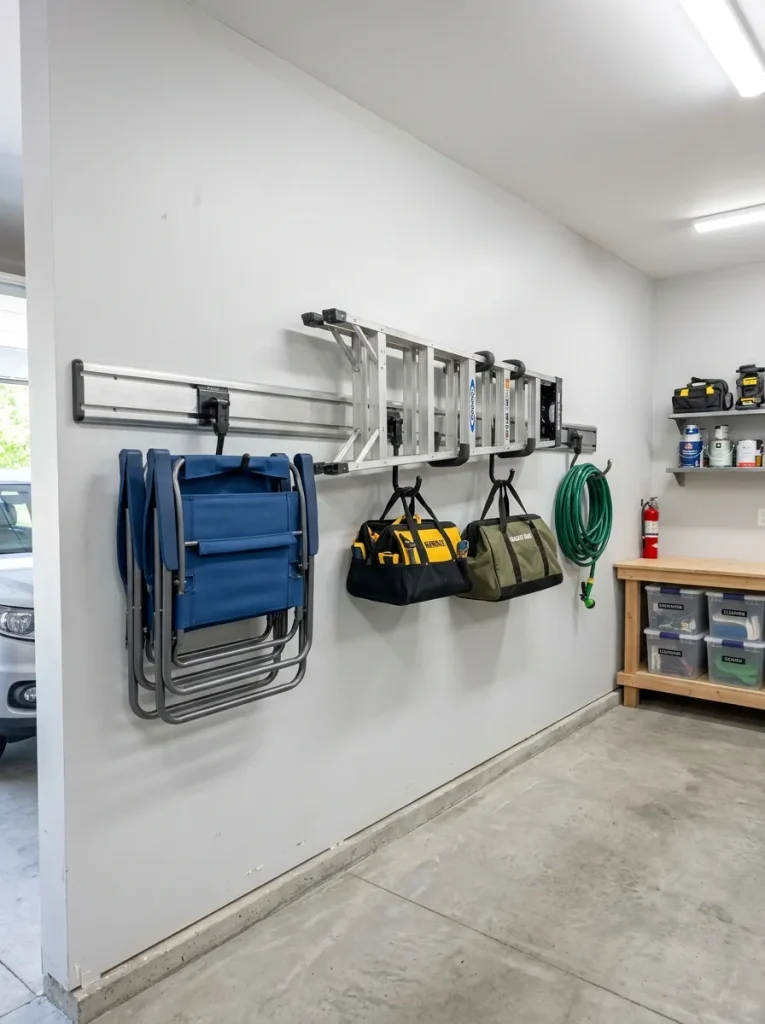
Rail-mounted sliding hook systems consist of a horizontal metal track attached to the wall that accommodates modular, adjustable storage hooks. This system offers flexibility, as individual hooks can slide left or right along the track or be unclipped and repositioned without tools. The underlying track mounts across multiple wall studs, distributing heavy total loads evenly along the structural frame of the building. Users can mix different hook styles—such as J-hooks, S-hooks, and twin-arm prongs—on a single track to accommodate varied gear profiles. Sliding hook tracks are ideal for small garages where storage needs shift seasonally, such as swapping winter shovels for summer gardening supplies. This modern design provides a clean aesthetic while allowing continuous customization as tool collections expand or change over time.
Step-by-Step Guide
Measure the wall area where the track will be installed and mark a straight horizontal line across the surface using a long level. Use a stud finder to locate and mark every wood stud along the path of the horizontal track. Hold the track frame against the wall, aligning its pre-drilled mounting slots with the marked stud locations. Drill pilot holes through the track slots into the structural studs along the full length of the rail. Secure the track to the wall using structural lag screws and washers, tightening them down evenly from one end to the other. Snap the protective end caps onto the rail and slide the modular storage hooks into the channel. Adjust the spacing between individual hooks to fit specific equipment, locking each hook module into place according to the manufacturer guidelines.
6. Vertical Bike Storage Wall Hooks
How to Create
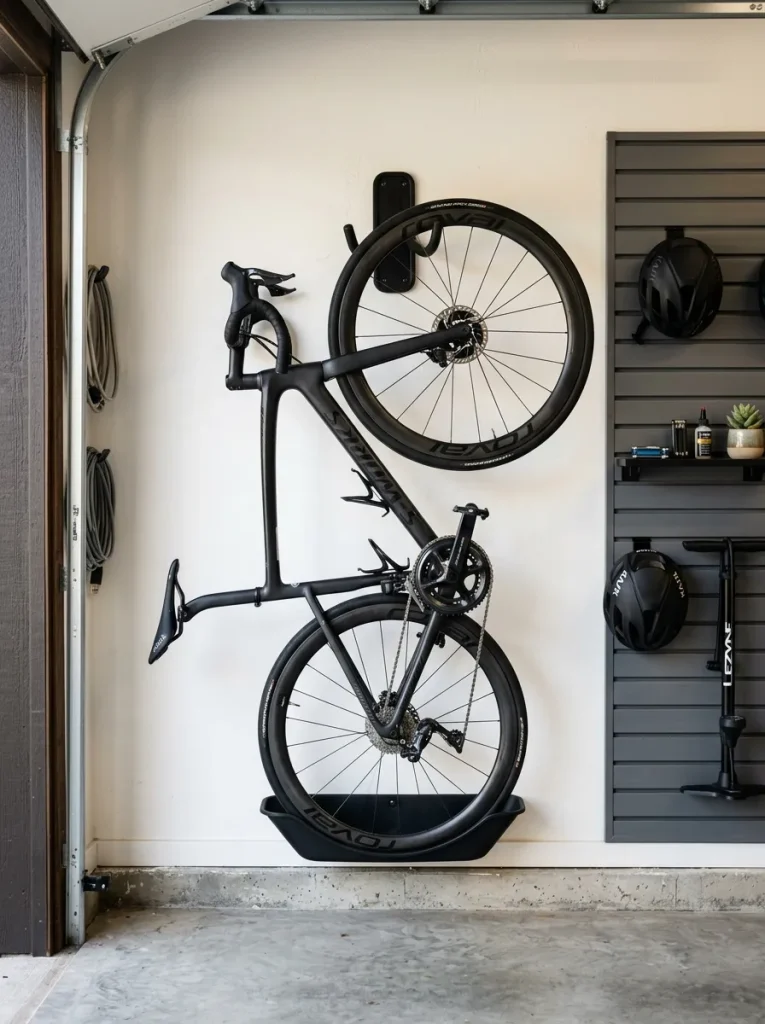
Vertical bike storage hooks hang bicycles by a single wheel perpendicular to the wall, dramatically reducing the floor footprint required for bike parking. These heavy-duty hooks feature a deep notch coated in thick rubber that safely grips the bike rim without scratching the metal or damaging the spokes. Many vertical bike hooks include a wide backing plate or lower tire tray that rests against the wall to prevent dirty tire marks on paint or drywall. Staggering the installation height of adjacent bike hooks allows handlebars to overlap slightly, enabling tighter packing of multiple bicycles along a single wall section. This orientation works particularly well in narrow garages where floor space beside vehicles is limited. Vertical storage keeps bicycles secure, organized, and ready for immediate use while keeping floor areas completely unobstructed.
Installation Process
Determine the correct mounting height by measuring the total length of the bicycle from the front tire edge to the rear tire edge, adding several inches for floor clearance. Locate a wood stud on the mounting wall, as bike storage requires solid anchorage to support dynamic hanging weight. Mark the upper hook mounting holes on the stud center line at the calculated height, using a level for vertical precision. Drill deep pilot holes into the wood stud to accommodate heavy lag bolts. Drive the mounting screws through the bike hook plate until the bracket presses tightly against the wall surface. If the kit includes a bottom tire tray, align it vertically below the top hook where the rear wheel contacts the wall and secure it with screws. Lift the bicycle onto its rear wheel and slide the front rim into the top hook, verifying stable weight suspension.
7. Compact Ladder Hooks with Locking Mechanisms
Execution Process
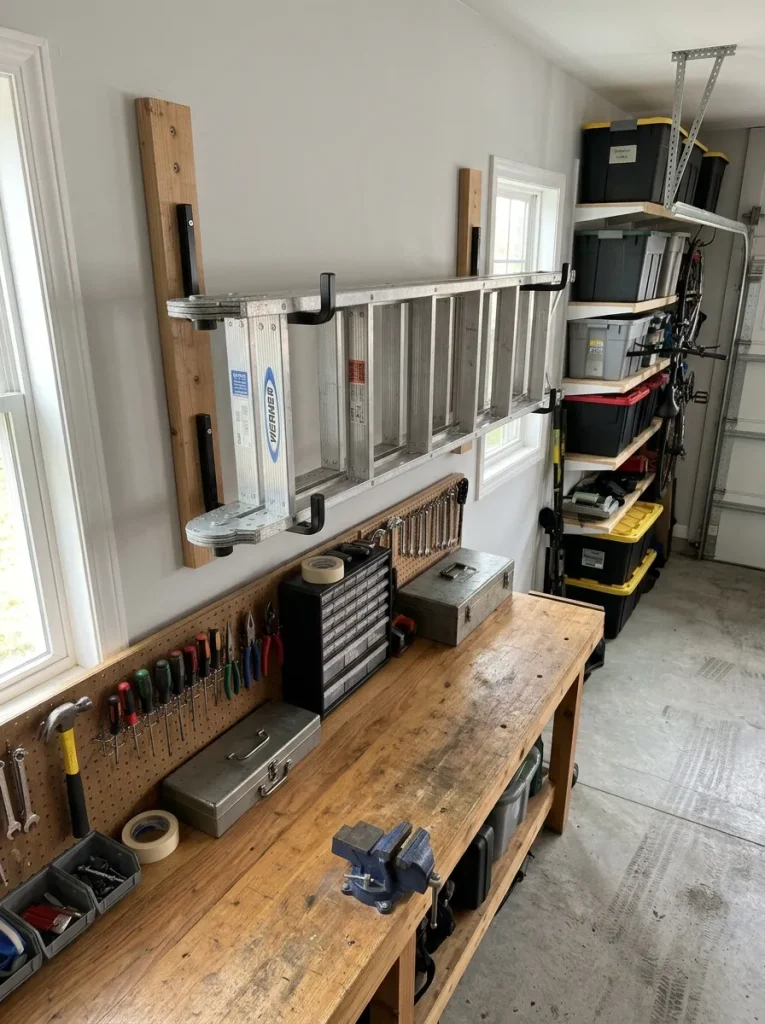
Compact ladder hooks are specialized heavy-duty brackets designed to support step stools and extension ladders flat against garage walls. Storage ladders are bulky and awkward to rest on floors or lean against corners, where they risk tipping over onto vehicles or pedestrians. Ladder hooks typically feature an upward-angled safety lip or a mechanical latch that prevents the ladder rungs from shifting off the support frame. Mounting ladders horizontally near ceiling level utilizes otherwise dead space above workbenches or vehicle hoods. Alternatively, vertical mounting along side walls offers quick access for routine household tasks. Using dedicated locking hooks ensures heavy metal or fiberglass ladders remain firmly attached to the wall structure, even if bumped accidentally in tight garage quarters.
Step-by-Step Guide
Measure the distance between two structural rungs on the ladder to establish the precise horizontal spacing required for the wall hooks. Use a stud finder to identify two wall studs matching that spacing, marking the center lines clearly with a pencil. Hold the first ladder hook on the marked stud line at the desired height and mark the screw placement holes. Use a level to transfer the exact height measurement to the second stud line, ensuring the ladder will hang perfectly level. Drill deep pilot holes into both marked stud locations to handle the high leverage load of the suspended ladder. Mount both hooks using heavy-duty lag bolts, driving them tightly into the structural framing. Lift the ladder into position so the side rails or rungs rest securely inside the hook cradles, engaging any safety latches provided with the hardware.
8. S-Hook and Pegboard Combo Systems
How to Make
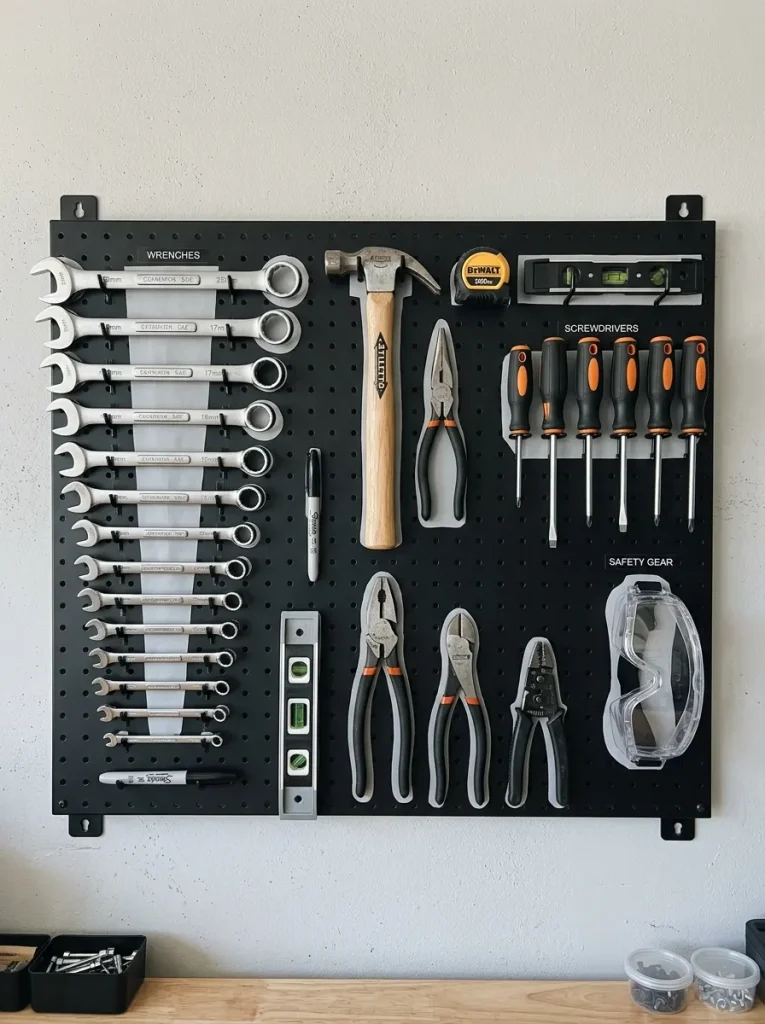
S-hook and pegboard combo systems utilize perforated metal or hardboard panels mounted to garage walls to create a modular tool organization grid. S-shaped metal hooks slide easily into the pre-punched pegboard holes, offering quick hanging points for small hand tools, wrenches, paintbrushes, and measuring tapes. The dual-curved design of S-hooks allows one end to anchor securely into the panel while the open lower loop holds hanging equipment. This system allows complete visual organization, where every hand tool has an assigned spot that can be rearranged in seconds without tools. Pegboards convert flat, unused wall surfaces into high-density storage zones suitable for fine organizing tasks above workbenches or assembly areas. The flexibility of S-hook configurations makes this approach ideal for craft makers, mechanics, and general home repair enthusiasts alike.
Execution Process
Cut the pegboard panel to the desired size and install spacer strips along its back edges to create clearance for S-hook insertion. Locate wall studs using a electronic finder, and mark vertical mounting lines corresponding to the outer edges and center of the pegboard. Mount the wooden spacer strips horizontally across the studs using long wood screws driven directly into the wall framing. Hold the pegboard panel flush against the spacer frame, aligning the mounting holes with the wooden backing strips. Secure the panel using washer-head screws driven through the pegboard holes into the underlying spacer frame at regular intervals. Insert S-hooks into the perforated holes in organized groupings based on tool categories and frequency of use. Hang hand tools, safety gear, and lightweight supplies on the lower loops, verifying that all hooks remain stable during tool removal.
9. Heavy-Duty Folding Wall Hooks
Setup Method
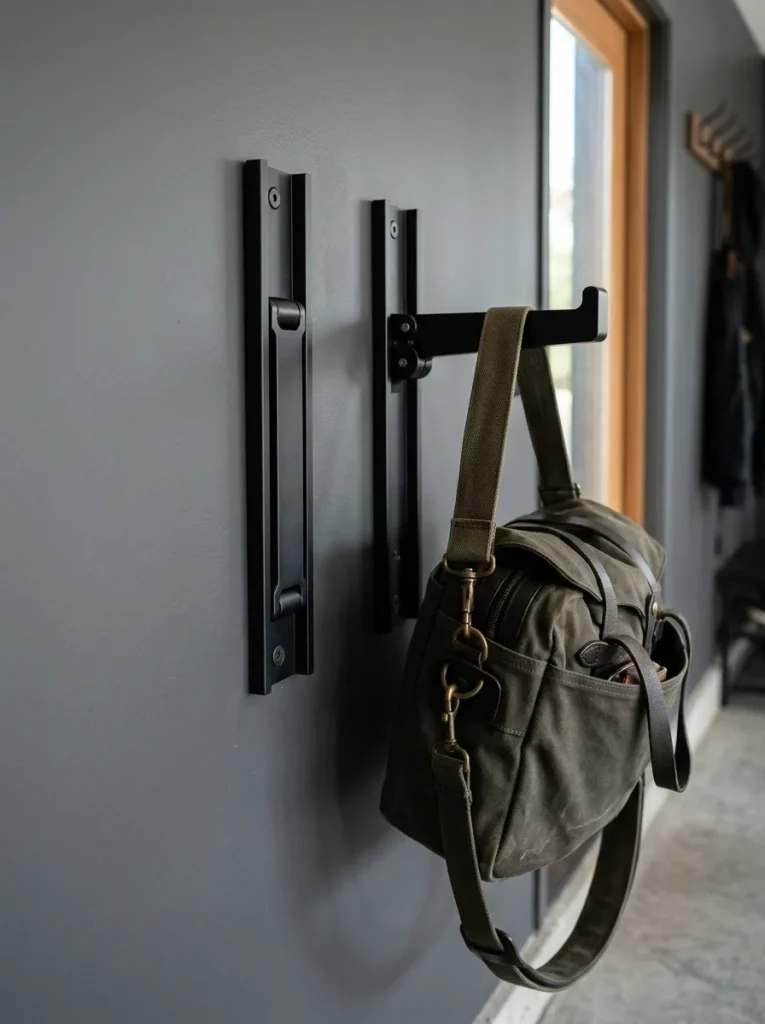
Heavy-duty folding wall hooks feature a hinged mechanism that allows the support arm to drop flat against the wall when not in use. This fold-away capability makes them suitable for high-traffic zones in small garages, such as narrow walkways or areas beside car doors where rigid hooks pose a bumping hazard. When extended, the solid metal arm supports substantial loads, including heavy coats, tool bags, folded folding tables, or seasonal gear. Integrated spring-loaded ball catches or tension hinges keep the hook folded flush against the wall plate until pulled down for duty. Installing folding hooks provides flexible temporary or permanent storage without permanently narrowing walkways or obstructing vehicle movement within tight space footprints.
How to Create
Identify tight traffic corridors or areas near garage entryways where flush-mounted hardware is necessary to maintain clear walking paths. Hold the folding hook mounting plate against the wall, ensuring the hinge moves freely upward and downward without striking nearby obstructions. Mark the mounting hole positions directly on a structural wall stud using a pencil and a spirit level. Drill pilot holes into the wood framing at the marked points to prepare for secure fastener attachment. Fasten the folding hook plate tightly to the wall stud using high-torque wood screws until the bracket sits completely flush. Test the fold-down mechanism several times to ensure smooth operation and check that the arm locks correctly in the open position. Hang items on the extended arm as needed, and simply flip the hook up flat when the equipment is removed.
10. Magnetic Hook Strip Assemblies
Step-by-Step Guide
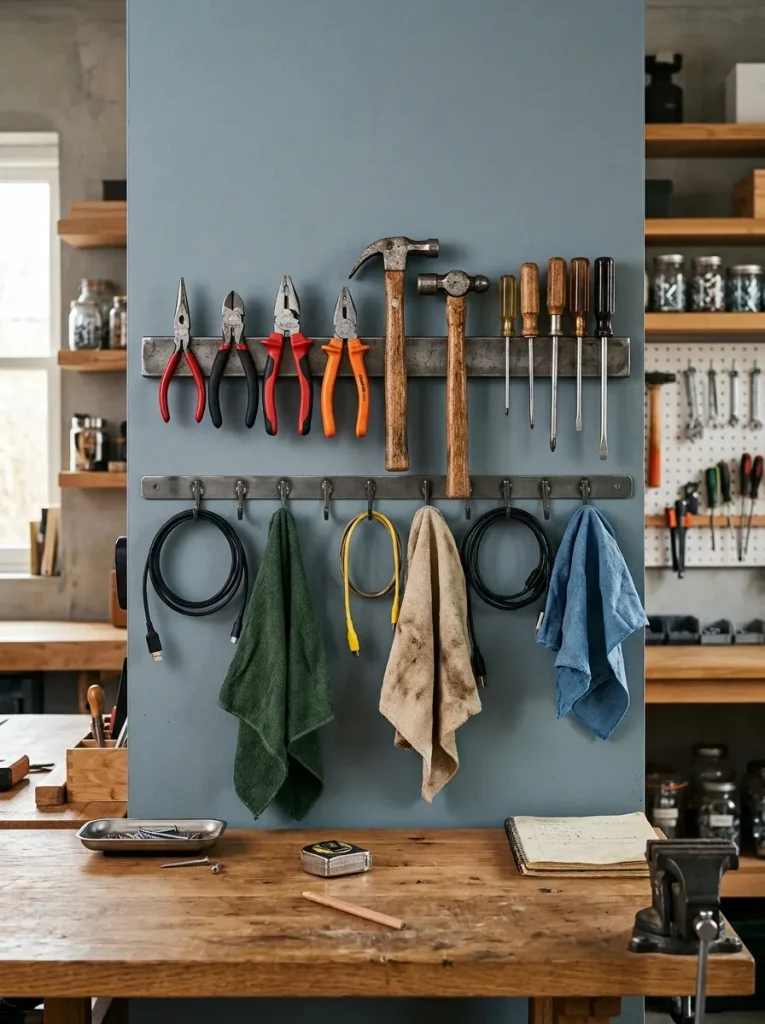
Magnetic hook strip assemblies combine high-strength neodymium magnets with integrated hanging prongs to hold metallic hand tools and light equipment. These sleek metal bars mount flat against garage walls, providing immediate magnetic grip for steel items like pliers, drill bits, hammers, and scissors. Incorporating small bottom hooks expands the unit capability to hold non-magnetic items like safety glasses, shop towels, or corded plug ends on the same assembly. Magnetic organization keeps frequently used hand tools organized in full view, eliminating time spent searching through cluttered toolboxes or drawers. The compact, flat profile of magnetic strips makes them suitable for installation on narrow wall spaces between cabinets or directly onto metal shelving units in small garage environments.
Execution Process
Select a convenient mounting spot directly above a primary workbench or project area where hand tools are regularly used. Hold the magnetic strip against the wall surface, checking its horizontal balance with a small torpedo level. Mark the screw hole locations on the wall, aiming for stud placement whenever possible for maximum stability. Drill pilot holes at the marked locations, or install threaded drywall anchors if structural studs are unavailable at that specific spot. Fasten the magnetic assembly mounting brackets tightly against the wall using the included installation screws. Attach the magnetic strip bar onto the mounted brackets, ensuring it locks firmly into place. Test the magnetic holding force by attaching various metal tools along the bar, and utilize the lower auxiliary hooks to organize non-metallic shop accessories safely.
Common Beginner Mistakes and How to Avoid Them
Successful garage organization requires avoiding common installation pitfalls that undermine stability and safety. A frequent error is mounting heavy storage hooks directly into hollow drywall without proper structural anchoring or stud support. Standard drywall anchors often fail under dynamic weight loads, causing hardware to pull free and damage wall surfaces. Always use an electronic stud finder to locate solid wood framing for high-capacity hooks, or utilize structural toggle bolts when studs are unavailable. Another mistake involves ignoring manufacturer weight limits, leading to bent hooks or dropped equipment. Overloading single storage points can strain both the hook and the wall assembly. Overcrowding hooks too close together also creates clutter, making items difficult to retrieve without knocking adjacent gear loose. Space hardware generously based on the total dimensions of the items being hung. Finally, failing to use a level during installation results in crooked racks that cause suspended gear to slide off center. Taking accurate measurements beforehand ensures a secure, long-lasting vertical storage system.
+-------------------------------------------------------------------+
|                  GARAGE HOOK SELECTION GUIDE                      |
+--------------------------+---------------------+------------------+
| Storage Need             | Recommended Hook    | Ideal Mounting   |
+--------------------------+---------------------+------------------+
| Heavy Power Tools        | Heavy-Duty J-Hooks  | Direct Wall Stud |
| Long-Handled Lawn Gear   | Dual-Arm Utility    | Wood Framing     |
| Bikes / Recreational     | Vertical Bike Hook  | Structural Stud  |
| Cords & Hoses            | Multi-Prong Arc     | Stud / Anchor    |
| Compact / Narrow Spaces  | Folding Wall Hooks  | Wall Stud        |
+--------------------------+---------------------+------------------+
Practical Tips for Better Results
Achieving professional organization results relies on deliberate preparation and smart hardware utilization strategies. Outline item dimensions on the wall using painter’s tape before drilling any holes to visualize the final storage footprint accurately. Group similar equipment together into dedicated functional zones—such as lawn care, automotive maintenance, and sports storage—to streamline daily workflow and tool retrieval. Choose corrosion-resistant hardware made from powder-coated steel or aluminum to withstand temperature fluctuations and damp garage conditions over time. Apply protective vinyl or rubber coatings to bare metal hooks to prevent scratching valuable gear during storage. When hanging heavy items at elevated heights, ensure clear clearance beneath them to maintain safe walking paths and avoid interference with opening vehicle doors. Periodically inspect mounted hardware and tighten any fasteners that may loosen slightly over time due to repeated loading cycles.
                 VERTICAL GARAGE LAYOUT PLAN

    +-------------------------------------------------+
    |  [High Zone]  Overhead Rails & Ladder Hooks     |
    |               (Seasonal / Seldom Used)          |
    +-------------------------------------------------+
    |  [Mid Zone]   Dual-Arm & J-Hooks                |
    |               (Lawn Care / Power Tools)         |
    +-------------------------------------------------+
    |  [Eye Level]  Pegboards & Magnetic Strips       |
    |               (Hand Tools / Small Hardware)     |
    +-------------------------------------------------+
    |  [Low Zone]   Heavy Ground Gear / Clearance     |
    +-------------------------------------------------+
Styling, Presentation, or Organization Ideas
A functional garage can also maintain a clean, visually appealing presentation through structured organization techniques. Grouping hardware by color and material creates a unified modern design aesthetic across the entire wall layout. Paint garage walls in light, neutral tones before installing mounting tracks to improve brightness and contrast, making tools easier to spot. Outline tool shapes on pegboards using thin vinyl tape or markers to create precise placement indicators that show where each item belongs. Install matching label tags on modular track hooks to identify designated storage zones for family members. Maintaining consistent mounting heights across related hook systems generates clean, horizontal lines that reduce visual clutter. Combining functional wall hooks with simple color-coded storage bins creates an aesthetically pleasing environment that feels organized, efficient, and inviting to work in.
Budget and Time Planning
+-------------------------------------------------------------------+
|                   PROJECT PLANNING & COSTS                        |
+------------------------+-------------------+----------------------+
| Task Phase             | Estimated Time    | Estimated Cost       |
+------------------------+-------------------+----------------------+
| Wall Layout & Planning | 1 - 2 Hours       | $0 (Self-Planned)    |
| Basic Hook Hardware    | Installation Time | $15 - $30 per Set    |
| Modular Track Systems  | 2 - 3 Hours       | $50 - $120 per Track |
| Complete Wall Setup    | Half-Day Project  | $100 - $250 Total    |
+------------------------+-------------------+----------------------+
Executing a garage storage upgrade efficiently requires basic budget planning and time management. A single wall hook installation takes under thirty minutes, while a full wall-mounted track system requires a dedicated half-day project. Basic utility hooks offer an economical entry point, while modular sliding rail assemblies require a higher initial hardware investment but offer long-term adaptability. To optimize costs, audit existing garage equipment first to purchase only the specific hook types and weight capacities needed. Installing hardware yourself eliminates labor expenses, making vertical garage organization an accessible DIY project. Phasing the installation across multiple weekends allows homeowners to build out storage zones incrementally without overspending. Investing in durable, high-capacity hardware initially prevents the added expense of replacing weak or broken anchors down the road.
Creative Expansion and Advanced Inspiration
Once basic wall hook storage is established, homeowners can expand their organization systems with advanced modular additions. Integrating wall-mounted tracks with overhead ceiling racks utilizes high-altitude storage space for long-term seasonal items like holiday decorations. Adding integrated LED strip lighting directly beneath hanging tool grids improves task illumination around workbenches and assembly tables. Installing custom hinged wood panels covered in pegboard hardware creates folding storage books that double available hanging surface area within narrow wall spaces. Combining heavy-duty wall hooks with lower rolling storage carts creates a hybrid vertical-and-mobile setup suited for complex DIY projects. Advanced planners can also incorporate small smart sensors that monitor garage humidity levels near high-value metal tools suspended on wall displays. Expanding your storage infrastructure thoughtfully transforms a basic garage into a high-efficiency utility hub tailored to dynamic lifestyle demands.