
10 Wall-Mounted Folding Chair and Ladder Rack Ideas
Vertical storage system design solves spatial constraints in small residential homes, utility garages, and multifunctional workspaces. Maximizing unused wall space allows homeowners to remove bulky items like extra seating and tall step ladders from primary floor zones. Wall-mounted folding chair and ladder racks serve as specialized organization structures that keep necessary utility items accessible without creating visual clutter. Pinterest home organization trends prioritize clever functional designs that blend seamlessly into surrounding room aesthetics. Implementing wall-mounted racks transforms bare vertical surfaces into dedicated storage zones that preserve valuable floor space for daily movement and main furniture. Homeowners seeking high-impact spatial improvements benefit significantly from understanding proper weight distribution, hardware selection, and material choices associated with vertical storage units. Learning how to properly anchor heavy objects onto structural wall studs eliminates safety hazards while organizing utility tools efficiently. A well-designed storage system protects chairs and ladders from unnecessary wear, scuff marks, and moisture damage caused by resting directly on ground surfaces. This comprehensive guide outlines the material requirements, installation processes, structural planning considerations, and ten detailed design concepts needed to build and style efficient wall-mounted racks. Integrating these structural ideas creates organized, practical spaces tailored to specific room requirements and aesthetic preferences.
Vertical wall storage systems remain heavily trending across digital platforms due to their unmatched practical value and high visual impact in compact living environments. Modern design philosophy emphasizes clean lines, minimal floor obstruction, and intentional placement of utility items within residential interiors. Folding chairs and extension ladders present unique storage challenges because their irregular shapes and variable weight profiles make standard shelving units ineffective for neat arrangement. Utilizing customized wall-mounted racks addresses these structural challenges by utilizing direct wall studs, heavy-duty hooks, wooden cleats, and specialized brackets tailored to specific frame geometries. DIY enthusiasts favor vertical organization projects because the installation process requires basic handheld power tools, predictable raw construction materials, and straight forward measuring techniques accessible to beginners. Building vertical racks allows homeowners to customize dimensions, wood finishes, and metal hardware to complement existing room decor, converting utilitarian storage into an intentional design feature. Budget-friendly materials like softwood lumber, steel utility hooks, and standard industrial fasteners make wall storage projects accessible to renters and homeowners alike. Maximizing vertical wall real estate delivers long-term organizational benefits, reduces physical room stress, speeds up floor cleaning routines, and ensures essential household utility equipment remains instantly accessible whenever required.
Executing a successful vertical storage installation requires systematic preparation, accurate spatial planning, and high-quality mounting hardware suited for heavy loads. Essential construction materials include high-density wood boards like oak or sturdy pine, heavy-duty steel utility brackets, steel mounting screws, wall anchors, wood glue, and protective finish coats like polyurethane or enamel paint. Basic power tools include a digital stud finder, a bubble or laser level, an electric drill driver, specialized drill bits, a tape measure, and a miter saw or hand saw. Preparation begins with measuring the physical dimensions of all target folding chairs and ladders, including their depth, width, total folded height, and combined weight. Locating structural wall studs using an electronic detector is a mandatory step, as heavy-duty items like steel ladders require direct anchor placement into solid wood framing rather than drywall alone. Planning visual layout markers on the wall using removable painter’s tape allows builders to test clearances, reach heights, and door swing pathways before drilling standard pilot holes. Smoothly sanding raw wood surfaces and applying protective clear finishes prior to wall installation prevents future splintering, structural moisture absorption, and scuff marks on hanging items.
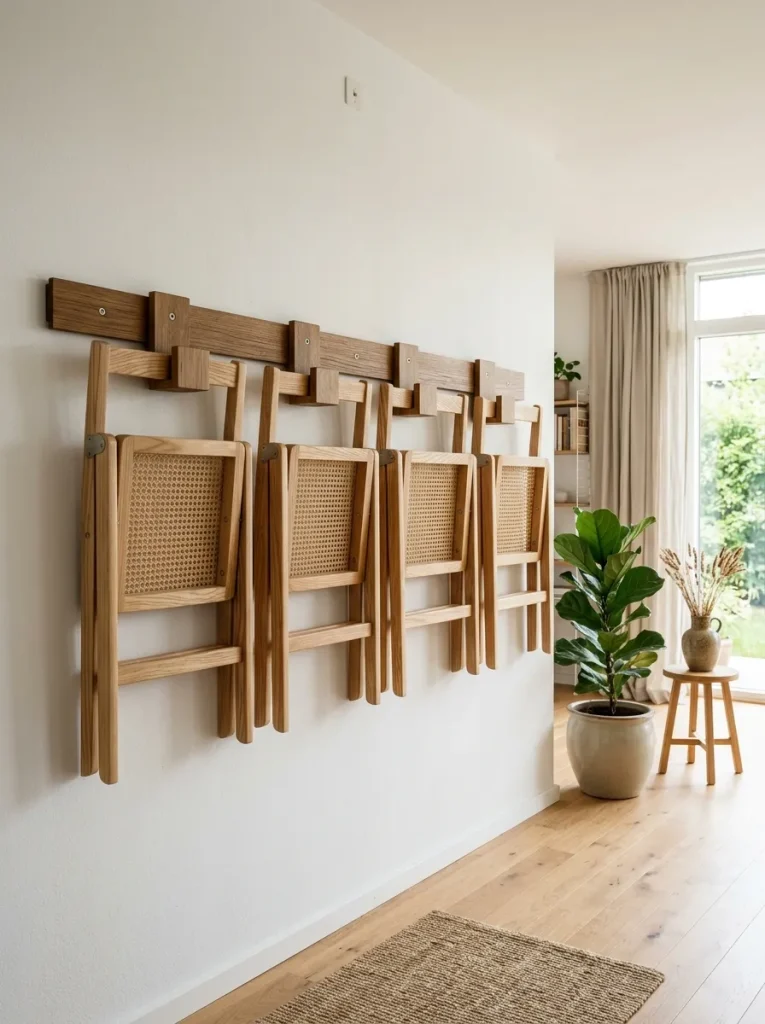
French Cleat Folding Chair Storage System
Design Mechanics and Spatial Utility
The French cleat storage system utilizes two interlocking forty-five-degree bevel cuts to distribute heavy physical loads uniformly across horizontal wall sections. A long wooden cleat strip mounts permanently to multiple wall studs, providing a continuous structural foundation capable of holding several folded chairs side by side. Matching inverted cleats attach directly to customized hanging blocks, which slide horizontally along the main wall rail to accommodate variable chair frame sizes. This modular design feature provides exceptional flexibility, allowing homeowners to modify spacing or add extra storage hooks as their furniture inventory changes over time. Hardwood species like oak, maple, or solid birch provide the necessary shear strength required to support multiple metal or wooden folding chairs without bending or splitting. The clean geometric lines of the cleat strip create a subtle architectural detail that complements minimalist interior styles, keeping utility spaces visually orderly and uncluttered. Painting the cleat rail in a color matching the wall creates a hidden mounting effect, whereas choosing contrasting wood stains highlights the natural craft of the installation.
Step-by-Step Installation Process
Creating a French cleat chair rack begins by ripping a three-inch wide, three-quarter-inch thick hardwood board down its length at a precise forty-five-degree angle using a table saw. The top half of the split board serves as the wall rail, installed with the angled bevel facing upward and inward toward the wall surface. Secure the wall cleat using three-inch heavy-duty cabinet screws driven directly into marked wall studs, verifying perfect horizontal alignment with a long bubble level. Construct individual chair mounting blocks by securing the opposing forty-five-degree cleat segment to solid hardwood backer blocks using wood glue and countersunk wood screws. Attach two extended wooden pegs or heavy rubber-coated steel utility arms to the front of each sliding block, projecting outward at a slight upward angle to hold chair frames securely. Once assembled, test the sliding action of the chair blocks along the main wall rail, ensuring smooth horizontal positioning across the entire span. Hang the folding chairs onto the projecting support arms, ensuring the weight transfers evenly through the interlocking bevels and directly into the structural wall studs.
Industrial Iron Pipe Utility Rack
Industrial Aesthetic and Structural Capacity
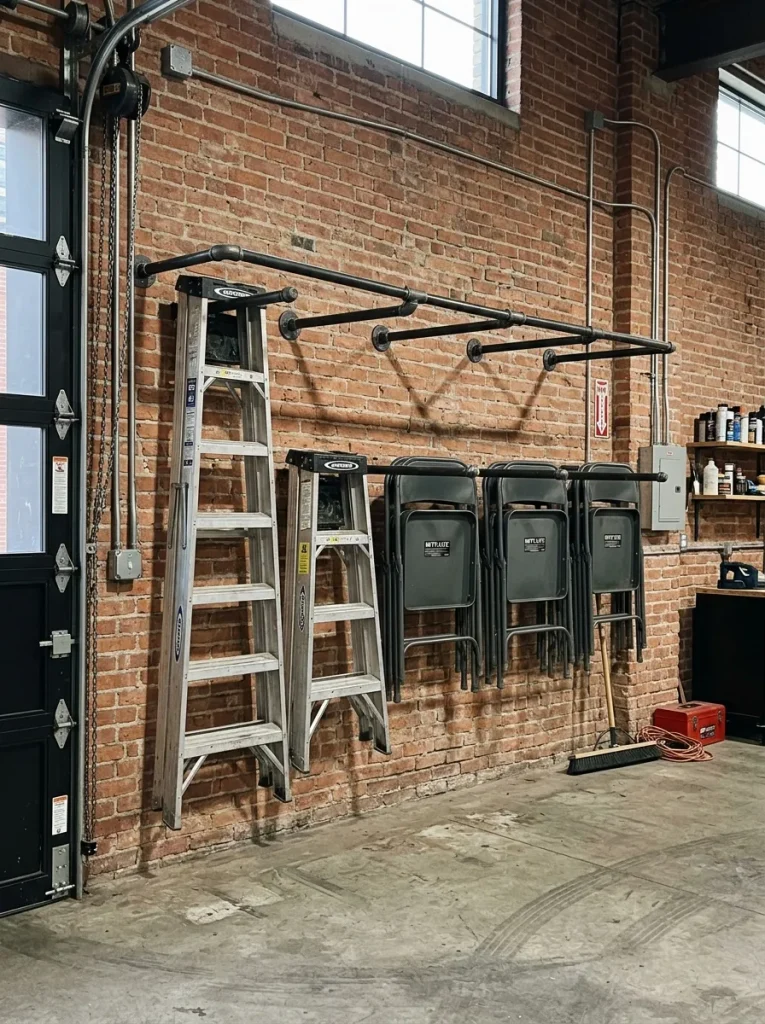
Industrial steel pipe construction provides an exceptionally strong mounting frame suited for holding heavy wooden ladders and commercial-grade metal folding chairs. Black malleable iron pipes and threaded galvanized steel fittings create an industrial aesthetic that pairs exceptionally well with exposed brick walls, modern concrete basements, and utilitarian garage environments. The structural integrity of threaded iron pipe components prevents flexing or metal fatigue under substantial physical loads, delivering reliable long-term wall storage performance. Customizing the depth of the rack requires selecting specific pipe nipple lengths, ensuring the extended arms clear the full folded thickness of multiple stacked chairs or thick step ladders. Wall attachment points utilize round floor flanges that offer four distinct mounting holes per point, maximizing mechanical fastener grip across broad wall areas. The natural dark oil finish of industrial black iron can be cleaned and sealed with clear matte enamel, or painted with rust-inhibiting enamel to preserve the metal surface against humidity. This heavy-duty mounting option provides high physical capacity while adding an authentic industrial character to functional utility spaces.
Execution and Assembly Method
Assemble the industrial pipe rack using three-quarter-inch diameter threaded iron pipe segments, including floor flanges, ninety-degree elbows, short pipe nipples, and protective end caps. Mark the mounting position on the wall, ensuring the iron flanges align directly over structural wood studs verified with a electronic stud finder. Fasten the base floor flanges to the wall using three-inch heavy-duty steel lag bolts, securing all four screw locations firmly into the center of the wooden studs. Thread the short horizontal pipe arms into the mounted wall flanges using pipe wrenches to ensure tight mechanical connections that prevent sag under load. Attach ninety-degree elbows to the extended ends of the horizontal arms, threading short vertical pipe stubs topped with end caps to create positive stop-caps that prevent chairs or ladders from sliding off forward. Check that both installed arm assemblies are parallel, perfectly level with one another, and spaced at an appropriate distance to support the width of the target items. Carefully suspend the folding chairs or ladders onto the dual pipe arms, verifying that all physical weight rests securely against the reinforced metal structure.
Heavy-Duty Wooden Peg Board Wall
Customized Layouts and Visual Versatility
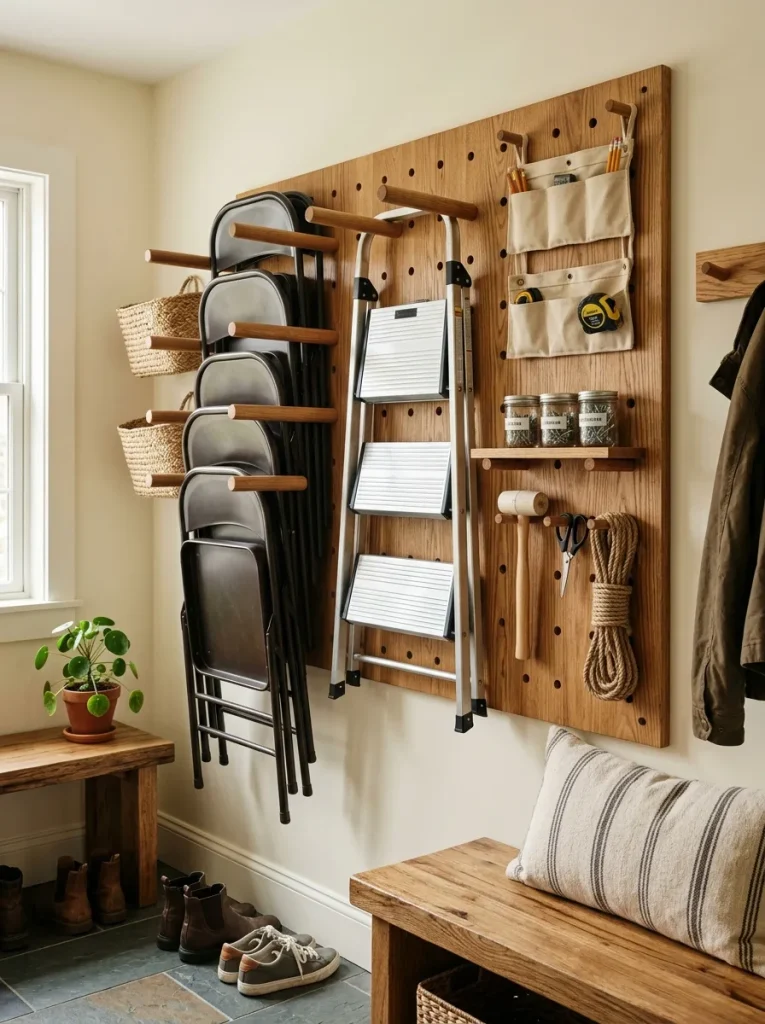
A heavy-duty custom wooden pegboard offers an organized, highly adaptable storage interface that easily handles varying furniture and ladder arrangements. Unlike thin perforated hardboard panels, a heavy-duty system uses three-quarter-inch thick exterior-grade plywood or solid hardwood planks drilled with uniform grid arrays. Thick wooden dowels or solid metal rods insert directly into these precision holes, forming removable, customizable support pins capable of holding substantial physical weight. The flexibility of this grid design allows users to adjust pin positions vertically and horizontally, easily accommodating various chair stack depths and different ladder heights on the same wall surface. Smooth sanded hardwood surfaces paired with turned wooden pegs deliver a warm visual style suitable for modern mudrooms, home workshops, and open utility areas. Applying a clear protective varnish or low-sheen sealer protects the wood surface from scuffing, dirt transfer, and impact damage caused by frequent tool handling. This design blends customizable storage capabilities with an elegant natural craft aesthetic, organizing utility items into clean decorative wall features.
Construction and Mounting Blueprint
Construct the heavy-duty pegboard by cutting a three-quarter-inch cabinet-grade plywood panel to the desired overall wall dimensions using a circular saw or table saw. Layout a precise grid pattern on the panel face with grid lines spaced four inches apart horizontally and vertically. Drill clean, uniform holes at every grid intersection using a one-inch Forstner bit mounted in a power drill press to ensure perfectly perpendicular hole walls. Cut one-inch diameter hardwood dowel stock into eight-inch lengths using a miter saw, rounding the front edges slightly with sandpaper for smooth insertion into the grid holes. Secure structural mounting cleats to the backside of the pegboard panel to create a one-inch rear clearance gap between the panel and the drywall surface. Mount the assembly firmly to structural wall studs using heavy-duty cabinet screws driven through the rear frame cleats, ensuring complete panel stability. Insert the turned hardwood dowels into designated grid locations matching the frame width of your chairs or ladders, pushing pins firmly through the panel depth. Hang the items onto the extended wooden pegs, repositioning individual pins whenever storage configurations need modification.
Integrated Fold-Away Wall Bracket System
Space Optimization and Retractable Design
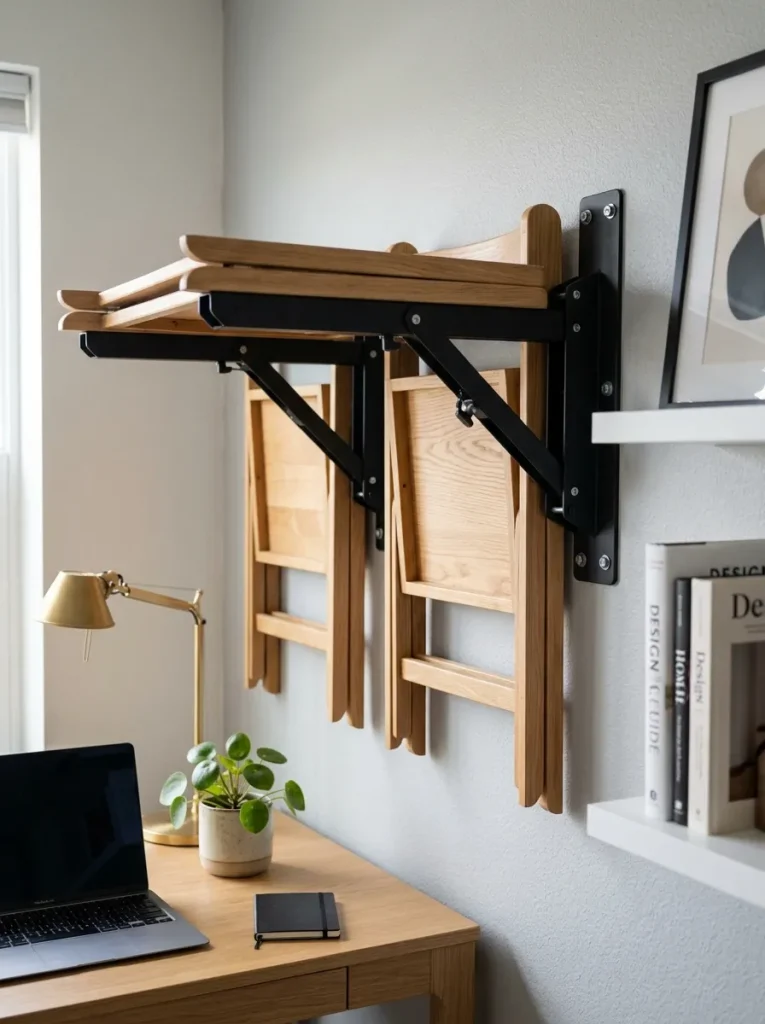
Integrated fold-away wall brackets provide a clean storage arrangement by folding flat against the wall surface when utility items are in use. These specialized retractable systems feature heavy-duty steel folding bracket arms equipped with spring-loaded locking mechanisms that hold the supports rigid when extended horizontal. When folding chairs or step ladders are removed for daily use, pressing the side release levers allows the mounting arms to drop down vertically against the wall panel. This retractable action eliminates protruding metal hazards in tight entryways, narrow utility hallways, and compact garage bays where walkway space is limited. The clean visual footprint of folding bracket systems suits modern minimal interiors, keeping utility hardware visually subtle during off-use periods. Powder-coated steel components offer durable protection against paint scratching, rust, and structural deformation, ensuring smooth mechanical bracket operation over many years. Combining functional folding hardware with compact backing plates creates a low-profile organization system that delivers high practical utility without sacrificing precious room space.
Installation and Hardware Setup
Select high-load folding shelf brackets rated for a minimum of one hundred pounds per pair, ensuring the bracket arm length matches the folded depth of your items. Measure the width between the main structural uprights of your ladder or folding chair frames to establish the horizontal mounting distance on the wall. Locate target wall studs using an electronic stud finder, marking vertical centerlines clearly with a pencil and level to ensure precise hardware alignment. Position the top mounting holes of the first folding bracket over the center of the stud, driving structural lag screws through the bracket base into the wood frame. Align the second folding bracket horizontally with the first using a long laser level, securing it to the adjacent wall stud with identical structural screws. Test the locking and folding mechanisms on both installed brackets repeatedly, verifying smooth mechanical release without binding or sticking against the wall surface. Extend both support arms until the internal side levers lock into their rigid ninety-degree position, then place the folding chairs or ladders carefully onto the extended brackets. Press the release triggers to fold the support arms flat against the wall face when storage items are in active use elsewhere.
Rustic Hardwood Cleat with Forged Iron Hooks
Heritage Aesthetics and Artisanal Character
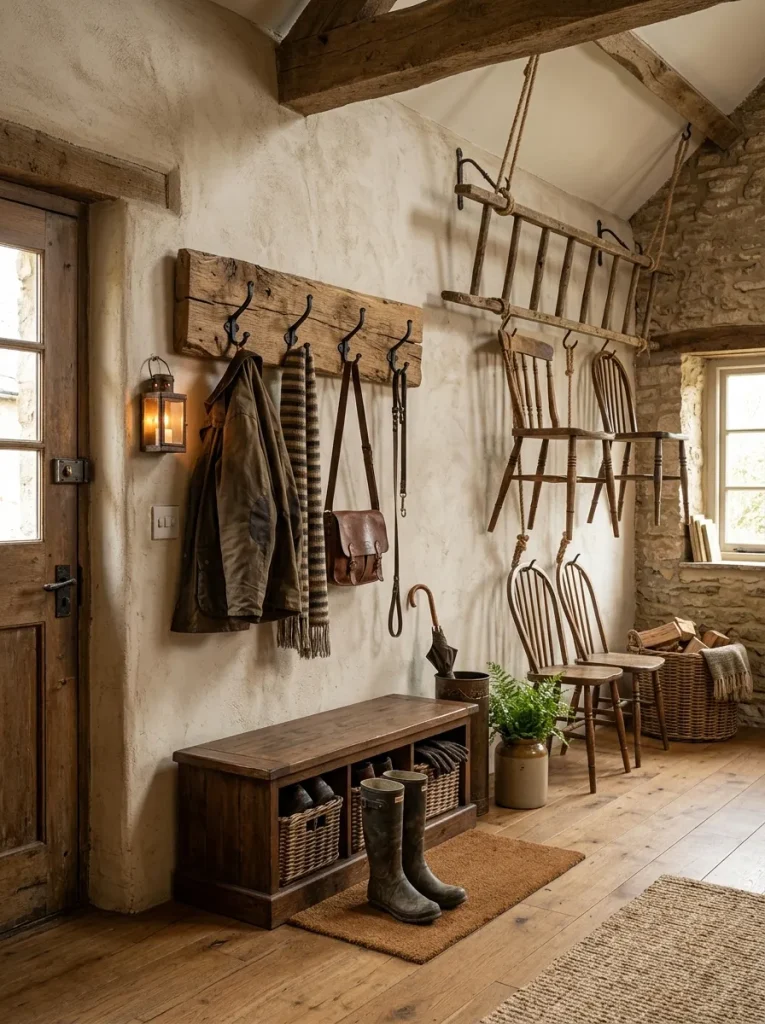
Combining thick, naturally textured hardwood boards with hand-forged steel hooks creates a rustic wall rack that functions as an attractive interior decor element. Reclaimed barn wood, live-edge timber slabs, or deeply stained rough-sawn pine boards provide an authentic organic backdrop that hides minor wear from hanging items. Hand-forged iron hooks feature wide mechanical throats and curved upward tips that securely catch chair frames and ladder rungs without slippage risks. This design approach fits exceptionally well within farmhouse, rustic cabin, or traditional mudroom interiors, turning basic utility storage into an intentional design feature. The thickness of the hardwood mounting base distributes the mechanical pull forces across multiple wall studs, protecting drywall surfaces from impact and abrasion damage. Applying dark paste wax, linseed oil, or matte polyurethane enhances natural wood grain patterns while providing long-term protection against ambient room humidity. Installing handcrafted hardware elevates basic home organization into an architectural statement that highlights quality material choices and detailed woodworking techniques.
Step-by-Step Build and Mounting
Prepare a solid two-inch thick by eight-inch wide hardwood board, cutting the length to span across at least three adjacent structural wall studs. Sand the face and edges of the timber using progressively finer sandpaper grits, removing rough splinters while preserving unique natural grain patterns and surface character. Apply a coat of rich oil-based wood stain, allowing it to penetrate deeply before wiping away excess surface finish and sealing with a protective matte topcoat. Position heavy-duty forged iron utility hooks evenly across the front of the stained hardwood board, aligning them with the width dimensions of your hanging items. Secure each metal hook to the wooden slab using heavy structural lag screws or square-head timber bolts driven into pre-drilled pilot holes. Hold the completed hardwood rack against the wall, leveling it carefully before driving three-and-a-half-inch wood screws through the front face into three structural studs. Sink all mounting screw heads slightly below the wood surface, filling the screw counter-bores with matching wooden plugs or decorative dark hardware caps. Hang folding chairs or wooden ladders onto the iron hooks, ensuring the weight settles cleanly into the rounded hook curves.
Recessed Wall Niche Storage Rack
Flush Architectural Integration
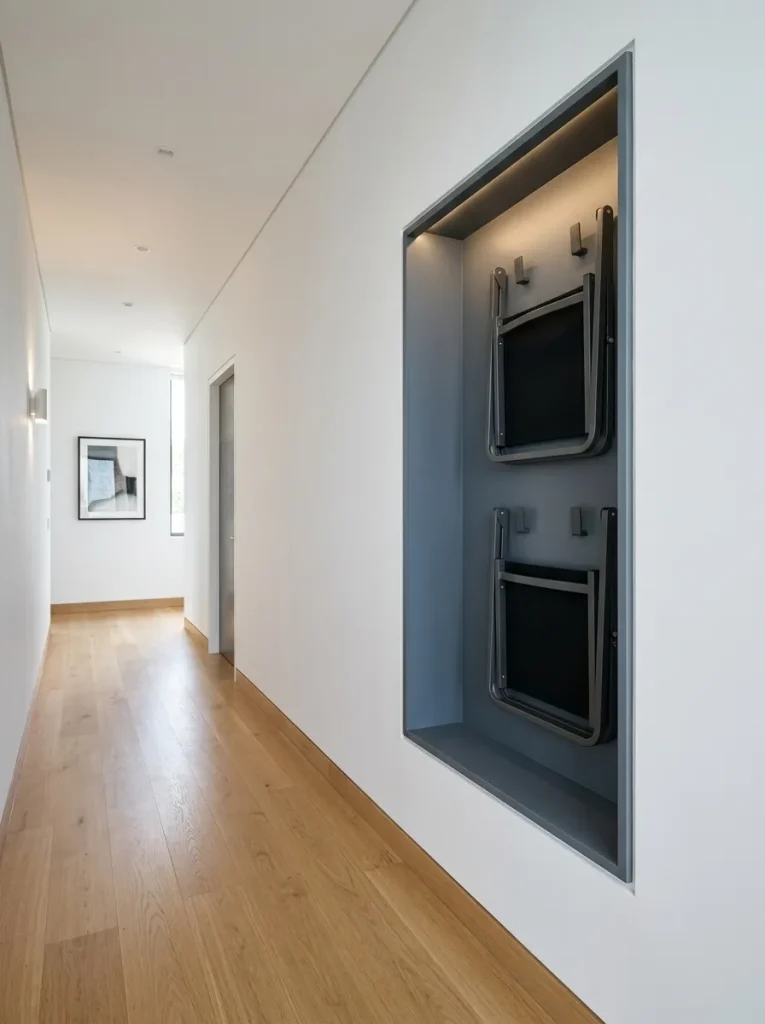
A recessed wall niche rack utilizes unused hollow space between interior wall studs to store folding chairs and flat step ladders flush with the wall face. Construction involves removing a rectangular section of drywall between two studs, framing the internal cavity perimeter, and installing internal utility hooks or support ledges. Because the hanging items rest partially or entirely within the wall depth, this system prevents storage items from projecting out into busy walkways. Recessed niches are ideal for narrow hallways, tight utility rooms, and small home offices where every inch of open floor space matters. The interior walls of the niche can be painted in contrasting accent colors or lined with thin hardwood plywood to create visual interest inside the wall opening. Adding trim moulding around the external niche perimeter frames the storage space, turning a simple recessed cavity into a intentional architectural feature. This hidden installation approach delivers maximum floor clearance, superior wall protection, and a clean modern aesthetic that keeps utility items completely unobtrusive.
Framing and Installation Steps
Locate two adjacent wall studs using an electronic stud finder, ensuring no electrical cables or plumbing pipes pass through the internal cavity using a wall scanner. Cut through the drywall carefully along the inner edges of both studs using an oscillating multi-tool or utility saw to create a clean rectangular opening. Construct a four-sided wooden liner box out of half-inch smooth plywood, sizing the outer dimensions to match the framed wall cavity opening precisely. Insert the plywood box into the wall opening, securing it firmly to the sides of the exposed wooden studs using cabinet screws driven from inside the box. Install heavy-duty steel double hooks or specialized utility brackets onto the back panel or top framing of the recessed box, anchoring directly into structural wood. Trim the outer face of the recessed niche with decorative casing moulding, mitering the corner joints for a clean finished appearance around the wall cutout. Paint or stain the interior wood box surfaces using durable enamel paint to protect against scuff marks caused by chair frames during daily use. Place the folding chairs or compact ladders inside the recessed opening, hanging them on the internal brackets to keep them flush with the main wall surface.
Modern Minimalist Metal Track System
Architectural Precision and Structural Adjustability
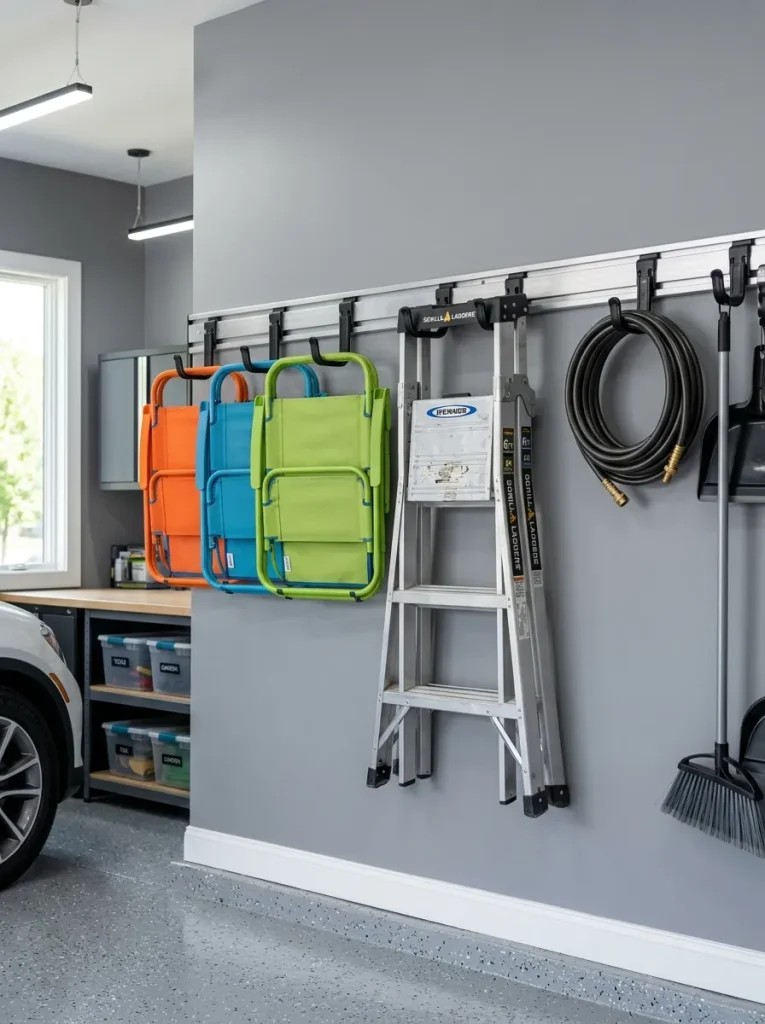
A minimalist metal track system uses slim powder-coated steel or extruded aluminum channels mounted horizontally across the wall to support adjustable utility hooks. The low-profile track design creates a sleek, contemporary aesthetic suitable for modern apartments, minimalist offices, and contemporary home studios. Precision-engineered hook attachments snap or slide directly into the aluminum track channel, allowing quick horizontal position adjustments without using additional tools. This functional versatility makes track systems ideal for organizing mixed items, such as hanging metal folding chairs beside lightweight aluminum step ladders on the same rail. High-grade aluminum and steel tracks offer high load capacities while maintaining thin profiles that project minimal distance from the wall surface. Matte black, brushed silver, or powder-coated white finishes allow the storage hardware to blend visually into surrounding wall decor or contrast cleanly against accent paint colors. The continuous metal track distributes physical weight evenly across multiple anchor points along the wall structure, providing stable support for heavy utility equipment.
Precision Assembly and Mounting
Position the heavy-duty metal track horizontally on the wall at the desired height, utilizing a long laser level to establish complete alignment across its length. Mark the pre-drilled track mounting holes onto the wall, ensuring that multiple fastener locations align directly with structural wood studs. Drill appropriate pilot holes into the wall studs, using heavy-duty toggle bolts or specialized metal anchors for any mounting holes falling over hollow drywall gaps. Secure the metal channel track to the wall using high-strength steel pan-head screws, tightening fasteners firmly until the rail rests flush against the drywall face. Install decorative vinyl end caps onto both open ends of the track to cover sharp metal edges and create a clean finished appearance. Slide specialized metal chair and ladder hooks into the track channel, sliding them horizontally to match the frame widths of your storage items. Engage the internal locking mechanisms on each hook attachment to lock them into position along the horizontal track rail. Hang the folding chairs and ladders onto the utility hooks, enjoying the combination of clean minimal design and adaptable vertical storage space.
Ceiling-Mounted Drop-Down Lift Rack
Overhead Storage and Space Reclamation
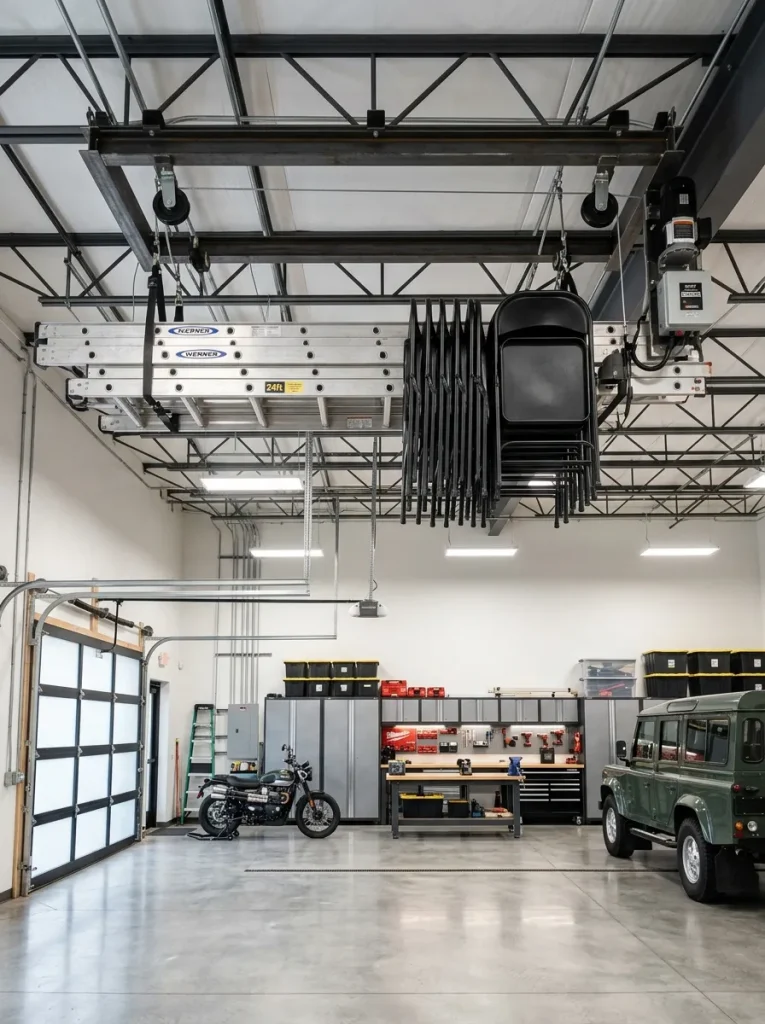
A ceiling-mounted drop-down lift system reclaims unused overhead space by hoisting folding chairs and tall extension ladders completely off vertical wall surfaces. This vertical organization approach is effective in high-ceiling garages, utility sheds, and compact home workshops where perimeter wall space is occupied by cabinetry or workbenches. The system operates using a mechanical pulley framework connected to steel cables or heavy-duty nylon straps attached to a drop-down metal storage rack. Users lower the storage platform or utility bars down to an accessible working height to load or unload items, then hoist the entire load up against the ceiling structure. Mechanical advantage pulleys or integrated hand cranks reduce the lifting effort required to raise heavy ladders and multiple stacked chairs safely. Safety locking mechanisms prevent the hoisted load from dropping unexpectedly, holding stored items flat against the upper ceiling surface. Elevating utility items to the ceiling keeps perimeter walls open while storing large, seasonal equipment out of sight until needed.
Mechanical Blueprint and Installation
Locate the ceiling joists above the target installation area using a stud finder, marking the exact direction and centerline of the overhead wooden framing. Position the pulley support brackets onto the ceiling joists, securing them with heavy structural lag bolts driven deep into solid wood members. Thread high-tensile steel cable through the pulley wheels, connecting one end to the lift cradle and the opposite end to a wall-mounted manual winch or mechanical cleat. Assemble the drop-down metal support frame, attaching padded utility hooks or adjustable straps designed to secure folding chairs and ladder rungs firmly. Lower the lift rack to waist level by releasing the manual winch brake, then arrange the chairs and ladders evenly across the support frame. Secure hanging items to the support frame using adjustable tie-down straps to prevent equipment shifting or tipping during movement. Operate the winch to hoist the storage assembly upward until it rests flat against the upper ceiling joists, engaging the mechanical safety lock completely. Mount the cable tension cleat or winch control handle securely to a nearby wall stud at an accessible height for safe operation.
Vertical Slatted Accent Wall System
Architectural Camouflage and Aesthetic Integration
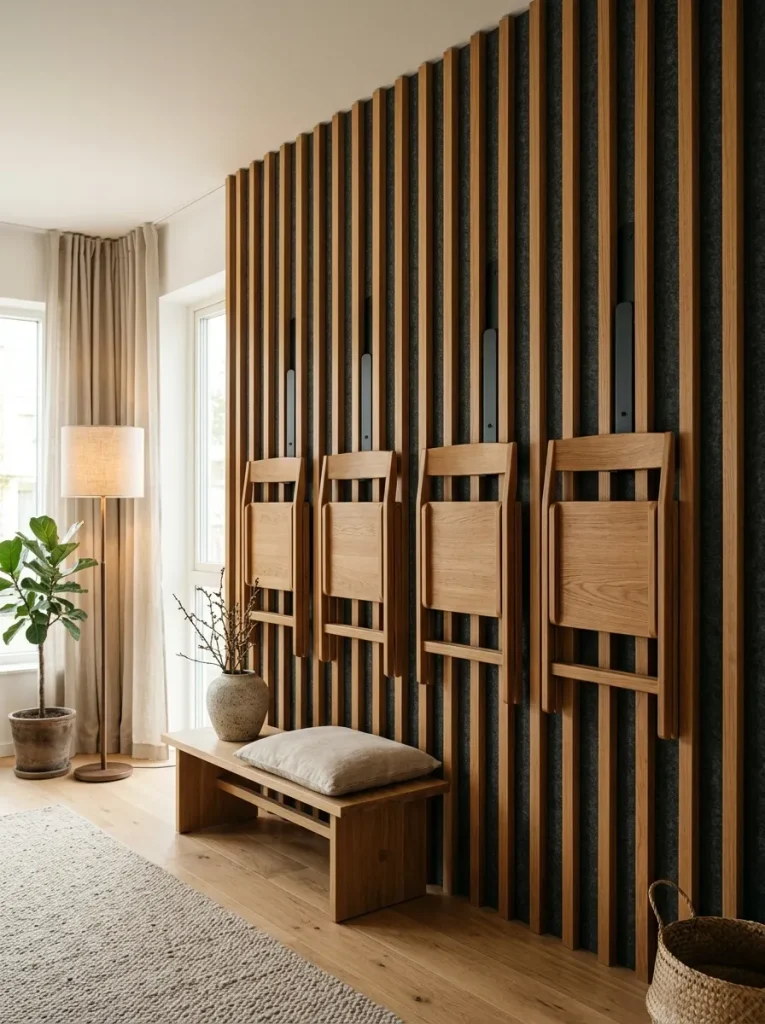
A vertical slatted accent wall integrates functional storage hooks into a decorative feature wall made of repeating vertical wood battens. Thin hardwood slats mounted over dark acoustic felt panels create visual depth, modern texture, and sound absorption while concealing integrated mounting points for heavy utility hooks. Custom metal brackets slide between individual wood slats to anchor directly into hidden structural backing rails mounted behind the decorative paneling. This design conceals utility storage within an architectural feature suitable for modern entryways, home offices, and living spaces where standard garage hardware would look out of place. Rich wood tones like walnut, white oak, or stained ash add warmth to interior spaces, disguising utilitarian items when hung intentionally within the wood slat pattern. The continuous vertical lines create an illusion of higher ceilings, enhancing the room’s proportions while organizing equipment efficiently. Integrating functional hardware into decorative wall paneling bridges the gap between utilitarian storage and modern interior architecture.
Panel Construction and Hardware Integration
Mount three-quarter-inch thick horizontal wooden furring strips across the target wall surface, securing them directly into structural wall studs with heavy-duty framing screws. Staple black acoustic felt insulation fabric across the furring strips to create a dark background that hides the wall structure behind the slatted panel. Rip hardwood boards into one-inch wide by three-quarter-inch deep vertical slats, sanding all four sides thoroughly to prepare the wood for staining or clear finishing. Fasten the vertical wood slats to the horizontal furring strips using finish nails, maintaining a consistent three-quarter-inch gap between every slat using spacer blocks. Fabricate specialized steel utility hooks with thin mounting bases designed to slide through the narrow gaps between the vertical wood slats. Secure the hook mounting bases directly to the hidden horizontal furring strips using heavy screws, ensuring physical loads transfer straight into the wall structure. Hang folding chairs or lightweight step ladders onto the metal hooks, allowing the items to sit neatly against the slatted wooden paneling.
Padded Dual-Arm Garage Storage System
Heavy-Duty Utility and Equipment Protection
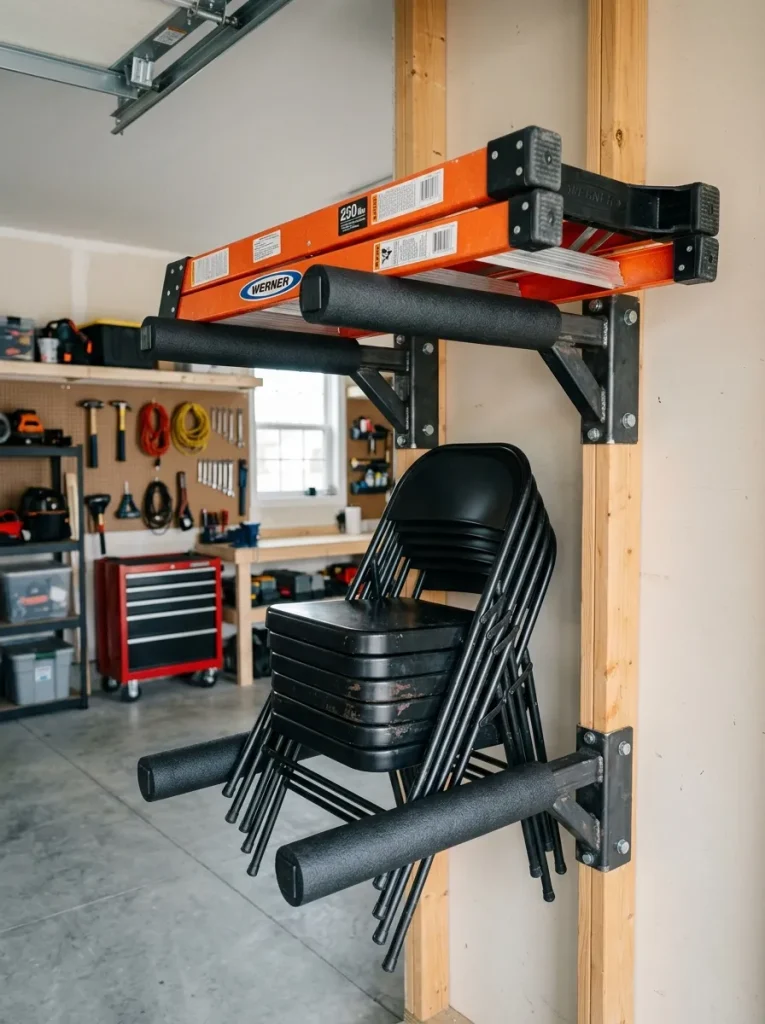
A padded dual-arm garage rack delivers reliable strength designed for heavy-duty extension ladders, bulk step stools, and heavy metal folding chairs. Constructed from thick steel tubular arms, these industrial storage racks feature soft EVA foam or rubber padding sleeves wrapped around the metal supports. The protective padding prevents metal-on-metal scratching, chipping paint, and denting delicate wooden chair frames during frequent storage loading. Dual extended arms project outward up to sixteen inches, accommodating deep stacks of four or more folded chairs or wide fiberglass ladders on a single rack set. High-tensile steel mounting plates distribute high leverage forces across structural studs, preventing hardware loosening or wall surface distortion over time. This heavy-duty storage solution excels in harsh garage environments, tool sheds, and outdoor utility rooms where heavy equipment requires sturdy, non-slip mounting points. Combining heavy physical load capacities with protective arm padding ensures utility equipment stays organized and protected from wear.
Execution and Mounting Strategy
Select a pair of heavy-duty steel utility arms equipped with protective foam sleeves and structural mounting bases rated for high weight loads. Measure the total length of the ladder or target folding chairs to determine the optimal horizontal spacing distance between the two mounting brackets. Locate two structural wood wall studs spaced at an appropriate distance, marking vertical centerlines using a electronic stud finder and a level. Align the top screw hole of the first padded utility arm over the center of the target stud, marking all mounting hole positions onto the wall face. Drill deep pilot holes into the structural wood studs, securing the mounting plate using heavy structural lag bolts fitted with flat washers. Install the second padded arm on the adjacent stud at identical horizontal height, using a laser level to ensure perfect alignment across both arms. Check that both installed steel arms rest firmly against the wall without movement or play when downward pressure is applied. Load the folding chairs or heavy ladder onto the padded arms, verifying that the rubber foam coating cushions the equipment frames securely.
Common Beginner Mistakes and How to Avoid Them
Successful vertical storage installation requires avoiding critical mistakes that compromise structural safety, wall integrity, and daily functionality. The most common error is securing heavy storage racks using hollow drywall anchors rather than anchoring directly into solid structural wood studs. Drywall alone lacks the shear strength required to support heavy step ladders or stacked metal chairs, which leads to hardware failure and wall damage. Always verify stud locations using an electronic stud finder and confirm stud edges using a thin pilot bit before driving primary structural fasteners. Another common mistake is ignoring the total depth of hanging items, which can cause chairs or ladders to block doorways, hit parked vehicles, or obstruct natural walkways. Pre-plan physical clearances by marking item dimensions on the wall with painter’s tape before selecting a rack mounting location. Overloading utility hooks beyond their weight capacity causes metal fatigue and fastener loosening over time. Always check the manufacturer load ratings for all brackets and hardware, maintaining a safe weight margin below maximum capacity thresholds. Finally, skipping leveling steps during installation leads to unbalanced weight distribution, causing hanging items to slide or rest unevenly on support arms.
Practical Tips for Better Results
Achieving professional results with wall-mounted storage projects requires paying attention to small design details, accurate measurements, and proper tool usage. Always use high-quality structural screws or lag bolts instead of standard drywall screws, which are brittle and prone to snapping under heavy shear loads. Applying a thin coat of wax or thread lubricant to large lag bolts makes driving fasteners into hardwood studs easier while preventing screw head stripping. When installing wooden cleats or custom pegs, select dense hardwoods like oak, maple, or birch rather than soft construction pine to prevent structural splitting under pressure. Pre-drill countersunk pilot holes for every screw to ensure flush fastener heads that won’t scratch hanging equipment or catch on chair frames. Add protective rubber caps, foam sleeves, or felt lining to bare metal hooks to prevent surface scuffs, paint transfer, and vibration noise when hanging metal items. For deep chair stacks, install a simple canvas safety strap with a quick-release buckle above the rack to hold items against the wall during accidental bumps. Keep extra hardware, spare pegs, and drill bits organized in a small labeled bin near your storage wall for fast system modifications later.
Styling, Presentation, or Organization Ideas
Organizing vertical utility storage involves balancing functional layout decisions with clean visual design to keep utility spaces looking neat. Group hanging items by frequency of use, placing daily step stools and common seating on lower, easily reachable hooks while storing long ladders higher up. Paint storage racks, cleats, and backer boards in colors matching your wall surface to create a subtle built-in look that minimizes visual noise. Alternatively, use dark wood stains paired with matte black metal hardware to transform functional garage storage into an attractive, intentional accent feature. Label dedicated hanging zones on wooden backer boards using painted stencils or vinyl decals, marking clear locations for specific chair sizes and ladder types. Hang chairs with their seat frames facing inward toward the wall surface to present a uniform appearance while minimizing outward extension into the room. Maintain consistent spacing between multiple hook sets across the wall, aligning horizontal rails using long level lines to establish clean geometric visual balance. Integrating small LED strip lights or puck lights above the rack area improves visibility in dimly lit utility closets, basements, and garage bays.
Budget or Time Planning
Planning project expenses and installation timelines prevents unexpected delays and keeps utility storage builds within target budget limits. A basic two-hook steel bracket installation anchored to existing studs requires less than thirty dollars in hardware and under an hour to complete. Medium-complexity projects like a wooden French cleat system or heavy-duty pegboard cost between fifty and one hundred dollars for quality materials, requiring two to three hours of work. Custom projects such as slatted accent walls or ceiling lift systems cost between one hundred fifty and three hundred dollars depending on wood species choices and specialized pulley hardware. Save on material costs by purchasing standard dimension lumber from local building supply yards rather than buying pre-cut specialty specialty components at retail stores. Schedule construction logically: complete cutting, sanding, and initial coat finishing on day one, allowing finishes to dry overnight before executing wall installation on day two. Factor in extra time for accurate stud location, layout measuring, and precise leveling, as thorough preparation eliminates costly installation errors and rework. Investing in durable hardware and structural fasteners ensures long-term reliability without requiring frequent repairs or replacement expenses down the road.
Creative Expansion and Advanced Inspiration
Expanding a basic vertical storage rack into a multifunctional utility zone maximizes wall efficiency and improves overall room organization. Integrate small top shelving units directly above chair racks to store compact items like seat cushions, instruction manuals, hardware containers, or cleaning supplies. Install vertical accessory tracks along the sides of the primary chair rack to hold extension cords, folding tables, yard tools, or work gloves on specialized attachments. Incorporate hinge mechanisms into custom wooden backer plates, allowing entire storage racks to swing outward for access to hidden shallow wall cabinets built behind them. Build modular wall units that combine folding chair racks with fold-down workbenches, creating adaptable spaces that transform from utility storage into active project workspaces. For large garage installations, integrate electronic smart sensors or digital load scales to track total equipment weight and confirm secure attachment state. Using modular track hardware allows quick updates to your storage layout whenever you purchase new tools, add extra seating, or reconfigure room layouts. Creative vertical storage design converts plain empty walls into dynamic visual assets that maximize functional living space across any home environment.