10 Hobby Lobby Craft Ideas

Crafting has become one of the most popular ways to create personalized home decor while exploring hands-on creativity. Many Pinterest users search for Hobby Lobby craft ideas because the style often combines rustic textures, farmhouse inspiration, seasonal decoration, and modern minimalist design elements.
These projects usually focus on accessible materials, clear step by step processes, and beginner friendly construction methods. The purpose of DIY craft projects is not only to produce decorative items but also to develop practical crafting skills such as painting, arranging materials, and assembling decorative structures. Hobby Lobby inspired crafts typically feature materials like wood panels, fabric pieces, glass containers, artificial greenery, and decorative lettering.
These materials allow individuals to create aesthetic pieces that fit into living room decor, entryway displays, kitchen organization, or seasonal decorations. The flexibility of these projects makes them suitable for different experience levels. Beginners can start with simple painted signs or jar crafts, while more advanced crafters may explore layered wall art or decorative wreaths. Because these projects focus on handmade creation rather than mass production, each finished item becomes unique. By following clear tutorials and thoughtful planning, DIY craft projects inspired by popular craft store styles can transform simple materials into meaningful and visually appealing home decor pieces.
Why Hobby Lobby Style Crafts Are Popular on Pinterest
Hobby Lobby style crafts frequently trend on Pinterest because they combine practicality, creativity, and decorative appeal. Pinterest users often search for craft inspiration that can be completed at home using simple tools and affordable materials. Hobby-inspired DIY projects meet these expectations by focusing on accessible crafting techniques such as painting wooden signs, arranging decorative greenery, or building small home decor displays. These projects are also highly adaptable. The same basic idea can be modified using different colors, textures, or decorative elements to match various home styles. Another factor contributing to their popularity is visual presentation. Many Hobby Lobby inspired crafts emphasize neutral color palettes, rustic wood textures, and organized decorative layouts that photograph well in Pinterest images. These aesthetics align with trending home decor styles such as farmhouse design, minimalist interiors, and modern rustic spaces. The step by step nature of these projects also encourages beginners to participate in crafting activities. Tutorials typically involve clear stages such as preparing materials, assembling structures, and adding decorative details. This structured approach allows people with limited crafting experience to produce professional-looking results. Additionally, DIY crafts provide an opportunity for personalization. Handmade items can include custom lettering, seasonal themes, or personalized color palettes, allowing individuals to create decor pieces that reflect their personal style while following popular Pinterest inspiration.
Materials and Preparation for DIY Craft Projects
Preparing the correct materials is an important step before beginning any craft project. Most Hobby Lobby style DIY crafts rely on simple crafting supplies that are easy to organize and work with. Common base materials include wooden boards, canvas panels, glass jars, picture frames, and small decorative containers. These surfaces serve as foundations for painting, attaching decorations, or creating layered craft designs. Acrylic paint is frequently used in DIY projects because it dries quickly and provides strong color coverage. Paintbrushes in different sizes help apply both base layers and detailed accents. Adhesive materials such as hot glue, craft glue, or double-sided tape are used to secure decorative elements to the project surface. Other common craft materials include artificial greenery, ribbon, twine, beads, fabric pieces, and small wooden cutouts. Before starting the project, materials should be organized on a clean workspace to prevent interruptions during the crafting process. Cutting decorative pieces in advance, arranging color palettes, and testing layouts can help maintain efficient workflow. Protective coverings such as craft mats or paper sheets should be placed on the work surface to prevent paint or glue stains. With proper preparation and organized materials, DIY craft projects become easier to execute and produce more consistent results.
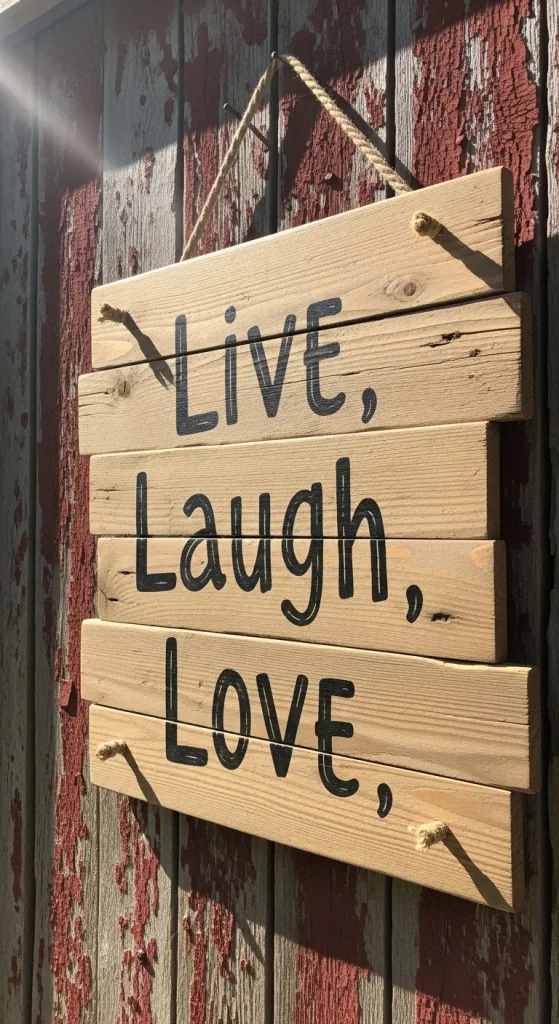
Rustic Wooden Quote Sign
How to Create
A rustic wooden quote sign is one of the most recognizable DIY craft projects inspired by farmhouse style decor. The design typically features a wooden board with painted lettering that displays a short phrase or inspirational message. To begin this project, select a smooth wooden panel or reclaimed wood board that measures approximately twelve to sixteen inches in width. Lightly sand the surface to remove rough areas and prepare the wood for painting. Apply a base coat of neutral colored paint such as white, cream, or light gray. This base color creates a clean background for the lettering. After the paint dries completely, the quote can be added using either hand lettering or a stencil technique. Stencils provide consistent letter shapes and are helpful for beginners who want clear text alignment. Acrylic paint in a darker shade such as black or charcoal is typically used for the lettering to create strong contrast against the background. Once the text is complete, the edges of the sign can be lightly distressed using sandpaper to produce a rustic aged appearance. A small sawtooth hanger or twine loop can be attached to the back for wall display. The finished craft piece works well in entryways, living rooms, or kitchen spaces as decorative farmhouse wall art.
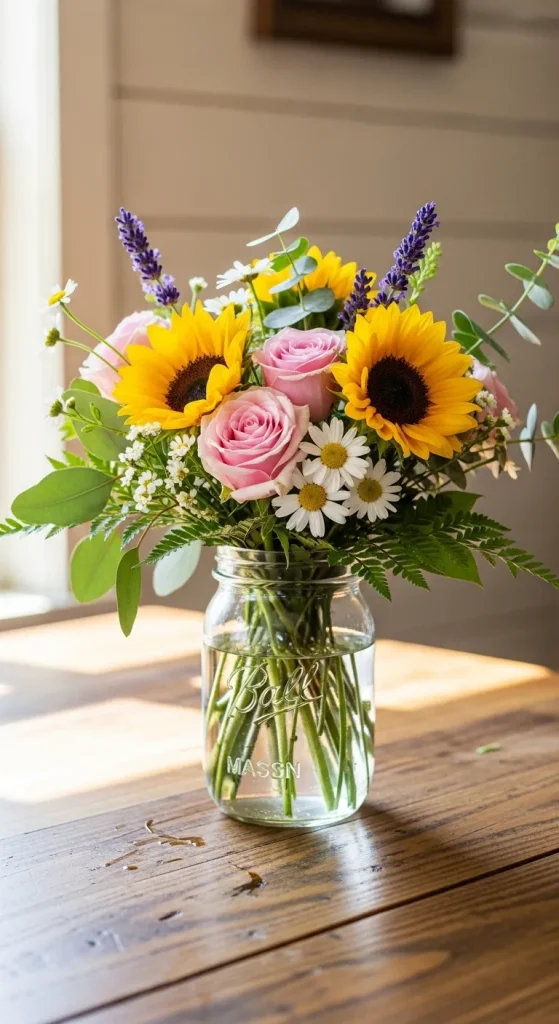
Mason Jar Flower Arrangement
Step-by-Step Guide
Mason jar flower arrangements are a popular DIY craft project because they combine simplicity with decorative charm. This craft begins with a clear glass mason jar that serves as the container for the floral arrangement. Before adding decorations, the jar can be painted or left transparent depending on the desired aesthetic. For a farmhouse style look, the jar may be painted in soft pastel colors such as pale blue, sage green, or cream. Chalk-style paint is often used to create a slightly textured finish. After the paint dries, twine or burlap ribbon can be wrapped around the neck of the jar to add rustic detail. Artificial flowers such as daisies, lavender stems, or wildflowers are then arranged inside the jar. To keep the flowers positioned upright, small decorative stones or dried moss can be placed at the bottom of the container. The arrangement should remain balanced with flowers extending slightly above the jar opening. These jar arrangements can be displayed individually on shelves or grouped together to create a centerpiece display. Because the design uses artificial flowers, the decoration remains long lasting and requires no watering. This simple project demonstrates how basic materials can be transformed into attractive handmade decor.
Decorative Wooden Tray Organizer
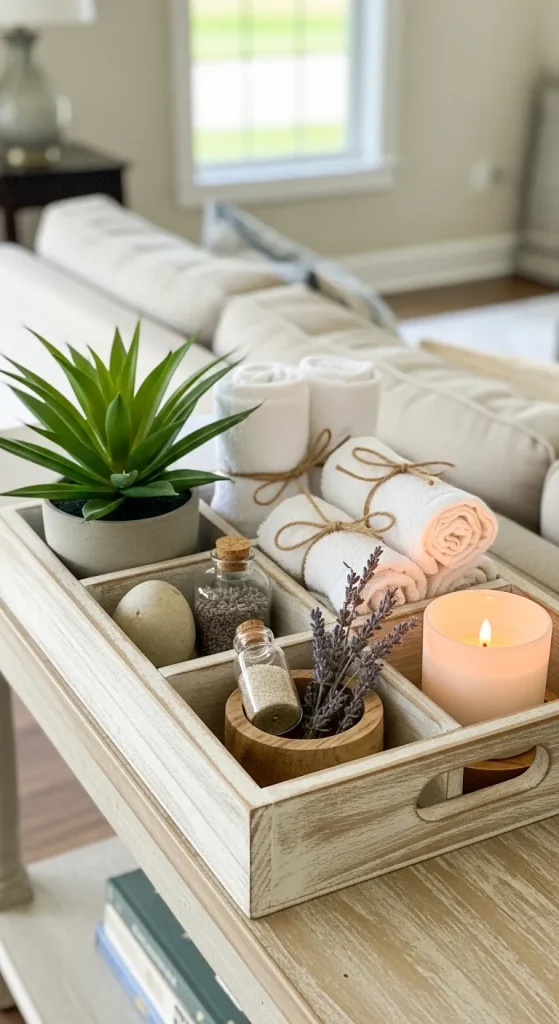
Execution Process
A decorative wooden tray organizer is a practical DIY craft project that combines organization with home decor styling. The tray can be constructed using a shallow wooden crate or small rectangular wooden board with attached handles. To begin the project, the wooden surface should be sanded lightly to create a smooth finish. A base coat of paint or wood stain can then be applied depending on the desired appearance. Neutral stains such as walnut or oak highlight the natural grain of the wood and work well with farmhouse decor. After the base layer dries, decorative stenciled patterns or painted borders can be added along the edges of the tray. These details enhance the visual design while maintaining a clean layout. The tray can then be used to organize small decorative items such as candles, jars, or miniature plant pots. In kitchen spaces, the tray can hold spice containers or cooking utensils. In bathrooms, it can organize toiletries or rolled hand towels. The structure of the tray keeps items grouped together while creating an attractive display. This craft project demonstrates how functional organization tools can also serve as decorative elements within a home.
Fabric Hoop Wall Decor
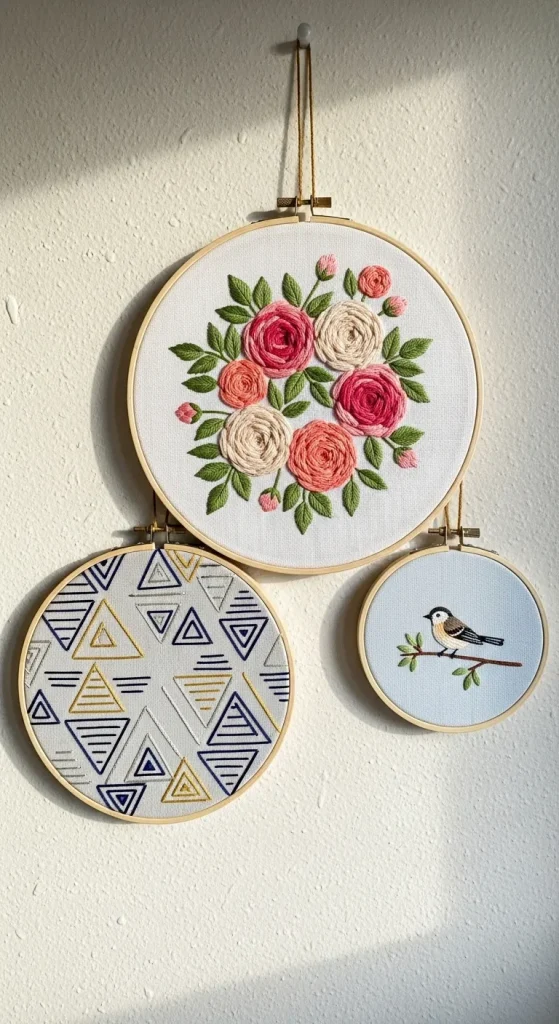
How to Make
Fabric hoop wall decor is a simple craft project that transforms decorative fabric into framed wall art. The main material used in this project is an embroidery hoop, which consists of two circular wooden rings that hold fabric tightly in place. To begin the process, select a piece of decorative fabric with a pattern that complements the room’s color palette. Floral prints, geometric designs, or minimalist patterns all work well for this craft. The fabric is placed between the two rings of the embroidery hoop and tightened until it becomes smooth and wrinkle free. Excess fabric around the edges can be trimmed or folded behind the hoop for a neat finish. To enhance the design, additional decorative elements such as lace trim, ribbon bows, or small fabric flowers can be attached to the front of the hoop. The finished hoop can be hung on the wall using a small nail or decorative hook. Multiple fabric hoops can also be grouped together to create a gallery style wall display. This DIY project is beginner friendly because it requires minimal tools and provides immediate decorative results.
Painted Terracotta Pot Planter
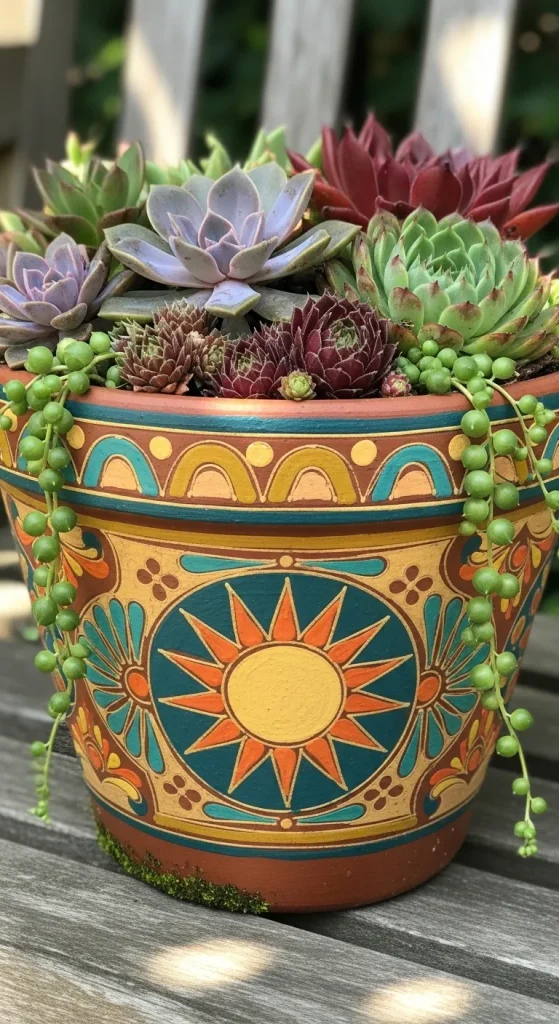
Setup Method
Painted terracotta pots offer a creative way to add handmade decoration to plant displays. Terracotta pots are commonly used for planting because they allow soil to breathe and support healthy plant growth. For this DIY craft project, the pots become decorative elements as well as functional containers. The project begins by cleaning the surface of the terracotta pot to remove dust or residue. Once the surface is dry, acrylic paint can be applied to create decorative patterns or color blocks. Popular designs include geometric shapes, horizontal stripes, or simple floral motifs. Applying two thin coats of paint helps achieve consistent coverage without visible brush marks. After the paint dries, a clear protective sealant can be applied to preserve the decoration. The pot can then be filled with soil and planted with small herbs, succulents, or decorative houseplants. Painted terracotta pots are often displayed on windowsills, kitchen counters, or patio tables. Because the designs can be customized with different colors and patterns, the project allows individuals to create planters that match their home decor style while maintaining the functionality of a traditional plant container.
Beaded Garland Decor
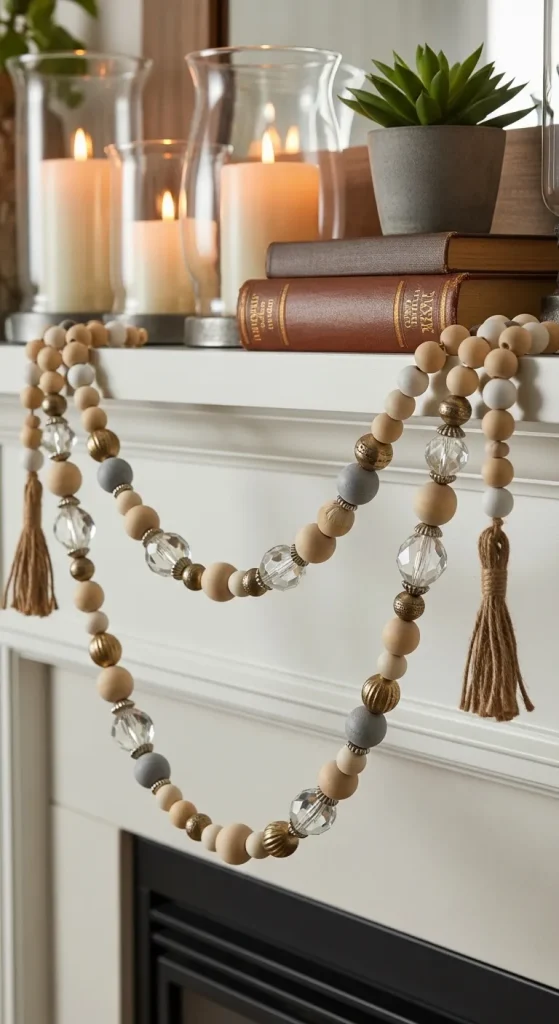
How to Create
Beaded garlands are decorative craft items that can be used for shelf styling, table decor, or wall accents. The main material used in this project is a collection of wooden beads strung together on durable twine or cotton cord. To begin the project, beads of different sizes are arranged in a pattern before stringing them onto the cord. Some crafters prefer alternating bead sizes to create visual rhythm along the garland. After threading the beads, knots are tied at each end of the cord to secure the arrangement. Decorative tassels made from cotton thread or yarn can be attached to both ends of the garland to complete the design. For additional customization, wooden beads can be painted in neutral colors such as white, beige, or light gray before being threaded onto the cord. The finished garland can be draped across shelves, wrapped around decorative trays, or placed along table centerpieces. This craft project is appreciated for its minimalist style and simple construction process.
Framed Botanical Wall Art
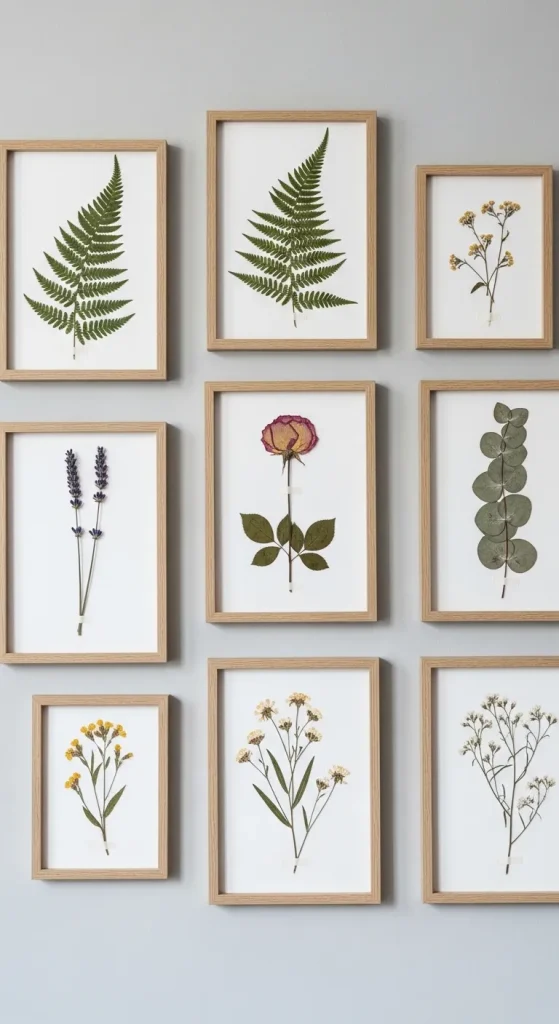
Execution Process
Framed botanical wall art is a craft project that combines natural imagery with decorative framing. The project begins by selecting a wooden picture frame that complements the room’s decor style. Inside the frame, botanical illustrations or pressed plant designs are displayed to create a nature inspired art piece. One method involves printing botanical drawings on textured paper and placing them within the frame. Another method uses real pressed leaves or flowers arranged carefully on a neutral background sheet. Once the design layout is finalized, the frame is assembled to secure the artwork in place. The finished piece can be displayed individually or arranged as part of a gallery wall. Botanical wall art works particularly well in spaces that feature natural materials, greenery, or soft color palettes. This project demonstrates how simple framing techniques can transform natural imagery into elegant decorative displays.
Candle Holder Centerpiece
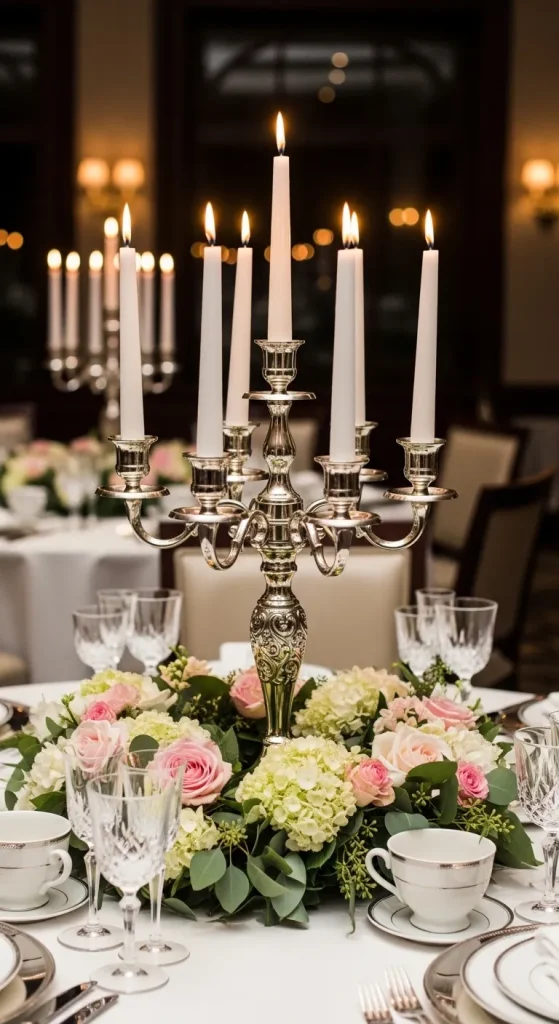
Step-by-Step Guide
A candle holder centerpiece is a decorative craft project that enhances table displays with soft lighting and structured arrangement. The centerpiece begins with a flat tray or wooden board that acts as the foundation for the design. Several small glass candle holders are placed evenly across the tray to create visual balance. Around the candle holders, decorative materials such as small stones, dried moss, or artificial greenery can be arranged to fill empty spaces. The goal is to create a symmetrical layout where the candles remain the central focal point. For seasonal variation, the decorative materials can be adjusted to reflect different themes. For example, pine branches may be used in winter displays while floral accents may be added for spring. The finished centerpiece can be placed on dining tables, coffee tables, or entryway consoles. This project illustrates how structured arrangement techniques can produce elegant home decor using simple materials.
Wooden Ladder Blanket Rack

How to Make
A wooden ladder blanket rack is both a decorative and functional craft project used to store blankets or towels. The structure resembles a small leaning ladder with horizontal rungs attached between two vertical wooden boards. To begin the project, wooden boards are measured and cut to equal lengths to ensure structural balance. The boards are then sanded and assembled using wood screws or strong adhesive. Once the ladder frame is complete, a coat of wood stain or paint can be applied to match the surrounding decor. Neutral stains often highlight the wood grain and complement rustic interiors. The ladder is then positioned against a wall where blankets can be draped across the rungs. In bathrooms, the ladder can also hold folded towels. This craft project combines simple woodworking techniques with practical home organization.
Seasonal Decorative Wreath

Setup Method
Seasonal decorative wreaths are versatile craft projects that allow individuals to update their home decor throughout the year. The base of the wreath is usually a grapevine ring or wire wreath frame. Decorative elements are then attached to represent the chosen season. For example, spring wreaths may include artificial flowers and greenery, while autumn wreaths may feature leaves and berries. The process begins by attaching greenery or base foliage around the wreath frame using floral wire. Additional decorative pieces such as ribbons, small wooden shapes, or miniature ornaments are then added to create visual interest. The arrangement should remain balanced around the circular frame so that no section appears overcrowded. Once the decorations are secure, a hanging loop made from ribbon or twine can be attached to the back of the wreath. Seasonal wreaths are commonly displayed on front doors or interior walls as rotating decorative elements.
Common Beginner Crafting Mistakes and How to Avoid Them
Many beginners encounter avoidable mistakes when starting DIY craft projects. One common issue is skipping surface preparation. Painting or gluing materials onto unprepared surfaces can lead to uneven results or weak adhesion. Cleaning and sanding materials before starting the project helps prevent these problems. Another mistake involves overcrowding decorative elements. Adding too many decorations can reduce visual balance and make the design appear cluttered. Maintaining a clear focal point helps create a more organized appearance. Beginners may also rush through drying stages when working with paint or glue. Allowing each layer to dry fully ensures that materials remain secure and prevents smudging. Measuring materials accurately is also important, particularly in woodworking projects where uneven cuts can affect structural stability. Planning the design layout before assembly helps identify potential issues early. By following careful preparation steps and maintaining patience during the crafting process, beginners can produce higher quality results.
Practical Tips for Achieving Better Craft Results
Improving the quality of DIY crafts often involves small adjustments in technique and planning. One effective method is testing paint colors on scrap material before applying them to the final project surface. This allows color combinations to be evaluated without risking the main design. Another helpful technique is layering decorations gradually rather than attaching everything at once. Starting with base elements such as greenery or background paint provides a stable foundation for additional details. Maintaining consistent spacing between decorative components also improves visual balance. For example, evenly distributing flowers or beads across a surface creates a more structured appearance. Using appropriate tools also enhances results. Fine detail brushes are useful for lettering or small decorative accents, while wider brushes provide smoother coverage for background painting. Keeping the workspace organized prevents materials from becoming misplaced during the project. With thoughtful preparation and careful execution, DIY crafts can achieve polished and visually appealing results.
Styling Handmade Crafts Within Home Decor
Handmade crafts become more impactful when they are displayed thoughtfully within a home environment. Placement plays an important role in how decorative items are perceived. Wall art and wooden signs should be positioned at eye level to maintain visual balance within a room. Decorative trays and centerpieces often work best on coffee tables or dining tables where they can be appreciated from multiple angles. Grouping similar decorative objects together can also create cohesive displays. For example, mason jar flower arrangements can be arranged in sets of three to form a balanced tabletop centerpiece. Color coordination is another important styling principle. Matching craft decor with existing furniture tones or wall colors helps integrate the piece into the room’s design. Lighting conditions should also be considered. Placing decorative crafts in well lit areas allows textures and colors to remain visible. Through thoughtful arrangement and coordinated styling, handmade crafts can become integral elements of home decor design.
Budget Planning for DIY Craft Projects
DIY craft projects can remain cost effective when materials are selected and organized carefully. Many projects use basic supplies that can be reused across multiple crafts. For example, paint, brushes, and adhesive tools can be applied to several different projects over time. Reclaimed materials such as leftover wood pieces or glass containers can also serve as useful crafting bases. Planning projects in advance helps avoid purchasing unnecessary materials. Creating a materials list before beginning the craft ensures that only required supplies are gathered. Time management also contributes to efficient crafting. Dividing the project into stages such as preparation, assembly, and finishing allows the work to progress smoothly without rushing. By combining careful planning with resourceful material use, DIY crafts can remain affordable while still producing high quality decorative results.
Expanding Craft Creativity with Advanced Ideas
Once basic crafting techniques are mastered, more advanced creative ideas can be explored. Layered wall art that combines multiple materials such as wood, fabric, and metal can add depth to decorative projects. Hand lettering techniques can also be practiced to create custom quote signs with personalized messages. Mixed media crafts allow individuals to combine painting, collage, and textured materials in a single project. Seasonal variations provide additional opportunities for creativity. Many crafts can be modified with different colors or decorations to reflect changing seasons. Experimenting with new textures, shapes, and arrangement methods helps expand crafting skills while producing unique handmade decor pieces. By continuously exploring new ideas and techniques, DIY crafting remains an evolving creative activity that encourages both artistic expression and practical design.