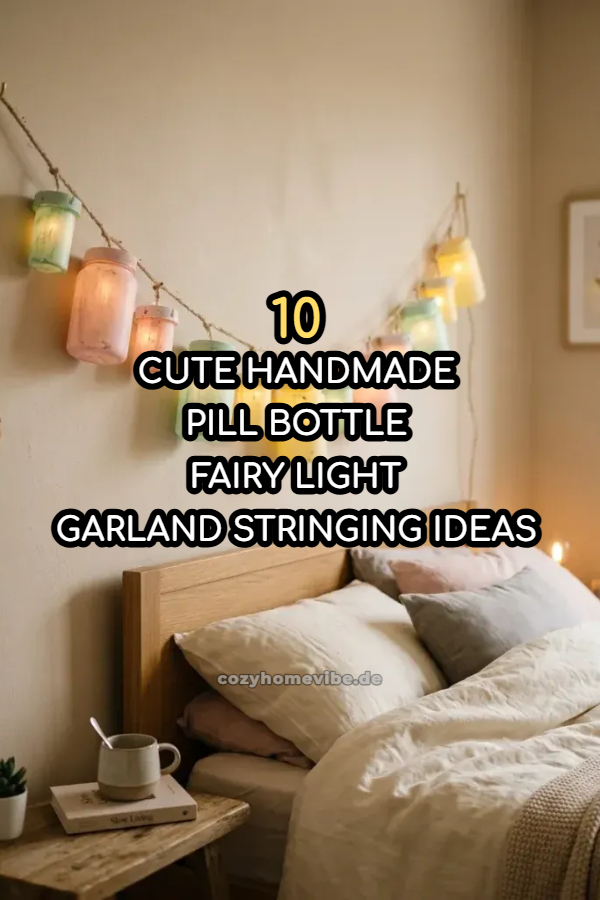
10 Cute Handmade Pill Bottle Fairy Light Garland Stringing Ideas
Upcycling everyday household items into whimsical home decor offers an exceptionally rewarding creative project for crafters of all skill levels. Plastic prescription containers and small supplement bottles possess a unique combination of semi-translucent material, uniform cylindrical structure, and lightweight durability, making them an ideal foundation for glowing ambient lighting installations. When combined with modern LED fairy lights, these discarded plastic vessels diffuse illumination softly, creating a cozy glow that elevates bedroom interiors, sheltered outdoor spaces, and party setups. Learning how to properly prepare, alter, and assemble these containers into decorative lighting allows individuals to practice sustainable crafting while adding personalized warmth to their living environment. This tutorial provides clear guidance on transforming routine waste into artistic string lights through accessible step-by-step techniques. By standardizing the preparation phase and exploring diverse aesthetic treatments, anyone can create custom garland installations that match specific color palettes and interior themes without requiring specialized machinery or expensive craft supplies.
The Rising Popularity of Upcycled Lighting Aesthetics
The popularity of repurposed light garlands stems from the growing interest in accessible DIY projects that combine eco-friendly practices with custom interior styling. Visual platforms like Pinterest frequently feature minimalist style room accents, budget ideas, and handcrafted fairy light installations that provide high visual impact at minimal financial cost. Repurposing prescription bottles solves two practical challenges at once: reducing household plastic waste and creating custom accent lights that are far more unique than standard store-bought decor. The soft plastic material of standard medicine bottles diffuses harsh LED bulbs effectively, turning pinpoint light sources into warm, ambient globes of light. Furthermore, the lightweight nature of empty containers makes the final string light garland simple to hang across walls, headboards, windows, or shelving units using basic mounting hardware. Beginners find this concept particularly appealing because the materials are readily available, highly forgiving to work with, and adaptable to various decorative themes ranging from rustic rustic charm to sleek modern design aesthetics.
Required Materials and Preparation Steps
Successful assembly of a custom lighting garland requires proper preparation of both tools and materials to ensure physical safety and visual appeal. Gather empty plastic pill bottles of uniform or complementary sizes, ensuring all original adhesive residue, labels, and prescription information are completely removed using warm soapy water and isopropyl alcohol. For the illuminating core, select a long string of low-heat LED copper wire fairy lights or standard thin-string battery-operated lights, ensuring the bulb spacing aligns well with your planned bottle placement. Essential preparation tools include a low-temperature hot glue gun, utility knife, small hand drill or leather hole punch, ruler, fine-grit sandpaper, and protective safety goggles. Preparing the workspace involves covering a flat tabletop with a protective cutting mat or cardboard sheet to prevent damage during drilling and cutting procedures. Planning your strand layout beforehand by calculating the distance between each bottle ensures an even, balanced distribution of weight and light along the final garland.
Soft Pastels Translucent Cylinder Assembly
Design Concept and Material Selection
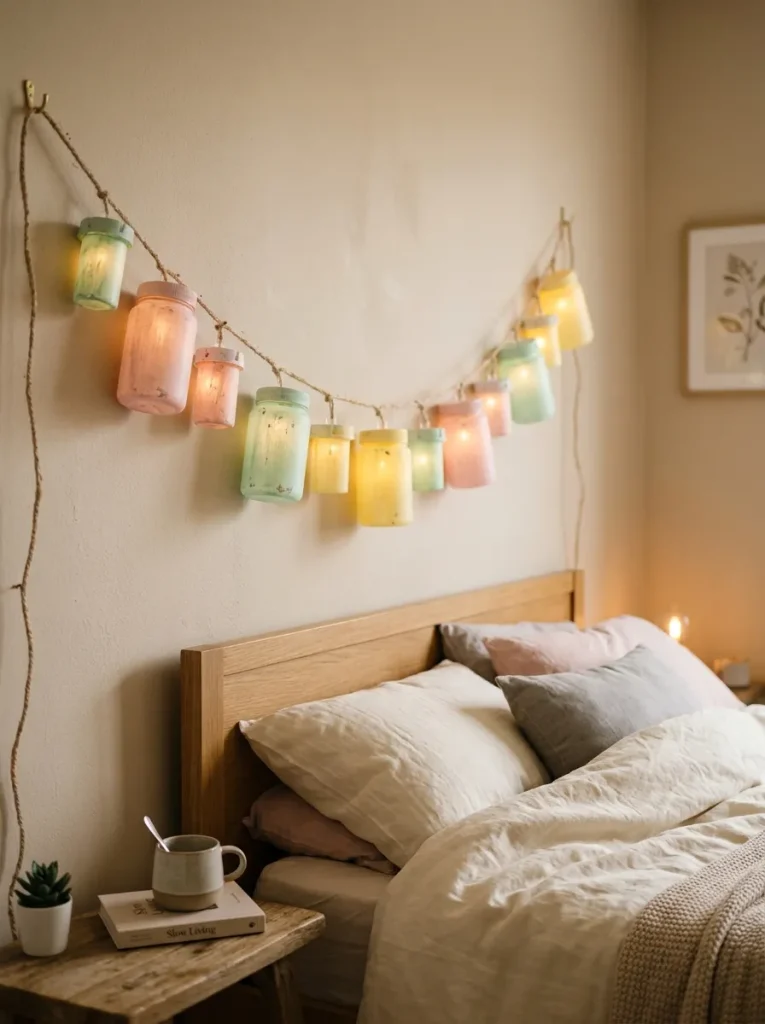
Soft pastel styling provides a gentle, soothing aesthetic suitable for cozy bedrooms, nursery spaces, or subtle seasonal accents. This approach utilizes translucent prescription containers treated with light matte acrylic paints or pastel tissue paper to soften the inner glow of the string lights. By keeping the color density low, light passes through the container wall smoothly, highlighting subtle shades of soft blush pink, pale mint green, powder blue, and soft butter yellow. Selecting bottles of identical height creates a clean, harmonious alignment along the display cord, promoting a sense of balanced minimalist style. The smooth surface of the plastic allows light to distribute evenly across the outer surface without producing harsh glare. Pairing these muted color choices with delicate warm-white LED lights results in a delicate ambient feature that complements modern Scandinavian or soft bohemian interior decors perfectly while hiding the industrial look of standard plastic caps.
Step-by-Step Creation Method
To build the soft pastel garland, begin by washing and thoroughly drying ten clear or amber plastic bottles of equal dimensions. Lightly scuff the outer plastic surface of each container with fine-grit sandpaper to give the acrylic paint an effective anchor. Mix tiny amounts of pastel acrylic paint with a transparent decoupage medium, then apply one thin, uniform layer across the exterior of each vessel using a soft sponge brush. Allow the coating to dry completely for two hours. Next, drill a center hole through the plastic cap of each bottle matching the precise width of your fairy light socket. Push a single LED bulb downwards through the top of each prepared cap, securing the wire on the interior side with a small bead of low-temperature hot glue. Thread the painted bottle base back onto its cap, securing the connection tightly. Repeat this mounting process sequentially for all ten units across the strand, ensuring equal spacing between each light globe.
+-----------------------------------------------------------------------+
|                         ASSEMBLY DIAGRAM                              |
|                                                                       |
|      Fairy Light Strand  ===================O===================      |
|                                             |                         |
|                                     +-------+-------+                 |
|                                     |  Drilled Cap  |                 |
|                                     +-------+-------+                 |
|                                             | (Hot Glue Seal)         |
|                                     +-------+-------+                 |
|                                     | Translucent   |                 |
|                                     | Painted Body  |                 |
|                                     +---------------+                 |
+-----------------------------------------------------------------------+
Frosted Glass Texture Simulation
Design Concept and Material Selection
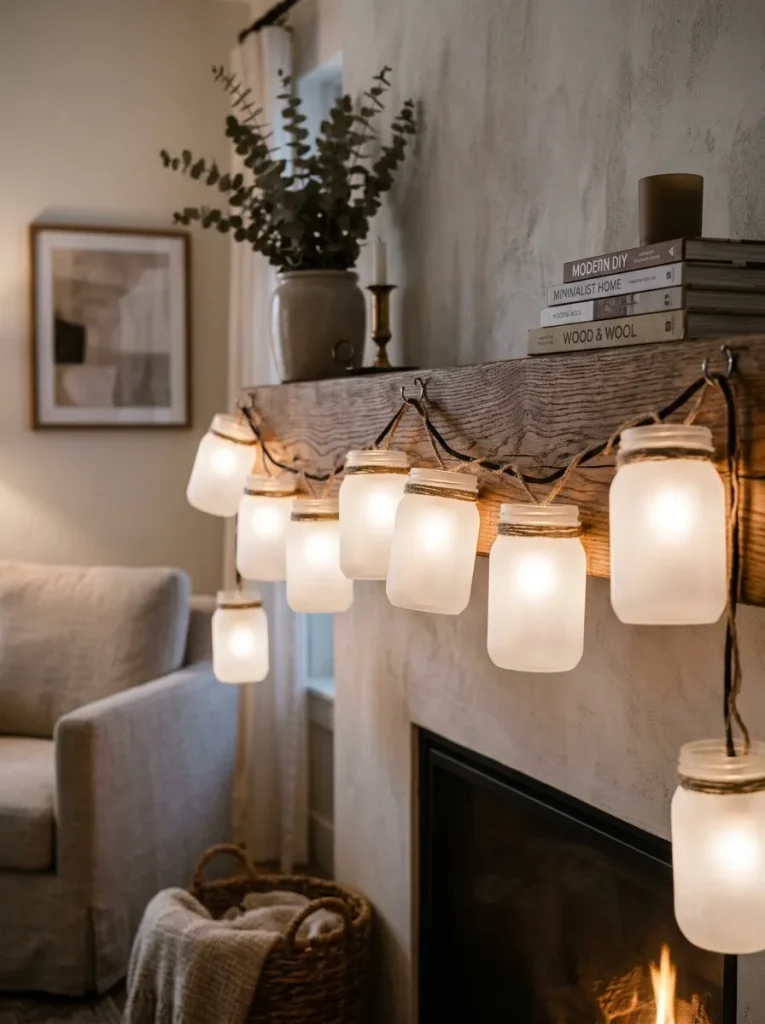
Recreating the tactile, semi-opaque look of sea glass or frosted crystal offers an elevated modern design aesthetic for custom light strands. This technique transforms standard clear or amber pill bottles into dense, light-diffusing globes that completely mask the inner bulb structure. Using frosted glass spray paint, coarse salt texturing, or matte finish medium gives the exterior plastic a sophisticated, velvety texture that distributes light uniformly in all directions. The frosted surface reduces hot spots from single LED points, turning each container into a soft, glowing lantern. This style pairs exceptionally well with cool white or warm white fairy light strands, providing a crisp, polished appearance suitable for year-round display along living room mantels, dining credenzas, or sheltered patio spaces.
Execution Process
Begin by securing your clean, empty pill containers in a well-ventilated workspace protected by drop cloths. Apply two light, sweeping coats of semi-translucent frosted glass spray paint to the exterior of the bottles, allowing twenty minutes of drying time between applications to prevent paint runs. If spray paint is unavailable, coat the exterior with liquid matte decoupage medium and lightly dust fine salt or clear glitter over the wet surface, allowing it to cure completely into a textured shell. Once dry, use a step drill bit to create a smooth hole in the exact center of each bottle cap, sized to snugly fit the LED bulb base. Insert the individual bulbs from the string lights into each cap opening, applying a small droplet of clear adhesive around the wire entry point to prevent sliding. Screw the frosted plastic bases back onto their respective caps, test the electrical string to ensure proper illumination diffusion, and mount the finished garland in your desired location.
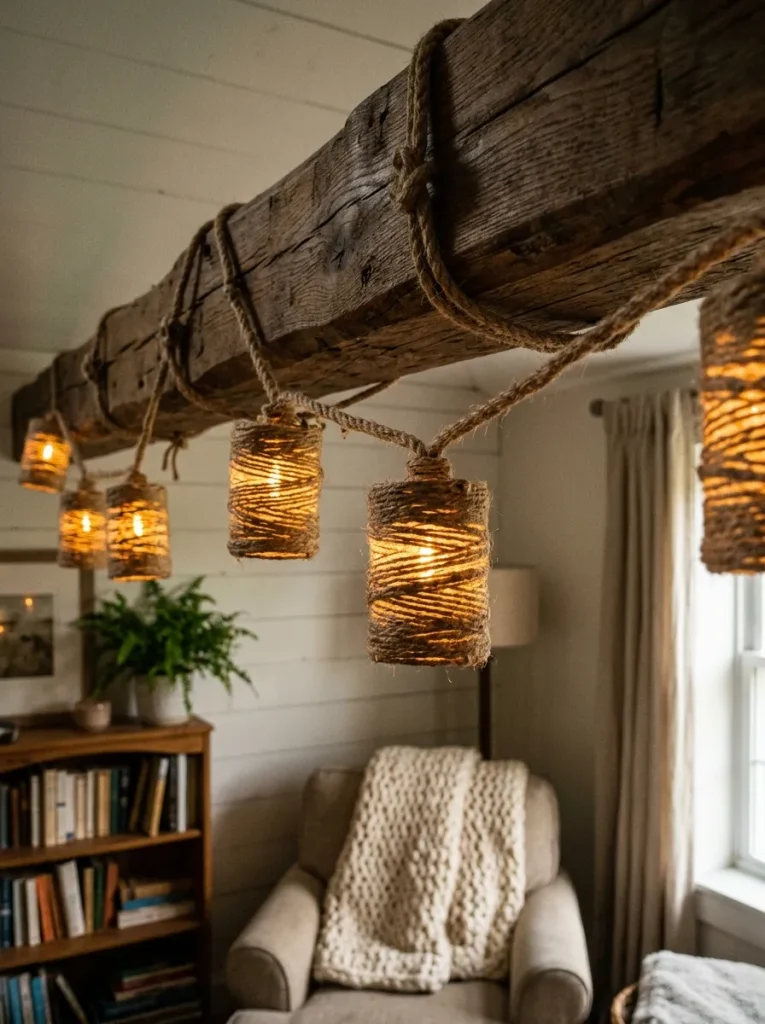
Wrapped Natural Jute Rustic Lanterns
Design Concept and Material Selection
Integrating organic textures with manufactured plastic elements creates a balanced, rustic aesthetic that fits warm farmhouses or bohemian living spaces. Wrapping plastic medicine containers with natural jute twine, hemp cord, or fine cotton yarn completely conceals the plastic base while permitting light to filter through the tiny gaps between strands. The natural brown or cream fiber tones bring warmth to the project, while the rigid shape of the underlying bottle maintains structural integrity. This approach provides an exceptionally durable finish that resists scratching or chipping over time, making it an ideal choice for high-traffic home areas or seasonal holiday decor setups where durability and texture are primary requirements.
How to Make
Prepare ten matching plastic containers by sanding the outer walls slightly to improve glue adhesion. Secure the starting end of a long piece of fine jute twine to the upper rim of the bottle using a small spot of hot glue. Begin wrapping the twine tightly around the circumference of the bottle in continuous downward concentric spirals, placing a thin line of adhesive every three turns to hold the cord firmly in place. Continue wrapping until the entire vertical surface of the container is covered, cutting the twine and securing the tail neatly at the base. Prepare the plastic caps by drilling a wide center hole, inserting an LED fairy bulb into each cap, and locking it with hot glue. Thread the jute-wrapped bottle bodies onto the fixed caps, ensuring the cord wrapping does not interfere with the threading mechanism. Repeat the process for all ten bottles to complete your natural rustic light strand.
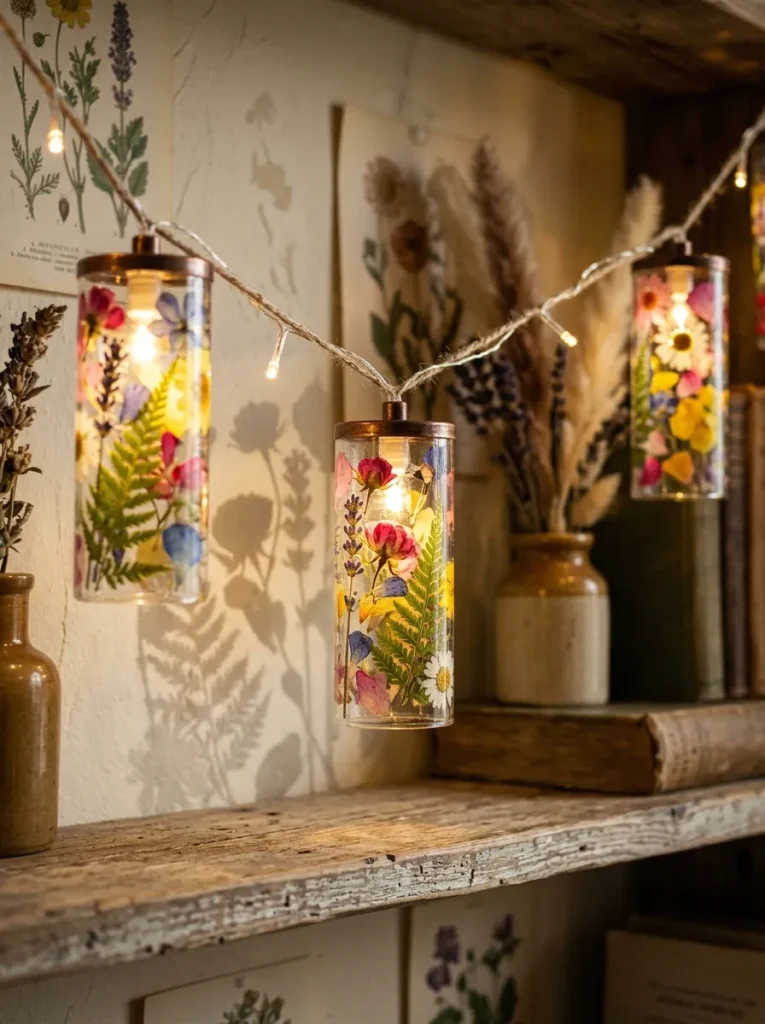
Decoupage Pressed Floral Motif
Design Concept and Material Selection
Incorporating real pressed botanical elements into translucent plastic containers produces a refined, nature-inspired decor piece reminiscent of vintage glass terrariums. Decoupage techniques allow delicate dried leaves, small flower petals, and thin ferns to be permanently sealed against the bottle walls. When illuminated from within by LED string lights, the intricate silhouettes and subtle natural colors of the plant specimens cast beautiful, soft shadows outward. This project offers a fantastic opportunity for botanical enthusiasts and crafters seeking unique room decorations that display real organic elements in a functional, light-emitting artwork.
Step-by-Step Guide
Select smooth, clear plastic prescription bottles and ensure all glue residue from label removal is eliminated. Collect thin pressed flowers or dried leaves, ensuring they are flat and completely moisture-free. Using a soft detail brush, apply a thin layer of clear decoupage glue across a section of the outer plastic bottle. Carefully position the pressed flowers onto the wet glue using tweezers, pressing down gently to smooth out air bubbles. Coat the entire exterior of the bottle with a final thin layer of decoupage sealer to lock the botanical elements under a protective, clear finish, and let it cure for three hours. Drill a centered entry point into each cap, insert the LED fairy light bulbs through the holes, and anchor them with glue. Secure the flower-decorated bottles onto the string light caps, creating an elegant, illuminated botanical collection.
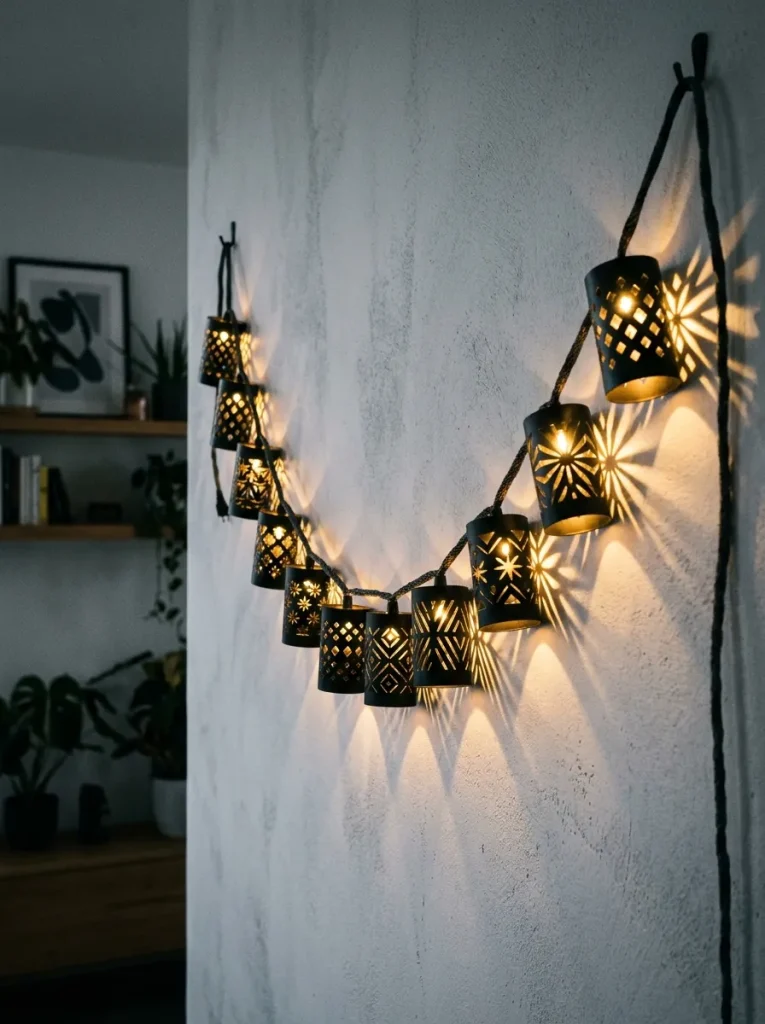
Geometric Cutout Shadow Projectors
Design Concept and Material Selection
Geometric cutout designs turn simple plastic containers into functional miniature light projectors that cast intricate pattern shadows across nearby walls and surfaces. By systematically punching or cutting repeating geometric shapes—such as small circles, diamonds, stars, or linear slots—into the bottle body, light escapes directly through the openings while remaining softened by the remaining plastic walls. This high-contrast interplay between solid plastic and open cuts produces a dynamic visual texture along the length of the string light garland. This modern design choice works particularly well with monochrome color schemes, black spray-painted exteriors, or metallic finishes.
Setup Method
Mark your chosen geometric pattern onto the exterior of ten plastic bottles using a fine permanent marker or grid stencil. Using a high-precision rotary tool fitted with a small drill bit, or a heated metal punch tool, carefully puncture holes along the marked guidelines to form your desired geometric pattern. Smooth away any plastic burrs or rough edges around the cutouts using fine sandpaper or a small craft file. Spray paint the exterior of the cut bottles with a matte black or metallic copper paint to create a strong visual contrast against the light passages, letting it dry thoroughly. Drill a central hole through each bottle cap, push your LED bulbs through into the interior space, and fix the wiring firmly with adhesive. Assemble the punched bottle bodies onto the light strand to complete a dramatic geometric projector garland.
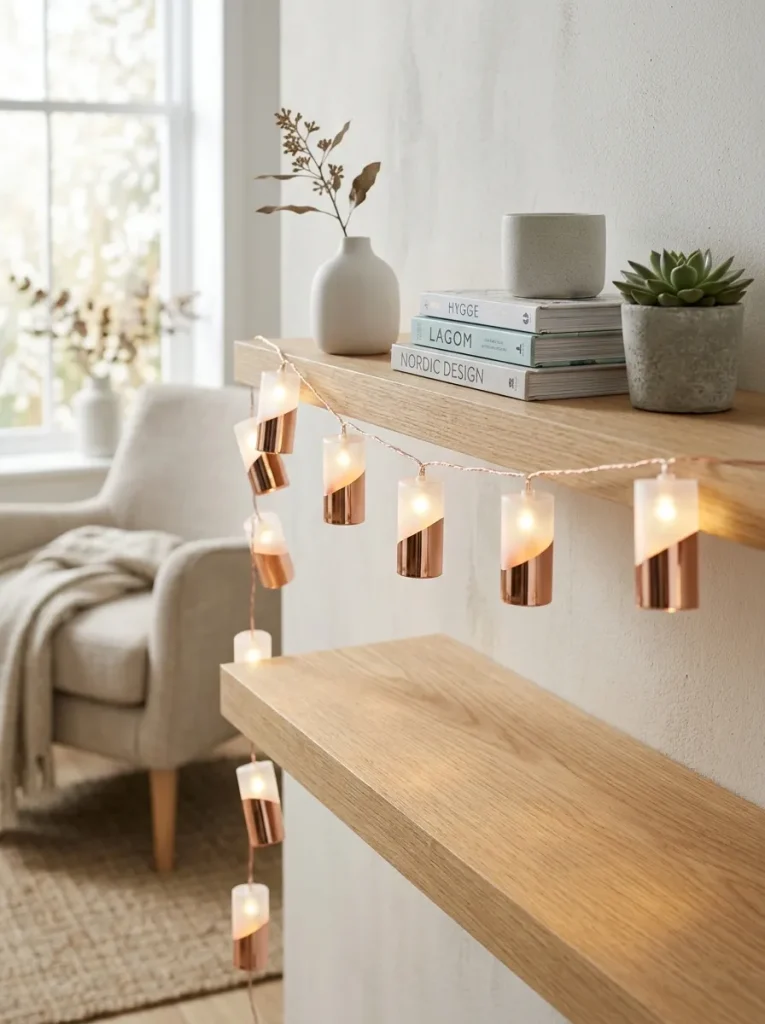
Metallic Foil Dipped Modern Accents
Design Concept and Material Selection
Combining sleek metallic tones with clean plastic surfaces creates a contemporary visual aesthetic suitable for modern home decor styles. The metallic dipped effect features a bold diagonal or horizontal division where the lower half of the translucent container is coated in shimmering metallic gold, rose gold, or silver leaf, while the upper portion remains translucent to diffuse the light bulb above. This contrast produces a high-end, store-bought appearance that belies the simple upcycled origin of the materials. The metallic base reflects downlight downward, casting a warm illumination while maintaining a clean, sophisticated profile.
How to Create
Clean ten identical plastic medicine bottles thoroughly with rubbing alcohol. Apply low-tack painter’s tape diagonally across the midpoint of each container to mask off the top half, ensuring the tape edge is pressed down firmly to prevent paint bleeding. Apply two light coats of metallic gold or copper spray paint to the exposed lower section of the bottles, allowing fifteen minutes between coats. Once dry, carefully peel away the painter’s tape to reveal the clean, sharp line between the clear plastic top and the metallic bottom. Pierce the center of each cap with a punch tool, insert an LED light bulb into each opening, and secure the light strand wiring with hot glue. Screw the metallic-dipped bottles onto the caps, ensuring all dipped angles face the same direction for a unified geometric presentation along the garland line.
Translucent Tinted Color Wash Bottles
Design Concept and Material Selection
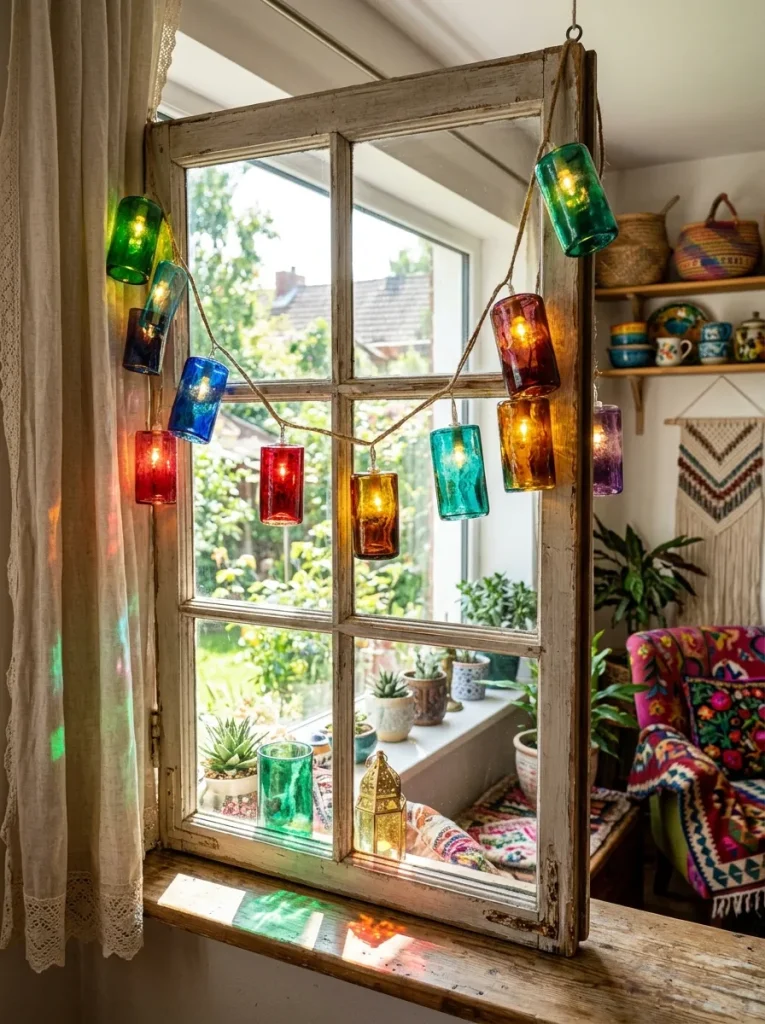
Tinting clear plastic containers with custom stained-glass effects allows crafters to produce vibrant, jewel-toned light garlands that fill a room with colorful ambient light. Unlike opaque paints, translucent color washes allow light to pass through the plastic completely unhindered, transforming warm white LED bulbs into rich shades of emerald green, deep amber, sapphire blue, or warm ruby red. This vibrant look is ideal for festive seasonal holiday displays, party lighting, or eclectic bohemian interiors that celebrate rich, saturated color schemes across home decor elements.
Step-by-Step Guide
Mix several drops of alcohol ink or glass-staining medium with clear acrylic varnish in small disposable cups to create your desired translucent colors. Pour a small amount of the liquid color mixture directly into the inside of a clean, clear plastic pill bottle. Slowly rotate and tilt the bottle in your hands so the colored glaze completely covers the inner plastic walls, then pour any excess liquid back into the mixing cup. Stand the bottles upside down on wire drying racks over newspaper for several hours to allow the excess tint to drain cleanly and cure into a smooth, transparent inner film. Prepare the cap assembly by drilling centered holes into each cap, feeding the individual fairy light sockets through, and securing them tightly with clear glue. Thread your jewel-toned, color-tinted bottles onto the light strand to produce a glowing, stained-glass garland effect.
+-----------------------------------------------------------------------+
|                    COLOR WASH PROCESS FLOW                            |
|                                                                       |
|   1. Mix Alcohol Ink & Varnish -> 2. Pour Into Bottle Interior        |
|                                         |                             |
|   4. Cure Upside Down          <- 3. Rotate to Coat Walls             |
|          |                                                            |
|   5. Insert LED Cap Assembly   -> 6. Final Jewel-Tone Garland         |
+-----------------------------------------------------------------------+
Minimalist Thread Wrapped Accent Rings
Design Concept and Material Selection
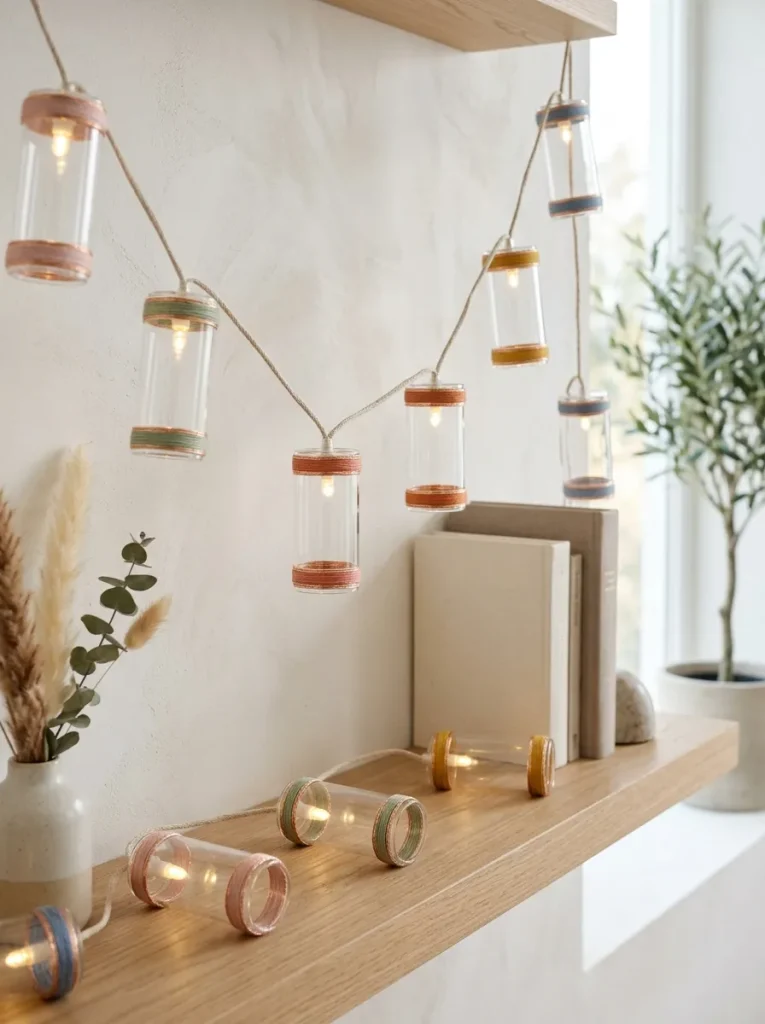
A subtle variation on full coverage wraps, thread-wrapped accent rings add delicate lines of color and texture while retaining maximum translucency across the main body of the plastic vessel. Thin embroidery floss or metallic thread is wound tightly around specific sections—such as the top rim, central band, or bottom edge—leaving clear plastic windows exposed for light diffusion. This minimalist style produces a refined, understated aesthetic that complements modern, clean interiors, providing precise pops of accent color without blocking light output.
How to Make
Clean ten clear medicine containers and plan your thread accent layout by lightly scoring guidelines around the container circumferences. Apply a paper-thin line of clear craft glue along the top rim of a bottle, then begin wrapping fine embroidery thread neatly around the plastic in tight, parallel rows until a half-inch band of solid color is achieved. Repeat this wrapping technique along the bottom rim or central axis according to your visual design plan, securing the thread ends neatly with clear adhesive. Drill a hole through the top of each plastic cap, push an LED fairy light bulb through the opening, and anchor the wiring inside the lid with adhesive. Screw the thread-accented bottles onto their designated cap sockets, completing an elegant, lightly detailed light strand that offers great ambient illumination.
Fabric Scraps Upcycled Patchwork Lanterns
Design Concept and Material Selection
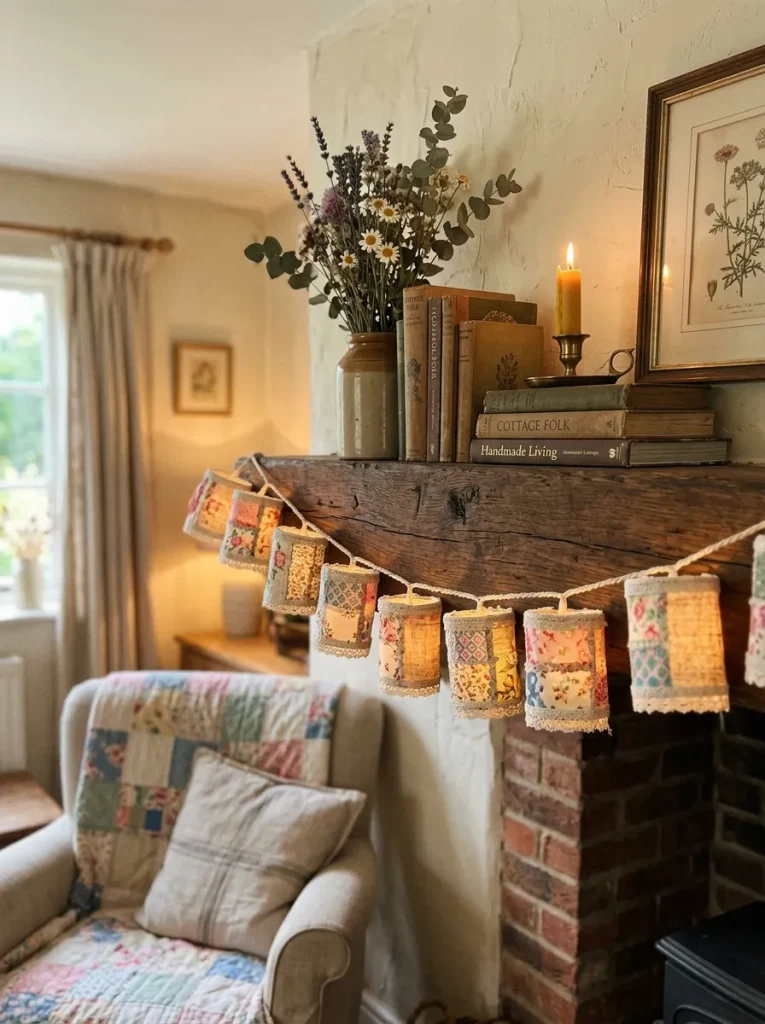
Utilizing leftover fabric scraps to cover plastic pill bottles provides an excellent method for integrating pattern, color, and textile texture into your lighting projects. Thin cotton fabrics, vintage lace, or translucent linen scraps allow light to filter through the weave, creating a cozy glow that emphasizes the fabric pattern. This patchwork approach is ideal for rustic, vintage, or cozy cottage-style rooms, allowing crafters to coordinate their light strand directly with existing curtains, pillows, or bedding fabrics for a cohesive home decor theme.
Execution Process
Cut your chosen lightweight fabric scraps into small rectangular strips or custom panels that match the height and circumference of your plastic pill containers. Apply a thin, even coat of decoupage glue across the entire exterior surface of a container using a flat brush. Smooth the fabric pieces onto the wet adhesive, overlapping edges slightly to build an attractive patchwork design while smoothing out wrinkles or air bubbles with your fingers. Apply a top layer of decoupage sealer over the fabric to protect it from dust and wear, letting it dry completely. Drill centered entry holes into each plastic cap, insert the LED fairy light bulbs into position, and seal the wire entries with hot glue. Screw the fabric-wrapped bodies onto the light sockets to complete a charming, handmade textile light garland.
Frosted Matte Ribbed Texture Design
Design Concept and Material Selection
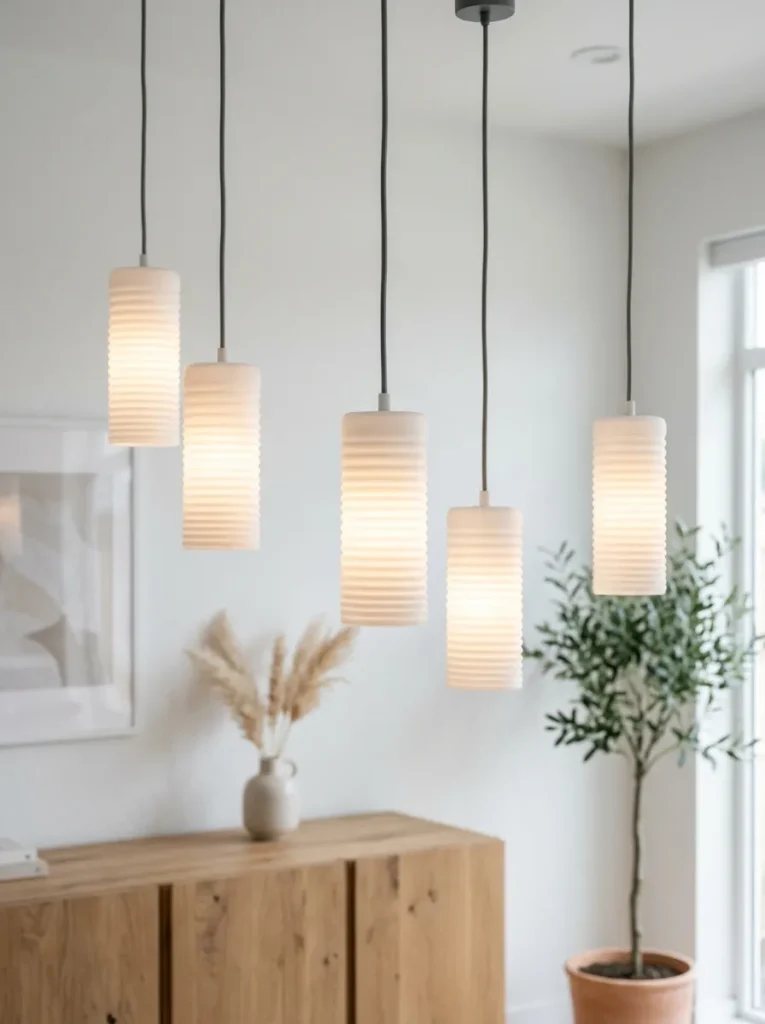
Creating three-dimensional linear ridges across translucent containers offers a modern industrial look that refracts light in interesting ways. By wrapping thin rubber bands, cordage, or structural adhesive lines horizontally around the plastic bottle before applying a frosted matte topcoat, you create contrasting raised ridges and smooth valleys across the surface. When illuminated, the varying thickness of the materials creates subtle highlights and shadows along the sides of each light globe. This minimalist design appeals to enthusiasts of modern architectural lines and subtle geometric textures.
Setup Method
Clean your pill bottles thoroughly and dry them completely. Wrap three to five small rubber bands or thin cord segments tightly around the body of each bottle, spacing them evenly to form raised horizontal rings. Apply two generous coats of frosted white or translucent matte spray paint over the entire exterior of the bottle, including the wrapped bands, allowing proper drying time between applications. Once dry, the texture will exhibit raised, soft-touch ribs along the light-diffusing cylinder. Drill a mounting hole through each bottle cap, thread your LED fairy light bulbs into place, and fix them securely with low-heat adhesive. Screw the textured bottles into place along the strand, completing a modern, structural lighting accent for your living space.
Common Beginner Mistakes and How to Avoid Them
When crafting pill bottle light garlands, several common technical errors can impact the durability, visual quality, and safety of the final project. A frequent mistake is using high-heat light sources, such as traditional incandescent bulb strands, which generate excessive heat capable of melting plastic containers and creating safety hazards; always select cool-operating, low-voltage LED fairy lights. Another common issue is inadequate label removal, which leaves sticky adhesive patches that collect dust and ruin paint applications. Eliminate residue completely using isopropyl alcohol or dedicated adhesive removers before painting. Additionally, failing to sand smooth plastic surfaces prior to applying paint or glue often leads to peeling coats later; always lightly scuff plastic surfaces with fine-grit sandpaper to create a strong mechanical bond. Finally, drilling cap holes that are too large will cause bulbs to slip out of position. Measure your light sockets carefully and drill small, precise holes, securing every connection with low-temperature hot glue to maintain proper alignment across your entire garland.
Practical Tips for Better Results
Achieving professional, long-lasting results with handmade light strands requires attention to small construction details and proper tool handling. When drilling holes through flexible plastic caps, support the cap on a scrap block of wood and use low drill speeds to prevent the plastic from cracking or tearing. If paint coverage appears uneven, apply multiple paper-thin coats rather than one heavy layer, allowing full drying time between applications to avoid drips and soft spots. Using low-temperature hot glue instead of high-heat adhesive protects both the thin plastic wiring of the LED lights and the containers from heat distortion during assembly. For enhanced portability and convenient placement anywhere in your home, choose battery-powered LED fairy light strands equipped with built-in timers, allowing your decor to illuminate automatically each evening without requiring access to wall outlets. Storing completed garlands by wrapping them loosely around a piece of flat cardboard prevents cord tangling and protects the decorated containers from crushing during off-season storage.
Styling, Presentation, and Organization Ideas
Presenting your completed light garland effectively elevates it from a simple DIY project into an eye-catching design accent within your home decor layout. Draping the strand along a wooden wall shelf, woven basket edge, or bedroom headboard creates a soft, layered ambient light source that enhances surrounding textures. For a structured, modern presentation, mount small clear adhesive hooks in a clean geometric line across a wall, hanging the garland tautly to emphasize its clean symmetry. Alternatively, coiled light strands can be arranged inside large clear glass vases or shallow decorative wooden bowls to serve as illuminated table centerpieces for evening gatherings. When pairing your handmade lighting with existing home accessories, choose locations where the soft, diffused light can reflect off nearby light-colored walls, mirrors, or glass surfaces, maximizing the warm ambient glow throughout your living area.
Budget and Time Planning
Planning both your time and expenses ensures a smooth, enjoyable crafting experience without unnecessary delays or excess costs. This upcycling project is exceptionally budget-friendly, as the primary material consists of household waste containers that would otherwise be discarded. The primary financial investment involves purchasing a quality LED fairy light strand and basic finishing supplies such as acrylic paint, jute twine, or decoupage glue. Total material costs typically remain low, making it an accessible option for budget-conscious home decorators.
| Project Stage | Estimated Time | Key Tasks |
|---|---|---|
| Preparation & Cleaning | 30 – 45 Minutes | Label removal, adhesive cleaning, surface sanding |
| Surface Treatment & Decoration | 1 – 2 Hours | Painting, wrapping, decoupaging, drying time |
| Cap Drilling & Light Assembly | 45 – 60 Minutes | Drilling holes, inserting bulbs, hot glue securing |
| Final Assembly & Mounting | 15 – 30 Minutes | Attaching bottle bases, strand testing, hanging |
By breaking the project into manageable phases, you can easily complete a custom garland over a single weekend.
Creative Expansion and Advanced Inspiration
Once you master the basic construction techniques of pill bottle garland assembly, numerous options exist for expanding the concept into larger, more complex decorative installations. You can mix bottle sizes—combining tall supplement bottles with small prescription containers—to create a dynamic visual rhythm along extended strands. Integrating secondary craft elements, such as wooden beads, macramé knots, or artificial greenery strands between each bottle, adds visual interest and hides open cord lengths. For advanced crafters, connecting smart LED light strands allows you to change light colors and flashing patterns via smartphone apps, instantly altering the mood of your translucent containers. You can also create themed holiday displays by switching color treatments seasonally, demonstrating how versatile upcycled materials can be when paired with creative lighting designs.