10 Short Layered Bob Thick Hair Round Faces Pixie Cuts Ideas
Finding the perfect short haircut when you have a combination of thick hair density and a round facial structure can feel like a balancing act. Thick hair provides enviable natural volume, but without proper shaping, it can quickly expand into a wide, boxy, or “mushroom” shape. Meanwhile, round face shapes feature soft, symmetrical contours—where facial width and length are roughly equal—meaning the goal of any flattering haircut is to create vertical height, lengthen the neck profile, and carve out slimming angles.
Enter the layered short haircut.
Whether engineered as a sharp, structured pixie or a face-framing layered bob, strategic short cuts are a secret weapon for thick hair and round faces. Rather than adding unwanted bulk, skilled interior layering, weight removal, and angled perimeters work together to streamline density while sculpting slender vertical lines around the cheeks and jawline.
This comprehensive guide explores 10 tailored short layered bob and pixie cut variations engineered specifically for thick hair and round facial structures, complete with expert cutting techniques, daily styling protocols, product guides, and long-term maintenance secrets.
Why Short Layered Cuts Flatter Thick Hair & Round Faces
Combining thick hair with a round face requires a double-action cutting approach: internal weight removal to prevent lateral bulk, and vertical framing to elongate facial proportions.
          [ The Strategic Cut Advantage ]
                        │
       ┌────────────────┼────────────────┐
       ▼                ▼                ▼
[ Interior Weight  ] [ Crown Lift for  ] [ Angled Side   ]
[ Removal          ] [ Vertical Height ] [ Slimming      ]
1. Interior Weight Removal vs. Outer Perimeter
Thick hair naturally expands horizontally when cut short. By carving out internal channel layers, slide-cutting, or point-cutting deep inside the haircut, a stylist removes interior density without making the bottom perimeter look thin or frayed. The hair lies flatter along the sides of the face where width is unwanted.
2. Strategic Crown Height Elongates Round Shapes
By concentrating shorter, piecey layers across the crown and top section, gravity works in your favor. Lightened top layers spring upward, creating vertical height that visually pulls the eye upward. This elongates a round face, creating the optical illusion of an oval silhouette.
3. Diagonal & Asymmetrical Framing Lines
Blunt horizontal lines (like straight-across fringe or chin-length blunt bobs) cut across round faces, emphasizing width. In contrast, diagonal side-swept bangs, asymmetrical front points, and face-framing curtain layers cut across cheek curves diagonally, creating slimming angles and highlighting cheekbones.
Hair Density, Face Shape & Consultation Matrix
Understanding how key cut features interact with your specific hair texture ensures you choose the ideal style during your salon consultation.
| Hair Texture & Pattern | Primary Styling Goal | Best Short Layered Cut | Key Cutting Feature |
| Straight & Ultra-Thick | Eliminate boxiness & stiff ends | Asymmetrical Angled Layered Bob | Deep interior slide-cutting & sharp forward slant |
| Coarse / Dense Straight | Prevent helmet shape; add height | Choppy Crown Pixie with Tapered Nape | Clipper-tapered nape with deep point-cut crown |
| Wavy & Thick | Control frizzy lateral expansion | Layered Pixie-Bob (Bixie) with Curtain Bangs | Long interior sliding layers to carve curl waves |
| Curly & Dense | Channel volume upward, not outward | Sculpted Tapered Curly Pixie | Dry-cut slicing to stack curls vertically |
10 Detailed Short Layered Bobs & Pixie Cuts
1. The Volumized Asymmetrical Layered Bob
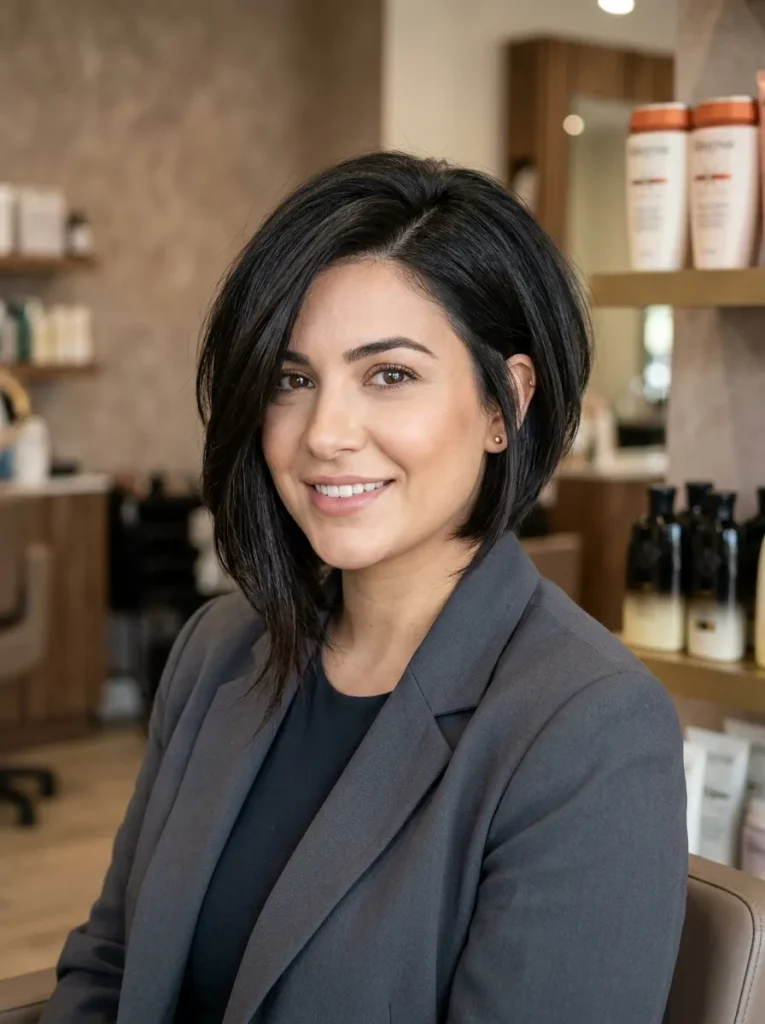
A high-fashion, architectural bob featuring a short, weight-controlled back that slopes forward into a dramatic, cheekbone-grazing point on one side.
       /  |   \   <-- Slanted Crown Volume
      (  / \   )  <-- Long Angled Front Point (Slimming Side)
       \_____/    <-- Tucked Shorter Side
Concept Overview & Aesthetic Appeal
Asymmetry is a top choice for round face shapes. By shifting hair weight to one side and creating a sharp diagonal perimeter line, this cut breaks up facial symmetry, drawing the eye down and elongating the chin and neck line.
Step-by-Step Styling Execution Guide
- Prep: Apply a heat-protectant smoothing cream through towel-dried hair.
- Blow-Dry Direction: Wrap-dry the hair using a flat paddle brush, sweeping the longer front layers across the forehead and down the cheek.
- Flat Iron Polish: Pass a flat iron through 1-inch sections of the longer side, curving the tip slightly inward toward the chin.
- Finish: Keep the shorter side tucked neatly behind the ear with a touch of light styling wax to emphasize the diagonal drop.
Pro Styling Tips
- Keep the side part deep, directly above the arch of one eye, to maximize the volume roll across the crown.
Common Mistakes to Avoid
- Blunt Ends on Long Side: Keeping the long asymmetrical point blunt adds bulk next to the jawline. Ensure the tips are sliced or point-cut for a soft drape.
2. The Choppy Crown Pixie with Tapered Nape
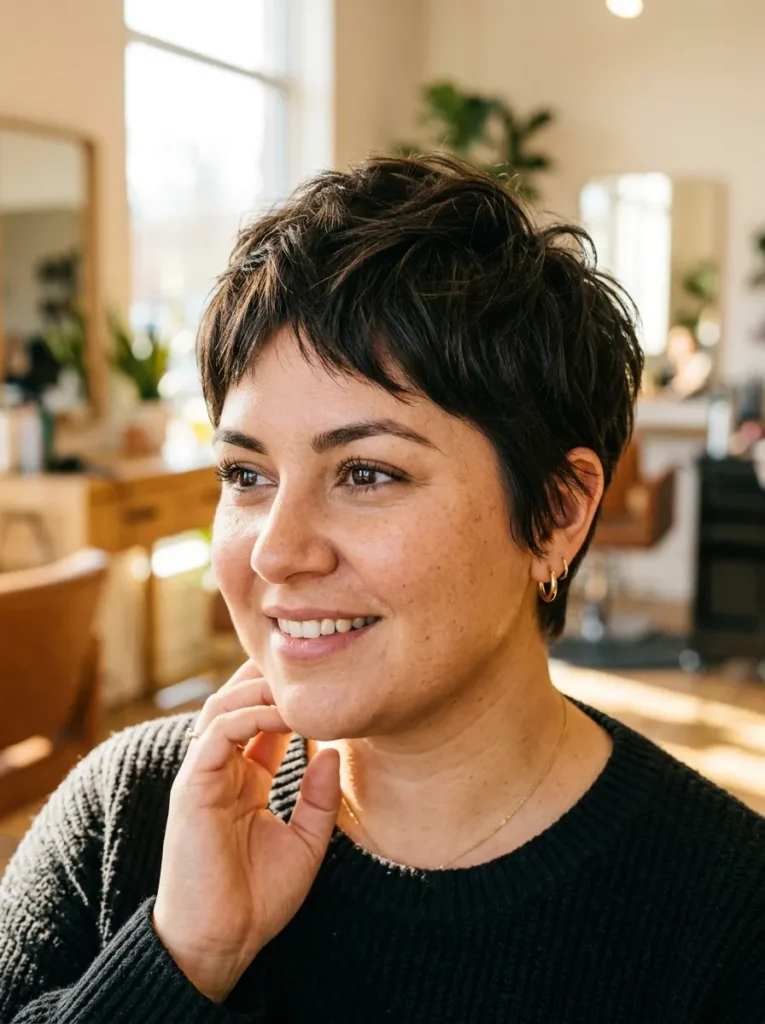
An energetic crop featuring short, vertical point-cut layers concentrated across the crown, paired with a flat, closely tapered neck perimeter.
Concept Overview & Aesthetic Appeal
This cut targets two goals at once: the closely cropped nape and sides eliminate thick hair bulk around the neck, while choppy vertical layers at the crown add vertical height to balance round cheeks.
Step-by-Step Styling Execution Guide
- Prep: Spray a lightweight volumizing root-lift tonic onto damp roots.
- Blow-Dry Direction: Power-dry using your fingers, pulling crown root sections straight upward while directing warm air at the base.
- Texture Application: Emulsify a dime-sized amount of matte fiber paste between your palms until warm.
- Detailing: Rake fingertips through top layers, pinching individual ends upward to define piecey spikes.
Pro Styling Tips
- Dust a tiny pinch of silica root powder onto crown roots for instant, re-workable height that lasts all day.
Common Mistakes to Avoid
- Bulky Nape Stacking: Leaving the nape section too thick causes the lower head to look wide. Keep the nape closely tapered against the neck.
3. The Soft Layered Pixie-Bob (The “Bixie”) with Curtain Bangs
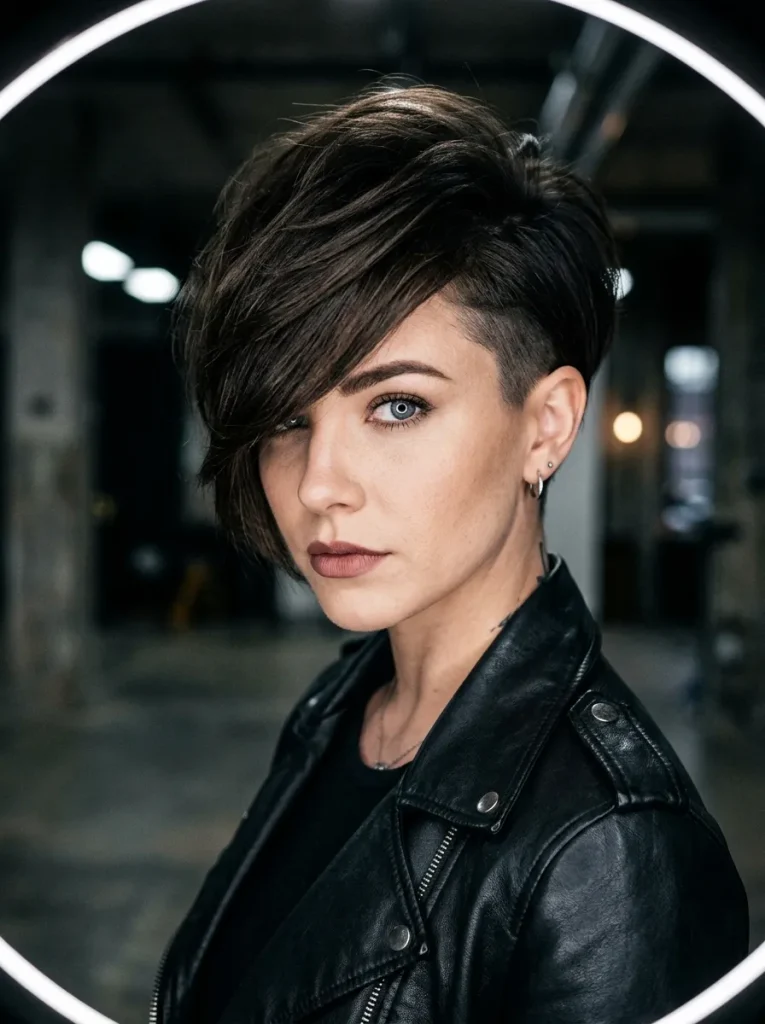
A hybrid cut combining the face-framing versatility of a short bob with the weightless crown lift of a pixie, enhanced by center-parted curtain bangs.
         .---.
        /  .  \   <-- Soft Layered Crown Height
       (  / \  )  <-- Curtain Bangs Sweeping Outward
        '---'     <-- Tapered Perimeter
Concept Overview & Aesthetic Appeal
If you prefer a softer look without committing to an ultra-short crop, the Bixie is ideal. Center-parted curtain bangs open up the middle of the forehead, creating a vertical diamond frame that slims round cheekbones.
Step-by-Step Styling Execution Guide
- Prep: Apply a thermal-protectant thickening spray to towel-dried hair.
- Style Curtain Bangs: Blow-dry curtain bangs holding a small round brush vertically, rolling outward away from the center of the face.
- Crown Blow-Dry: Lift top layers upward with a medium ceramic round brush to build internal body.
- Finish: Mist with a flexible-hold texturizing hairspray to lock in movement.
Pro Styling Tips
- Tuck side sections behind the ears to highlight your jawline and allow the curtain bangs to act as the primary face frame.
Common Mistakes to Avoid
- Flat Curtain Fringe: Pressing curtain bangs flat against the forehead widens the upper face. Always curve them outward at the temples.
4. The Disconnected Undercut Pixie with Long Sweeping Fringe

An edgy, high-contrast cut featuring a closely buzzed or clipper-tapered undercut around the ears and nape, topped with long, heavily layered crown sections.
Concept Overview & Aesthetic Appeal
The ultimate weight-removal technique for extreme hair density! Shaving or close-cropping the lower half of the head eliminates 50% of hair bulk while leaving sweeping top layers to style forward and diagonally across round faces.
Step-by-Step Styling Execution Guide
- Prep: Apply a heat protectant and smoothing lotion to the long top sections.
- Blow-Dry Direction: Blow-dry the long top layers diagonally across the face using a paddle brush.
- Smooth Top Ends: Pass a flat iron quickly through the top ends to create a sleek, sweeping curtain of hair.
- Finish: Keep the exposed undercut sides neat with a drop of hair oil or edge control.
Pro Styling Tips
- The contrast between the dark, close-cropped sides and the voluminous top instantly narrow the visual width of the head.
Common Mistakes to Avoid
- Placing Undercut Line Too High: Shaving too far above the parietal ridge deprives top layers of structural support, causing them to fall flat.
5. The Textured Shag Pixie with Side-Swept Bangs

A rock-and-roll inspired crop featuring heavily razored, piecey layers throughout the crown, paired with long, feathered side-swept bangs.
Concept Overview & Aesthetic Appeal
Razor-cut shag layers break up heavy hair weight while creating an undone, lived-in texture. The long side-swept fringe cuts diagonally across the forehead, breaking up round facial symmetry.
Step-by-Step Styling Execution Guide
- Prep: Apply sea salt spray or texturizing mousse to damp hair.
- Scrunch & Diffuse: Gently scrunch hair upward with fingers, then dry using a diffuser on low airflow to encourage natural body.
- Sweep Fringe: Blow-dry the side bangs diagonally across the brow using a flat paddle brush.
- Finish: Work a small amount of dry matte paste into ends to accentuate choppy tips.
Pro Styling Tips
- Ideal for thick hair with natural wave, as razored layers allow wave patterns to bend without expanding laterally.
Common Mistakes to Avoid
- Razoring Coarse Frizzy Hair: If your thick hair is extremely coarse or prone to severe frizz, stick to point-cutting with sharp shears instead of a razor blade to avoid frayed ends.
6. The Angled Layered Bob with Long Face-Framing Layers
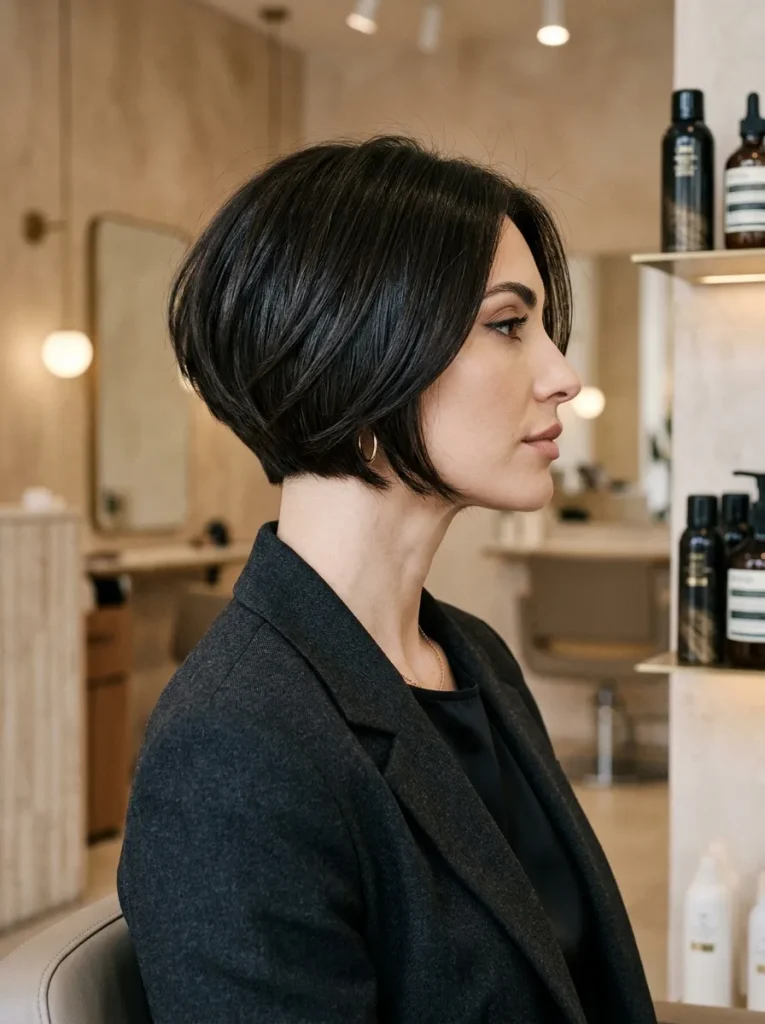
A chin-length bob cut shorter in the back and sloping down into long, sliced front layers that frame the cheeks and neck.
          /\  /\     <-- Stacked Back Height
         /  \/  \
        (________)   <-- Sloping Perimeter
         \      /    <-- Long Sliced Front Points
Concept Overview & Aesthetic Appeal
A classic slimming silhouette. The forward-sloping perimeter draws focus away from cheek fullness and directs attention down toward the collarbones, creating an elongated neck profile.
Step-by-Step Styling Execution Guide
- Prep: Work a smoothing blow-dry cream through mid-lengths and ends.
- Blow-Dry: Blow-dry using a medium ceramic round brush, turning the front ends slightly inward toward the chin while lifting the back roots.
- Flat Iron Polish: Run a flat iron down the front panels for a smooth, curtain-like drape.
- Finish: Mist with a lightweight gloss spray for a sleek finish.
Pro Styling Tips
- Ensure interior layers are slide-cut along the front panels so the hair hugs the cheekbones closely rather than flaring outward.
Common Mistakes to Avoid
- Cutting Baseline Too Short: Ending the front length directly at the widest part of the cheeks emphasizes facial roundness. Keep front points grazing the jaw or chin.
7. The Sculpted Tapered Pixie for Thick Curly Hair

A tailored cut designed specifically for dense curls, featuring tight, neat sides and a sculpted crown of bouncy, defined curl clusters.
       (  ~  ~  )  <-- Bouncy Layered Curls at Crown
      (  ~  ~  ~ )
       (________)  <-- Tapered, Defined Lower Perimeter
Concept Overview & Aesthetic Appeal
This style controls natural curl density while elongating the face shape. By tapering the sides close to the head, thick curls are channeled upward, adding flattering vertical height.
Step-by-Step Styling Execution Guide
- Prep: Apply a hydrating curl cream or leave-in conditioner to soaking-wet hair.
- Define Curls: Finger-coil small curl sections at the crown to encourage uniform curl clusters.
- Diffuse: Cup curls gently into a diffuser attachment and dry on low heat until 85% dry, then air-dry the rest.
- Finish: Scrunch a drop of lightweight hair oil into curls to break any gel cast and add shine.
Pro Styling Tips
- Always request a dry-cutting technique for thick curly hair so your stylist can carve layers where each curl naturally rests.
Common Mistakes to Avoid
- Combing Curls Dry: Never brush or comb dry curly pixies, as this disrupts curl definition and expands the haircut into an uncontrolled cloud shape.
8. The French-Inspired Pixie with Wispy Micro-Bangs
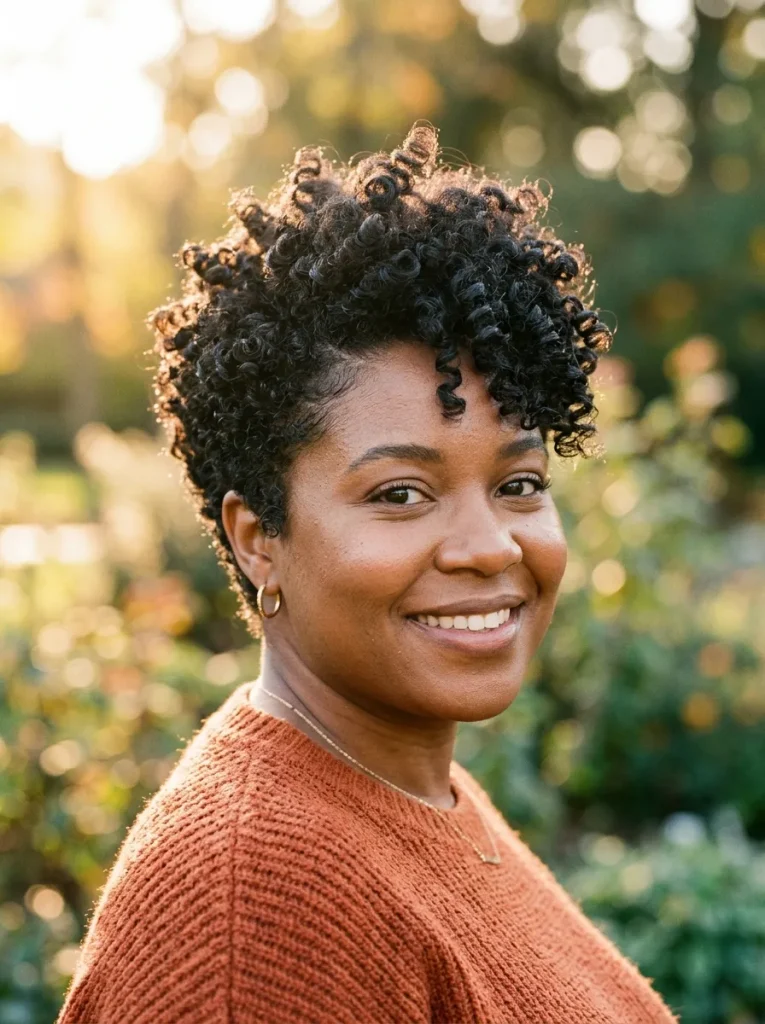
A chic, Parisian-inspired crop featuring soft surface layers throughout the crown, paired with delicate, wispy micro-fringe resting above the eyebrows.
Concept Overview & Aesthetic Appeal
Micro-bangs open up the upper face, drawing focus up toward the eyes and eyebrows. Paired with textured crown layers and soft sides, this cut offers a stylish, face-elongating silhouette.
Step-by-Step Styling Execution Guide
- Prep: Apply a light texturizing foam to damp hair.
- Finger-Dry: Power-dry using fingers, pushing hair side-to-side across the forehead for a natural fall.
- Detail Micro-Bangs: Use a mini flat iron to give micro-bangs a subtle inward curve.
- Finish: Dab a tiny bit of matte paste onto fringe tips to separate wispy ends.
Pro Styling Tips
- Keep eyebrows well-groomed, as micro-bangs draw direct attention to your brow line and eyes.
Common Mistakes to Avoid
- Heavy, Blunt Micro-Bangs: Cutting micro-bangs too thick creates a heavy horizontal line across the forehead, widening the face. Keep fringe light and wispy.
9. The Spiky Volumized Crop with Tapered Sides

An energetic, high-contrast crop featuring short vertical point-cut layers across the crown styled upward into touchable spikes, grounded by tapered sides.
         /\ /\ /\   <-- Upward Spiked Crown Layers
        |  |  |  |
        (________)  <-- Tapered Side Panels
Concept Overview & Aesthetic Appeal
Thick hair holds vertical structure better than any other hair type! This fun style uses dense natural hair structure to maintain upward spikes, maximizing vertical elongation for round faces.
Step-by-Step Styling Execution Guide
- Prep: Apply a firm-hold volumizing liquid texturizer to damp roots.
- Blow-Dry Upward: Blow-dry while pulling crown layers straight up with your fingers, directing warm air at the root base.
- Apply Product: Rub a nickel-sized amount of firm-hold matte clay between palms.
- Pinch Spikes: Gently pinch small clusters of crown hair upward and slightly forward, defining piecey vertical height.
Pro Styling Tips
- Keep the sides pressed flat so the eye is drawn exclusively to the vertical height on top.
Common Mistakes to Avoid
- Using Heavy Waxes: Oily waxes weigh down vertical spikes on thick hair, causing them to collapse after an hour. Use lightweight clays or fiber pastes.
10. The Deep Side-Parted Sleek Layered Bob
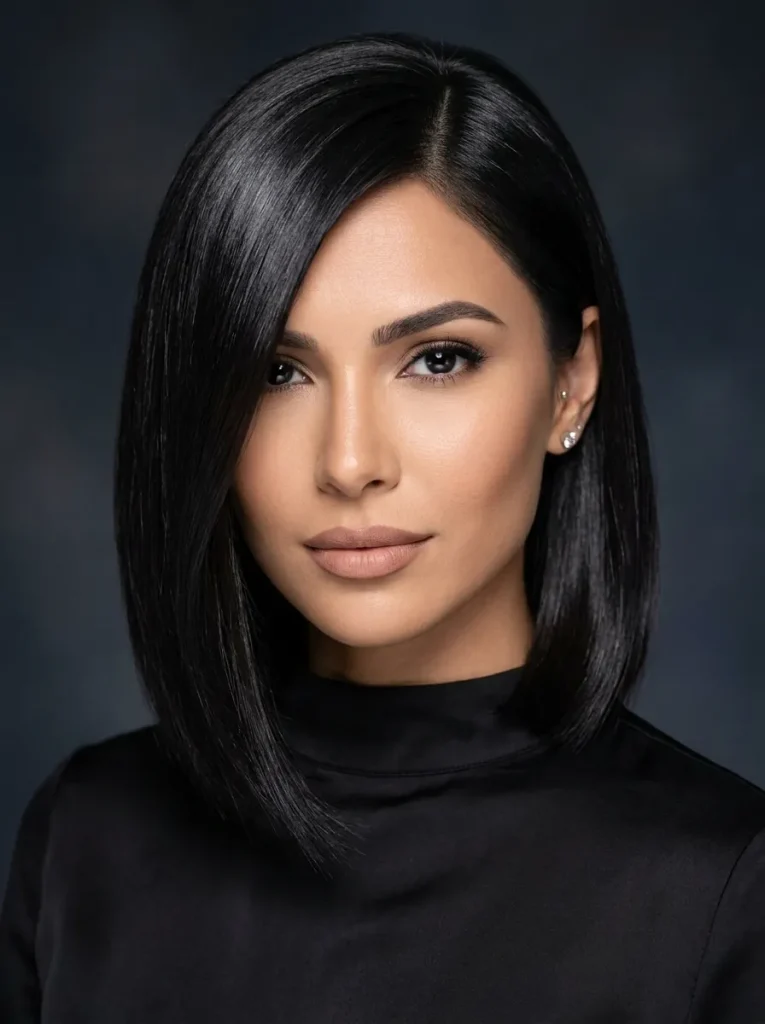
A refined, high-shine bob where thick hair layers are debulked internally and smoothed flat, anchored by a deep diagonal side part.
Concept Overview & Aesthetic Appeal
Proof that sleek bobs work on thick hair and round faces when debulked correctly! The deep side part creates an asymmetrical veil across one cheek, narrowing facial width while displaying a polished, glossy finish.
Step-by-Step Styling Execution Guide
- Prep: Apply a straightening heat-protectant serum from roots to ends.
- Precision Part: Use a fine-tooth comb to establish a deep side part aligned with the outer arch of your eyebrow.
- Wrap-Dry: Blow-dry using a paddle brush, sweeping hair flat around the curve of the head shape to flatten bulk.
- Finish: Pass a flat iron through 1-inch sections and mist with a high-shine pomade spray.
Pro Styling Tips
- Tuck the side with less hair tightly behind the ear to create a crisp, vertical jawline frame.
Common Mistakes to Avoid
- Skipping Interior Debulking: Attempting this style without internal weight removal will cause the bob to flare out into a triangular shape at the bottom.
Common Beginner Mistakes & How to Avoid Them
Avoiding these common styling pitfalls ensures your short cut stays sleek, structured, and flattering every day:
    [ Styling Pitfalls to Avoid ]
                  │
  ┌───────────────┼───────────────┐
  ▼               ▼               ▼
[ Overuse of      ] [ Center Parts  ] [ Heavy Product ]
[ Thinning Shears ] [ Without Layer ] [ Overload at Roots]
1. Overusing Thinning Shears at the Crown
- The Problem: Indiscriminate thinning shear use cuts short hairs deep near the scalp. On thick or coarse hair, these stubby hairs act like mini-springs, pushing outer layers OUTWARD and creating unwanted lateral bulk!
- The Solution: Request point-cutting, channeling, or slide-cutting with sharp standard shears to carve out weight cleanly.
2. Wearing Flat Center Parts Without Height
- The Problem: A flat center part on a chin-length bob allows thick hair to fall equally on both sides, creating a round, wide frame around a round face.
- The Solution: Opt for deep side parts, curtain bangs, or asymmetrical sweeps that break up facial symmetry and add diagonal lines.
3. Product Overload at the Roots
- The Problem: Applying heavy waxes, oils, or butter pomades directly onto roots makes thick hair look greasy and flat on top while remaining puffy at the ends.
- The Solution: Always emulsify product thoroughly between your palms first. Apply starting at the back and mid-lengths, working forward to the tips, using only leftover residue on roots.
Pro Maintenance, Styling Tools & Product Selection
Equip yourself with the right toolkit to maintain your short layered cut effortlessly:
Essential Toolkit for Short Layered Thick Hair
| Tool / Product | Ideal Specification | Primary Function |
| Matte Clay / Fiber Paste | Firm hold, zero-shine finish | Defining piecey crown layers without adding oil |
| Mini Flat Iron (1/2 Inch) | Narrow ceramic or titanium plates | Precision styling for short bangs, nape, and front points |
| Paddle / Skeleton Vent Brush | Vent openings for rapid airflow | Wrap-drying short hair flat against head shape |
| Silica Root Powder | Weightless volumizing dust | Instant crown root lift and grit for thick hair |
| Lightweight Leave-In Spray | Water-based hydrating mist | Keeping thick ends soft without weighing hair down |
Styling, Accessories & Face-Framing Pairings
A short layered cut opens up your neck, jawline, and facial structure! Enhance your silhouette with these fashion pairings:
- Long Drop & Dangle Earrings: Vertical drop earrings complement short cuts on round faces, creating an elongating visual line down to the shoulders.
- Angular & Geometric Eyewear: Pair soft round face contours with structured, angular, or cat-eye glasses frames to add striking contrast.
- V-Neck & Off-the-Shoulder Tops: Open necklines lengthen the neck profile, enhancing the slimming effect of short bobs and pixies.
Budgeting & Time Planning
While short architectural haircuts require routine maintenance trims, they drastically cut down daily morning styling time and product usage.
| Style Variation | Daily Styling Time | Salon Trim Frequency | Primary Product Investment |
| Volumized Asymmetrical Bob | 5 – 8 mins | Every 5 – 6 weeks | Heat protectant, mini flat iron |
| Choppy Crown Pixie | 3 – 5 mins | Every 4 – 5 weeks | Matte texturizing clay |
| Disconnected Undercut Pixie | 5 – 7 mins | Every 3 – 4 weeks (nape touch-up) | Volumizing root powder |
| Sculpted Curly Pixie | 5 mins (diffuse/air-dry) | Every 5 – 6 weeks | Hydrating curl cream |
Frequently Asked Questions (FAQs)
Will a short pixie cut make my round face look rounder?
Not if it is cut with vertical height and tapered sides! A pixie cut that is closely tapered around the ears and nape while building piecey volume at the crown actually slims and elongates a round face by pulling visual focus upward and exposing the neck.
How often do I need to get a thick short haircut trimmed?
To keep interior weight channels clear and prevent hair from swelling around the nape, schedule a maintenance trim every 4 to 6 weeks. Many salons offer quick “nape-and-side touch-up” appointments between full haircuts.
Can I rock a short bob with thick wavy hair without it looking poofy?
Yes! The key is interior weight removal through slide-cutting or channeling. By removing weight from underneath while leaving longer surface layers to drape smoothly, your waves will form defined, touchable patterns without expanding laterally into a mushroom shape.
What should I tell my stylist during my consultation?
Ask for interior debulking through point-cutting or slide-cutting (avoiding heavy thinning shears at the crown). Specify that you want vertical crown height and diagonal or face-elongating perimeter lines to complement your round face shape. Showing clear reference photos is always the best way to ensure complete alignment!