
10 Light Pole Ideas Outdoors
Transforming an open backyard, patio, or garden into a warm, illuminated retreat requires strategic vertical elements that support elevated outdoor lighting. Outdoor light poles serve as essential structural anchors that allow homeowners to suspend overhead string lights, position solar lanterns, or frame gathering zones without requiring existing trees or roof eaves. On popular visual discovery platforms, vertical outdoor lighting projects represent a top trend for elevating evening curb appeal and extending outdoor living usability long after sunset. Readers exploring this guide will learn practical methods for constructing, anchoring, and styling free-standing and permanently installed light poles. This comprehensive article covers structural considerations, material selection, weight distribution, and weatherproofing strategies to ensure every installation remains safe, upright, and visually appealing throughout changing seasons. Understanding these core principles allows homeowners to customize their yards with creative ideas that align with modern design preferences and budget constraints. By integrating sturdy physical supports into open outdoor spaces, individuals can establish clear functional zones for outdoor dining, fire pit relaxation, and casual evening entertainment. Master these proven structural concepts to create a long-lasting, aesthetic lighting setup that brings professional-grade warmth and atmosphere to any residential property.
Why Vertical Outdoor Illumination Represents a Trending Living Upgrade
The growing popularity of free-standing light pole installations across visual design boards stems from their exceptional versatility, high practical value, and accessible DIY appeal. In modern exterior decoration, open spaces like lawns, stone patios, and wood decks often lack elevated attachment points needed to hang overhead string lights. Vertical poles solve this fundamental design challenge by creating custom anchor points exactly where illumination is needed most. These projects appeal to beginners because they require straightforward building techniques and accessible hardware store materials. Homeowners can complete an installation over a single weekend using basic tools, avoiding expensive contractor fees while tailoring the aesthetic to match their home decor. From a practical standpoint, elevating lights above eye level eliminates low-hanging glare, keeps walking pathways clear, and casts a soft, even glow across entire seating areas. Additionally, mobile and planter-based pole options offer flexible solutions for renters who require non-permanent outdoor additions. By combining minimalist style framing with warm glowing light strands, these vertical projects instantly upgrade open outdoor zones into cozy, functional living extensions.
Essential Sourcing, Hardware Selection, and Site Preparation
Executing a stable outdoor light pole installation requires thorough site evaluation and systematic material preparation before beginning physical construction. Homeowners must first measure the total span between proposed pole locations to determine light strand lengths, cable tension, and required post heights. To ensure adequate head clearance under sagging light strands, vertical supports should extend at least eight to ten feet above ground level. Common building materials include pressure-treated timber posts, cedar timbers, galvanized electrical conduit, black iron piping, heavy-duty planter pots, and quick-setting concrete mix. Essential assembly tools include post-hole diggers, hand levels, power drills, eye hooks, tape measures, and safety gear. Site planning must account for wind loads, soil density, and nearby power sources to prevent tipping or electrical hazards. For planter-based builds, placing inner buckets inside decorative pots allows excess rainwater to drain without oversaturating the concrete base. Proper pre-construction preparation prevents leaning posts, structural sagging, and premature wood rot, guaranteeing that the completed handmade supports withstand outdoor weather conditions over time.
10 Outdoor Light Pole Ideas
Idea 1: The Concrete-Anchored Planter Box Light Pole
Step-by-Step Guide
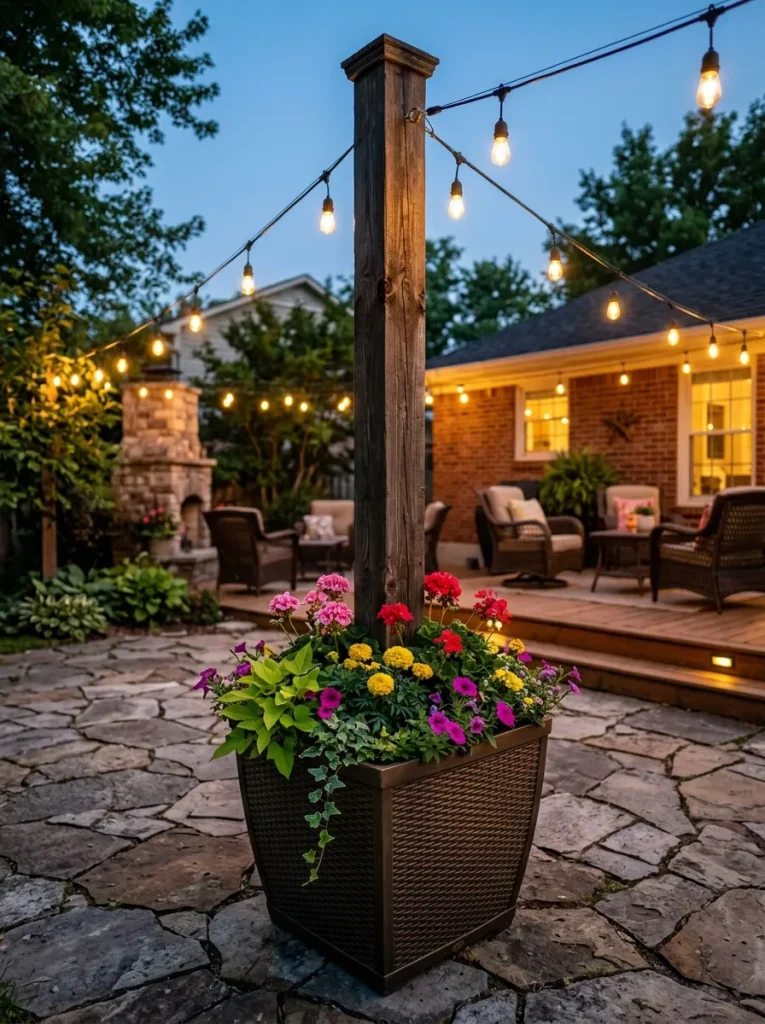
The concrete-anchored planter box light pole integrates heavy structural support into a decorative floral container, making it ideal for stone patios and rental yards where ground digging is not permitted. This setup uses a central vertical post secured firmly inside a base container filled with quick-setting concrete. The top portion of the planter above the concrete matrix is filled with potting soil, enabling homeowners to cultivate cascading flowers, lush herbs, or ornamental grasses. This dual-purpose design combines functional vertical illumination with vibrant botanical textures, effectively disguising the heavy weighted ballast. By selecting weather-resistant planters made from resin, ceramic, or thick wood barrels, the light pole becomes an attractive furniture-grade accent that anchors patio boundaries.
To execute this easy project, place a two-gallon plastic bucket directly in the center of a large decorative planter. Position an eight-foot pressure-treated four-by-four timber or heavy metal post inside the inner bucket, using a magnetic level to ensure the post remains plumb. Mix quick-setting concrete with water inside the inner bucket, pouring it around the post until the bucket is three-quarters full. Allow the concrete to cure completely for twenty-four hours while securing the post upright with temporary support clamps. Drill drainage holes through the outer planter wall just above the inner concrete line to prevent water pooling. Fill the remaining upper space with rich potting soil, plant seasonal flowers, and attach a stainless steel screw eye hook near the top of the post to support your outdoor light strands.
Idea 2: The Heavy-Duty Wooden Timber Ground-Set Light Pole
How to Create
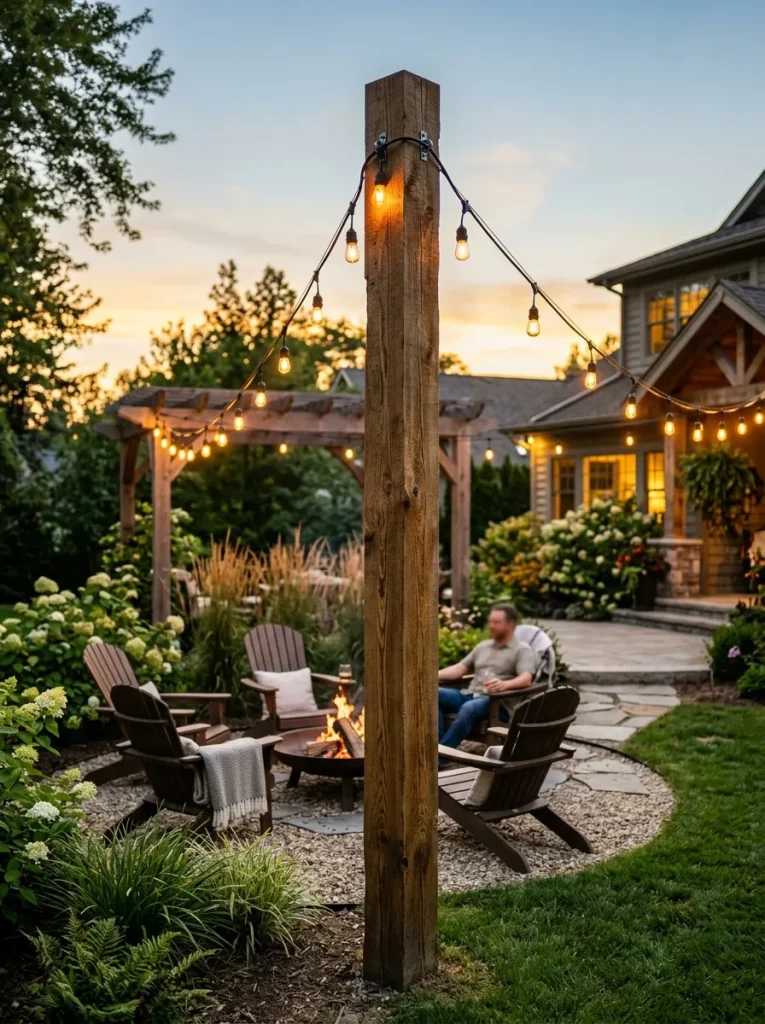
The ground-set wooden timber light pole provides maximum structural rigidity, making it the preferred option for long cable spans and heavy commercial-grade light strands. Utilizing four-by-four cedar or pressure-treated pine timbers anchored deep into native soil ensures that the poles remain rigid against strong winds and cable tension. Cedar posts offer natural rot resistance and a warm wood grain aesthetic that blends seamlessly into landscaped gardens and fire pit zones. Staining or varnishing the timber protects the surface from moisture damage and sun bleaching, maintaining its polished appearance over many years. This permanent structural approach creates clean visual sightlines across open lawns without requiring bulky ground containers.
Begin by measuring layout points around your outdoor gathering space, marking exact post locations with wooden stakes. Use a post-hole digger to excavate a hole twenty-four inches deep and eight inches wide for each ten-foot timber post. Pour two inches of crushed gravel into the bottom of the hole to facilitate water drainage under the post end. Set the timber post into the hole, using a post level to verify vertical alignment on two adjacent sides. Fill the hole around the post with fast-setting concrete mix, adding water according to manufacturer directions while holding the post steady. Once cured, backfill the top two inches with topsoil, install a heavy-duty screw hook near the top cap, and string your lights securely across the yard.
Idea 3: The Sleek Metal Electrical Conduit Pole
Execution Process
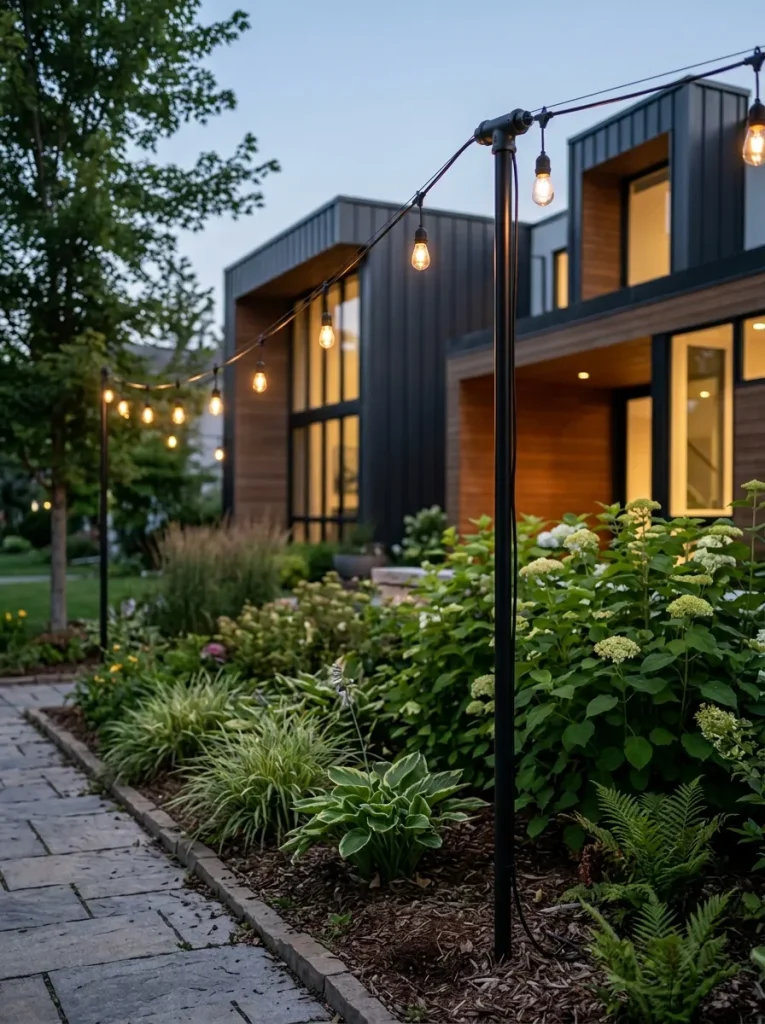
Metal electrical conduit light poles offer a sleek, industrial, and minimalist style silhouette that complements modern architectural homes. Constructed from rigid metal conduit or thin-wall EMT piping, these metal shafts resist warping, cracking, and weathering better than thin wooden stakes. The slim profile allows the poles to blend discreetly into garden borders, fence lines, and patio edges without blocking open sightlines. Applying a coat of rust-inhibiting matte black or oil-rubbed bronze spray paint transforms basic electrical conduit into a refined custom hardware fixture. Top attachments like squeeze connectors or eyelet caps hold overhead light cables firmly without slipping.
To create metal conduit light poles, purchase ten-foot lengths of three-quarter-inch galvanized electrical conduit pipe from a local hardware store. Sand the exterior metal surface lightly with fine-grit sandpaper, wiping away dust before applying two coats of exterior matte black spray paint. Attach a three-quarter-inch metal squeeze connector or eyebolt fitting to the top end of each conduit pipe to act as a secure light anchor. Drive two-foot lengths of wider PVC pipe or steel rebar into the ground where the poles will stand, leaving a short sleeve exposed at ground level. Slide the metal conduit pipe down over or inside the sleeve support, ensuring the pole stays plumb. Thread light strands through the top connectors, creating an ultra-clean lighting framework that can be dismantled easily during winter months.
Idea 4: The Freestanding Mobile Umbrella Stand Light Pole
Setup Method
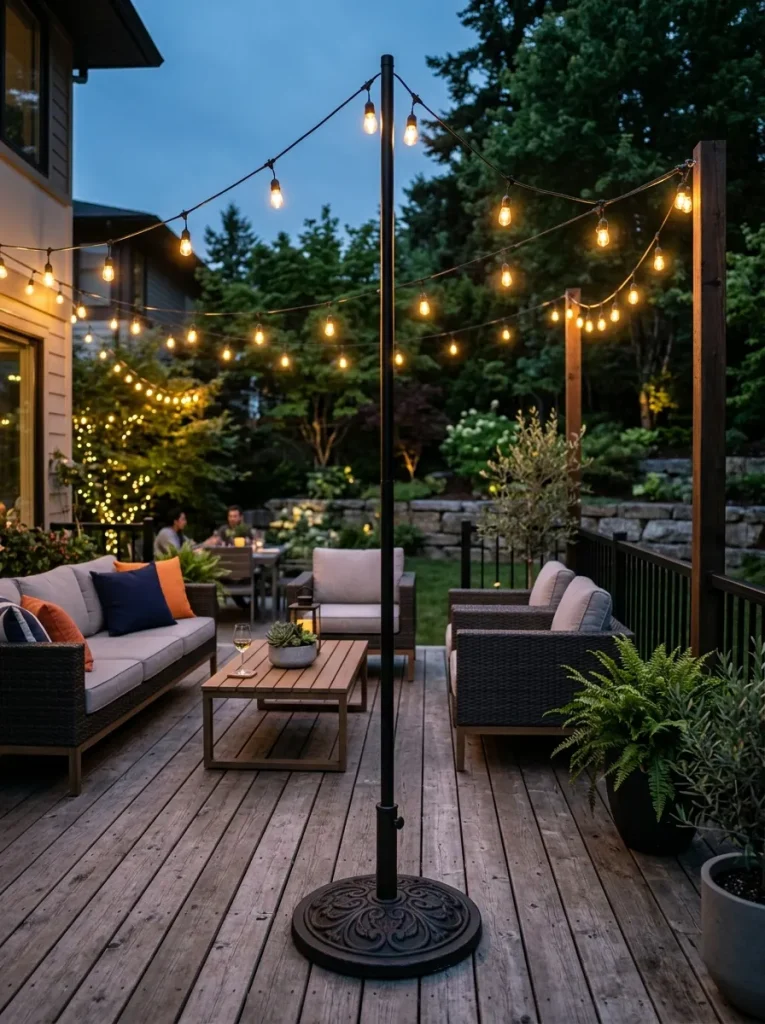
The freestanding mobile umbrella stand light pole utilizes weighted patio umbrella bases to create an entirely moveable lighting support system. This setup provides maximum flexibility for multi-use decks and patios where layout requirements change based on specific events. Heavy cast-iron or water-fillable umbrella stands provide sufficient ballast to hold slender metal or wooden poles upright without drilling holes into deck boards. The portable design allows homeowners to reposition their lighting array as needed, making it a valuable option for entertaining, outdoor dining, or seasonal rearrangement.
Select a heavy-duty umbrella base weighing at least thirty to forty pounds, ensuring the central collar features a tight locking knob mechanism. Insert an eight-foot powder-coated metal rod or smooth wooden pole into the central neck sleeve of the umbrella stand. Tighten the collar screw firmly against the vertical post to prevent wobbling or leaning under cable tension. Mount a durable open-loop screw hook or carabiner clip near the top end of the vertical pole. Position two or more weighted stands around the perimeter of your patio, connect shatterproof LED string lights between the hooks, and enjoy an adaptable overhead light grid.
Idea 5: The Ground-Sleeved Removable PVC Light Pole
How to Make
The ground-sleeved removable PVC light pole system uses hidden subterranean sleeves that allow vertical light posts to be inserted or removed in seconds. Wide PVC pipes are buried flush with the lawn surface, serving as permanent receiving sockets for removable metal or wooden light shafts. During summer months, the light poles stand firmly inside the ground sleeves to support overhead string light strands. When cold weather arrives or lawn mowing requires an unobstructed yard, the poles pull out easily, and protective caps seal the ground sockets. This clean design maintains a clutter-free lawn during off-seasons while simplifying routine yard maintenance.
Start by digging a twenty-four-inch deep hole in the lawn using a post-hole digger at each designated lighting corner. Cut a two-foot length of two-inch diameter PVC pipe, placing it vertically into the hole so the top edge sits flush with the surrounding grass line. Backfill around the PVC sleeve with quick-setting concrete or compacted gravel, checking that the sleeve remains perfectly vertical as the fill sets. Select an eight-to-ten-foot metal conduit or wooden pole that fits snugly inside the PVC opening. Slide the pole into the buried sleeve, install a top eye hook, and connect your light cords. Insert removable plastic pipe caps over the ground sleeves whenever the poles are stored away to keep dirt and lawn debris out.
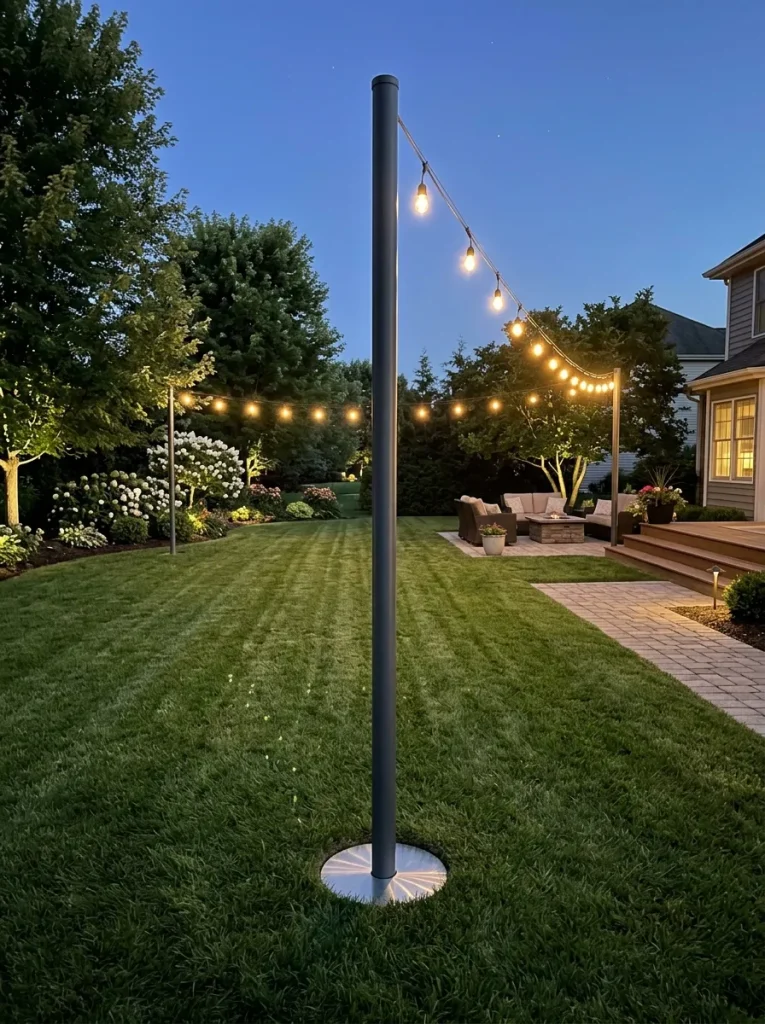
Idea 6: The Solar-Powered Top Post Cap Light Pole
Execution Process
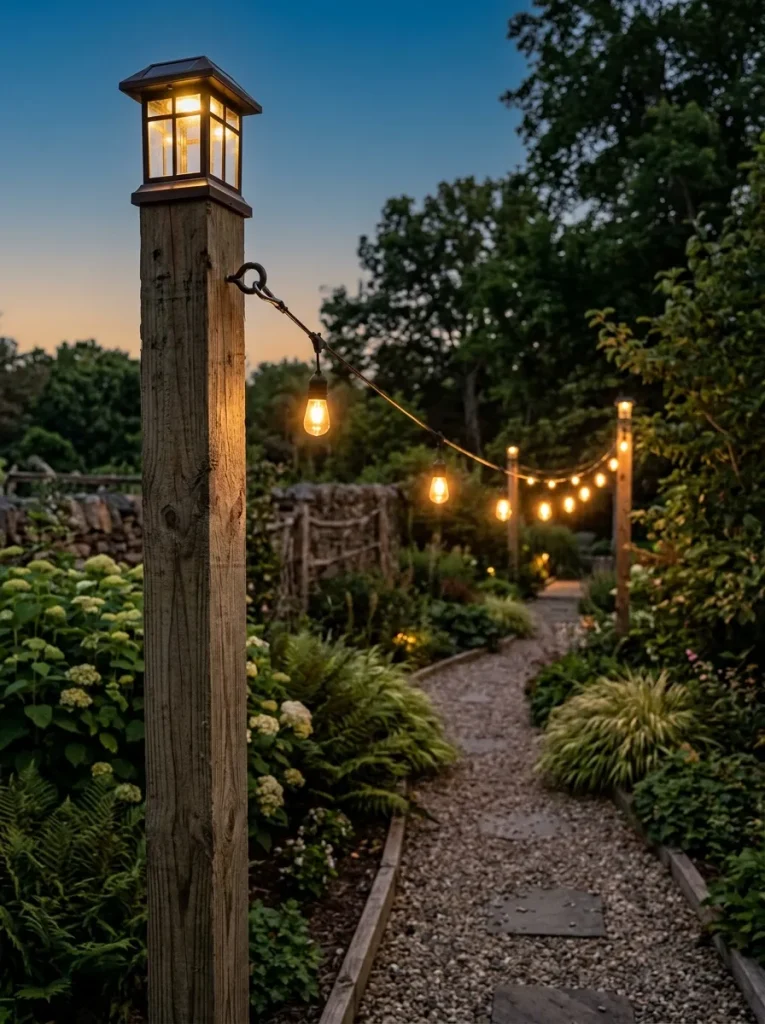
The solar-powered top post cap light pole combines elevated string light hanging points with self-sustaining off-grid cap lanterns at the top of each post. Mounting solar-powered post caps onto timber light supports illuminates the posts themselves while simultaneously holding overhead light strands. During daytime hours, integrated solar panels charge internal batteries, automatically illuminating the post caps at dusk without requiring complex electrical wiring. This dual lighting strategy provides ambient vertical perimeter lighting along with suspended overhead warmth, enhancing safety along garden pathways and property boundaries.
Begin by preparing four-by-four pressure-treated wood posts, cutting them to an eight-foot height and applying an exterior wood stain or protective varnish. Anchor the posts firmly into ground holes using concrete or set them within heavy planters. Attach a metal screw hook two inches below the top top edge of each wooden post to support overhead string light cables. Install a fitted solar post cap lantern over the top end of each timber post, securing it with side mounting screws. Position the posts where they receive unshaded daylight during afternoon hours to ensure solar collectors charge fully before nightfall.
Idea 7: The Industrial Iron Pipe and Flange Light Pole
Step-by-Step Guide
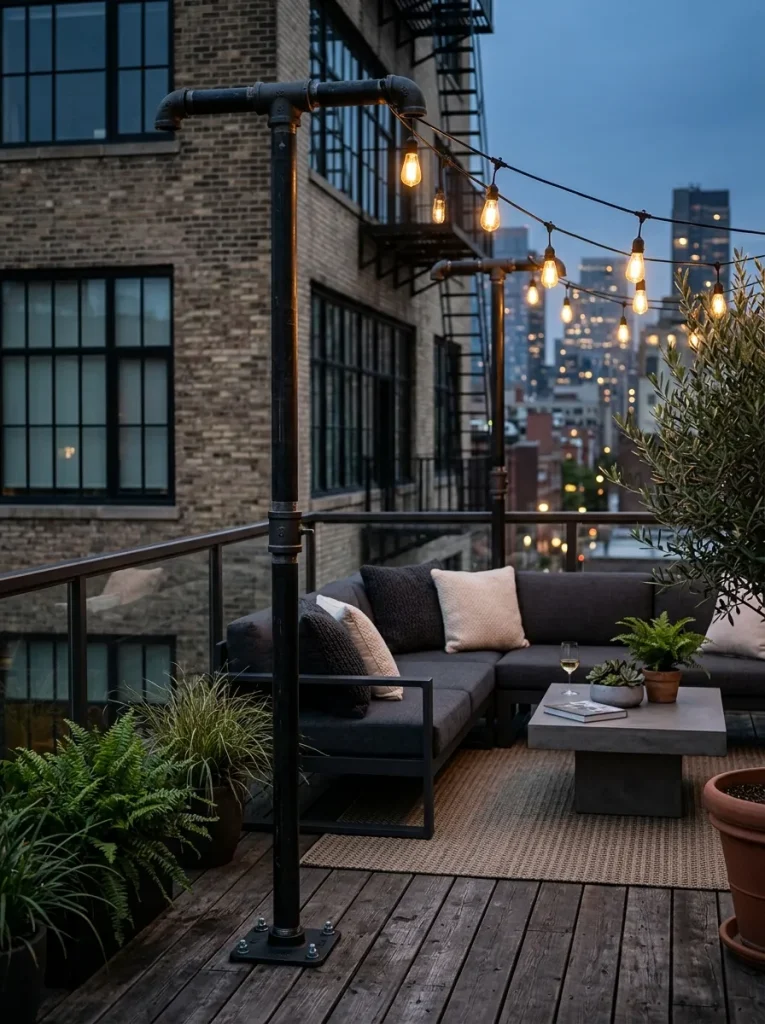
The industrial iron pipe and flange light pole utilizes black iron or galvanized steel plumbing pipes mounted directly onto wood decks or masonry walls using heavy floor flanges. Threaded iron pipe fittings provide exceptional rigidity, allowing slender posts to support heavy light strands without bending or swaying. The exposed industrial fittings and dark metal finish deliver a rugged urban loft look that pairs exceptionally well with modern outdoor furniture and wood decking. Securing the base flanges directly into underlying joists ensures a permanent, space-saving mounting solution that consumes zero floor footprint on elevated decks.
To construct this industrial setup, purchase three-quarter-inch threaded black iron pipes cut into six-foot and two-foot sections, joining them with a threaded coupling to reach an eight-foot height. Thread a heavy three-quarter-inch floor flange onto the bottom end of the pipe assembly. Position the flange on a solid section of wood decking directly over a structural joist, marking four screw hole locations. Drill pilot holes and drive heavy stainless steel lag screws through the flange into the framing lumber below. Thread a top elbow fitting or eyelet fixture onto the upper end of the pipe, seal the metal with a clear anti-rust clear coat, and attach overhead light strands securely.
Idea 8: The Whiskey Barrel Rustic Light Pole Stand
Setup Method
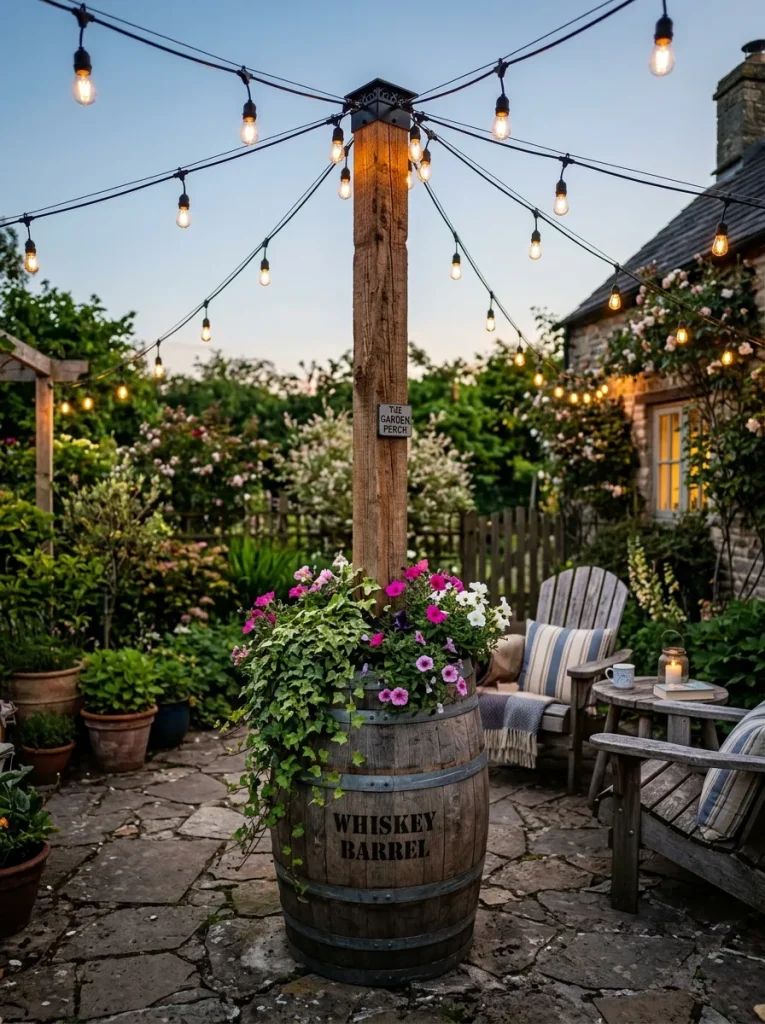
The whiskey barrel rustic light pole stand combines a classic, large-capacity wooden barrel with a heavy centered timber post to create a high-impact country-inspired accent. Half-whiskey barrels offer a massive base footprint that holds substantial concrete ballast, providing unmatched stability against strong wind gusts. The spacious interior volume above the concrete base offers ample room for planting deep-rooted perennials, trailing vines, or vegetable gardens. This design brings warm texture and historic character to large yards, fire pit surroundings, and outdoor wedding venues.
Select a sturdy, weather-sealed half-whiskey barrel, placing a two-gallon plastic bucket in the center of the wooden bottom. Insert an eight-foot, four-by-four cedar post into the bucket, holding it vertical with a level while pouring fast-setting concrete into the bucket space. Once the concrete cures, drill drainage holes through the barrel sides right above the bucket line. Fill the surrounding wooden barrel with rich potting soil, planting a mix of tall focal plants, filler flowers, and trailing ivy. Screw an eye hook near the top cap of the cedar post and run your overhead light cables across the patio space.
Idea 9: The Stone Masonry Wrapped Light Pole Base
How to Create
The stone masonry wrapped light pole base encloses the lower section of a vertical support post within a stacked stone or brick veneer pedestal. This architectural approach merges vertical outdoor lighting with existing stone retaining walls, pavers, or outdoor kitchen surfaces. Enclosing the base in natural or manufactured stone adds substantial weight and physical protection while concealing concrete footings. The resulting structure feels like a permanent architectural feature built alongside the home, adding lasting value and upscale curb appeal.
Begin by pouring a square concrete pad footing eighteen inches deep and sixteen inches wide at your designated light location. Set a heavy-duty steel or timber post vertically into the center of the wet concrete footing, ensuring it remains plumb. Once the footing cures, construct a two-foot-tall square pillar around the post base using concrete masonry units or stacked wall stones held together with mortar. Apply stone veneer over the block core, topping the pedestal with a smooth cast stone cap cut to fit around the central post. Finish the exposed upper post with stain or paint, and mount high-grade light fixtures to complete the gateway look.
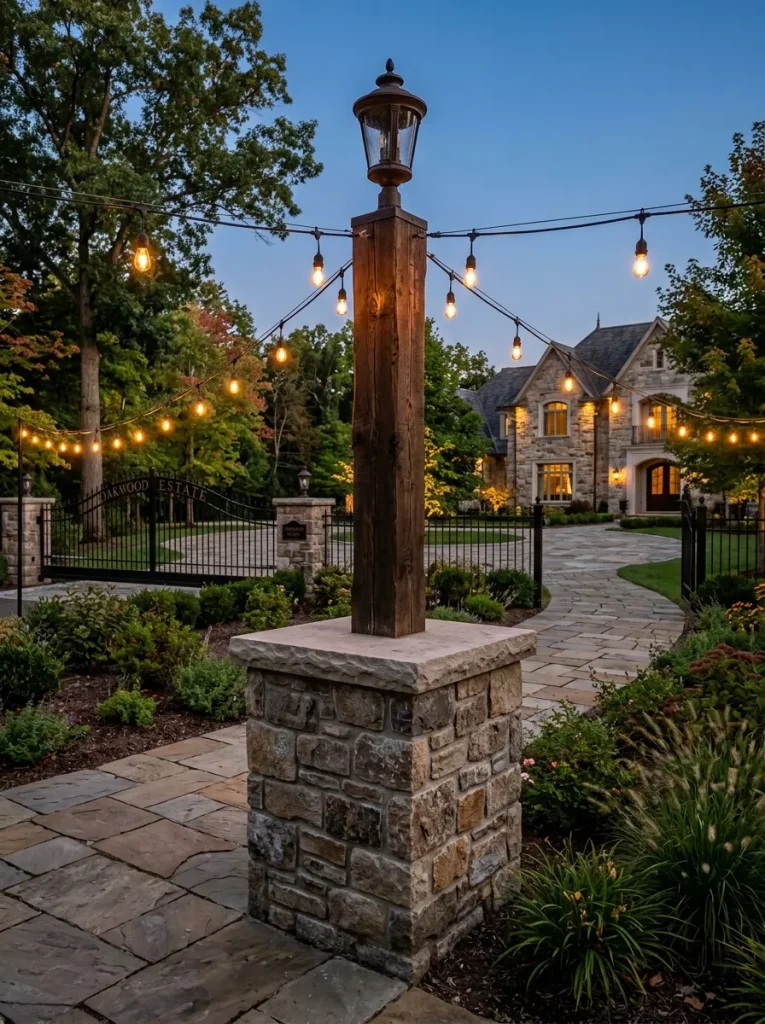
Idea 10: The Wall-Mounted Cantilevered Pergola Light Pole
Execution Process
The wall-mounted cantilevered light pole attaches directly to house siding, deck railings, or pergola beams using heavy-duty mounting brackets. This space-saving execution method raises overhead light attachment points without consuming any floor space on decks or patios. Cantilever brackets hold vertical metal or timber posts securely against existing vertical surfaces, distributing cable tension across structural building frames. This strategy works exceptionally well for narrow side yards, townhouse balconies, and elevated wooden decks where ground mounting is impractical.
Locate solid structural wall studs or deck framing posts using a stud finder or visual inspection. Align heavy-duty steel conduit clamps or heavy offset brackets vertically along the structural post, spacing brackets two feet apart. Drill pilot holes and drive heavy lag screws through the bracket plates into the underlying framing lumber. Slide an eight-to-ten-foot metal or wooden pole through the brackets, tightening clamp bolts to lock the pole at your desired height. Attach eye hooks to the top of the extension pole and string your lights outward across the outdoor living zone.
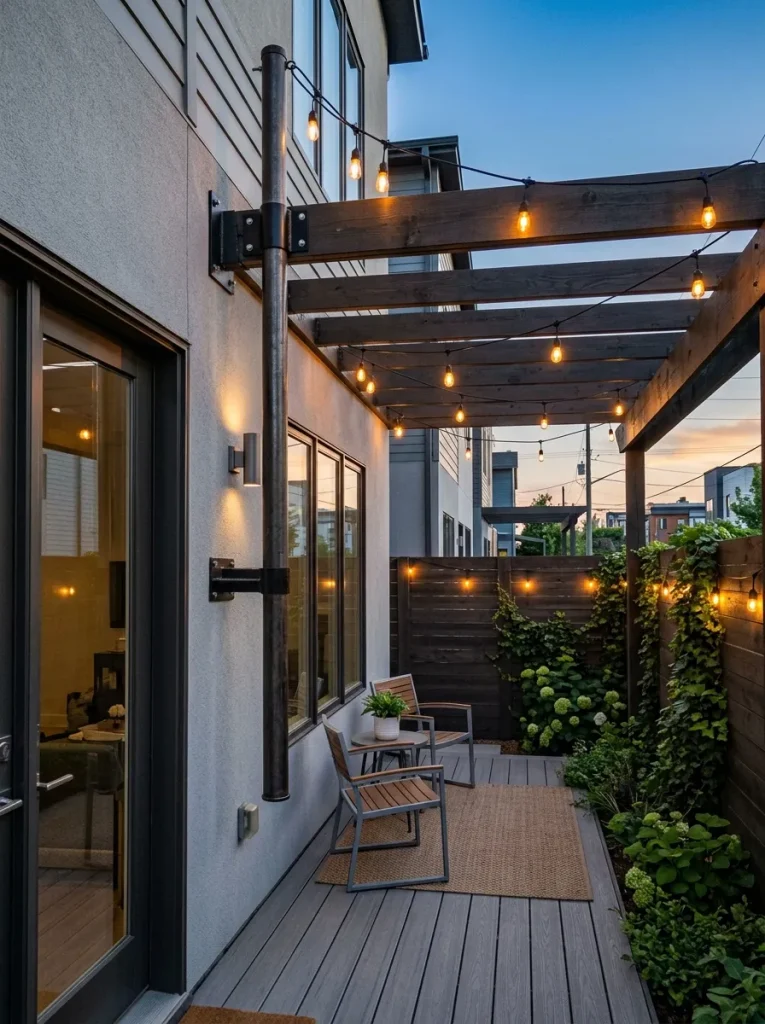
Common Beginner Mistakes and How to Avoid Them
When assembling outdoor light poles, beginners often make structural errors that compromise safety, stability, and long-term durability. A major mistake is underestimating cable tension and wind resistance, which can cause undersized poles to flex or tip inward over time. To prevent leaning, use sturdy four-by-four timber or rigid metal conduit rather than thin wooden stakes, and ensure ground holes reach a depth equal to one-quarter of the total post length. Another frequent oversight is omitting drainage holes in planter-based builds. When rainwater accumulates on top of concrete inside sealed pots, it rots wooden posts and drowns plant roots. Always drill weep holes through planter walls right above the internal concrete level. Additionally, using thin indoor extension cords or non-shatterproof glass bulbs creates electrical and safety hazards outdoors. Always select heavy-duty, weather-rated outdoor light strands equipped with shatterproof LED bulbs, and plug them into ground-fault circuit interrupter outlets. Finally, double-check vertical alignment with a post level before concrete sets, as correcting a crooked post after curing requires complete re-excavation.
Practical Tips for Better Results
Achieving professional, long-lasting results with outdoor light poles requires careful attention to material finishes, cable support, and hardware connections. Always install a guide wire cable—also known as a messenger wire—when spanning light strands over twenty feet. Attaching light strands to a taut stainless steel aircraft cable prevents stress on electrical wires, eliminating mid-strand sagging and wire failure. For wooden posts, apply a protective exterior sealant, stain, or marine varnish before assembly to prevent moisture absorption and graying. When building planter light poles, use lightweight potting mix above the concrete line rather than heavy topsoil to keep the total planter weight manageable if repositioning is required. Utilize stainless steel or hot-dipped galvanized hardware to prevent rust stains from running down custom-painted poles. Furthermore, wait to screw delicate light bulbs into sockets until after strands are fully suspended to avoid accidental bulb breakage during installation. Taking these extra step by step precautions guarantees a clean, durable, and reliable lighting setup.
Styling, Presentation, and Organization Ideas
Styling your outdoor light poles involves integrating hardware elements smoothly into the surrounding landscape and home architecture. Paint metal conduit or iron pipes matte black or dark bronze to create a modern minimalist style aesthetic that coordinates with dark window trim and patio furniture. For planter-based setups, select flowers and foliage that match your overall home decor palette. Combine upright plants like ornamental grasses with cascading vines like sweet potato vine or ivy to overflow gracefully over planter edges. Wrap fairy lights or climbing greenery up the lower half of vertical posts to add multidimensional warmth from ground level to the overhead canopy. Arrange light strands in clean geometric patterns—such as a perimeter border, a crisscross grid, or a central Maypole design—to define distinct outdoor dining and seating zones. Conceal extension cords along deck railings or under garden mulch using outdoor wire clips to maintain a tidy, hazard-free recreation area.
Budget and Time Planning
Planning an outdoor light pole project requires clear budgeting and efficient scheduling across all building phases. Most handmade light pole setups can be completed over a single weekend with basic tools and intermediate effort. Simple conduit or planter-based builds typically cost between fifty and one hundred dollars per pole, depending on container choices and wood species. Allocate roughly forty percent of your total budget to structural supports and concrete, thirty percent to heavy-duty outdoor string lights, and thirty percent to planters, soil, and decorative hardware. Sourcing materials like quick-setting concrete and timber posts from local building supply yards keeps delivery costs low. To maximize time efficiency, complete all cutting, sanding, and staining steps on day one, allowing finishes and concrete bases to dry overnight. Reserve day two for setting posts, planting flowers, and hanging light strands. Following a systematic planning timeline prevents unexpected delays and keeps your creative project on schedule and within budget.
Creative Expansion and Advanced Inspiration
Once foundational light poles are installed, homeowners can explore advanced customizations that increase functionality and visual charm. Consider attaching hanging plant brackets to wooden posts below the light hooks, displaying seasonal hanging flower baskets or bird feeders. Integrating smart outdoor plugs allows you to control overhead lights via smartphone applications, set automated evening schedules, or adjust dimming levels for outdoor movie nights. For coastal or rustic themes, wrap thick manila rope around metal conduit posts to add rich tactile texture while concealing structural pipes. You can also install small Bluetooth outdoor speakers or solar tiki torches onto vertical supports to build an all-in-one entertainment station. Combining these advanced creative ideas transforms basic vertical light supports into multifunctional landscape features that elevate outdoor living year-round.