
10 Library Walls Decoration Ideas
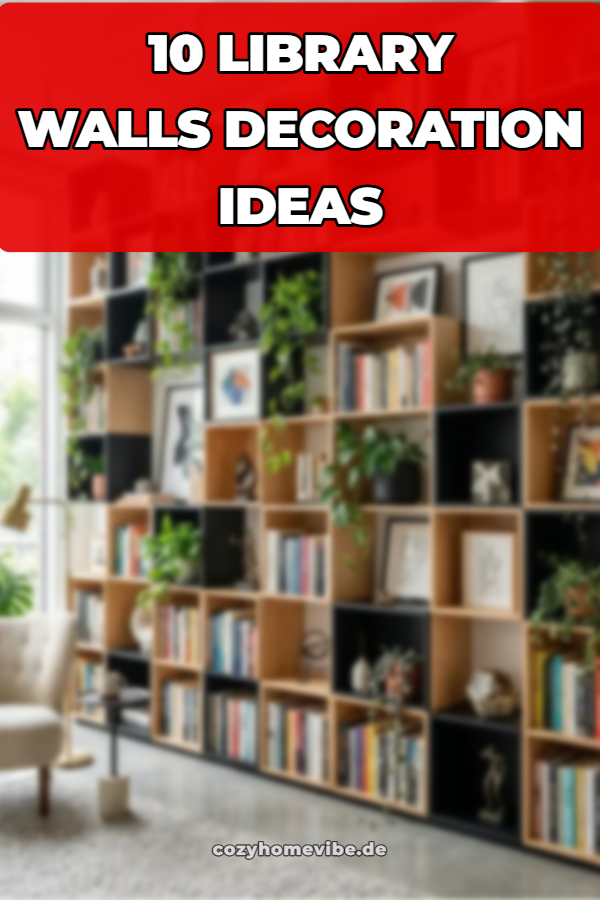
Designing a dedicated library wall elevates any residential interior by combining practical book storage with refined architectural character. Whether transforming a formal study, a living room accent surface, or a quiet reading corner, library walls serve as essential home decor features. In this detailed guide, readers will explore ten distinct structural themes, arrangement strategies, and decoration methods specifically tailored for custom wall installations. You will learn how to balance shelf depth, organize literary collections, integrate accent lighting, and incorporate art pieces without cluttering functional storage. Mastering these interior styling concepts helps convert basic vertical surfaces into captivating focal points that improve space organization and reflect personal aesthetic taste. Whether operating in a small apartment with floating ledges or constructing full floor-to-ceiling built-in shelving, these practical creative ideas deliver step by step inspiration for every home layout.
Why Library Wall Decorations Are Trending and Practical
Vertical book displays remain immensely popular across modern Pinterest ideas because they deliver high visual impact alongside practical space management. From an organizational standpoint, utilizing vertical wall area maximizes floor space, making library walls ideal for both compact urban apartments and expansive suburban residences. The aesthetic appeal lies in structural versatility, where homeowners take functional book storage and elevate it with framed art, sculpture, plants, and accent paint. Building a customized book wall offers accessible DIY appeal, allowing beginners to start with modular shelving units or simple wall brackets before expanding into elaborate installations. Incorporating thoughtful design concepts like minimalist style frames, warm lighting, and textured backdrop wallpapers ensures your shelving stays organized while enhancing overall residential design. The combination of easy preparation, high storage utility, and charming visual texture makes library wall decoration a favorite project for homeowners seeking functional home improvement.
Essential Materials, Tools, and Pre-Build Planning
Proper preparation ensures a smooth installation process without structural instability, surface misalignment, or spatial layout errors. The foundation of a successful library wall begins with selecting durable materials like hardwood boards, sturdy metal shelf brackets, or pre-assembled bookcase units. Wall anchor fasteners, heavy-duty wood screws, wood stain, primer, and interior latex paint provide structural strength and cohesive color finishing. Essential installation tools include a digital stud finder, a spirit level, a measuring tape, a cordless power drill, and a painter’s tape roll. Prior to installing shelves or placing furniture, measure your wall dimensions accurately and plot stud locations to guarantee secure load-bearing support for heavy books. Clearing the work zone, patching drywall imperfections, and applying background paint or wallpaper beforehand streamlines the construction phase. Proper planning guarantees your custom library wall achieves professional durability and visual balance.
Ten Actionable Concepts for Decorating Library Walls
Idea 1: Floor-to-Ceiling Built-In Shelving with Accent Wallpaper Backing
Execution Process
The floor-to-ceiling built-in concept centers on maximizing vertical wall height to create an authentic architectural library feel. This design utilizes tall wooden bookcase frames securely anchored from baseboard line to ceiling crown molding, creating a seamless custom look. The defining feature is the application of patterned or textured wallpaper across the rear wall surface behind the open shelves. Selecting subtle botanical prints, geometric motifs, or grasscloth textures introduces depth and color contrast behind stored books. Integrated crown molding along the top boundary unites individual shelving sections, while adjustable interior shelves accommodate books of varying physical heights. This classic structure balances high-density literary storage with rich interior decoration, making it an ideal choice for formal living rooms, home offices, and dedicated reading rooms.
To execute this built-in design, begin by measuring wall height and floor width to determine required framework dimensions. Install pre-built tall bookcase units or assemble custom hardwood frames, securing the rear supports directly into wall studs using heavy-duty wood screws. Before attaching fixed shelf boards, apply paste-the-wall decorative wallpaper across the exposed drywall backing, smoothing out air bubbles with a plastic smoothing tool. Once the wallpaper adhesive cures, mount the shelving units flush against the back wall, sealing perimeter gaps with paintable caulk. Attach decorative crown molding across the top ceiling junction and add matching baseboards along the bottom edge to simulate custom millwork. Finish by painting the outer wooden frames in a dark neutral shade, such as navy or deep forest green, allowing the patterned wallpaper backing to stand out behind your book arrangements.
Idea 2: Minimalist Floating Hardwood Ledges with Integrated LED Lighting
Step-by-Step Guide
The minimalist floating ledge concept introduces a sleek modern design characterized by clean lines, uncluttered surfaces, and concealed mounting hardware. Utilizing thick oak, walnut, or maple hardwood planks, this installation creates the illusion of weightless wooden platforms hovering against the wall. The primary aesthetic element is the integration of warm, indirect LED light strips mounted into carved channels beneath each shelf ledge. These hidden light channels cast a gentle downward illumination across book spines and decorative accessories below, eliminating harsh shadows and enhancing nighttime atmosphere. The minimalist approach keeps floor areas open, making it an excellent choice for modern living rooms, narrow hallways, or contemporary home workspaces where spatial airiness is essential.
Constructing minimalist floating ledges starts with identifying wall stud positions using an electronic stud finder and marking level horizontal guidelines with a spirit level. Secure heavy-duty steel floating shelf brackets directly into the wooden studs using lag bolts to ensure high weight capacities. Prepare thick hardwood boards by routing a narrow channel along the rear bottom edge to conceal LED light strips and low-voltage wiring. Slide the hollowed hardwood boards onto the steel bracket rods, ensuring a tight, level fit against the wall surface. Thread thin LED strip lighting into the pre-routed bottom channels, connecting the wiring to a hidden low-voltage power driver or wall switch. Finish the wood using a matte clear sealer to highlight natural grain patterns, and organize books in slim, spaced groupings interspersed with small ceramic vases.
Idea 3: Asymmetrical Modular Cube Grid for Books and Art Display
How to Create
The asymmetrical modular cube grid combines modern geometric framing with flexible organizational layout options for dynamic book displays. This concept relies on interlocking square and rectangular open boxes arranged in an intentionally unbalanced, staggered pattern across the wall. By alternating between densely packed book compartments and open decorative display sections, the installation avoids heavy visual monotony while accommodating varied object sizes. The varying box depths create interesting light and shadow variations, transforming basic wall storage into an engaging geometric sculpture. This creative project offers exceptional adaptability for contemporary interiors, enabling homeowners to showcase framed artwork, sculptures, potted plants, and literary collections within one unified wall installation.
Building an asymmetrical grid begins with sketching a balanced layout plan on grid paper to determine box sizes and overall wall composition. Construct individual cube modules using three-quarter-inch birch plywood, joining corners with pocket-hole screws and wood glue for concealed structural joints. Sand all module surfaces smooth and paint or stain them in contrasting tones, such as matte black paired with natural birch interiors. Mount the central cube module securely onto wall studs using heavy-duty keyhole brackets, checking level alignment carefully. Attach surrounding modules outward from the center piece in a staggered formation, securing adjacent box walls together with flush cabinet connector screws. Fill selected open cubes with vertical book rows, reserving adjacent compartments for framed art prints, small sculptures, and trailing indoor plants.
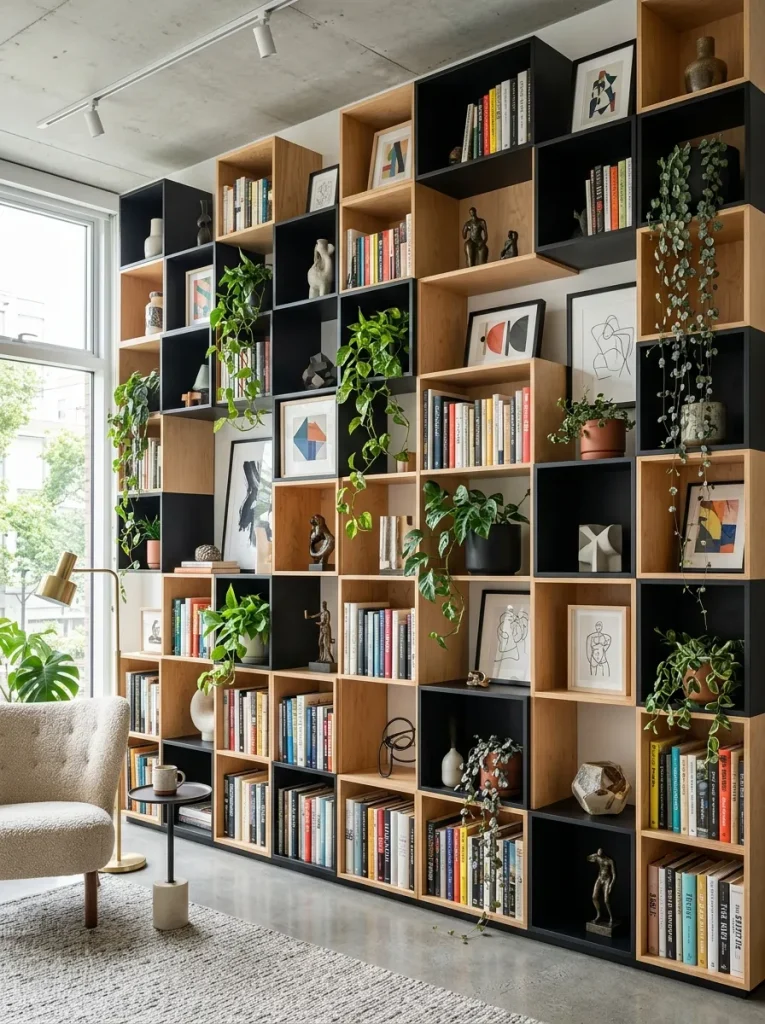
Idea 4: Dark Academic Gallery Wall with Integrated Portrait Art
Setup Method
The dark academic gallery concept leverages deep paint colors, classical artwork, and vintage brass accents to create an atmospheric, historic study feel. Featuring rich charcoal, dark chocolate, or deep teal wall paint, this design integrates framed portrait art and vintage oil paintings directly into the open spaces between book stacks. Dark stained wooden shelves provide rigid platforms for books, while small picture lights mounted above framed canvases illuminate classic artwork. The deliberate combination of leather-bound books, antique brass bookends, framed sketches, and dark background paint delivers a cozy, dramatic aesthetic. This sophisticated style suits traditional home libraries, formal dining areas, and private office spaces seeking timeless historical charm.
To set up a dark academic wall, paint the target wall surface in a matte or eggshell deep charcoal shade, allowing it to dry completely. Mount dark walnut-stained wood shelves onto heavy iron brackets, spacing shelves with sufficient vertical clearance to hang small picture frames in between. Position books both vertically and horizontally across the shelves, leaving three-inch gaps between stacks to create display openings. Hang small gilded or dark wood frames containing classic portrait prints or landscape sketches directly onto the exposed wall gaps using small picture nails. Install battery-powered or hardwired brass picture lights directly above selected frame groupings to cast warm localized light across the artwork. Complete the arrangement with brass bookends, vintage globes, and antique leather volumes.
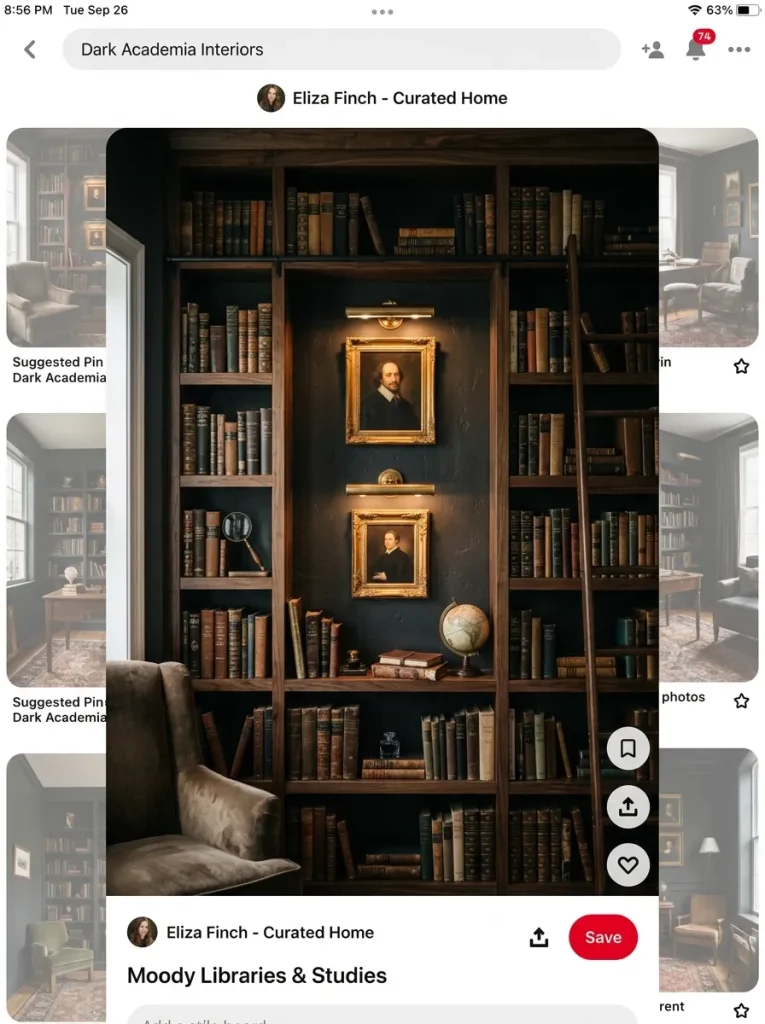
Idea 5: Industrial Steel Pipe Framing with Reclaimed Wood Shelves
Construction Steps
The industrial pipe framework design pairs raw metallic structural fittings with heavily textured reclaimed wood boards to construct an urban loft aesthetic. Utilizing threaded dark steel or galvanized iron pipes as primary vertical supports, this open-shelf system bolts directly into wall studs and floor joists for maximum weight capacity. Thick, weathered reclaimed timber planks rest across the horizontal pipe supports, introducing organic warmth and historical character to the metallic frame. The open-sided structure maintains unobstructed wall visibility, preventing large shelving installations from feeling overly dense or restrictive. This durable design is exceptionally resistant to heavy load stress, making it an excellent choice for housing large encyclopedia collections, textbooks, and heavy art volumes.
Begin construction by measuring floor and wall attachment points, marking vertical alignment lines with a laser level. Assemble vertical support frames using three-quarter-inch dark iron pipes, floor flanges, tees, and ninety-degree elbow fittings, tightening all threaded joints firmly with pipe wrenches. Position the pipe assemblies against the wall, securing the top and bottom floor flanges into studs and floor joists using heavy-duty lag screws. Prepare reclaimed wood planks by sanding rough splinters while preserving natural saw marks, nail holes, and weathered patina, then sealing with a matte polyurethane coat. Lay the prepared timber planks horizontally across the pipe supports, securing the wood from underneath using pipe strap clamps and wood screws. Load the shelves with dense book collections, balancing the industrial metal texture with green potted plants and metal storage bins.
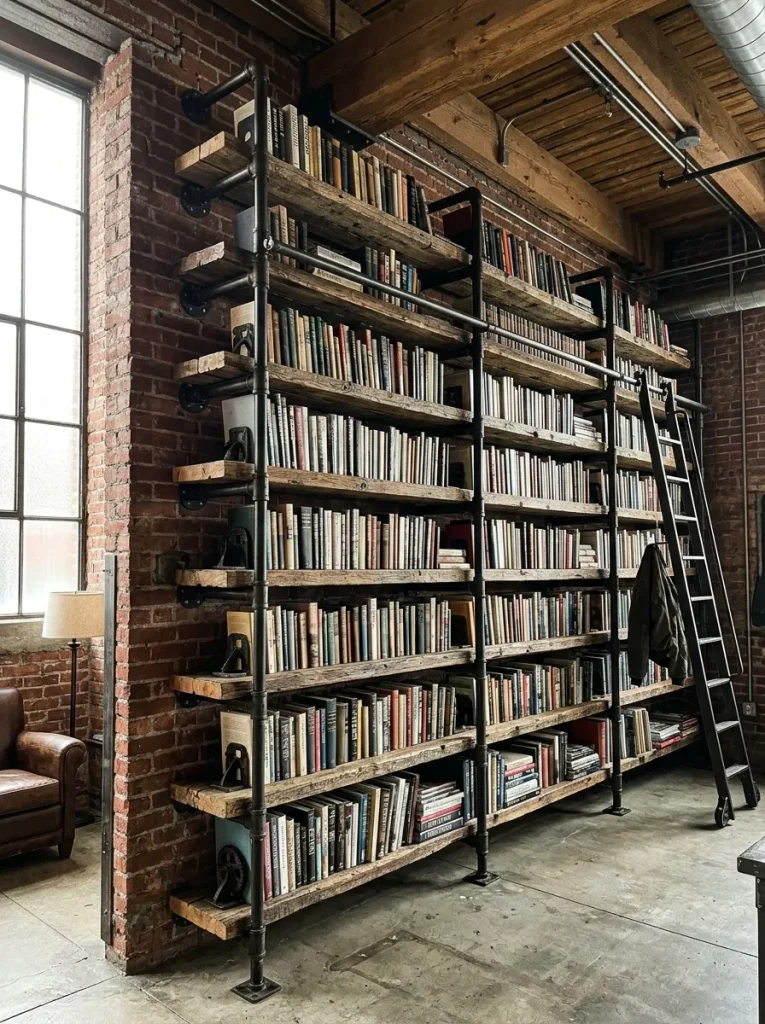
Idea 6: Botanical Garden Display with Trailing Foliage and Natural Wood
Execution Process
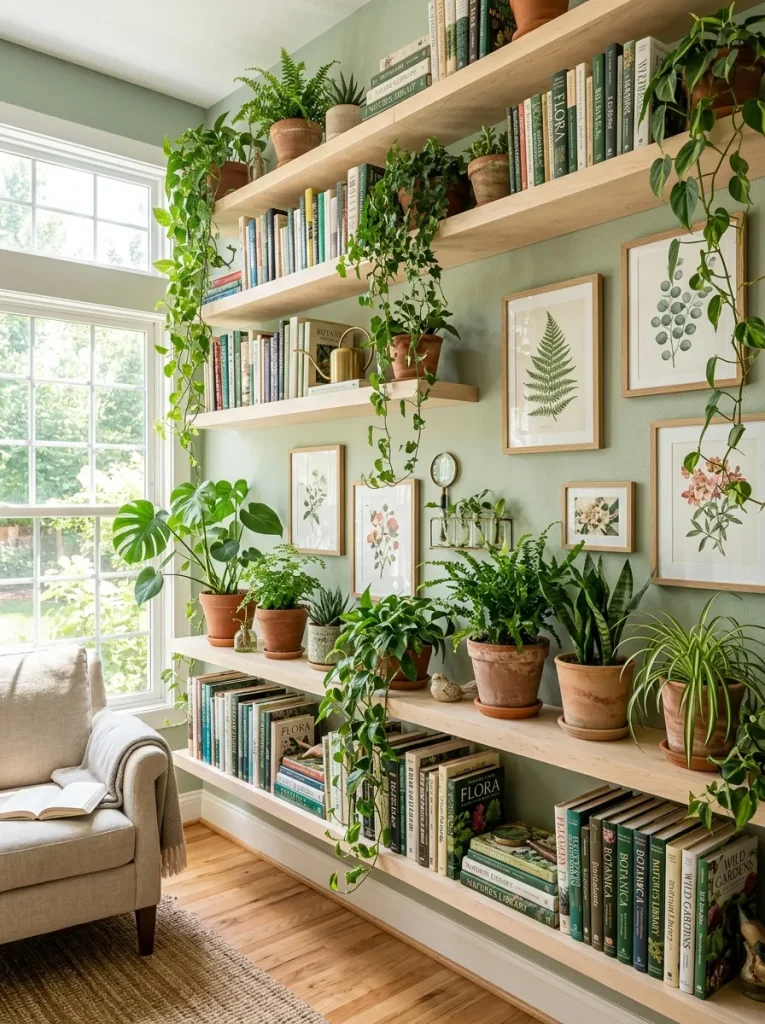
The botanical garden library concept combines natural wood shelving with abundant indoor plant life, transforming book storage into a fresh, organic display. Utilizing light birch, ash, or pine wooden shelves set against crisp white walls, this design emphasizes natural daylight, airiness, and vibrant plant textures. Trailing vines like pothos, philodendrons, and ivy are placed on upper shelf levels, allowing green foliage to drape gracefully down over book spines and shelf edges. Terracotta pots, woven seagrass baskets, and botanical art prints are intermixed with literary collections to reinforce the living indoor garden theme. This cheerful, refreshing layout suits sunlit living rooms, plant-filled sunrooms, and bohemian interior spaces.
To execute this botanical wall arrangement, install light-toned natural wood shelves onto white painted wall brackets, ensuring placement near a reliable natural light source. Paint the background wall in a clean, soft white or pale sage green shade to maximize light reflection through the foliage. Arrange books in small groupings across lower and middle shelf levels, utilizing heavy stone or terracotta pots as natural bookends to hold volumes upright. Place potted trailing plants on upper shelf ledges, directing long vines to weave gently around book stacks without blocking access to book spines. Insert small framed botanical illustrations, dried flower frames, and natural wooden bowls into open shelf gaps. Maintain regular plant care routines by utilizing saucer trays underneath pots to protect wooden shelves from water damage.
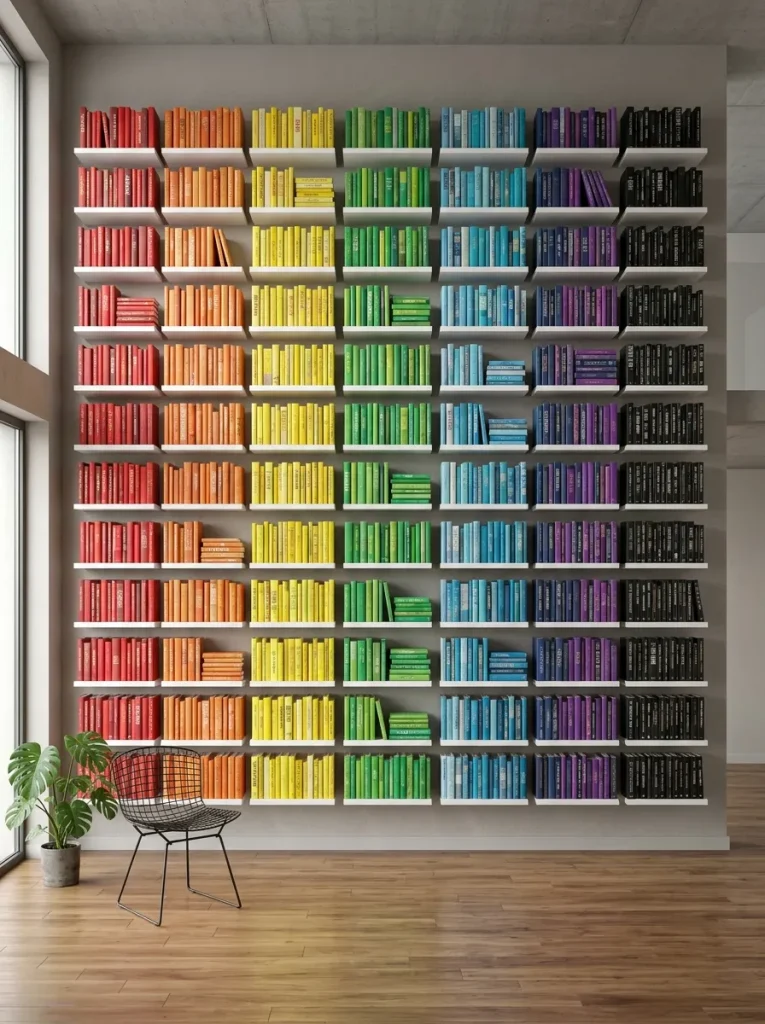
Idea 7: Monochromatic Color-Coded Rainbow Wall Display
Step-by-Step Guide
The monochromatic color-coded display turns literary collections into a striking visual rainbow spectrum by organizing book dust jackets strictly by color hue. Utilizing clean white or neutral floating shelves, this organization method groups books systematically from red, orange, and yellow through green, blue, purple, black, and white. The continuous gradient transition creates a dramatic color block effect that transforms varied book collections into a structured, eye-catching focal point. The minimalist style of the white shelving ensures that the vibrant colors of the book spines remain the absolute center of visual attention. This modern design concept works exceptionally well in contemporary living rooms, creative home studios, and children’s reading spaces.
Assemble a color-coded wall display by mounting simple white floating shelves or white modular bookcase units across a clean neutral wall. Gather all books intended for display and sort them into distinct color piles based on the dominant shade of their spine covers. Begin arranging books on the top left shelf starting with deep red tones, transitioning gradually into orange, yellow, and light green shades across the top row. Continue the color spectrum down onto lower shelf levels, moving through dark green, cyan, royal blue, violet, magenta, and finishing with grey, black, and white volumes on the lowest ledges. Align book spines flush with the front edge of each shelf to maintain crisp vertical alignment across the entire gradient installation.
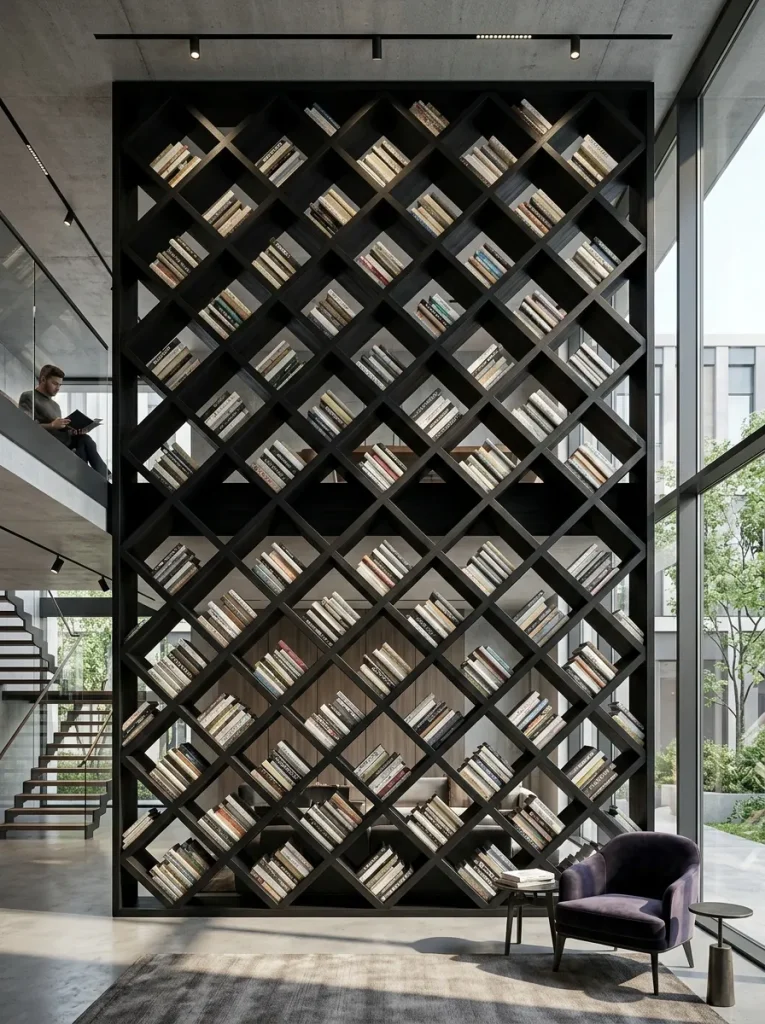
Idea 8: Diagonal Diamond-Grid Shelving for Artistic Storage
Setup Method
The diagonal diamond-grid design departs from conventional horizontal shelving by slanting shelf dividers at forty-five-degree angles to construct a diamond pattern framework. This artistic structural approach turns ordinary book storage into an engaging geometric pattern that catches light dynamically across diagonal angles. Books are stored resting at angles within the diamond compartments, creating a unique visual orientation that holds volumes securely without needing standard bookends. The geometric division naturally categorizes smaller book groupings into individual diamond cells, making visual organization intuitive and order maintained effortlessly. This distinctive concept serves as an outstanding architectural feature for modern dining rooms, creative offices, and entry foyers.
To set up a diagonal diamond grid, measure your wall area and construct an outer square frame from three-quarter-inch hardwood boards. Build an internal lattice matrix by crisscrossing hardwood divider boards at precise forty-five-degree angles, joining intersections with half-lap wood joints for maximum structural rigidity. Secure the completed diamond grid framework into wall studs using heavy-duty mounting brackets hidden behind interior frame corners. Sand the entire diamond structure smooth and apply a high-contrast finish, such as satin black paint or a rich walnut stain. Fill individual diamond cells by placing three to five books diagonally within each compartment, alternating book spine orientations between adjacent cells to create a balanced, dynamic geometric pattern.
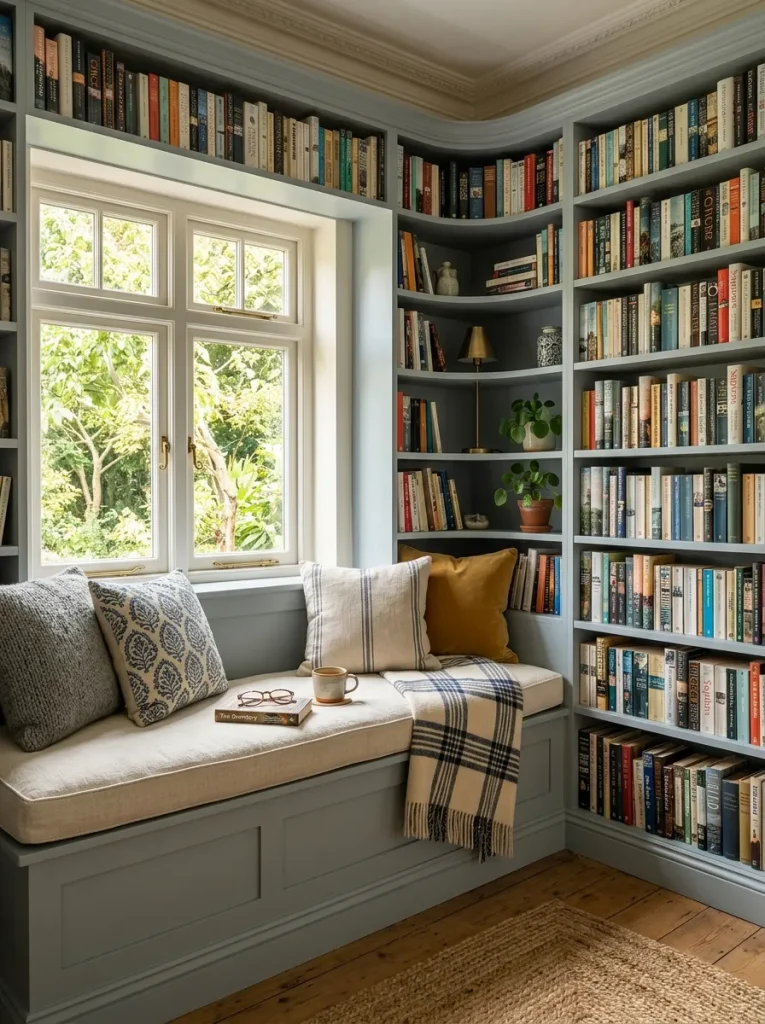
Idea 9: Corner Wrap-Around Library Wall with Integrated Reading Bench
Construction Steps
The corner wrap-around concept maximizes underutilized room corners by extending continuous shelving across two intersecting walls and integrating a built-in window seat or reading bench below. This comprehensive design creates an intimate, cozy reading nook that utilizes every inch of available corner space. The custom bench features internal lift-up storage lids or lower cubby drawers, providing hidden storage for extra blankets, pillows, and magazines. Continuous horizontal shelf runs wrap seamlessly around the ninety-degree wall corner, uniting the two wall planes into one cohesive architectural feature. This cozy transformation is ideal for master bedrooms, quiet study nooks, and unused living room corners.
Begin construction by building a sturdy wooden box frame for the corner bench using two-by-four dimensional lumber, anchoring the frame directly into floor joists and wall studs. Top the bench frame with a thick plywood lid attached with piano hinges for internal storage access, or install open lower cubbies for extra book bins. Construct open shelving units above the bench, extending the shelves continuously along both meeting walls and joining corner shelf intersections with tight forty-five-degree miter seams. Install a custom foam bench cushion wrapped in durable upholstery fabric across the bench top, adding plush throw pillows for back support. Paint the entire wrap-around assembly in a unified color, such as soft blue-grey or warm cream, and load the upper shelves with book collections.
Idea 10: Rustic Farmhouse Sliding Barn Door Bookcase
Execution Process
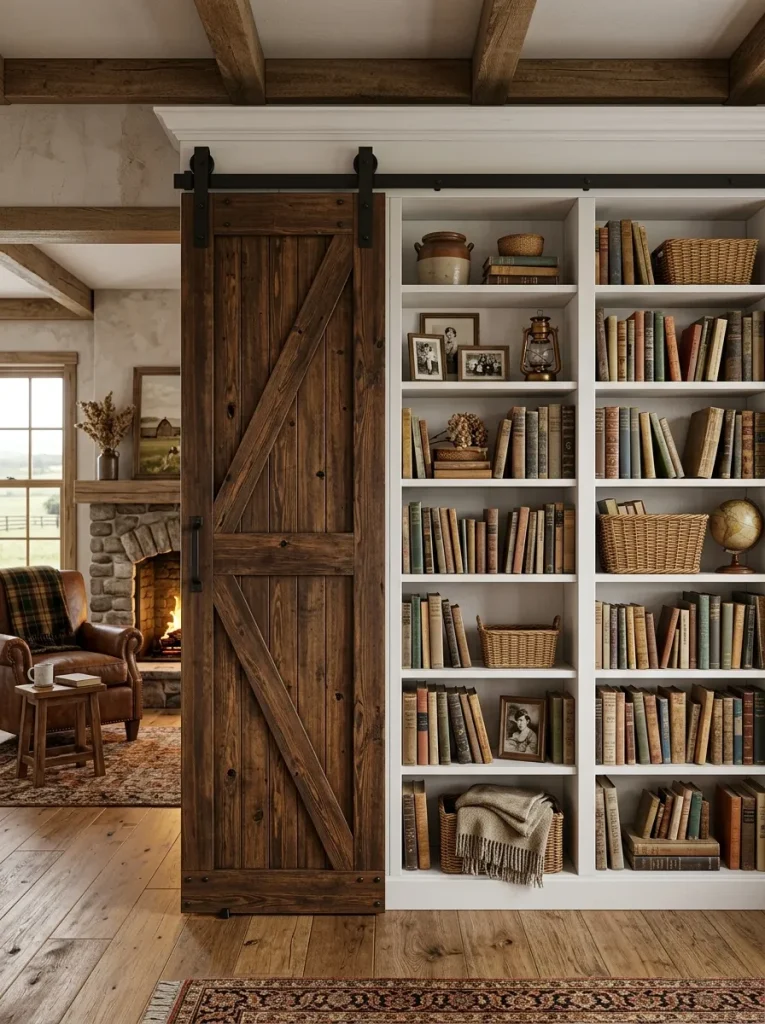
The rustic farmhouse concept pairs built-in wooden shelving with a sliding wooden barn door mounted on a heavy black iron top track. This functional design allows homeowners to partially conceal or reveal different sections of the library wall by sliding the door horizontally along the steel rail. The contrast between white-painted shelf interiors and a dark, stained wood barn door introduces charming rustic texture and architectural character. Uncovered shelf sections display curated book collections and decorative items, while the covered section hides television screens, home office equipment, or media storage clutter. This versatile design provides incredible practical utility for multi-functional family rooms, rustic basements, and open-concept living spaces.
To execute this sliding door installation, construct a wide three-bay wooden bookcase unit anchored securely into wall studs and finished with white interior paint. Mount a heavy-duty black steel barn door track horizontally across the top header wall board, ensuring the track is perfectly level and anchored into solid framing header lumber. Assemble a custom Z-frame barn door from tongue-and-groove pine boards, staining the wood in a dark walnut shade and sealing with a protective matte varnish. Attach steel roller wheel brackets onto the top edge of the wooden door, then lift the door onto the upper steel rail. Install rubber floor guides along the bottom baseboard to keep the door sliding smoothly without scratching the lower cabinet face, and organize books across the open shelving bays.
Common Beginner Mistakes and How to Avoid Them
When designing and decorating library walls, beginners frequently make structural and visual planning errors that compromise safety and aesthetics. A primary mistake is failing to anchor heavy shelving units directly into wall studs, relying instead on basic drywall anchors that can pull free under the weight of hardbound books. Always use a digital stud finder and secure primary frame supports into solid wood studs with heavy-duty screws. Another common error is overfilling every inch of shelf space with books stacked tightly together, which creates a crowded, heavy appearance that overwhelms the room. Leave open spaces, vary book orientations between vertical and horizontal stacks, and integrate decorative objects to break up continuous text blocks. Additionally, homeowners often neglect lighting planning, resulting in dark, unreadable shelf corners during evening hours. Incorporate battery-operated puck lights, clip-on picture lamps, or LED light strips during the initial build phase to ensure all display areas remain well-lit and accessible.
Practical Tips for Achieving Professional Results
Achieving a high-end, custom look on your library wall requires attention to detail, proper surface finishing, and balanced styling techniques. Always sand raw wood components progressively using fine-grit sandpaper to eliminate rough grain before applying paints or wood stains. Use paintable acrylic caulk to seal small gaps where shelving frames meet drywall or ceiling moldings, creating a seamless built-in appearance. When styling book stacks, mix vertical rows with low horizontal piles that double as pedestals for small decorative accessories like brass clocks, coral pieces, or framed photos. Group decorative objects in odd numbers—such as clusters of three small vases—to create a natural visual rhythm across open shelves. Finally, line the front edges of books flush with the front edge of the shelf board rather than pushing them back against the rear wall; this simple alignment detail instantly creates a neat, professional display.
Styling, Presentation, and Organization Ideas
Organizing and presenting a completed library wall effectively relies on functional categorization, visual balance, and thoughtful accessory placement. Group books logically by topic, author, or binding color to ensure finding specific titles remains quick and intuitive. Utilize decorative bookends made from heavy materials like marble, cast iron, or solid wood to keep vertical book rows standing straight without sagging. Place larger, heavier art volumes and encyclopedia sets on lower shelves to anchor the installation visually and maintain physical stability. Use woven storage baskets or decorative fabric bins on bottom shelf tiers to conceal small items like charging cables, board games, and loose paperwork. Distribute color accents evenly across the entire wall layout, ensuring bright book covers or decorative ceramics are balanced from top to bottom rather than clumped in one area.
Budgeting, Sourcing, and Time Planning
Executing a library wall renovation efficiently requires clear budget management, strategic material sourcing, and realistic time planning. Allocate your budget across primary categories: structural lumber and shelves (40%), paint, stain, and wallpaper finishes (25%), hardware and LED lighting (20%), and decorative accessories or storage baskets (15%). To manage costs effectively without sacrificing visual quality, utilize pre-built modular bookcases as raw structural cores and customize them with added trim molding and paint. Source decorative items, vintage bookends, and classic hardbound books from local thrift shops and estate sales to fill large shelf areas affordably. Structure your time across a manageable multi-day timeline: complete wall prep, stud marking, and background painting on Day 1; execute shelf installation, molding attachment, and caulking on Day 2; and reserve Day 3 for final paint touch-ups, lighting hookups, and book styling.
Creative Expansion and Advanced Inspiration
Once you master basic library wall designs, you can explore advanced structural variations and interactive features that elevate your home space further. Consider installing a traditional rolling wooden library ladder mounted on a brass top rail to grant easy access to high upper shelves while adding authentic historic elegance. Advanced builders can integrate hidden secret door mechanisms into shelving panels, allowing a portion of the library wall to swing open and reveal a hidden room, closet, or home office space behind. You can also experiment with smart home technology, integrating app-controlled RGBW LED strip lighting that changes color temperatures to match daytime work hours or cozy evening reading moods. Expanding your library wall around doorways, archways, or media centers builds a unified architectural narrative that increases total home utility and long-term resale value.