
10 Easy DIY Pill Bottle Monster Toys for Kids Ideas
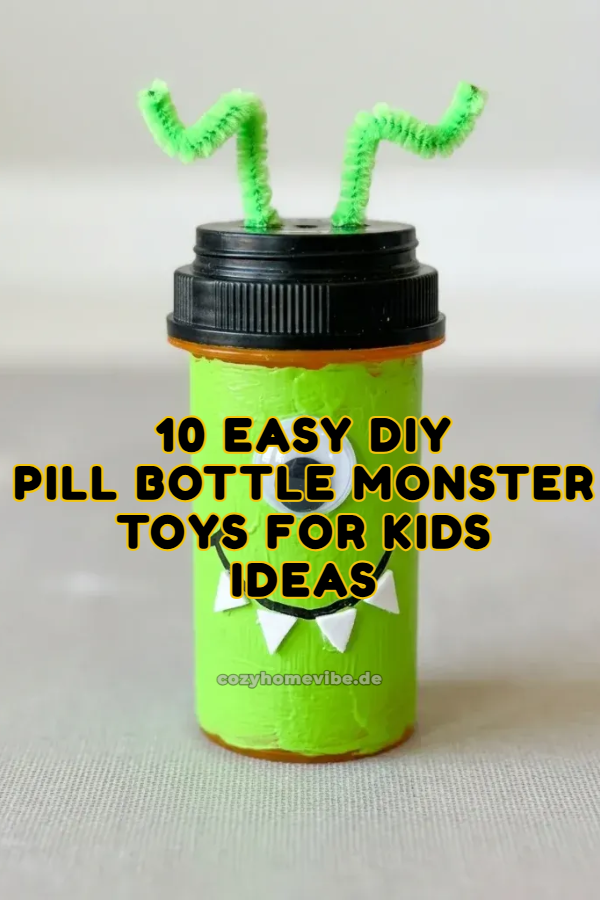
Upcycling everyday household items into creative projects offers an exceptional way to engage children while promoting eco-friendly habits. Empty medicine containers provide a sturdy, safe, and versatile base for crafting small interactive playthings. Transforming these plastic cylinders into colorful creature figures allows kids to explore visual art, fine motor skills, and imaginative play through a accessible handmade medium. This guide details step-by-step methods for creating ten distinct monster character designs using basic craft supplies and simple techniques. Each project focuses on functional visual elements, easy assembly methods, and engaging textures suitable for young creators. Readers will gain comprehensive instructions on material preparation, construction methods, safety considerations, aesthetic styling, and budget planning for these upcycled toys.
Why Pill Bottle Monsters Are Popular in Modern DIY Culture
Repurposing small plastic containers into creative monster toys has gained significant traction across social media and crafting communities due to its blend of sustainability and accessibility. Parents, educators, and makers frequently seek out low-cost projects that utilize materials already present in the home, reducing waste while providing immediate creative outlets. The uniform cylindrical shape of medicine bottles makes them ideal foundations for mini figures, offering natural stability and built-in storage capabilities. Children naturally gravitate toward playful monster aesthetics, as fantasy creatures allow unlimited freedom in color choices, facial feature arrangements, and textural elements without strict rules of realistic representation.
Essential Materials and Preparation Steps
Proper preparation ensures a smooth, safe craft session when working with upcycled plastic containers. Safety must remain the top priority when sourcing medicine bottles; all containers must be thoroughly emptied, washed with warm soapy water, and completely dried to remove residual substances. Remove paper labels by soaking the bottles in hot water mixed with a small amount of dish soap or rubbing alcohol to clear sticky adhesive residues. Once cleaned, collect foundational art supplies including non-toxic acrylic paints, multi-surface primers, craft foam sheet pieces, googly eyes, chenille stems, colorful yarn, felt scraps, non-toxic tacky glue, and low-temperature glue guns operated by adults.
Ten Unique Pill Bottle Monster Projects
1. The Multi-Eyed Cyclops Mini Figure
Concept and Visual Aesthetics
The single-eyed or multi-eyed cyclops design offers a classic fantasy aesthetic that allows children to experiment with asymmetrical visual balance. Building a cyclops character around a small plastic container emphasizes central facial features, making it an ideal introductory project for younger crafters who are learning basic placement techniques. Using vibrant background colors like neon green, bright purple, or electric blue provides a high-contrast foundation that makes varied sizes of googly eyes stand out dramatically. The hollow interior of the container serves as a secret compartment for tiny treasures, secret notes, or small sensory beads, adding an interactive play layer to the finished toy.
Step-by-Step Assembly Method
Begin by applying a uniform layer of multi-surface acrylic primer to the clean plastic container to ensure subsequent paint layers adhere smoothly without peeling. Once dry, coat the entire body in two layers of bright green acrylic paint, letting it dry completely between coats. Select one large central googly eye or a cluster of mismatched smaller eyes, and secure them firmly to the upper middle section of the bottle using tacky glue. Cut small triangular teeth out of white craft foam sheets and attach them along a hand-drawn black marker mouth line. Finish the figure by wrapping a fuzzy green pipe cleaner around the top cap to form alien antennae.
       [ ( (O) ) ]    <- Antenna Cap
     +-------------+
     |   /  O  \   |  <- Central Eyeball
     |  |   u   |  |  <- Mouth & Teeth
     |   \_____/   |
     +-------------+  <- Base Container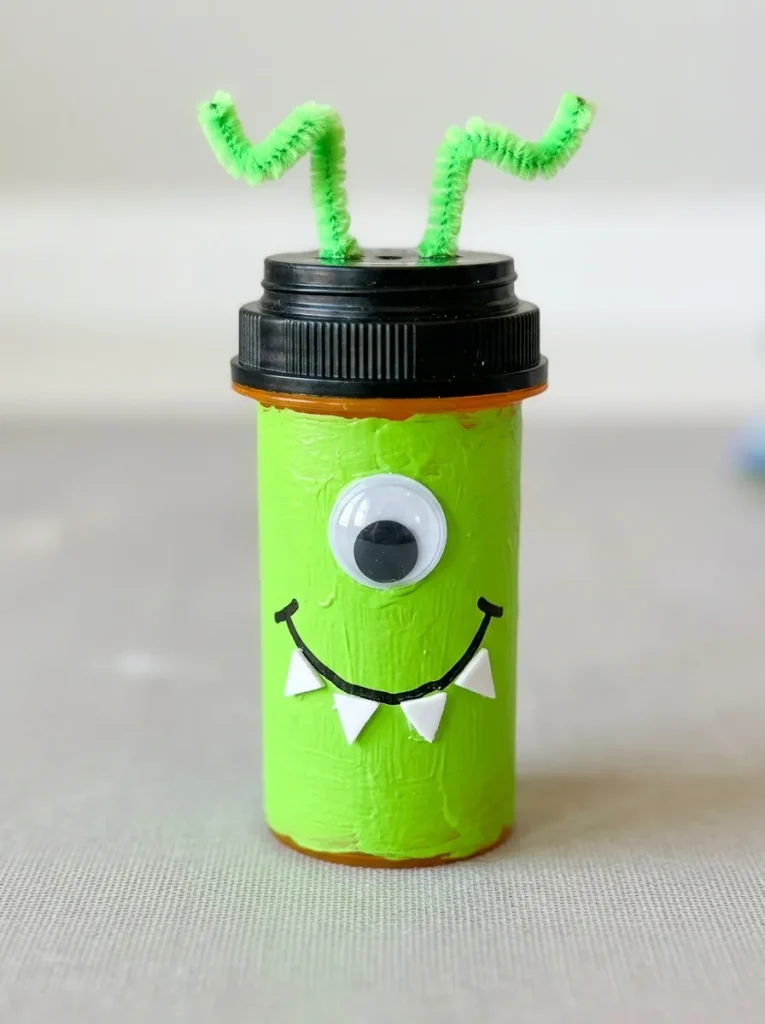
2. Fuzzy Yarn Texture Monster
Concept and Visual Aesthetics
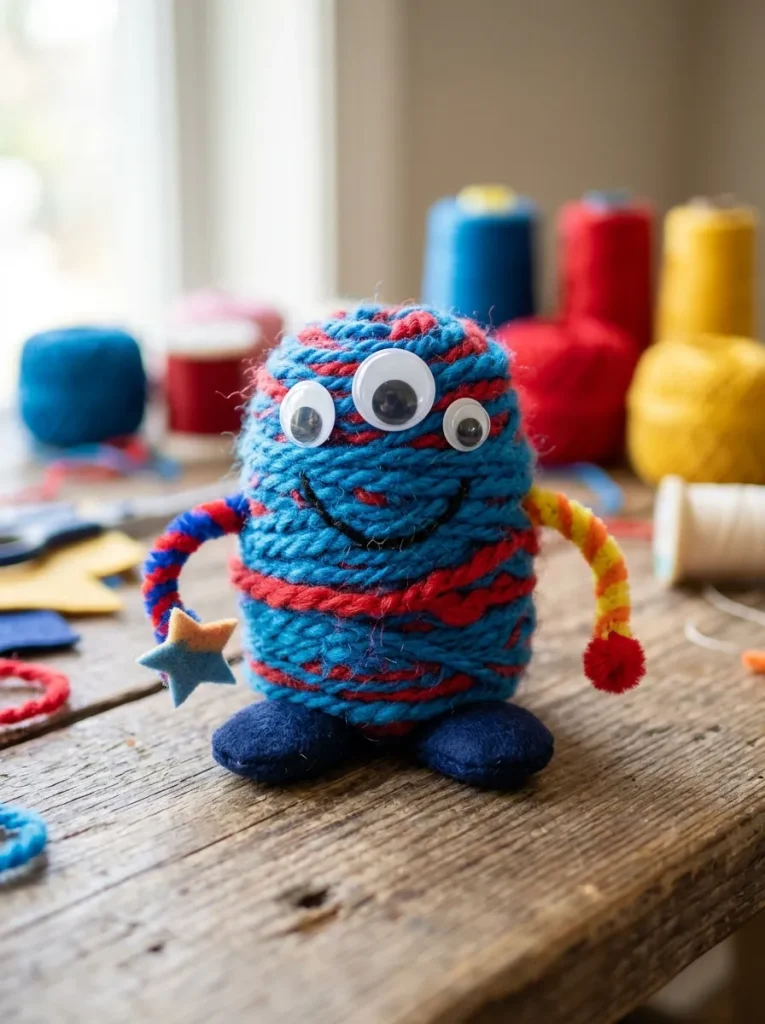
Textural exploration plays a vital role in childhood developmental crafts, making yarn-wrapped monster figures both visually appealing and tactilely stimulating. Covering the slick plastic surface of a pill bottle with thick, colorful strands creates a soft, huggable mini monster that contrasts nicely with rigid plastic elements. Crafters can choose single bold hues or layer multiple scrap yarn colors to achieve striped, speckled, or ombre patterns across the creature’s body. Adding felt appendages such as arms, feet, and horns directly over the yarn texture gives the character depth, turning a simple plastic vessel into a detailed handmade figurine suitable for storytelling activities.
Execution Process
Apply a liberal coat of craft glue or double-sided adhesive tape around the circumference of the medicine bottle, starting just below the rim of the twist-off cap. Anchor the end of a thick bundle of bright red or blue yarn at the base, and carefully wrap it around the body in tight, even rows until the plastic is fully concealed. Snip the end of the yarn and secure it with a dab of quick-drying craft adhesive. Cut small foot shapes out of stiff felt and glue the bottom of the wrapped bottle onto them for stability. Glue two or three craft eyes onto the upper yarn surface and insert bent pipe cleaners into the top cap for arms.
3. Glowing Night Light Creature
Concept and Visual Aesthetics
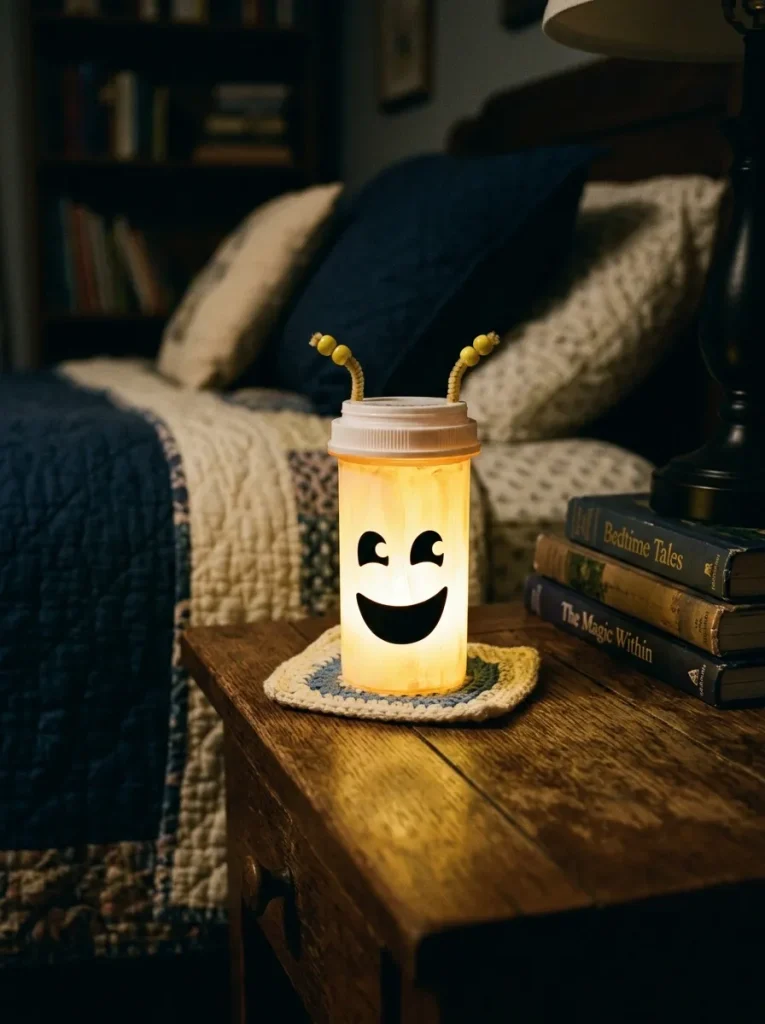
Illuminated monster toys bring an element of functionality to bedroom decor while offering kids a comforting nighttime accessory. Utilizing translucent or semi-clear pill bottles enables battery-operated LED tealights to project a soft, warm glow through painted or decorated plastic surfaces. Design themes for glowing monsters typically lean toward gentle, friendly expressions rather than scary aesthetics, using cheerful pastel colors, silhouette cutouts, and translucent paper layers. This project introduces children to light diffusion principles while allowing them to build a functional handmade night light that fits neatly on a bedside table or bookshelf display.
Setup Method
Select a translucent clear or amber plastic pill bottle and wipe the interior completely dry to ensure optimal light dispersion. Paint the outside using sheer glass paints or thin layers of diluted acrylics in shades of yellow, orange, or light blue, leaving semi-translucent zones for light transmission. Trace facial features such as smiling mouths, round eyes, and tiny fangs onto black vinyl or cardstock, cut them out precisely, and adhere them to the painted exterior surface. Insert a small, battery-operated LED tealight directly into the bottle, securing the cap on top to seal the internal light source while allowing easy power button access.
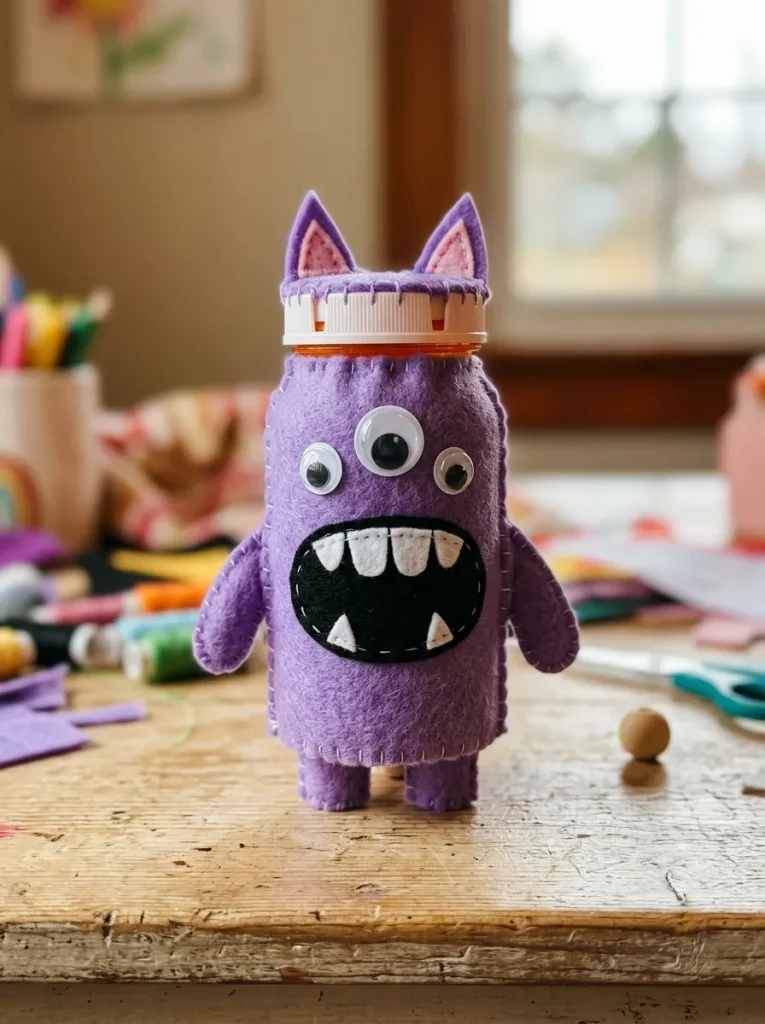
4. Recycled Felt Tooth Monster
Concept and Visual Aesthetics
Focusing on oversized teeth and wide mouths provides an entertaining visual theme that encourages playful interaction during craft sessions. The tooth monster concept uses soft felt sheets to construct pronounced facial features, large white incisors, and flexible lip borders surrounding the neck of the bottle. Children can design friendly herbivore creatures with broad square teeth or funny carnivores featuring pointed fangs made from white craft foam or felt scraps. This design serves a dual purpose as a playful Tooth Fairy box, where kids can store lost teeth or small rewards inside the secure twist-cap container safely.
Step-by-Step Creation Method
Cut a wide strip of thick grey or purple felt measuring the exact height and circumference of the pill bottle, wrapping it tightly around the body and securing the seam with tacky glue. Cut out a large oval shape from black felt to represent an open mouth, gluing it centrally onto the wrapped surface. Trim several small triangles and rectangles from white stiff felt to create misaligned monster teeth, adhering them along the top and bottom borders of the black mouth. Finish by adding three varied googly eyes above the mouth and gluing two small felt triangles onto the upper cap to serve as monster ears.
5. Magnetized Fridge Critter
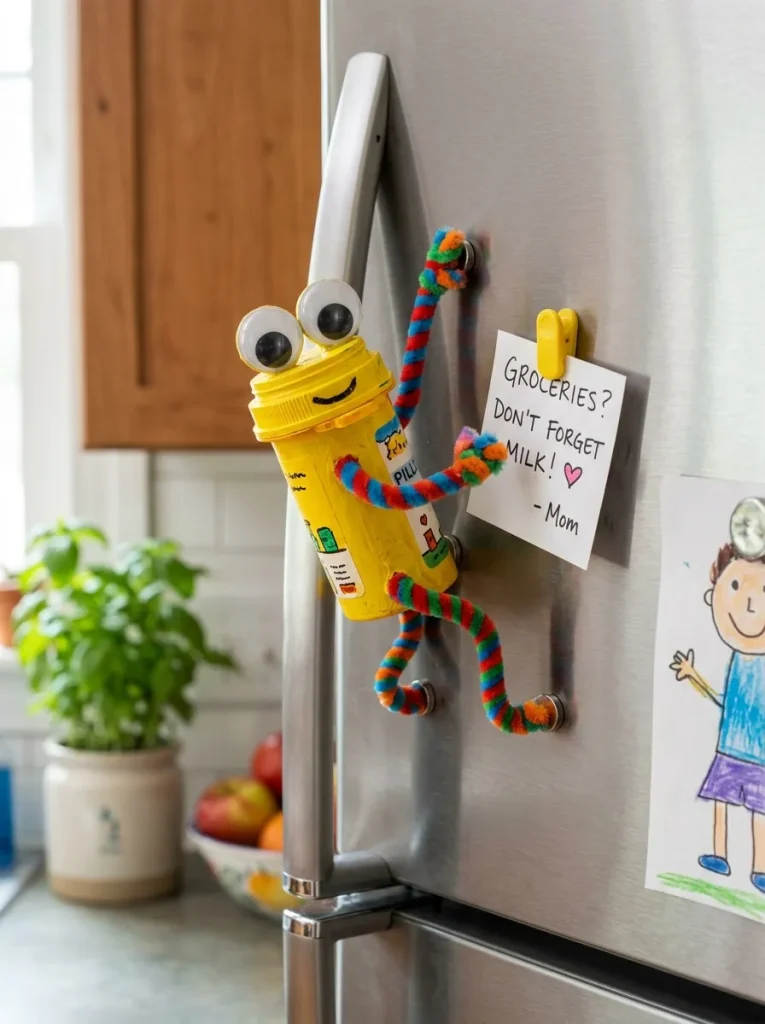
Concept and Visual Aesthetics
Functional crafts that interact with household surfaces like magnetic refrigerator doors maximize the play value of finished handmade toys. Magnetized pill bottle monsters combine lightweight plastic construction with strong ceramic or neodymium magnets, creating hold-everything kitchen accessories capable of displaying artwork or note pads. The visual design of fridge critters often highlights long flexible limbs made from wrapped wire or pipe cleaners that can be posed into dynamic climbing, dangling, or waving stances. Using vibrant primary colors ensures these decorative creatures pop visually against stainless steel or neutral appliance backdrops.
Execution Process
Paint the exterior of a clean plastic pill bottle with two coats of high-coverage acrylic paint in bright yellow or orange, letting it dry completely. Glue a strong, flat adhesive magnet directly to the back side of the container using high-strength craft glue, ensuring the surface is level for flat contact with metal doors. Attach four long pipe cleaners to the sides and bottom of the bottle to form bendable arms and legs, twisting the ends into small looped hands and feet. Add googly eyes and fine marker detailing to the front side of the bottle to complete the interactive character design.
6. Glittery Space Alien Monster
Concept and Visual Aesthetics
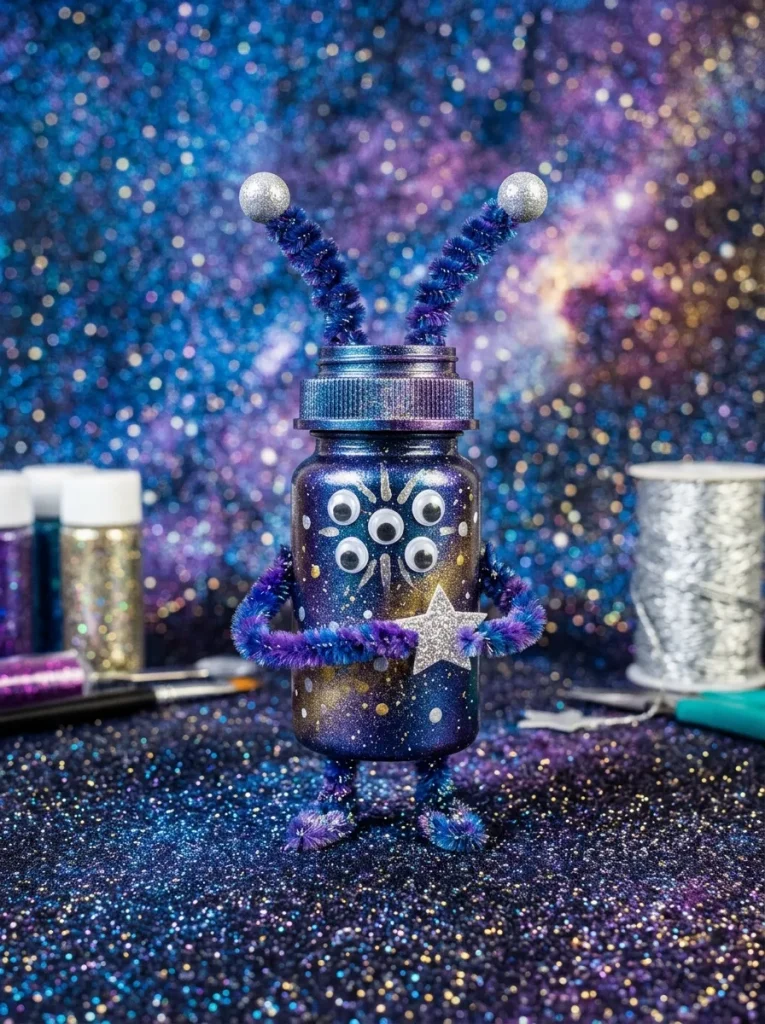
Space-themed creative ideas allow children to express wild visual concepts using metallic finishes, sparkling glitter powders, and galactic color palettes. A glittery alien monster transforms standard translucent pill bottles into cosmic creatures featuring multiple limbs, shimmering skins, and futuristic antennae extensions. Blending dark purples, deep blues, and shimmering silver paint creates a nebula effect across the cylindrical body, providing a rich backdrop for sparkling accents. This project helps children practice blending paint colors while introducing decorative materials like sequins, foil stars, and iridescent glitter to enhance sensory engagement.
Step-by-Step Guide
Sponge a mix of dark purple, turquoise, and black acrylic paint onto the medicine bottle surface to create a swirling cosmic base layer. While the paint remains damp, sprinkle fine iridescent glitter over the exterior, tapping off any excess after the paint dries completely. Secure several metallic chenille pipe cleaners inside the top cap by punching small pilot holes or using strong glue, coiling the exposed ends into spiraled alien antennae. Glue five small googly eyes in a radial pattern around the top section of the bottle, and draw metallic silver stars across the body using paint markers.
7. Springy Spooky Bobble-Head
Concept and Visual Aesthetics
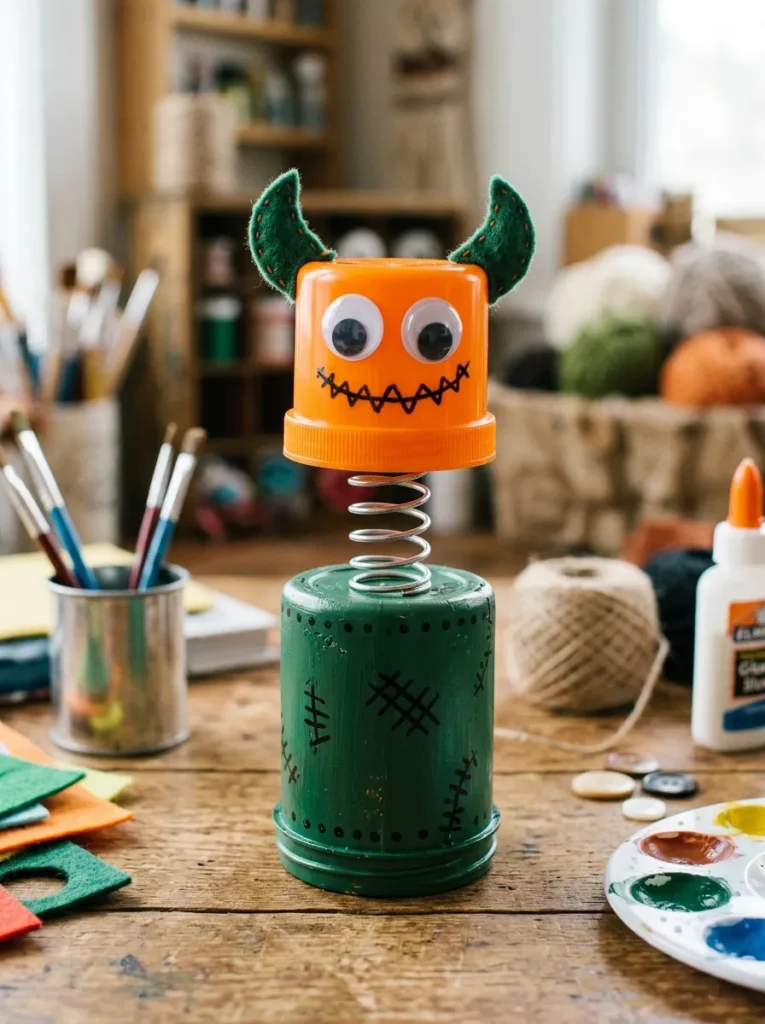
Dynamic motion elevates simple static toys into entertaining interactive figures that respond to touch through bouncing or wobbling head movements. Constructing a bobble-head monster involves separating the cap from the main bottle body using a small metal spring or coiled craft wire connector. The main body acts as the sturdy pedestal base, while the top cap transforms into an oversized, expressive monster head that jiggles when tapped gently. This structural format offers kids a basic lesson in mechanical balance, spring tension, and dimensional art design while assembling a quirky decorative desk toy.
Execution Process
Paint the bottom half of the pill bottle in a solid shade of dark green to act as the body, adding simple chest details like buttons or stitches using paint pens. Paint the separate plastic lid in a contrasting bright orange shade to serve as the oversized monster head, adding large eyes, felt horns, and a wide mouth expression. Secure one end of a two-inch steel craft spring to the top center of the bottle body using strong epoxy or heavy-duty craft adhesive. Glue the underside of the decorated cap to the top end of the spring, ensuring the head balances evenly without tipping over.
8. Winged Gargoyle Monster
Concept and Visual Aesthetics
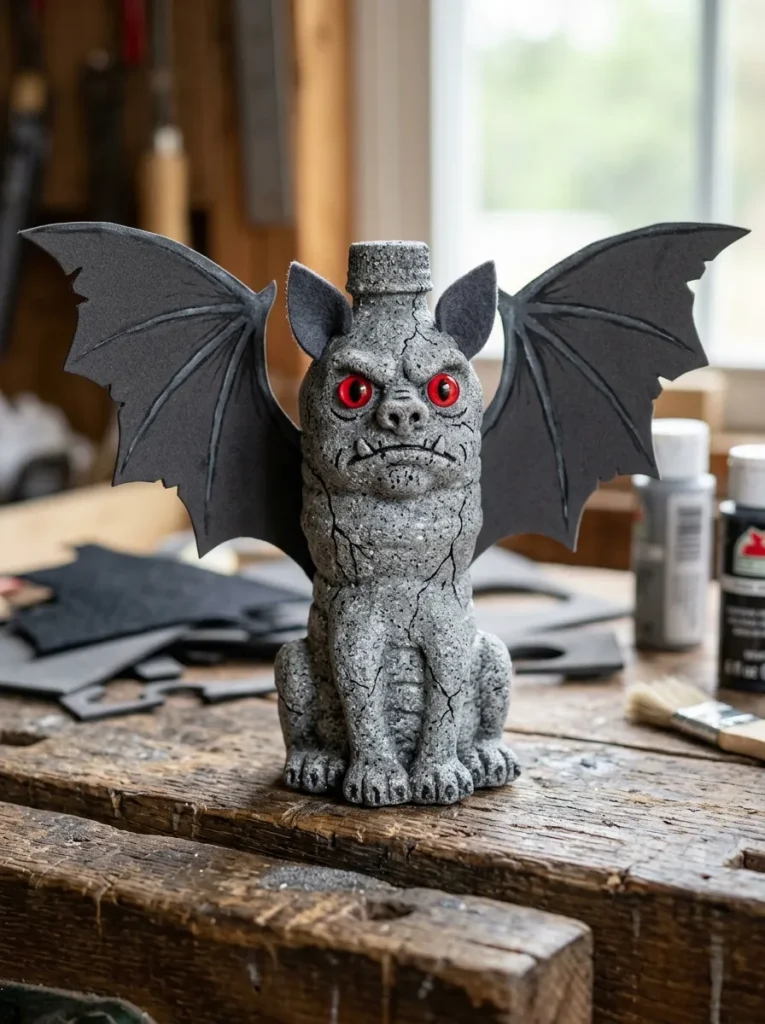
Architectural and mythical inspiration leads to structural craft ideas like winged gargoyle monsters, which feature broad wing structures and stone-like visual textures. Utilizing neutral color palettes such as grey, granite, black, and slate blue allows children to focus on sculpted shapes and silhouette outlines rather than bright neon colors. Attaching wide craft foam or cardstock wings to the back of the pill bottle creates an impressive span that changes the silhouette of the plastic cylinder. This project introduces kids to faux-texture painting methods while building creatures inspired by classic stories and historic stonework.
Step-by-Step Creation Method
Mix grey acrylic paint with a tiny drop of black paint and sand or texture paste, dabbing it onto the medicine bottle with a sea sponge to mimic stone textures. Trace a pair of bat-like gargoyle wings onto thick grey craft foam, cut them out cleanly, and attach them horizontally across the upper back of the bottle. Cut short pointy ears and small claw shapes from dark grey felt, gluing the claws near the base of the bottle and the ears onto the sides of the cap. Finish by adding small red or yellow craft eyes and drawing fine cracks across the stone body using a thin black gel pen.
9. Multi-Legged Centipede Beast
Concept and Visual Aesthetics
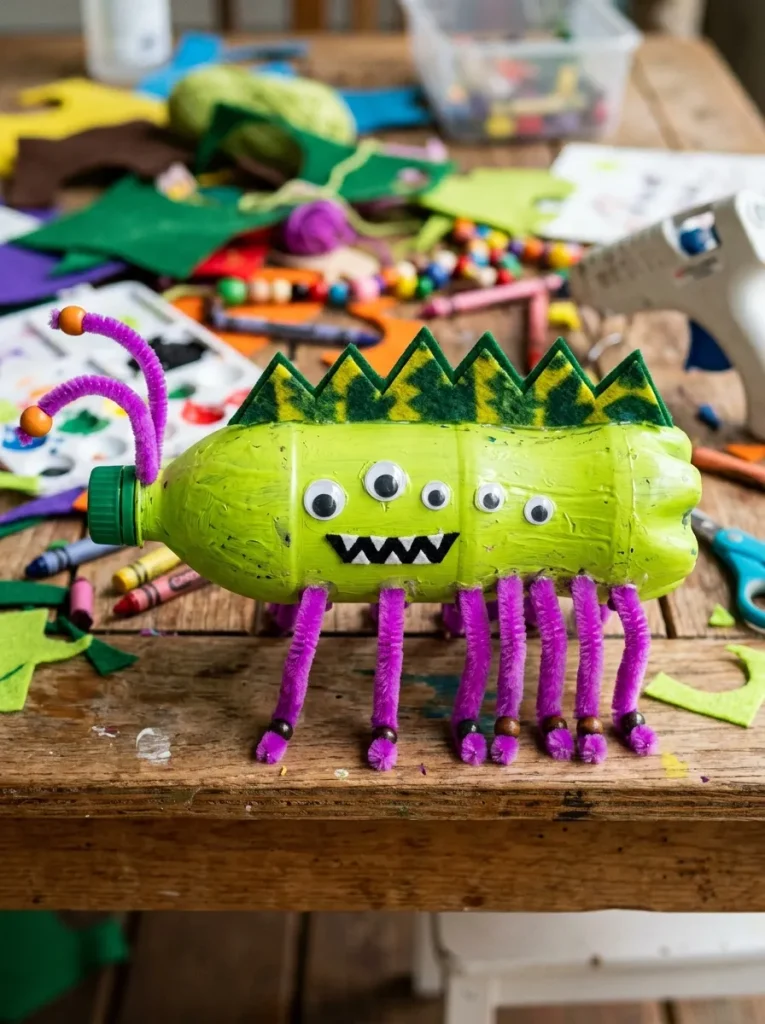
Insect-inspired monster designs focus on repetitive limb patterns, elongated body forms, and segmented visual details that make figures look active and creepy-crawly. Connecting multiple pipe cleaners along the sides of a horizontally oriented pill bottle transforms a vertical container into a multi-legged centipede creature. Kids can experiment with color symmetry, lining up identical pipe cleaner legs on both sides, or create chaotic multicolored limb arrangements for a more comedic monster look. Placing the container horizontally also provides a wider surface area for long, detailed facial features and textured spine ridges along the back.
Setup Method
Turn the pill bottle horizontally and paint the entire surface in vibrant lime green or magenta acrylic paint, allowing it to dry thoroughly. Glue four to six pairs of equal-length pipe cleaner strips along the bottom left and right edges of the cylinder, bending the tips to form small balance feet that support the bottle. Attach two long, curved pipe cleaners to the front cap to act as sweeping insect feelers or mandibles. Secure a row of small googly eyes across the front cap face and glue a strip of zig-zag felt trim down the top spine of the horizontally resting creature.
10. Stackable Monster Tribe Figures
Concept and Visual Aesthetics
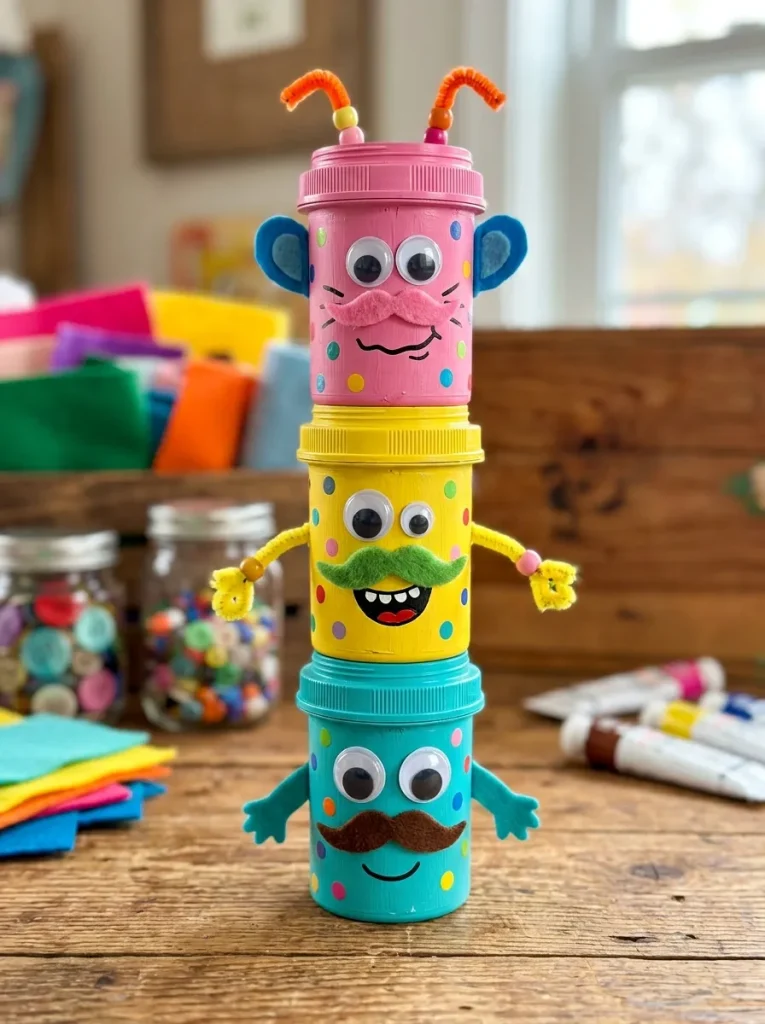
Creating modular, stackable monster figures introduces children to interactive building concepts where multiple characters can be reconfigured into taller structures. By standardizing the paint themes and attachment methods across multiple prescription bottles of identical size, kids build a collection of interchangeable monster segments. Each individual bottle represents a unique character torso or head, featuring distinct colors, expressions, and accessories. Stacking the containers securely on top of one another allows young creators to build towering monster totems, promoting social play, sharing, and continuous imaginative redesigns among siblings or playgroups.
Step-by-Step Guide
Collect three or four pill bottles of identical diameter, washing and prepping them completely to ensure safe handling during repeated stacking play. Paint each container a different bright solid color—such as turquoise, sunshine yellow, hot pink, and lime green—using durable multi-surface acrylic paint. Give each bottle a unique personality by adding distinct facial features, such as single eyes, mustache felt cutouts, toothy grins, or polka-dot body patterns. Ensure top caps and bottom bases remain clean of heavy embellishments so the bottles can nest or stack vertically on top of each other without falling over during play.
Comparative Project Quick Guide
| Project Name | Primary Material | Difficulty Level | Main Feature | Estimated Craft Time |
|---|---|---|---|---|
| Multi-Eyed Cyclops | Acrylic Paint & Eyes | Beginner | Asymmetrical Eye Layout | 20 Minutes |
| Fuzzy Yarn Monster | Colorful Scrap Yarn | Beginner | Soft Tactile Wrapping | 30 Minutes |
| Glowing Night Light | LED Tealight & Paint | Intermediate | Internal Glow Effect | 25 Minutes |
| Felt Tooth Monster | Craft Felt & Foam | Beginner | Oversized Mouth & Storage | 30 Minutes |
| Magnetized Critter | Heavy-Duty Magnet | Intermediate | Vertical Surface Attachment | 25 Minutes |
| Glittery Space Alien | Glitter & Pipe Cleaners | Intermediate | Shimmering Galactic Skin | 35 Minutes |
| Spooky Bobble-Head | Craft Spring & Cap | Advanced | Wobbling Head Motion | 40 Minutes |
| Winged Gargoyle | Craft Foam & Texture Paint | Intermediate | Broad Silhouette Wings | 35 Minutes |
| Centipede Beast | Multiple Pipe Cleaners | Beginner | Multi-Legged Alignment | 25 Minutes |
| Stackable Tribe | Multiple Matching Bottles | Intermediate | Modular Vertical Play | 45 Minutes |
Common Beginner Mistakes and How to Avoid Them
Working with slick plastic surfaces like prescription medicine bottles presents specific crafting challenges that can occasionally frustrate young makers. A common mistake is applying liquid acrylic paint directly onto smooth plastic without proper surface preparation, which frequently leads to peeling, flaking, or streaky color coverage. To prevent this issue, light scuffing with fine sandpaper followed by a dedicated plastic primer creates an optimal bonding surface for paint. Another frequent error involves using hot glue guns directly on thin plastic containers, which can warp the bottle or create burning hazards for children; using low-temperature glue tools or non-toxic craft adhesive ensures both structural integrity and user safety throughout the building process.
Practical Tips for Achieving Professional Results
Enhancing the visual polish of handmade monster toys involves applying simple finishing techniques that improve durability and appearance. Applying a clear matte or glossy sealant spray over painted surfaces protects the figures from chipping or fading during active playtime. Crafters should also layer varied textures—such as combining smooth foam, fuzzy pipe cleaners, glossy plastic eyes, and soft felt—to make the characters visually dynamic and tactilely engaging. When adding limbs or heavy facial features, balance the weight distribution carefully around the base of the medicine container to ensure the finished creature stands upright reliably without tipping over on flat surfaces.
Styling, Organization, and Creative Presentation Ideas
Presenting finished DIY monster toys creatively enhances their play value and keeps craft areas organized. Children can construct miniature monster habitat boxes using repurposed shoeboxes decorated with paper trees, felt cave structures, and painted background scenery. Displaying a row of finished monsters on floating bedroom shelves converts simple upcycled projects into vibrant handmade room decor items. Additionally, utilizing the functional hollow interiors of the pill bottles allows these toys to double as organized storage containers for small school supplies like paper clips, erasers, safety pins, or small hair accessories, combining artistic expression with practical home organization.
Efficient Budgeting and Craft Time Planning
Upcycled craft projects offer exceptional value by utilizing low-cost household waste alongside affordable bulk art materials. Families and educators can minimize expenses by collecting plastic prescription bottles over several months and sourcing multi-packs of googly eyes, pipe cleaners, and felt sheets from discount stores. Planning a structured craft session involves gathering materials into individual activity trays beforehand to keep work areas organized and prevent spills. Most single monster projects take between twenty and forty minutes to construct, making them ideal activities for rainy afternoons, weekend art sessions, birthday party craft stations, or classroom recycling lesson plans.
Creative Expansion and Advanced Project Ideas
Once children master basic pill bottle monster construction, they can expand their skills by incorporating advanced craft techniques and interactive features. Young makers can experiment with air-dry clay or polymer clay wrapped around the plastic base to sculpt intricate monster scales, tail structures, and detailed facial expressions before painting. Introducing simple electrical components, such as basic battery-and-switch circuits with small LED lights, turns these upcycled toys into introductory STEM learning tools. Crafting themed monster sets based on favorite storybooks or inventing custom board games where the pill bottle figures act as playable game pieces further extends the educational value of these creative projects.