
10 Bottle Crafts With Lights Ideas
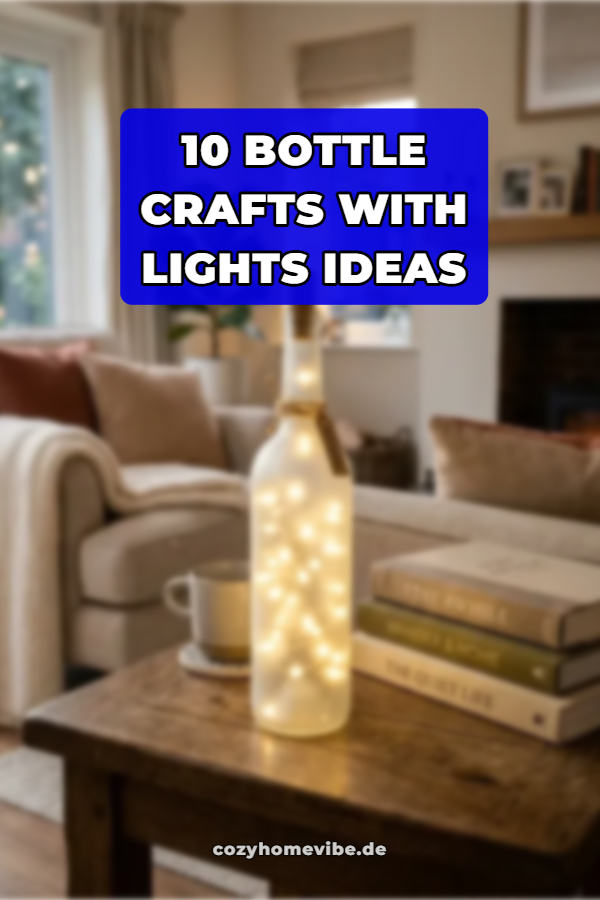
Upcycling glass bottles into illuminated decorative accents provides an eco-friendly and stylish way to enhance home interiors. Combining glass containers with LED string lights allows homeowners to create ambient lighting, seasonal decor, and functional centerpieces without requiring complex electrical skills. This comprehensive guide delivers ten practical bottle crafts with lights ideas designed to elevate residential spaces, outdoor patios, and event setups. Readers will discover clear instructions on material selection, surface preparation, glass cutting, drilling techniques, and wiring placement. Master how to convert transparent, amber, green, and frosted bottles into custom lamps, hanging pendants, and table arrangements that suit various interior themes. Each project emphasizes accessible step-by-step methods requiring basic tools, making them suitable for beginners and seasoned DIY enthusiasts alike. By applying thoughtful planning, proper safety protocols, and quality lighting fixtures, everyday glass containers can be transformed into durable, high-end design features. Learning how to properly prepare glass, manage wiring, and integrate decorative accents empowers individuals to execute budget-friendly home decor projects that add warmth, visual interest, and personalized charm to any room.
Why This Idea Is Trending or Useful
Illuminated bottle crafts dominate visual inspiration boards because they blend sustainable upcycling with modern lighting design. Glass bottles are durable, readily available household items that often end up in recycling streams. Repurposing these containers into custom light fixtures reduces waste while offering endless creative customization. The popularity of illuminated bottle projects stems from their practical versatility and high visual appeal; warm LED lights diffuse through colored or frosted glass, creating a soft atmospheric glow that instantly cozy up living spaces. For beginners entering the world of handmade home decor, bottle lighting projects offer a forgiving starting point. Battery-operated micro fairy lights, cork-shaped LED strings, and solar inserts eliminate the need for dangerous electrical re-wiring. Furthermore, these craft projects complement various interior aesthetics, including rustic farmhouse, industrial modern, bohemian, and minimalist styles. Decorating with light-filled bottles provides an affordable way to create custom wedding centerpieces, patio lighting, or holiday displays on a modest budget. Transforming basic glassware into functional illumination demonstrates how thoughtful DIY techniques elevate everyday materials into sophisticated design statements.
Materials and Preparation
Achieving a clean, safe, and professional finish on illuminated bottle crafts requires proper tool selection, safety equipment, and thorough glass preparation. Before beginning any lighting project, thoroughly clean the glass bottles inside and out using warm water, dish soap, and white vinegar to remove residue and odors. Eliminate paper labels and stubborn adhesives by soaking containers in warm soapy water and scrubbing with a plastic scraper or isopropyl alcohol. Safety equipment is critical when working with glass; always wear protective safety goggles, cut-resistant gloves, and a dust mask if drilling or cutting. Essential materials and tools include empty glass bottles of various shapes, battery-powered LED cork lights, fairy light strings, diamond-hole drill bits, painter’s tape, water spray bottles for cooling, spray paint, decoupage glue, and decorative embellishments. When drilling entry holes for wiring, maintain a steady low drill speed and continuously apply water to cool the glass bit, preventing thermal cracking. Establishing a clean, well-lit workspace lined with towels or silicone mats protects glassware from rolling and scratching during preparation phases.
Frosted Fairy Light Wine Bottle Accent
Visual Atmosphere and Light Diffusion
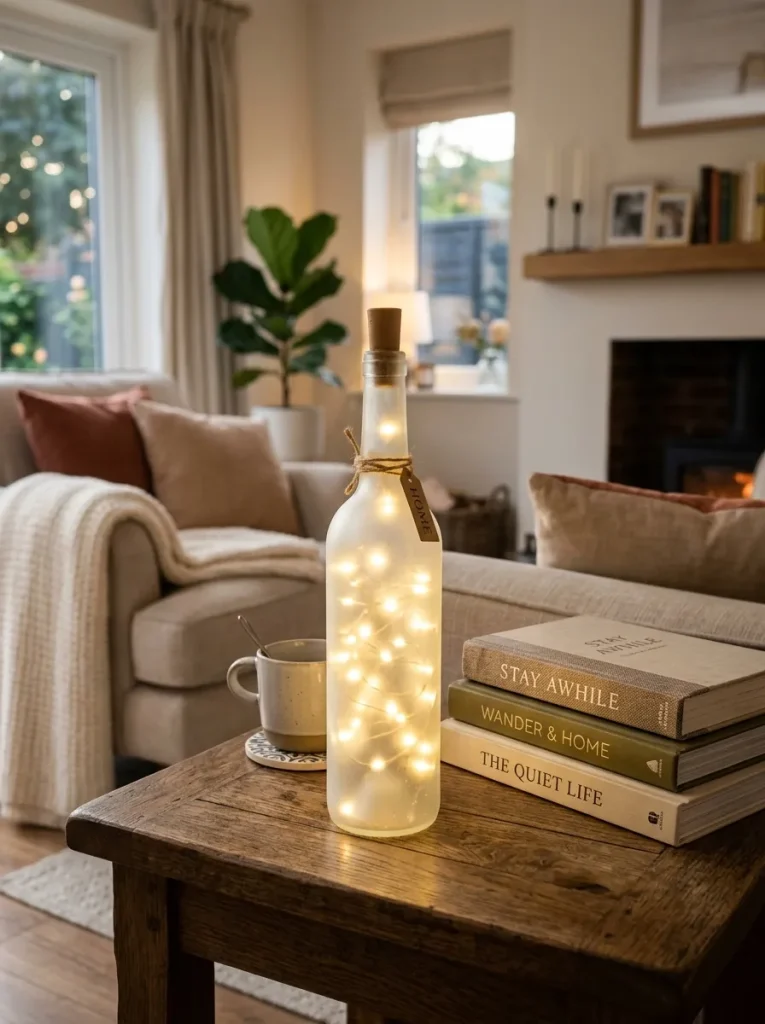
Applying a frosted coating to transparent wine bottles transforms raw glass into a soft, light-diffusing canvas that conceals interior wiring. The frosted surface scatters the output of enclosed LED fairy lights, producing a gentle, uniform glow reminiscent of classic frosted art glass. This minimalist style fits seamlessly into contemporary living rooms, bedrooms, and dining tables, serving as an understated ambient nightlight or decorative accent. Utilizing cool white or warm copper LED strings inside frosted glass accentuates delicate surface textures while casting a soothing illumination. The soft matte finish eliminates harsh glare, making this design an excellent option for relaxing home environments.
Execution Process
Begin by selecting a clean, clear wine bottle and ensuring all adhesive residue is completely removed from the exterior surface. Mask the bottle neck opening with painter’s tape to keep the interior glass clean during paint application. Spray two to three light, even coats of frosted glass finish spray paint over the entire bottle exterior, allowing fifteen minutes of drying time between applications to prevent drips. Once the paint cures fully after two hours, carefully remove the painter’s tape from the bottle neck. Insert a string of battery-operated LED cork lights into the top opening, feeding the wire down until the bulbs fill the interior chamber evenly. Switch on the cork light unit, resting the battery-containing cork stopper securely in the bottle neck to complete the assembly.
Diamond Drilled Table Lamp Station
Permanent Electrical Integration and Stability
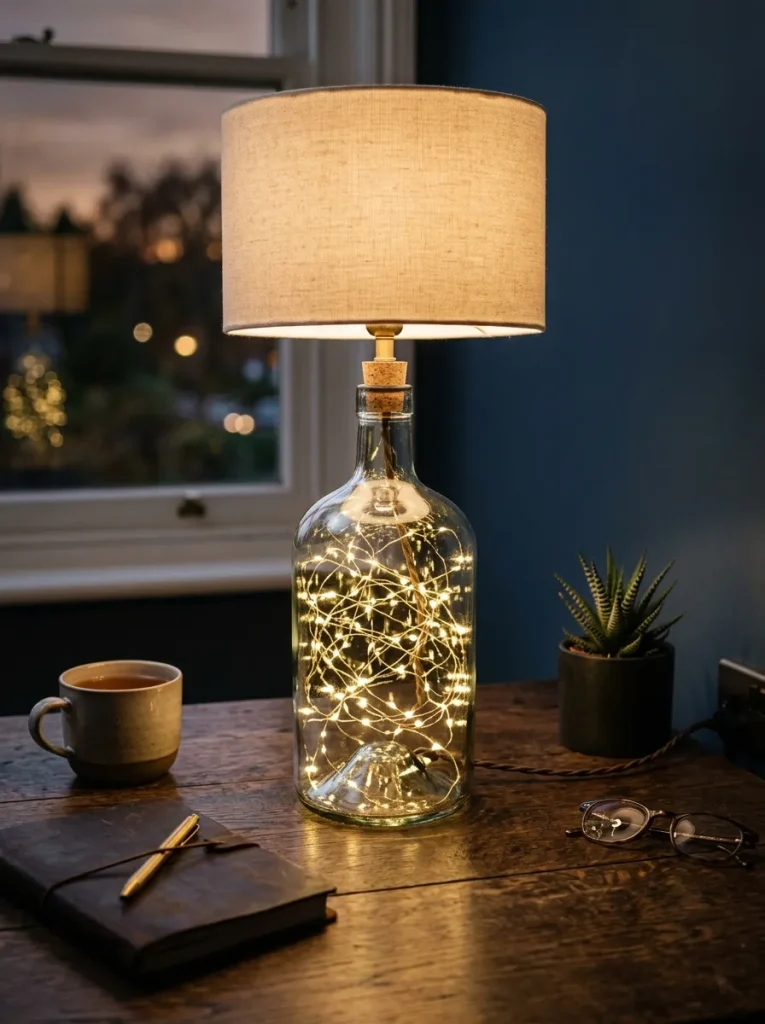
Creating a dedicated table lamp station using a diamond-drilled glass bottle provides a permanent, professional lighting solution without visible top wires. Drilling a clean access hole near the bottom base allows power cords or LED wires to exit cleanly behind the container. This structural modification converts heavy liquor, vinegar, or antique glass bottles into sturdy accent lamps suitable for side tables, desks, and bookshelves. Filling the bottle interior with warm fairy lights or installing a standard lamp socket at the top offers versatility in brightness and function. The bottom-exit wire design keeps the silhouette neat, streamlined, and visually balanced.
Step-by-Step Guide
Secure a clean, heavy-bottomed glass bottle onto a soft, stable work surface using clamps or a non-slip pad. Place a piece of heavy masking tape near the bottom rear base of the bottle, marking the exact spot for the wire entry hole. Put on safety goggles and gloves, then attach a half-inch diamond core drill bit to an electric drill. Apply a continuous stream of cold water over the target mark while drilling at a low speed and forty-five-degree angle, slowly leveling the bit flat as it bites into the glass. Once the drill penetrates the inner wall, flush out glass dust with water and allow the bottle to dry completely. Feed an LED wire or lamp cord through the freshly drilled hole, pull it up through the neck, and connect your lighting fixture before sealing the hole edges with a rubber grommet.
Rustic Twine Wrapped Amber Bottle Pendant
Earthy Textures and Warm Illumination
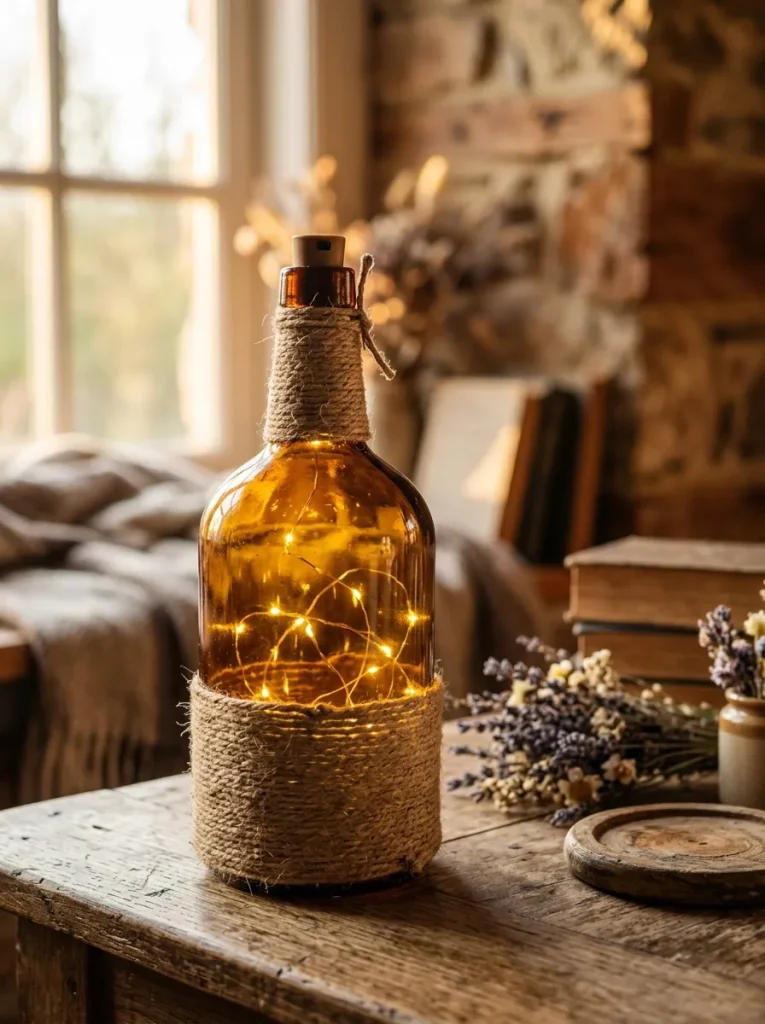
Wrapping amber glass bottles in natural jute twine yields a warm, rustic pendant light that complements farmhouse, bohemian, and cabin decor styles. Deep amber glass naturally filters harsh light rays, casting a rich golden glow that accentuates natural wood surfaces and warm color palettes. Wrapping strategic sections of the bottle in textured cord introduces tactile contrast against the smooth, reflective glass body. Leaving open glass bands between twine wraps creates dynamic light patterns across nearby walls and tabletops. This easy project requires zero specialized power tools, relying on basic adhesives and cork lights to deliver immediate visual warmth.
Setup Method
Thoroughly clean an amber glass bottle, wiping the outer surface with rubbing alcohol to ensure maximum adhesive bonding. Apply a thin line of hot glue or clear craft adhesive around the lower base perimeter of the bottle. Press the starting end of natural jute twine into the glue, wrapping the cord tightly around the bottle body in continuous horizontal spirals. Apply small dabs of adhesive every few turns to lock the twine layers in place, leaving the middle or upper section of the amber glass exposed to allow light output. Secure the end of the twine with glue near the neck, trimming excess cord neatly with sharp craft scissors. Insert a warm-white LED string light fitted with a cork battery pack into the top opening to illuminate the exposed amber glass panels.
Hanging Solar Bottle Lantern Array
Outdoor Illumination and Weatherproofing
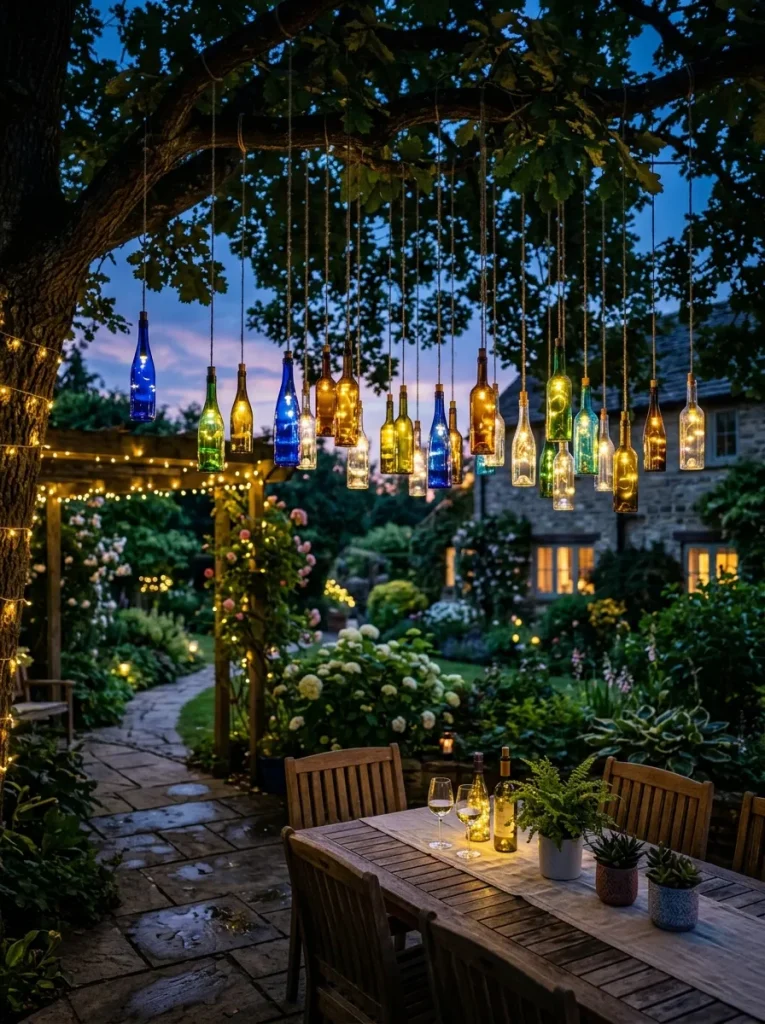
Constructing a hanging solar bottle lantern array provides an eco-friendly outdoor lighting system for garden pathways, patios, and outdoor dining areas. Equipped with waterproof solar lid inserts, these glass bottle lanterns charge automatically during daylight hours and illuminate outdoor spaces at dusk. Suspending multiple bottles at varying heights from tree branches, pergola beams, or shepherd hooks creates an enchanting visual display. The sealed glass body shields internal light components from rain and wind, ensuring long-lasting outdoor performance. Utilizing colorful wine or cobalt blue bottles adds vibrant pops of color to green garden landscapes during both daytime and evening hours.
Execution Process
Collect three to five colorful glass bottles of similar size, cleaning them thoroughly and removing all exterior paper labels. Attach a heavy-duty stainless steel wire bail or copper hanging bracket around the neck of each bottle, twisting the wire tightly with pliers to form a secure hanging loop. Insert a waterproof solar-powered fairy light lid unit into the top opening of each bottle, ensuring the rubber sealing gasket fits snugly against the glass rim to prevent water intrusion. Hang the bottles in an open outdoor location that receives direct, unobstructed sunlight throughout the day to maximize solar panel charging efficiency. Position the lanterns along garden borders or outdoor seating areas, allowing the internal light sensors to switch on the LEDs automatically as darkness falls.
Decoupage Floral Tinted Glass Vase
Artistic Patterns and Soft Silhouette
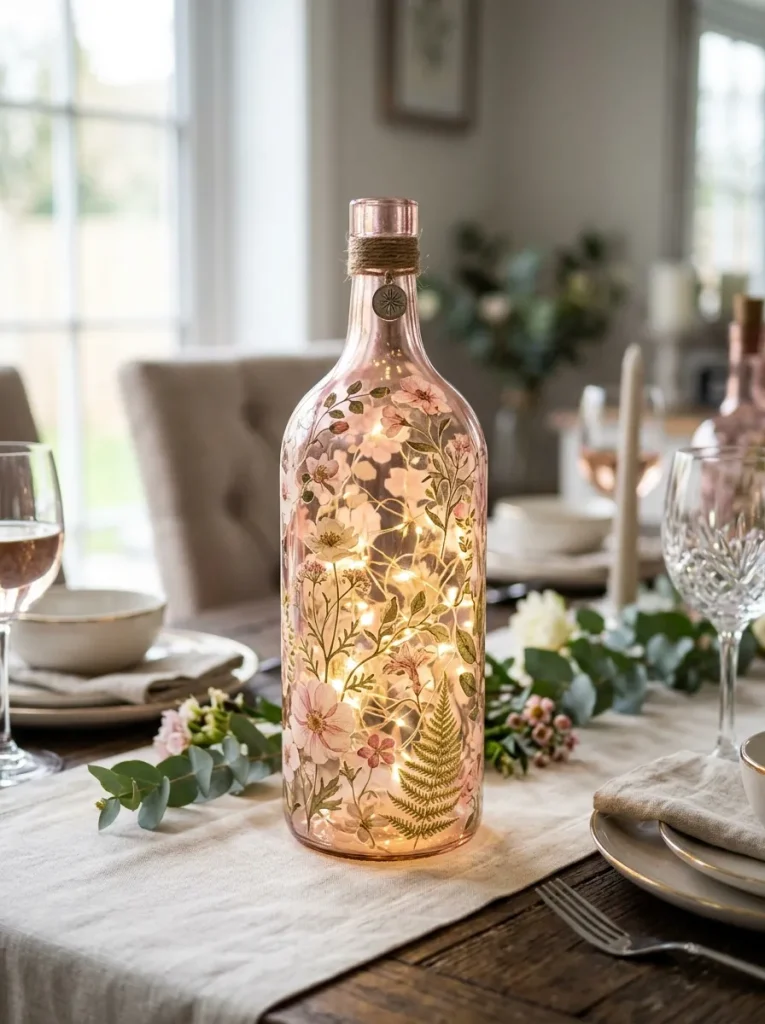
Decoupage floral tinted glass bottles merge delicate paper art with internal illumination, creating a glowing decorative vase that functions as an artistic centerpiece. Applying thin botanical paper cuts or floral napkins to light-colored glass allows light rays to pass through the paper fibers, highlighting intricate leaf veins and colorful petals. The combination of translucent glass stain and patterned decoupage materials creates a stained-glass effect when the internal lights are activated. This creative project offers endless customization, allowing crafters to match seasonal themes, wedding color schemes, or specific room palettes effortlessly.
Step-by-Step Guide
Coat the interior of a clean, clear glass bottle with a small amount of liquid glass stain or tinted Mod Podge, swirling the liquid around until the inner walls are evenly covered before draining the excess. Allow the interior tint coat to dry completely for twenty-four hours until transparent and smooth. Cut out delicate floral or botanical motifs from paper napkins, separating the printed top ply from the plain white backing layers. Apply a thin layer of clear decoupage medium onto the bottle exterior, gently pressing the paper cutouts onto the wet glue using a soft, dry sponge brush to eliminate wrinkles. Apply a protective top coat of matte decoupage sealer over the entire bottle, let it dry, and feed a micro-LED fairy light string inside to cast a soft floral glow.
Nautical Rope Encased Blue Bottle Lamp
Maritime Aesthetics and Textural Weaving
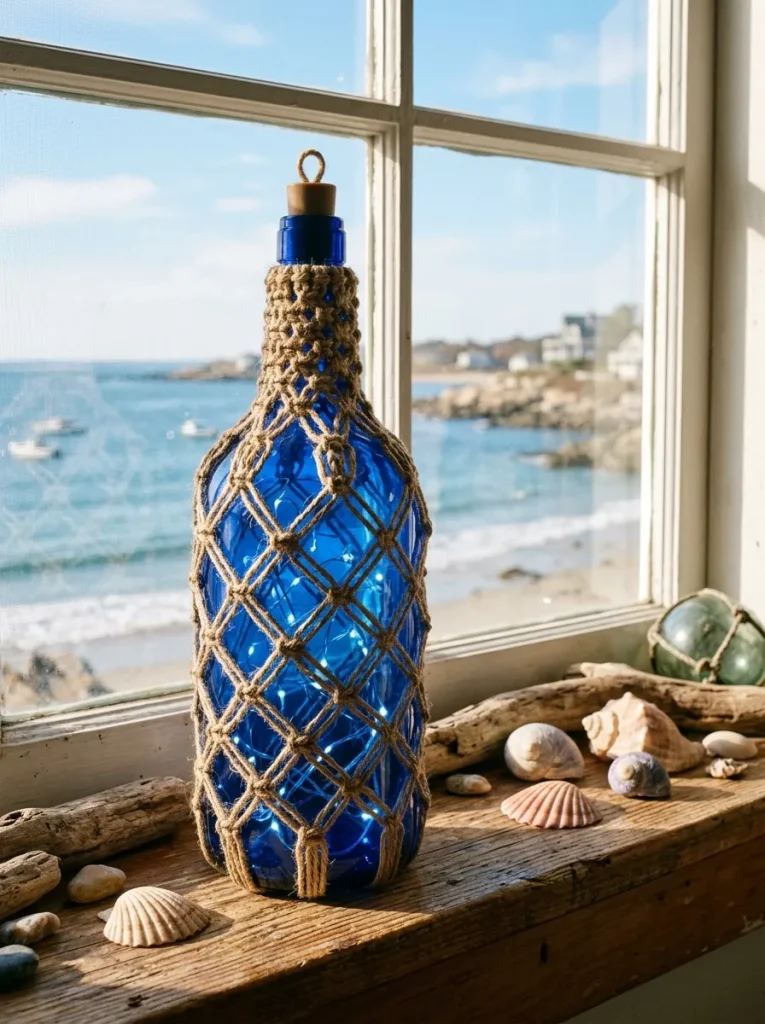
Encasing a deep cobalt blue glass bottle in a decorative nautical rope net creates a coastal-inspired accent piece that evokes traditional sea glass and glass fishing floats. The deep blue glass produces a serene, oceanic illumination when lit internally, while the surrounding rope grid adds structural texture and geometric detail. Utilizing macrame knots, square knots, or simple netting loops allows crafters to customize the density of the rope enclosure. This design serves as an attractive feature on coastal mantels, bathroom shelves, or outdoor porch tables, bringing a relaxed maritime aesthetic to home interiors.
Setup Method
Select a cobalt blue glass bottle and clean the surface thoroughly to remove grease and dust particles. Cut four long lengths of quarter-inch natural cotton or jute rope, folding them in half and securing them around the bottle neck with a central horizontal anchor cord. Pair adjacent rope strands and tie simple overhand knots one inch below the neck line, working around the perimeter of the bottle. Continue tying staggered knots down the length of the bottle body to form an open, diamond-shaped rope netting grid that hugs the curved glass. Gather all trailing rope ends tightly beneath the bottom base of the bottle, binding them securely with a tight whip knot and trimming excess cord flush. Insert a cool-white LED cork light string through the top opening to illuminate the blue glass through the surrounding rope netting.
Etched Glass Monogram Bottle Light
Customized Surface Carving and Elegance
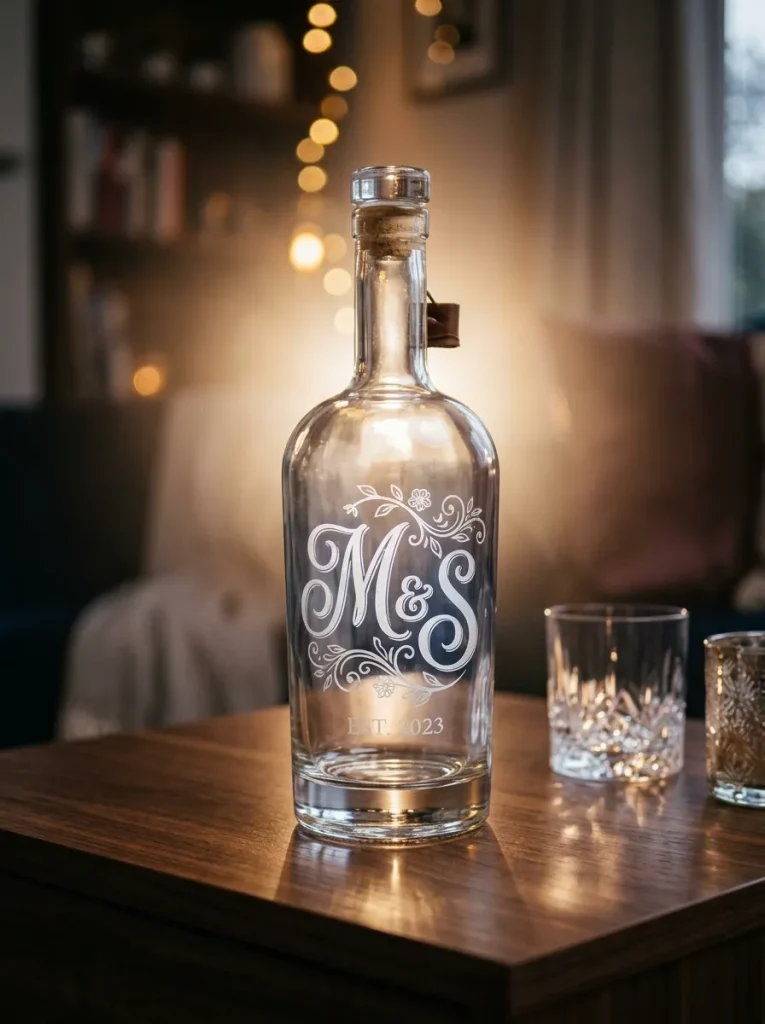
Etching custom monograms, family crests, or geometric patterns onto glass bottles yields a personalized, high-end decorative light ideal for personalized gifts, anniversaries, or weddings. Glass etching cream chemical processes transform smooth, glossy surfaces into permanent, frosted white designs that glow brightly when internal lights scatter against the etched lines. The contrast between clear polished glass and frosted custom lettering provides an elegant, professional look that elevates simple wine or spirit bottles into keepsake decor. Incorporating micro-fairy lights inside the bottle illuminates the etched graphics from behind, highlighting fine lines and detailed typography cleanly.
Execution Process
Clean the exterior of a glass bottle with rubbing alcohol to remove natural oils, ensuring complete surface adhesion for stencils. Cut a custom monogram or graphic design out of adhesive vinyl using a digital cutting machine or precision craft knife, weeding out the design areas to create a negative stencil. Press the adhesive vinyl stencil firmly onto the center of the bottle wall, using a scraper tool to smooth out all air bubbles along the design edges. Apply a thick, even layer of chemical glass etching cream over the exposed stencil area using a synthetic brush, allowing the chemical reaction to sit for fifteen minutes. Rinse the etching cream off thoroughly under running water, peel away the vinyl stencil, dry the bottle, and insert a battery-operated LED string to illuminate the frosted monogram artwork.
Painted Geometric Metallic Accent Bottle
Modern Minimalism and Metallic Sheen
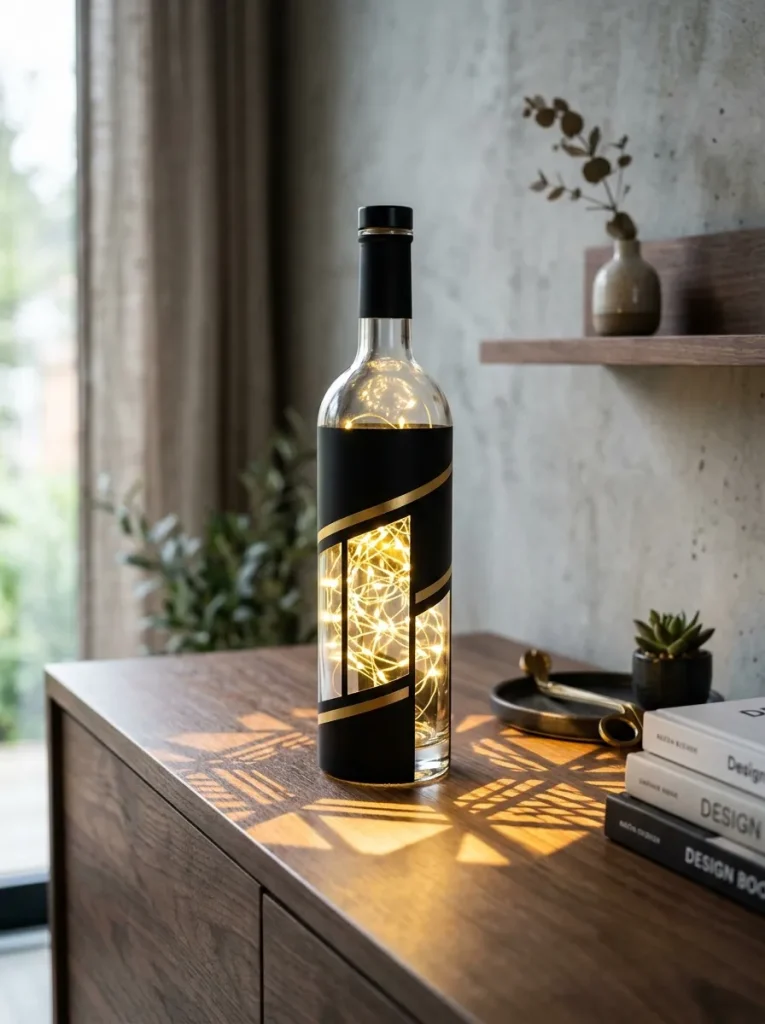
Combining bold geometric paint blocks with metallic accents on glass bottles establishes a contemporary, minimalist design piece that functions well in modern spaces. Using high-gloss metallic gold, copper, or silver spray paint alongside matte black or white blocks creates crisp visual lines that frame internal light output. By leaving unpainted geometric windows—such as triangles, diamonds, or arches—light escapes through defined openings, casting dramatic geometric shadows across nearby surfaces. This modern approach converts basic household bottles into stylish sculptural accents suitable for minimalist shelving, entry tables, and office desks.
Step-by-Step Guide
Clean a glass bottle with isopropyl alcohol, ensuring the surface is entirely dry and free of fingerprints. Apply low-tack painter’s tape across the bottle body to outline crisp geometric shapes, such as diagonal stripes, intersecting triangles, or horizontal color blocks. Press the edges of the painter’s tape down firmly using a plastic burnishing tool to prevent paint from seeping beneath the lines. Spray the exposed glass sections with two thin coats of matte black paint, followed by metallic gold accents on secondary sections, allowing thirty minutes of drying time between coats. Carefully peel away the painter’s tape while the final paint coat is slightly tacky to reveal razor-sharp glass windows and clean painted lines. Insert a copper-wire LED fairy light string into the bottle neck, positioning the tiny lights behind the clear glass windows to achieve geometric light projection.
Chalkboard Label Storage Bottle Light
Functional Organization and Custom Messages
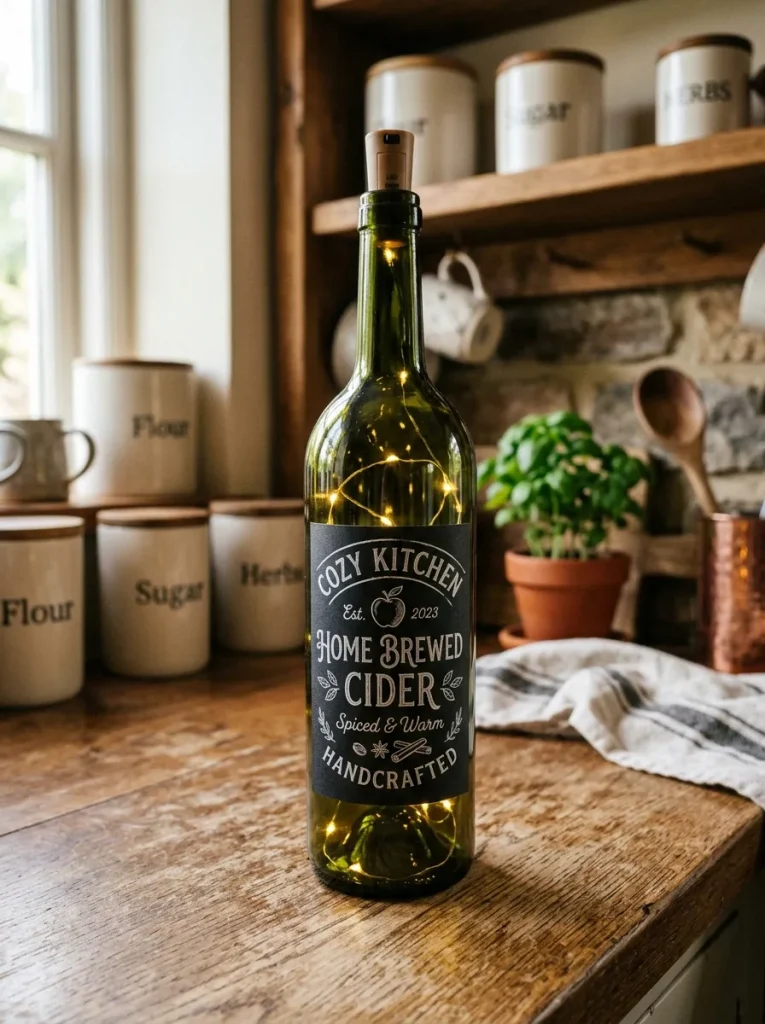
Integrating a chalkboard paint panel onto an illuminated glass bottle produces an interactive, functional accent that combines customizable message displays with ambient lighting. The dark matte chalkboard surface provides a stark contrast against glowing glass, allowing users to write temporary labels, daily quotes, or holiday greetings using chalk markers. This design serves a dual purpose in kitchens, pantries, or entryways, acting as both an organizational storage marker and a warm atmospheric light source. Erasing and rewriting messages is effortless, making this project an adaptable addition to dynamic home spaces and seasonal events.
Setup Method
Wipe down a glass bottle with rubbing alcohol and position painter’s tape to frame a rectangular or oval panel area on the front wall. Apply two to three thin coats of chalkboard paint over the masked panel zone using a soft foam brush, waiting one hour between applications for proper curing. Carefully peel off the painter’s tape framing to reveal a clean, sharp chalkboard panel on the bottle face. Condition the chalkboard surface after twenty-four hours by rubbing the side of a piece of white chalk over the painted area and wiping it clean with a dry cloth. Write a custom message, kitchen label, or decorative greeting onto the panel using liquid chalk markers, then feed a warm LED cork light string inside the bottle to illuminate the surrounding glass.
Mixed Media Shell Encrusted Bottle Lamp
Coastal Textures and Organic Materials
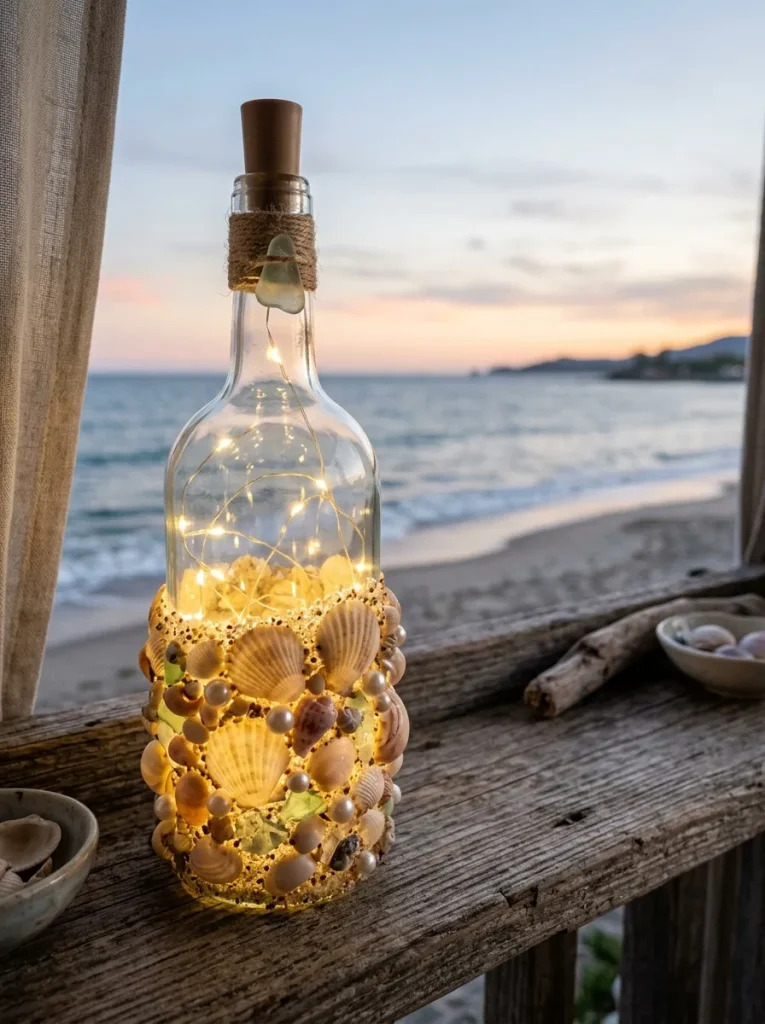
Covering glass bottles with natural sea shells, crushed glass, and beach sand creates a rich, textured coastal lamp that brings organic beach elements indoors. Using multi-surface craft adhesives or heavy modeling paste to embed small seashells, pearls, and sand around the bottle base transforms simple glassware into sculptural art. Internal LED lights shine through gaps between shells and diffuse through semi-translucent material layers, casting organic textural shadows. This design offers a memorable way to display beach vacation keepsakes, turning collected shells into functional, light-emitting home decor accents.
Execution Process
Clean a glass bottle thoroughly, applying a thick coat of heavy-body acrylic gel medium or tile adhesive over the lower two-thirds of the container body. Press an assortment of small sea shells, flat sea glass pieces, and small pebbles firmly into the wet adhesive medium, arranging them in an organic cluster pattern. Sprinkle fine craft sand or crushed glass flakes into the remaining wet adhesive gaps between the larger shells to cover the exposed glue completely. Allow the heavy adhesive and shell layer to cure undisturbed for twenty-four hours until completely hardened and clear. Coat the dried shell cluster with a layer of clear gloss sealer to lock in loose sand particles, then insert an LED cork light string through the neck to cast warm light through the coastal textures.
Common Beginner Mistakes and How to Avoid Them
| Common Crafting Mistake | Impact on Glass Project | Prevention and Correction Strategy |
|---|---|---|
| Drilling Glass Without Water | Causes extreme heat buildup, leading to cracked glass and broken drill bits. | Continuously stream cold water over the drill site while keeping drill speeds low. |
| Skipping Surface Degreasing | Oils and dirt prevent paint, glue, and vinyl stencils from adhering properly. | Thoroughly wipe all glass surfaces with rubbing alcohol before applying finishes. |
| Using High-Heat Light Bulbs | Enclosed traditional bulbs overheat rapidly inside sealed bottles, posing fire hazards. | Use low-voltage LED string lights or battery-operated cork LEDs exclusively. |
| Rushing Paint Drying Times | Causes paint to tear, smudge, or peel when removing painter’s tape lines. | Allow paint coats to dry completely and remove tape at a sharp forty-five-degree angle. |
| Neglecting Safety Equipment | Glass dust and flying splinters cause serious eye, lung, and skin injuries. | Always wear safety goggles, cut-resistant gloves, and a dust mask during drilling/cutting. |
Practical Tips for Better Results
Achieving professional results when crafting illuminated bottle projects relies on careful preparation, technical discipline, and high-quality lighting components. Always test your LED light strings before feeding them into prepared bottles; checking battery levels and wire integrity beforehand prevents having to remove lights from tight glass necks later. When painting or frosting glass surfaces, apply multiple ultra-thin coats rather than one heavy coat to eliminate unsightly runs, drips, and uneven brush marks. Utilize flexible copper-wire LED lights rather than thick plastic-coated wires, as copper wires can be bent and shaped easily to distribute light evenly across the bottle height. When drilling access holes near the bottom of glass bottles, place a piece of clay or putty around the drill site to form a small water reservoir that holds cooling water automatically. Finally, apply a clear protective acrylic sealer over painted, etched, or decoupaged bottle surfaces to safeguard your artwork against scratches, moisture damage, and daily handling wear.
Styling, Presentation, or Organization Ideas
Grouping and Visual Balance
Presenting illuminated bottle crafts effectively within home interiors depends on intentional grouping, height variation, and color balance. Arranging light-filled bottles in odd-numbered clusters—such as sets of three or five—on wooden trays, fireplace mantels, or dining tables creates a balanced, harmonious composition. Combine bottles of varying heights, shapes, and glass tones (such as pairing a tall green wine bottle with a medium amber flask and a short frosted bottle) to establish dynamic visual interest.
Incorporating Complementary Decor
Enhance illuminated bottle displays by integrating complementary natural elements around the base of your arrangement. Surround warm glass bottle lights with seasonal greenery, eucalyptus sprigs, pinecones, or wooden bead garlands to anchor the lighting feature within your overall room design. Placing bottle light arrangements in front of mirrors or reflective wall surfaces doubles the ambient glow, amplifying light output across dark corners or hallway tables. For special events, line garden pathways or outdoor dining tables with matching solar or cork-light bottle sets to establish a warm, welcoming environment for guests.
Budget or Time Planning
Material Cost Allocation and Savings
| Expense Category | Typical DIY Investment | Cost-Reduction Strategy |
|---|---|---|
| Glass Bottles | $0.00 (Upcycled household packaging) | Collect empty wine, sauce, and beverage bottles from home or friends. |
| LED Lights & Cork Lights | $8.00 – $15.00 (Multi-packs) | Purchase multi-packs of battery-operated LED cork lights online in bulk. |
| Paints, Glue & Etching Cream | $5.00 – $12.00 | Utilize multi-purpose acrylic paints and craft glues suitable for multiple home projects. |
| Drilling Tools & Safety Gear | $10.00 – $18.00 (One-time investment) | Invest in a basic diamond core bit set that can be re-used for future glass crafts. |
| Total Project Range | $23.00 – $45.00 total | Creates multiple custom lighting features for a fraction of store fixture costs. |
Project Execution Timelines
Executing an illuminated bottle craft efficiently requires a structured timeline that accounts for cleaning, surface preparation, drilling, paint curing, and final assembly. Dedicate the first hour to soaking off paper labels, scrubbing adhesive residue, and thoroughly drying all collected glass containers. Allocate thirty to forty-five minutes for drilling wire access holes or applying surface treatments like frosted spray paint, decoupage, or chalkboard panels. Allow at least two to four hours of drying and curing time for painted or glued surfaces before handling glass containers for light installation. Reserve the final thirty minutes for feeding LED light strings inside, adjusting wire distribution, positioning battery corks, and styling your completed bottle lamps within your home spaces.
Creative Expansion and Advanced Inspiration
Once you master basic illuminated bottle craft techniques, explore advanced variations that push your upcycling skills into unique artistic territory. Combine multiple bottle lights together using custom wooden bases or industrial pipe fittings to construct multi-light chandeliers, hanging island pendants, or desktop lamp stations. Experiment with smart LED lighting inserts that allow you to adjust color hues, brightness levels, and lighting effects directly from a smartphone app or remote control.
Advanced makers can explore cut-glass techniques using bottle cutters to slice off bottle bases or tops, converting glass cylinders into open-bottom storm lanterns, hurricane candle holders, or terrariums fitted with hanging micro-lights. Integrating resin casting inside bottle bases allows you to embed dried flowers, glitter, or ocean elements beneath glowing LED wires permanently. Transforming simple glass bottles through creative lighting modifications yields endless possibilities for functional art, proving that thoughtful DIY execution turns everyday packaging into extraordinary home decor features.