
10 Balloon Cluster Birthday Party Centerpiece Ideas
A well-crafted balloon cluster centerpiece instantly elevates table styling, serving as an eye-catching focal point for birthday celebrations of every age. Party planning enthusiasts and DIY decorators frequently turn to balloon arrangements because they offer high visual impact, customizable color palettes, and budget-friendly appeal. This comprehensive guide presents ten creative ideas for building professional-quality balloon cluster centerpieces that suit various aesthetic preferences, from minimalist modern designs to lush organic arrangements. By exploring these practical concepts, readers will learn how to select appropriate materials, balance color schemes, engineer stable base structures, and integrate complementary elements like greenery, floral accents, and warm LED lighting. Understanding these core techniques empowers beginners to transform simple latex balloons into structured, elegant table decorations that unify the overall party theme. Whether hosting an intimate family dinner or a large festive gathering, mastering these step-by-step methods ensures your celebration setup looks polished, cohesive, and visually memorable.
Balloon cluster centerpieces continue to dominate modern Pinterest ideas because they combine high decorative flexibility with low material costs. As event styling leans toward interactive, textured, and three-dimensional home decor elements, balloons provide a versatile medium that easily adapts to trending color palettes like muted pastels, metallic chrome tones, and warm earth shades. The appeal of a balloon cluster lies in its accessibility; even a complete novice can construct impressive table arrangements without specialized artistic training or expensive professional equipment. Furthermore, handmade balloon projects allow party hosts to customize size, height, and density according to specific venue dimensions and seating configurations. From casual backyard gatherings to formal indoor birthday events, these creative ideas offer practical solutions that fit diverse party budgets while maintaining a fresh, modern design aesthetic that photograph exceptionally well for social media sharing.
Proper preparation and strategic material selection form the foundation of durable, visually appealing balloon centerpiece construction. Before starting any project, gather high-quality latex balloons in coordinated sizes—typically five-inch, nine-inch, and twelve-inch diameters—along with a dual-action hand pump or electric balloon inflator for efficient inflation. Essential assembly tools include clear fishing line, low-temp glue dots, flexible aluminum craft wire, weight bases, and sturdy tabletop stands or metal hoops. Preparing your workspace involves clearing a large, flat surface and ensuring it remains free of sharp edges or static-inducing dust that could pop balloons. Planning the arrangement requires measuring table lengths to determine proper centerpiece scale, ensuring finished clusters do not obstruct eye-level conversation between seated guests. Measuring balloon sizes consistently using a cardboard sizing box guarantees uniform clusters, creating a balanced, professional finish across all party tables.
Tiered Pastel Quad Cluster
How to Create
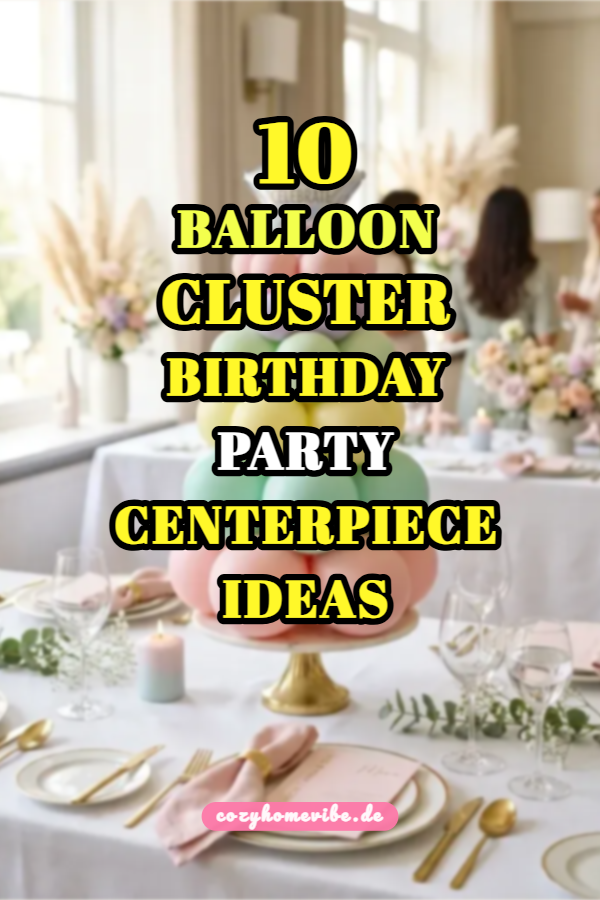
The tiered pastel quad cluster is a timeless centerpiece design that utilizes four-balloon bases stacked vertically to build structured, balanced volume. This concept relies on soft pastel shades—such as muted blush, mint green, pale lemon, and soft lavender—to create an inviting, gentle color palette suitable for children’s birthdays, milestone celebrations, or elegant brunch gatherings. By stacking multiple layers of four-balloon quads in decreasing sizes, the arrangement achieves an appealing pyramid silhouette that draws the eye upward toward a central focal point, such as a foil number or clear orb balloon. The key to this aesthetic lies in color distribution; alternating soft shades across each layer adds subtle visual depth while maintaining a clean, orderly appearance that complements light tablecloths and minimalist table settings perfectly.
To assemble this tiered structure step by step, begin by inflating eight five-inch balloons and eight nine-inch balloons in your chosen pastel colors using a balloon sizing box to ensure exact dimensions. Tie two balloons together by their necks to form duos, then twist two duos together at their central knots to construct a sturdy four-balloon cluster, known as a quad. Repeat this process until you have two large nine-inch quads and two smaller five-inch quads. Secure a small weight, such as a water-filled balloon wrapped in foil, to the center of the first large quad to serve as a stable foundation on the table surface. Stack the second large quad directly above the first, tying them together securely with clear fishing line or craft wire. Finish the structure by stacking the two smaller quads on top, adjusting individual balloon positions to ensure tight nesting, and crown the apex with a small accent foil balloon.
Organic Eucalyptus Garland Pod
Execution Process
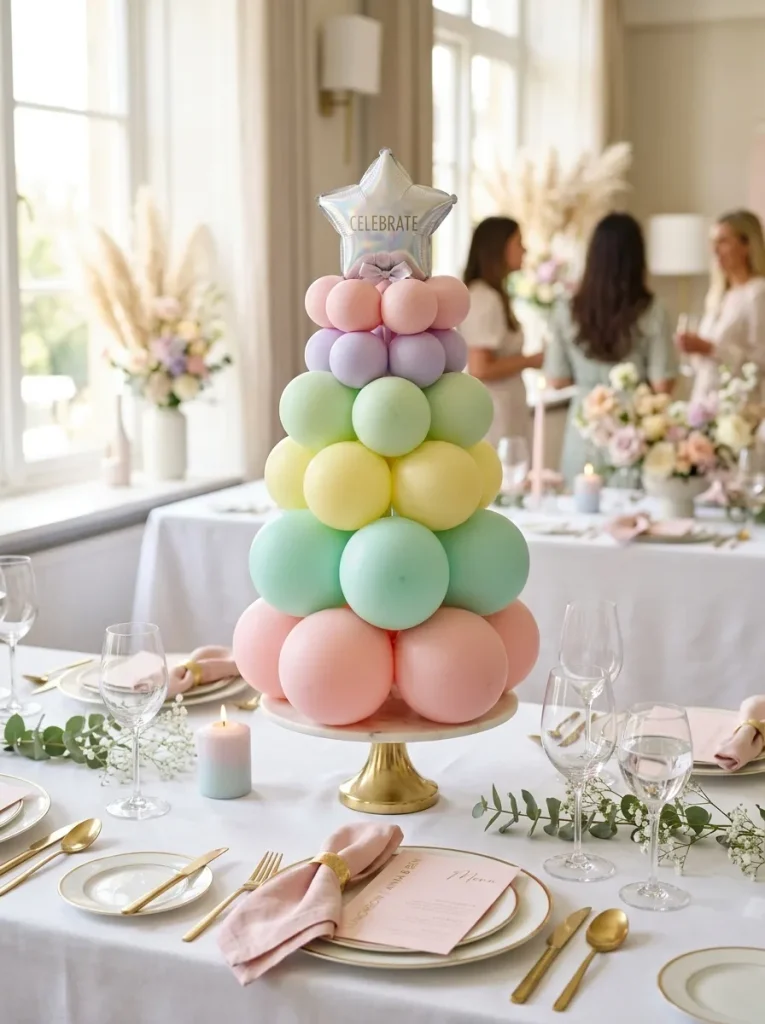
The organic eucalyptus garland pod integrates natural botanical foliage with varied balloon sizes to produce an organic, garden-inspired centerpiece. Unlike rigid geometric arrangements, this design style emphasizes intentional asymmetry, where balloons of random diameters appear to cluster naturally around fresh or faux eucalyptus sprigs. Utilizing matte sage green, warm cream, and eucalyptus-toned latex balloons creates a sophisticated, earthy color palette that aligns seamlessly with modern boho or rustic birthday themes. The inclusion of textured greenery softens the rubbery appearance of latex, adding organic lines, rich botanical scent, and delicate movement that rests gracefully along the center of dining tables, making it an ideal choice for adult birthday dinners.
Constructing this botanical centerpiece requires building a flexible wire core that supports both balloons and greenery stems securely. Cut a twelve-inch length of flexible aluminum craft wire, looping both ends to eliminate sharp edges that might puncture the latex. Inflate an assortment of five-inch and nine-inch balloons in sage, cream, and olive tones to varying capacity, creating duos and trios rather than uniform quads to emphasize the organic style. Wrap the tied necks of these balloon clusters tightly around the wire core, packing them closely together to form a dense central pod. Once the balloon base is secured, slide fresh or high-quality silk eucalyptus stems between the balloon gaps, anchoring them into the central knots with low-temp glue dots or floral wire. Adjust leaf placement so stems spray outward along the tabletop, framing the balloon pod gracefully.
Metallic Chrome Ring Anchor
Setup Method
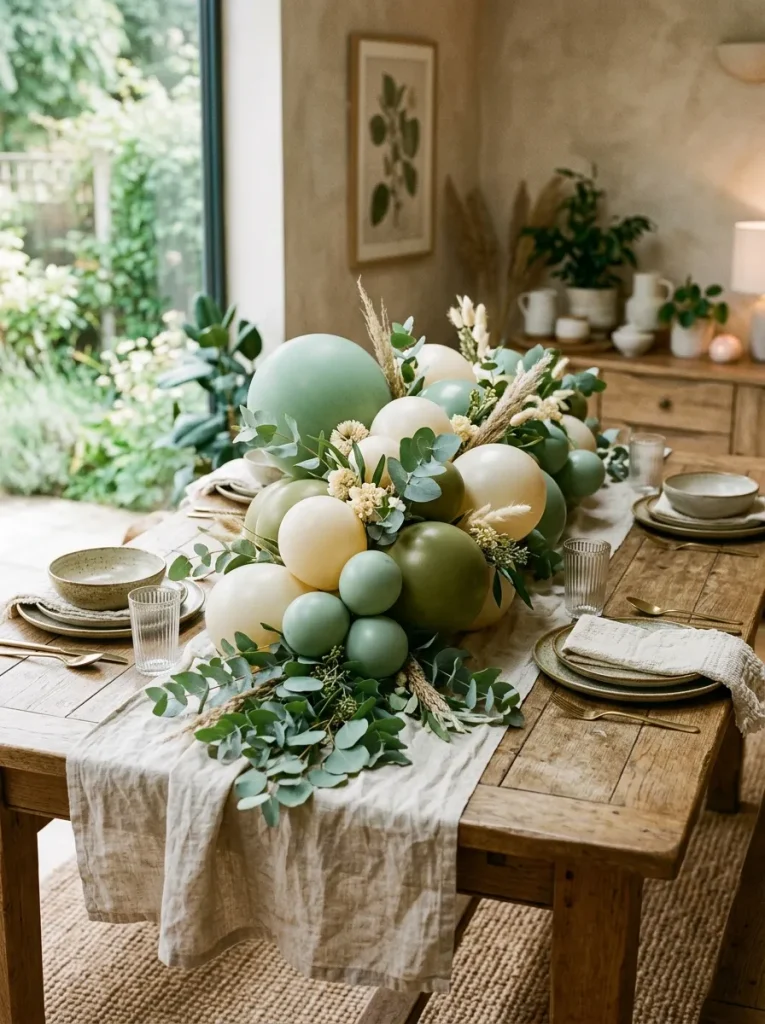
The metallic chrome ring anchor presents a sleek, contemporary aesthetic by framing a dense balloon cluster within a freestanding circular metal hoop stand. This design juxtaposes the clean, industrial lines of a gold, silver, or rose gold hoop against the soft, rounded textures of high-shine metallic chrome balloons. By clustering balloons along only one side or the lower quadrant of the metal ring, the arrangement achieves an artistic, semi-arch effect that leaves open negative space inside the frame. This open space provides an ideal backdrop for custom laser-cut acrylic birthday signage, hanging photo charms, or delicate hanging crystals, making the centerpiece a striking modern focal point for evening celebrations and formal dinner setups.
Building this architectural centerpiece begins with assembling a stable tabletop metal hoop stand, ensuring the heavy weighted base rests flat against the table runner. Inflate a mixture of five-inch metallic chrome gold, silver, and champagne balloons, tying them into small, tight quad clusters using clear fishing line. Attach the largest balloon quad to the bottom corner of the metal ring using zip ties or floral wire, ensuring the connection point remains completely concealed behind the balloon bodies. Continue layering smaller quad clusters upward along one arc of the hoop, tapering balloon sizes gradually as you move higher up the metal frame to maintain visual balance. Fill any visible gaps or exposed mounting hardware by attaching tiny five-inch individual balloons using double-sided balloon glue dots, then secure a personalized birthday acrylic sign to the center of the open hoop.
Illuminated LED Bubble Orb
Step-by-Step Guide
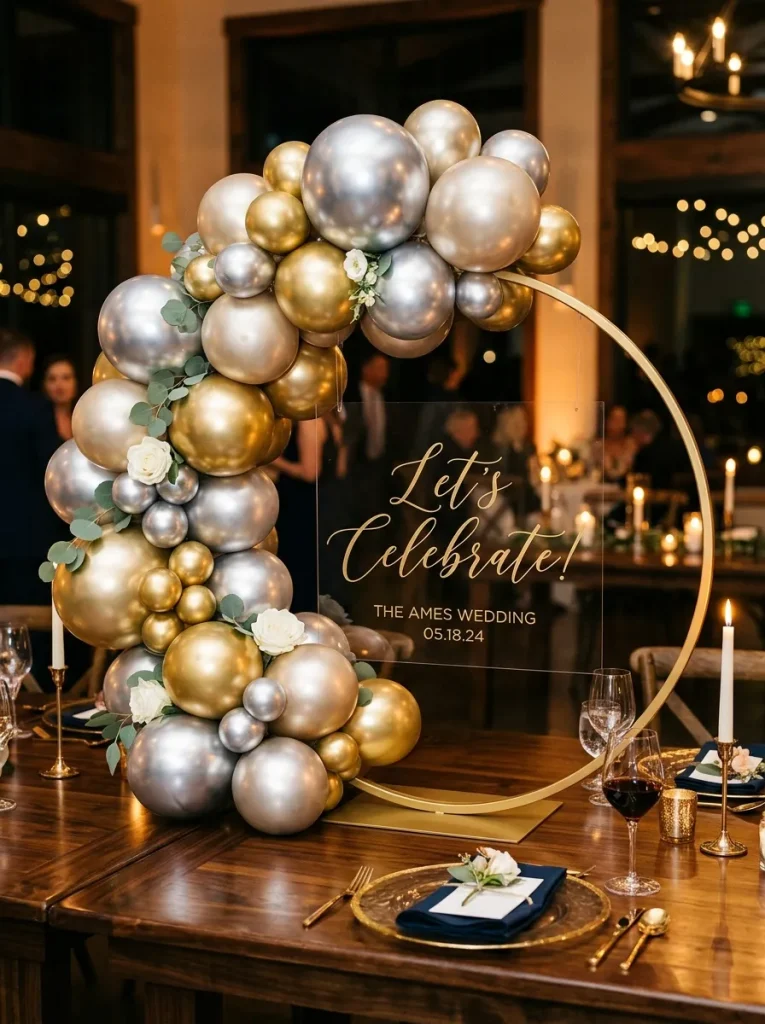
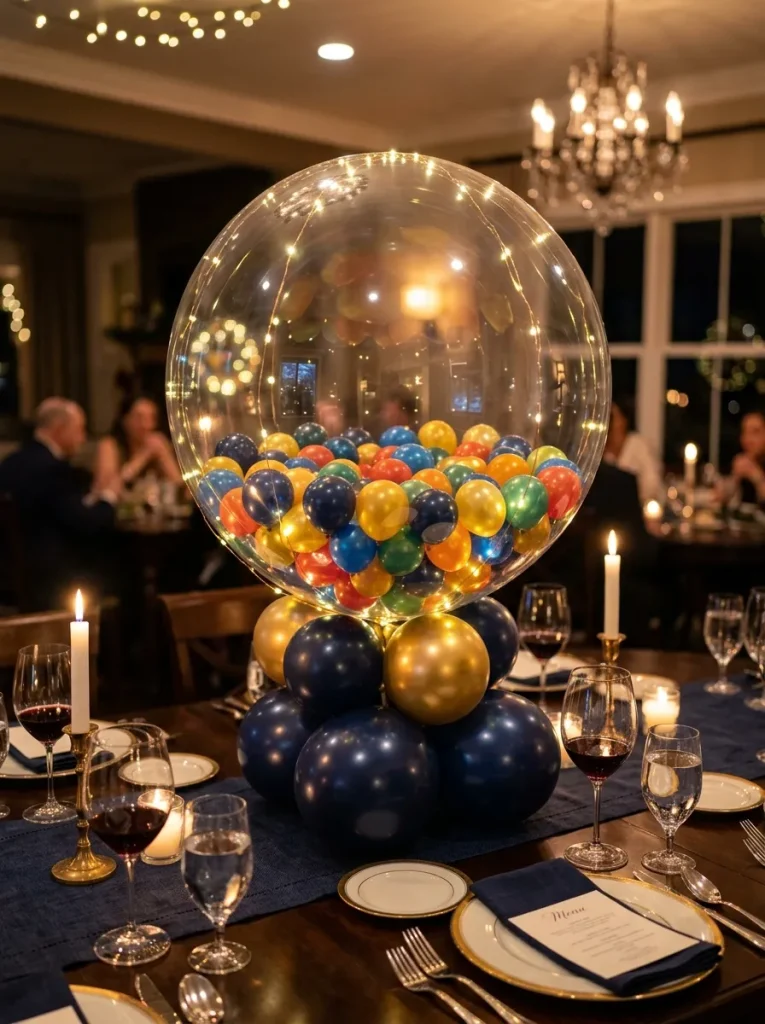
The illuminated LED bubble orb centerpiece combines clear, crystal-like stretchy plastic balloons with warm micro-fairy lights and small internal balloon clusters for a magical, ambient presentation. This creative idea centers on a large transparent orb balloon filled with tiny colorful latex balloons that match the birthday party theme. Wrapped in delicate copper-wire LED string lights, the clear orb glows softly from within, casting a gentle illumination over the dining table during nighttime or dimly lit indoor events. The base of the orb is anchored by a dense, low-profile latex balloon cluster that conceals the battery box while providing necessary weight and visual grounding on the table surface.
To construct this glowing centerpiece, begin by inflating four to six five-inch colorful latex balloons using a hand pump, inserting them one by one inside an uninflated clear stretchy bubble balloon before fully inflating the main transparent orb with air or helium. Tie the neck of the clear orb tightly with a knot, securing it with clear line. Next, build a solid base cluster by creating a large four-balloon quad using nine-inch latex balloons, weighted at the bottom with a small sand weight. Secure the neck of the illuminated orb to the central knot of the base quad using craft wire. Wrap a warm-white LED light strand around the exterior of the clear orb, trailing the wire down the stem into the base quad, where you can hide the battery pack within the lower balloon cluster for a clean finish.
Minimalist Single-Tone Cluster
How to Make
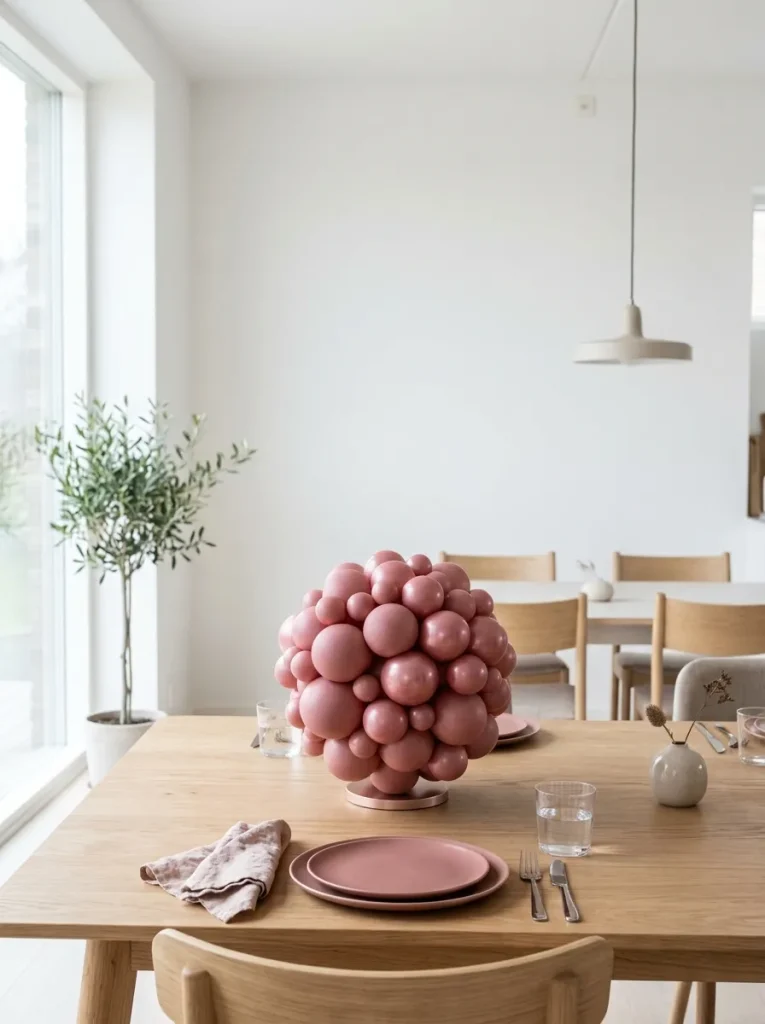
The minimalist single-tone cluster embraces simplicity and modern interior trends by utilizing a single color in varying balloon sizes and finishes. Rather than mixing multiple contrasting hues, this approach focuses entirely on monochrome depth—such as all-terracotta, monochromatic matte black, or soft dusty rose—to create a understated yet sophisticated table statement. By blending matte, satin, and glossy latex finishes within the exact same color family, the arrangement relies on light reflection and shadow rather than high contrast to attract visual interest. This streamlined style pairs exceptionally well with Scandinavian, industrial, or minimalist table settings where clean lines and uncluttered aesthetics are paramount.
Executing a monochrome cluster requires precise control over balloon sizing and surface finishes to maximize subtle texture differences. Select three distinct finishes of balloons in your chosen singular color, such as matte, metallic, and crystal clear tinted variations in five-inch and nine-inch sizes. Inflate the balloons to precise, calibrated diameters using a sizing guide, assembling them into three uniform four-balloon quads. Interlace these quads together using clear elastic thread, pulling them tightly toward a central weight to form a dense, spherical mega-cluster. Nest smaller five-inch matte balloons deep into the center crevices using balloon adhesive dots to create subtle shadows, ensuring no mounting mechanics, tying necks, or internal weight structures remain visible from any angle around the dining table.
Floral Sprig Crown Cluster
Assembly Instructions
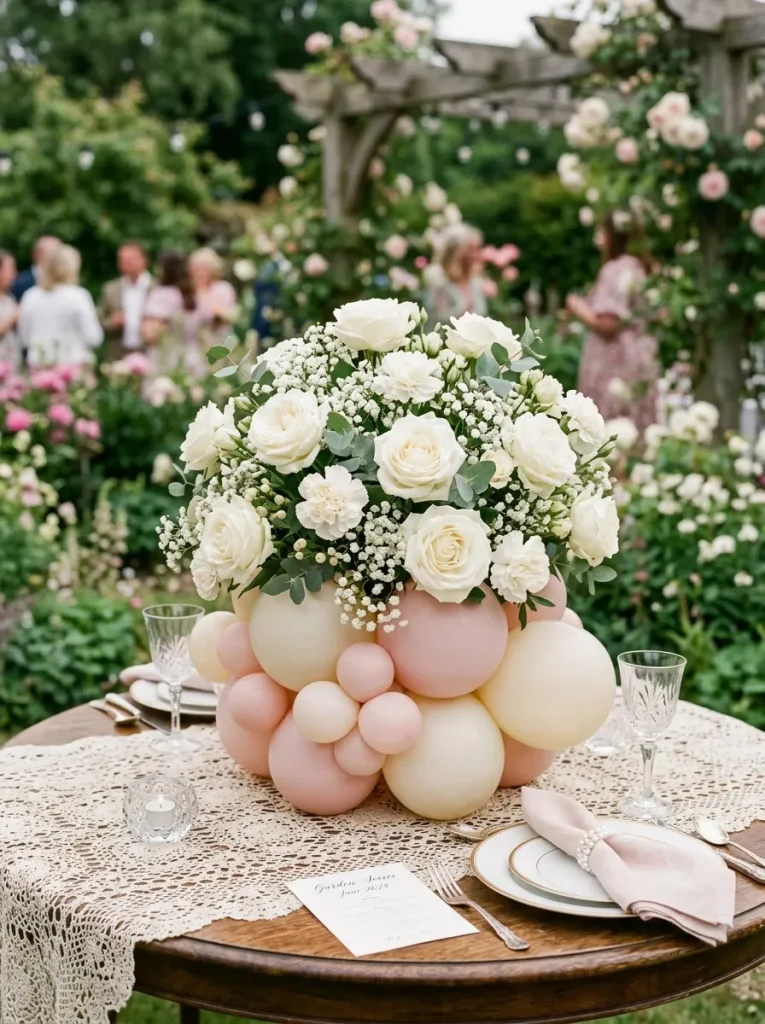
The floral sprig crown cluster combines fresh or artificial flower stems with a compact balloon base to deliver a romantic, garden-party aesthetic. This concept features a dense foundation of soft pastel balloons topped with an delicate crown of fresh blooms, such as roses, spray carnations, baby’s breath, or statice. The flowers emerge from the center of the balloon cluster, replacing traditional ribbon accents with natural petal textures. This arrangement works wonderfully for tea party birthdays, garden celebrations, or spring milestone events, offering a sweet balance between playful balloon shapes and refined botanical styling that enhances tablecloth textiles and delicate dinnerware.
To create this floral-accented centerpiece step by step, start by building a firm four-balloon base quad using nine-inch latex balloons in soft blush or ivory shades, weighted securely to prevent movement. Construct a smaller five-inch quad in complementary tones and nest it tightly on top of the base quad using craft wire. Prepare fresh flower stems by trimming them short—approximately three to four inches—and placing the cut ends into small water-filled plastic floral tubes capped with rubber stoppers to preserve freshness. Slide these floral tubes down into the central crevices between the top and bottom balloon quads, angling the blossom heads outward so they rest naturally against the latex surfaces. Fill remaining gaps with fine sprays of baby’s breath to complete the romantic floral crown.
Geometric Box and Balloon Riser
Construction Plan
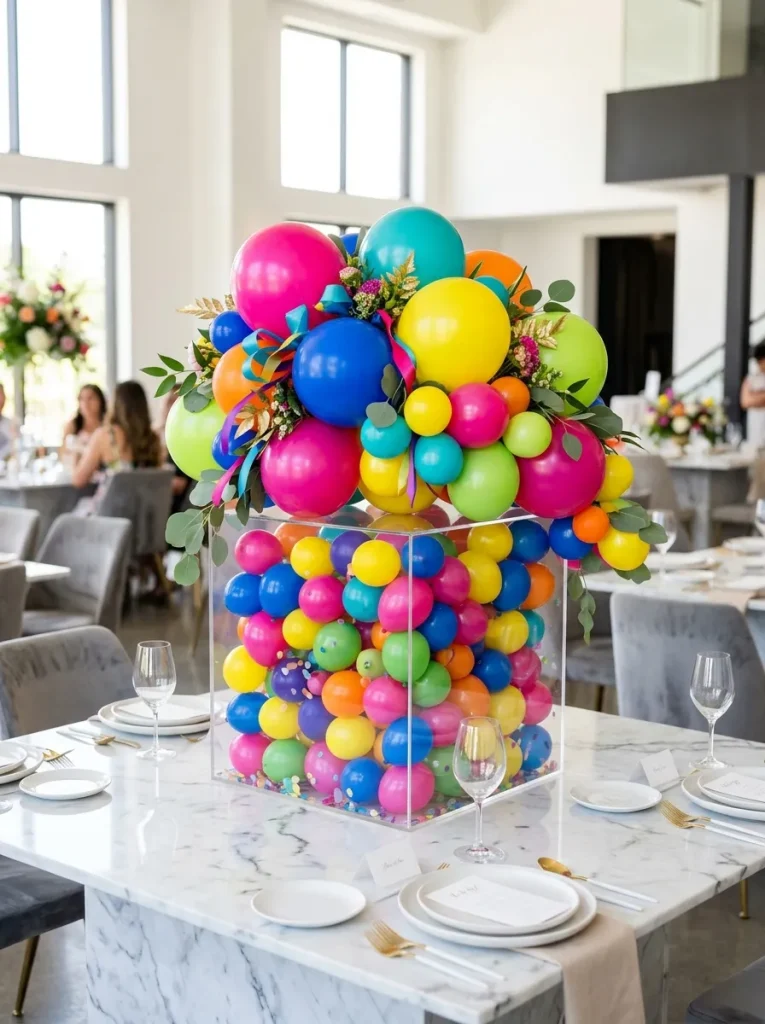
The geometric box and balloon riser lifts the balloon cluster off the tabletop surface using a hollow wood, acrylic, or metal pedestal box, keeping table space open while adding vertical drama. This setup features a clear or open-frame geometric cube base filled with mini balloons, capped with a lush balloon cluster spilling over the top edges. Elevating the arrangement improves guest sightlines across the dining table while introducing structured architectural shapes into the party decor. The combination of clean box geometry with soft, rounded balloon forms creates a modern aesthetic that suits sophisticated adult birthday parties, corporate-style celebrations, or contemporary venue spaces.
Building this elevated centerpiece involves first preparing the geometric riser box, selecting either a clear acrylic cube or a hollow wire-frame pedestal stand measuring roughly eight to twelve inches tall. Fill the interior volume of the hollow box with loose, unattached five-inch balloons inflated to small three-inch sizes in secondary theme colors. Construct a dense balloon cluster using a mix of nine-inch and five-inch balloons tied tightly together into a multi-quad bundle. Anchor this main balloon cluster securely to the top surface or upper rim of the geometric box using clear double-sided mounting tape or zip ties. Allow several small five-inch balloons to spill over the top edge and cascade slightly down one side of the riser box, creating a fluid transition between the elevated cluster and the geometric stand.
Confetti Orb and Tassel Anchor
Execution Guide
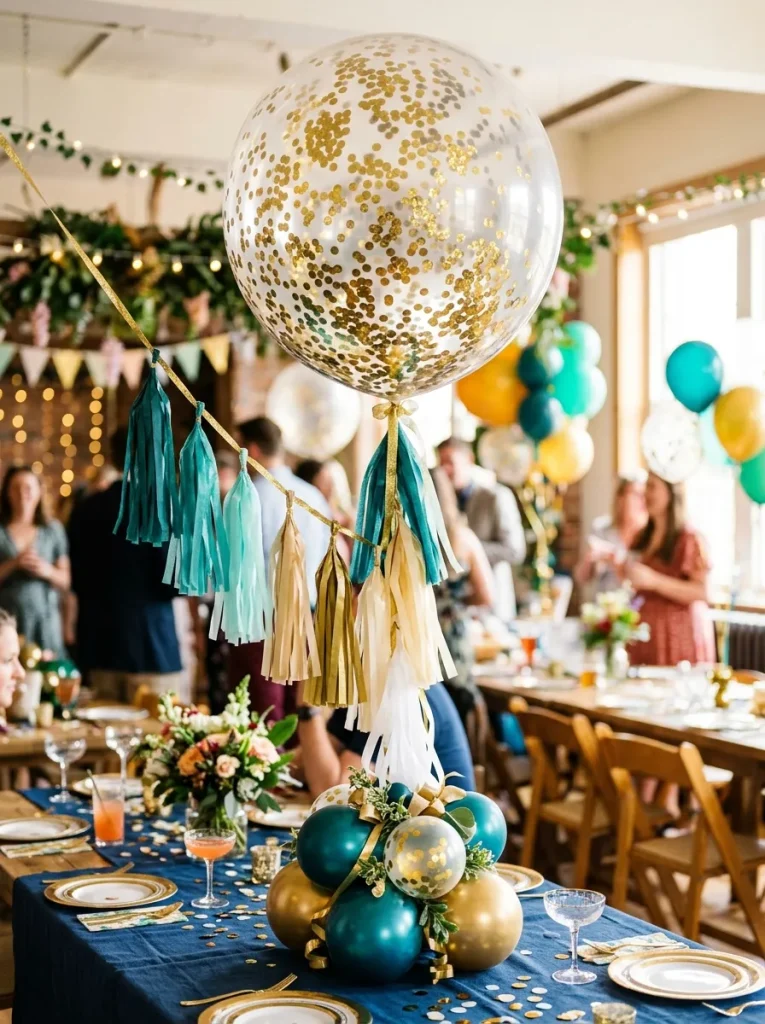
The confetti orb and tassel anchor combines a large clear balloon pre-filled with metallic or paper confetti with a structured latex balloon base and flowing paper tassels. The clear top orb displays floating confetti pieces that catch light as guests move around the table, while a delicate tissue paper or metallic foil tassel garland hangs beneath it, connecting the top balloon to the tabletop cluster. This playful, high-energy idea brings vibrant motion and texture to birthday table settings, making it particularly popular for festive milestone parties, teen celebrations, and bright summer gatherings where whimsical home decor elements shine.
Constructing this dynamic centerpiece begins with building a sturdy four-balloon latex base quad in vibrant colors using nine-inch balloons, weighted with a small sand bag. Stretch a wide-neck clear latex or plastic balloon, filling the interior with lightweight tissue paper or foil confetti dots before inflating it fully with air or helium using a hand pump. Tie the neck of the confetti balloon securely with a long length of clear fishing line or satin ribbon. Craft a tissue paper tassel garland by folding and fringe-cutting colorful paper sheets, stringing three to four small tassels along the ribbon line. Tie the bottom of the ribbon and tassel line to the weighted base quad, allowing the clear confetti orb to float or sit fixed six to twelve inches above the tabletop base for optimal visual impact.
Dual-Tone Number Focal Base
Setup Instructions
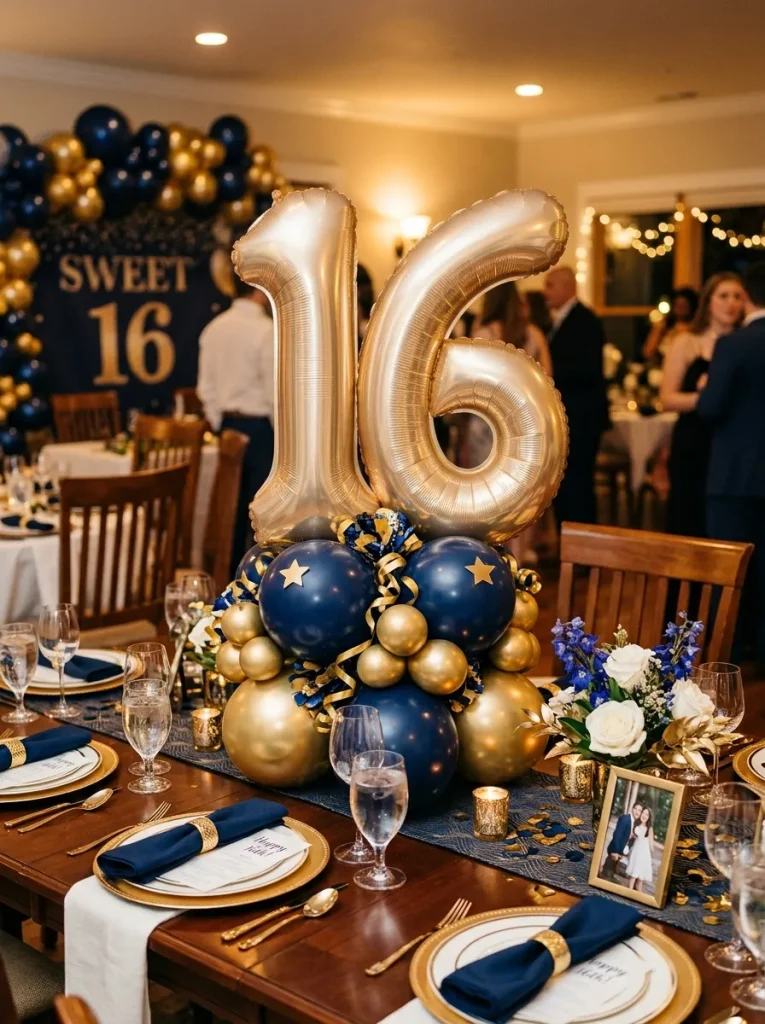
The dual-tone number focal base incorporates a freestanding foil number balloon directly into the center of a two-tone latex balloon cluster. Designed to highlight the celebrated age clearly, this functional centerpiece serves as both a decorative focal point and a personalized party feature. By pairing two contrasting yet harmonious colors—such as navy blue and champagne gold, or dark plum and lavender—the arrangement creates strong visual clarity that makes the central number pop. The latex base acts as a stable pedestal that holds the foil number upright without requiring helium, offering an easy project setup that lasts throughout long event hours.
To assemble this personalized centerpiece step by step, begin by inflating eight latex balloons in two contrasting colors—four nine-inch balloons in your primary tone and four five-inch balloons in your secondary accent tone. Tie the four nine-inch balloons into a large, weighted base quad, and twist the four five-inch balloons into a smaller accent quad. Stack the smaller quad directly on top of the large quad, securing them tightly together with clear craft wire to form a stable two-tiered pedestal. Inflate a sixteen-inch foil number balloon using a plastic straw or hand pump, pinching the self-sealing valve flat. Apply double-sided balloon glue dots or wrapped painter’s tape to the lower edge of the foil number, pressing it firmly into the central crevice of the upper balloon quad until it stands straight and unsupported.
Rustic Wood Slice and Moss Base
Creation Method
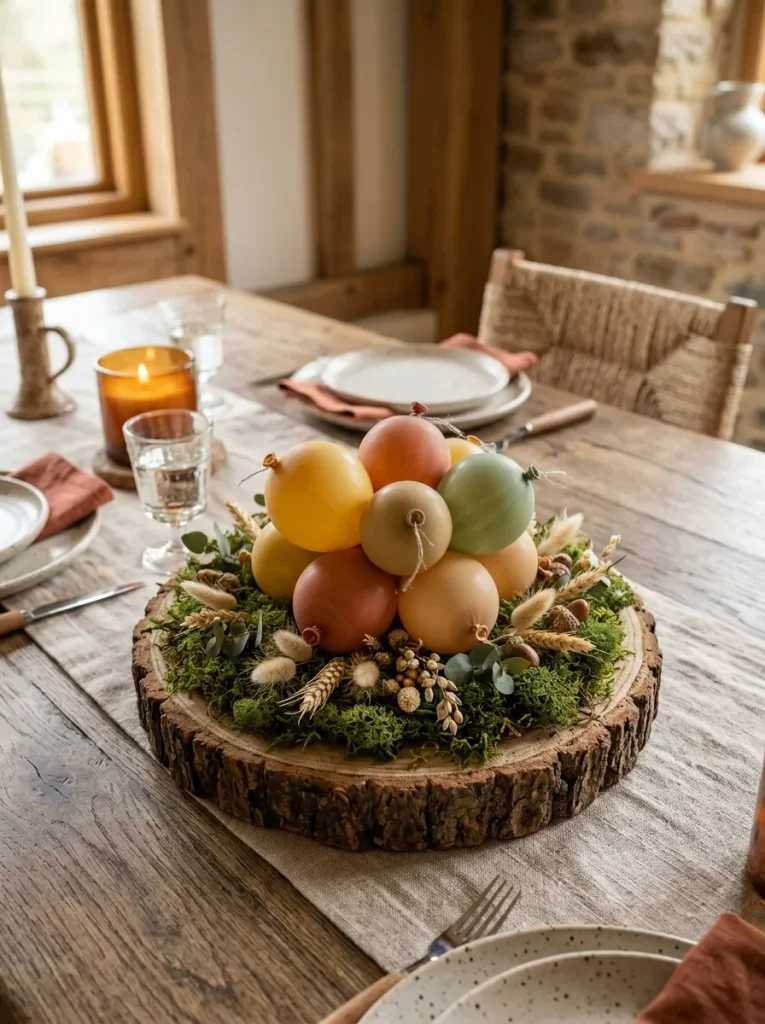
The rustic wood slice and moss base centerpiece grounds colorful latex balloon clusters onto a natural timber plaque adorned with preserved green moss and organic elements. This design bridges the gap between synthetic balloon materials and natural textures, creating a cozy, woodland-inspired table accent perfect for rustic birthdays, outdoor garden parties, or autumn gatherings. The flat, wide surface of a natural wood slice provides exceptional stability for tabletop displays, while preserved sheet moss, small pinecones, or dried botanicals cover mechanical attachments, yielding an organic aesthetic that harmonizes beautifully with wooden dining tables and burlap runners.
Building this natural centerpiece starts with selecting a treated, bark-edged wood slice measuring ten to twelve inches in diameter to serve as your decorative base tray. Attach a low-profile plastic anchor tab or heavy-duty mounting clip to the top center of the wood slice using strong adhesive or hot glue. Construct a compact balloon cluster by tying together six to eight five-inch latex balloons in earthy tones such as mustard yellow, terracotta, olive green, and warm beige. Secure the central knot of this balloon cluster to the mounting clip on the wood slice using floral wire. Fill the exposed wooden surface around the balloon base with preserved green sheet moss, tucking small sprigs of dried lagurus grass or mini pinecones between the balloons to conceal all mounting hardware and complete the rustic presentation.
Common Beginner Mistakes and How to Avoid Them
Creating balloon cluster centerpieces can sometimes lead to common assembly errors that diminish the overall visual appeal and durability of your party decor. One frequent mistake is over-inflating balloons, which causes them to lose their soft round shape, become pear-shaped, and pop easily when handling or exposed to warm room temperatures. Avoid this by inflating balloons slightly below maximum capacity and using a cardboard sizing box to maintain consistent diameters. Another common issue is failing to anchor arrangements properly, resulting in unstable centerpieces that tip over during meals or fall due to minor air drafts. Always integrate a hidden weight, such as a water balloon, sandbag, or heavy base plate, into the lowermost quad cluster. Additionally, using standard tape or low-quality adhesives often leads to balloons detaching mid-event; instead, utilize specialized balloon glue dots or clear craft wire to join clusters securely. Finally, assembling latex balloon arrangements too far in advance can result in oxidation, which creates a dull, chalky film over glossy surfaces. To prevent oxidation, inflate and build your arrangements within twelve to twenty-four hours of the event, or treat latex surfaces with a commercial balloon shine spray.
Practical Tips for Better Results
Achieving professional, editorial-quality results with DIY balloon centerpieces relies on applying simple styling and handling techniques during assembly. Always stretch latex balloons manually in all directions before inflating, which makes them easier to pump and helps them expand into smooth, perfectly symmetrical spheres. When creating color palettes, limit your main scheme to two or three primary shades, introducing depth through varied balloon sizes rather than adding too many competing colors. Utilizing a mixture of balloon sizes—combining five-inch, nine-inch, and twelve-inch balloons within the same cluster—creates a dynamic, professional texture that looks far more sophisticated than clusters made from single-size balloons. To keep your workspace organized, inflate and tie all balloon duos before attempting to twist them into quads or final centerpiece structures. Furthermore, ensure your hands and assembly surfaces remain completely clean and oil-free, as oils and dust weaken latex walls. If hosting an outdoor celebration, keep balloon centerpieces shaded until the event begins, as direct sunlight and heat cause air expansion, leading to popped balloons and accelerated color fading.
Styling, Presentation, or Organization Ideas
Integrating balloon cluster centerpieces seamlessly into your dining space requires careful coordination with surrounding table elements, dinnerware, and room decor. Frame each centerpiece by placing it over a contrasting fabric runner—such as velvet, linen, or cheesecloth—which visually anchors the arrangement to the tabletop while protecting surfaces from friction. When arranging long rectangular banquet tables, place balloon centerpieces at balanced intervals, alternating between tall elevated structures and low-profile clusters to maintain visual interest down the line. Complement the color palette of your balloons by matching table napkins, place cards, or party favors to secondary accent tones within the balloon clusters. Keep guest comfort in mind by ensuring low-profile centerpieces stay under twelve inches in height, or elevating tall stands above twenty-four inches, leaving eye-level space open for easy conversation. To enhance evening celebrations, place battery-operated tea lights or warm votive candles around the base of balloon clusters, allowing warm light to bounce off metallic and glossy balloon surfaces for an inviting, festive room glow.
Budget or Time Planning
Executing stylish balloon centerpieces efficiently requires thoughtful management of both material expenses and construction time. Balloon projects are inherently budget friendly, but purchasing latex balloons in bulk multipacks rather than individual retail bags significantly reduces cost per unit. To maximize time efficiency during party prep, organize a streamlined assembly line: inflate all balloons first, tie them into pairs, form quads, and finally attach them to base structures. Expect to spend approximately fifteen to twenty minutes assembling each basic tabletop cluster once materials are prepared. If creating multiple centerpieces for a large venue, using an electric dual-port balloon pump cuts inflation time in half compared to manual hand pumps. You can safely inflate and assemble latex arrangements one day prior to your event, provided they are stored indoors in a temperature-controlled, dark room away from sharp objects and direct sunlight. Reusable structural elements—such as metal hoop stands, geometric acrylic risers, and wooden slice bases—can be purchased once and repurposed across future celebrations, maximizing your decorative investment over time.
Creative Expansion and Advanced Inspiration
Once you master basic balloon quad construction, exploring advanced design techniques allows you to create truly unique party installations. Experiment with custom color layering, known as double-stuffing, by inserting one colored balloon inside a translucent or metallic balloon before inflation to produce custom, exclusive shades unavailable in standard retail packs. Expand your centerpieces into continuous table runners by connecting multiple balloon clusters end-to-end with craft wire, allowing the arrangement to meander down the entire length of the table alongside trailing vines or flickering LED lights. Consider incorporating unexpected materials into your balloon bases, such as pampas grass plumes, dried palm spears, acrylic number toppers, or personalized vinyl lettering applied directly onto large orb balloons. For high-end milestone birthdays, integrate subtle scent elements by spraying gentle floral waters onto foliage accents, engaging multiple senses for seated guests. Documenting your favorite balloon cluster configurations through photos builds a personal styling reference portfolio, making planning future birthday decorations, holiday parties, and family events increasingly effortless and rewarding.