
10 Adorable Chibi Animal Desk Buddy Clay Figure Ideas
Clay sculpting provides a versatile, tactile medium for creating charming handmade tabletop decorations that bring personality and warmth to everyday workspaces. Exploring modern Pinterest ideas for desk organization and accessories reveals that miniature chibi animal figures serve as both delightful accents and functional utility holders. In this comprehensive guide, you will learn practical clay modeling methods, armature support techniques, step by step color blending, and long-lasting finishing processes designed specifically for miniature crafts. Crafting chibi animal desk buddies is useful because it allows creators to personalize their office setup with miniature art pieces that hold paperclips, support pens, or simply add a joyful visual focal point to an otherwise utilitarian desk surface. By utilizing straightforward sculpting fundamentals, beginners and experienced crafters alike can produce durable, expressive figurines without needing expensive specialized studio equipment. Each featured project in this tutorial combines cute aesthetic appeal with functional design elements, transforming simple polymer or air-dry clay blocks into polished desktop companions. The following sections provide clear, systematic instructions to help you execute ten unique handmade animal figures with structural precision and creative confidence.
Why This Idea Is Trending or Useful
Miniature desktop figures have become immensely popular across modern design and crafting communities due to the rising demand for personalized, cozy workspace aesthetics. The distinct chibi art style—characterized by oversized rounded heads, compact bodies, and simplified expressive facial features—delivers immediate visual charm that softens the rigid lines of computer monitors and office stationery. Beyond their decorative value, these miniature sculptures offer practical utility as cable organizers, photo card stands, and ring holders that keep essential desktop items neatly organized. The DIY appeal of working with polymer or air-dry clay lies in its accessibility, allowing crafters to achieve professional-looking results right at home using budget ideas and basic household tools. Sculpting small-scale figurines is an exceptionally beginner friendly easy project because it requires minimal material volume and allows for quick adjustments before curing or baking. These trending ideas bridge the gap between creative relaxation and functional home decor, making miniature clay crafting an engaging activity for hobbyists seeking mindful hands-on artistic expression.
Materials and Preparation
Successful clay sculpting requires selecting suitable mediums, setting up a clean work area, and assembling basic shaping tools before beginning any project. The primary materials needed include high-density polymer clay or premium lightweight air-dry clay in diverse pastel and neutral shades, liquid clay adhesive, and water-based acrylic paints. Essential sculpting tools comprise silicone-tipped clay shapers, ball stylus tools of varying diameters, acrylic rolling pins, craft precision blades, and smooth ceramic or glass work tiles. Preparation involves thoroughly cleaning your work surface to prevent dust particles or lint from embedding into light-colored clay during the shaping phase. Condition polymer clay by kneading small portions repeatedly between your palms until pliable, or keep a small dish of water nearby to smooth surface cracks when working with air-dry clay. Planning your proportions beforehand using basic geometric sketches ensures that the oversized chibi heads remain structurally balanced on their smaller body bases during baking or drying cycles.
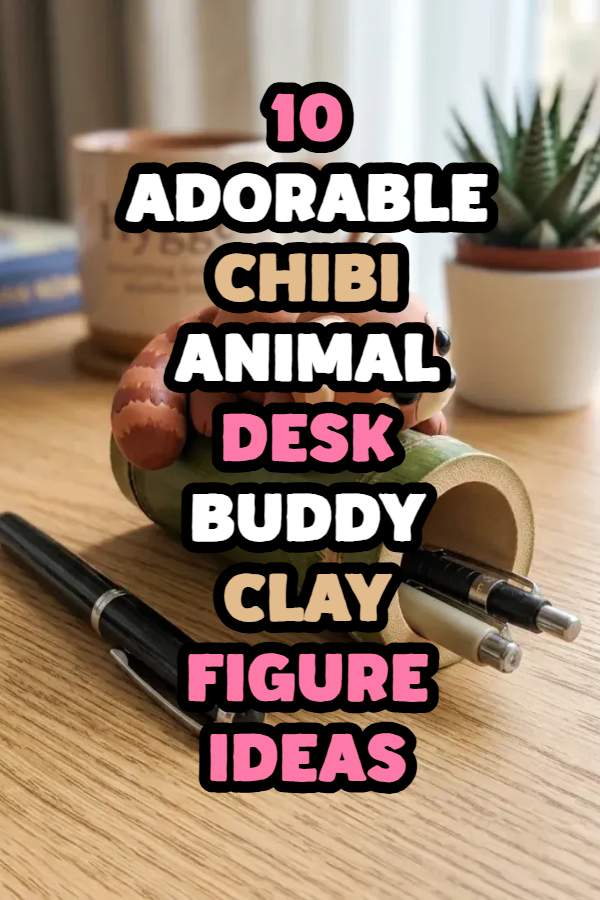
Miniature Sleepy Red Panda Resting on a Hollowed Bamboo Log
How to Create
The sleepy red panda desk buddy combines rich terracotta tones with a functional resting base modeled after a cut bamboo shoot. This chibi design features an elongated teardrop head resting comfortably on outstretched front paws, creating a relaxed silhouette that sits flush against flat surfaces. The hollowed bamboo trunk beneath the red panda serves a dual purpose as a dedicated cradle for standard writing pens, styluses, or paperclip clusters. Distinctive facial markings—including white cheek patches, pointed white inner ears, and dark eye stripes—give the red panda its recognizable playful character without complicating the minimalist chibi geometry. The rounded tail wraps neatly around the base, featuring alternating bands of rust-orange and warm cream clay to provide visual rhythm and extra structural stability. This compact desk companion introduces an earthy, botanical vibe to your computer setup while keeping your primary writing instrument anchored in one secure location.
To build this red panda figure, condition portions of terracotta, cream, dark brown, and olive green polymer clay on your smooth glass tile. Form the bamboo log by rolling a thick cylinder of olive green clay, indenting the center lengthwise with an acrylic rod to create a pen groove, and scoring horizontal bamboo ring lines with a craft blade. Shape the red panda body from terracotta clay into a smooth oval, flattening the underside before pressing it firmly onto one side of the green bamboo base. Roll a larger sphere for the chibi head, indent the eye sockets with a small ball stylus, and attach tiny dark brown clay beads for eyes alongside white teardrop cheek accents. Sculpt four small cylindrical paws in dark brown clay, positioning the front paws so they drape over the edge of the bamboo log. Bake the assembled piece on a ceramic tile according to the manufacturer guidelines, and apply a satin water-based varnish once fully cooled.
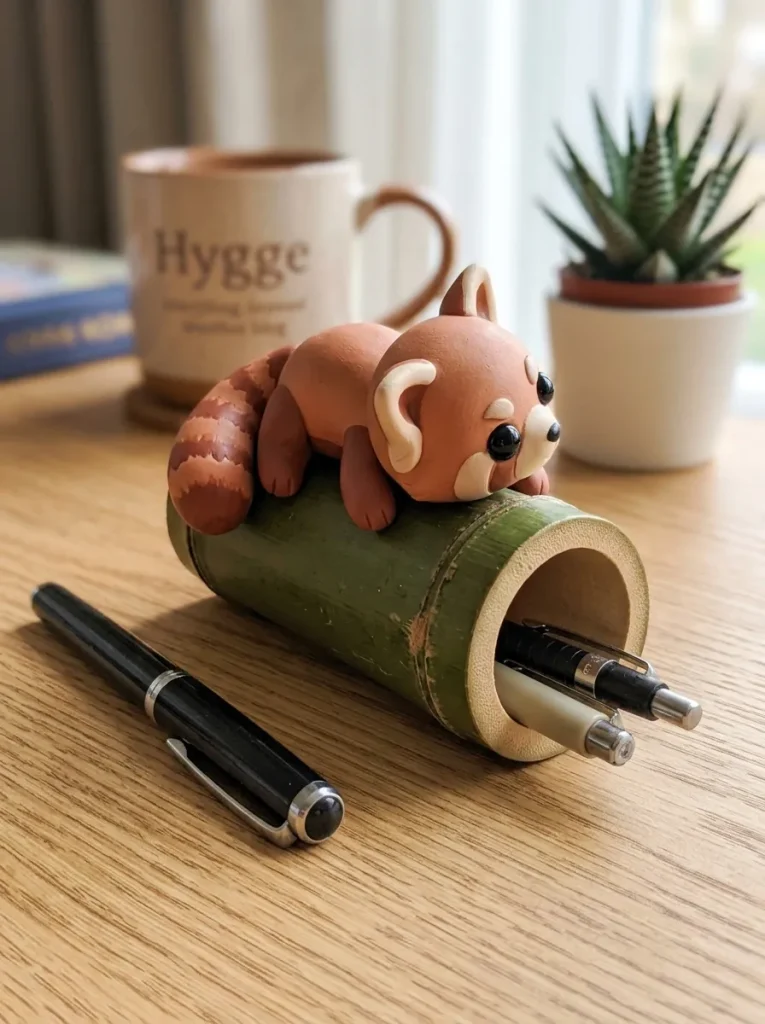
Pastel Strawberry Cow with Integrated Photo Card Display Clip
Step-by-Step Guide
The pastel strawberry cow is a playful take on classic farm animal decor, incorporating soft pink hues and delicate fruit patterns into a functional memo holder. The chibi proportions feature a rounded cubical head paired with a bell-shaped body that provides a sturdy, weighted base capable of supporting upright wire clips. Light pastel pink clay forms the primary coat, accented by darker strawberry-pink patches shaped like miniature hearts and rounded organic spots. A soft cream muzzle with subtle indented nostrils and tiny golden horns completes the gentle, cartoonish bovine aesthetic. Embedding a coiled metal wire clip into the back of the figure transforms this cute sculpture into a practical display stand for business cards, sticky notes, or small polaroid prints. The clean finish and soft color palette introduce a bright, cheerful aesthetic that brightens up corporate cubicles and home study desks alike.
Begin by cutting a six-inch length of flexible craft wire and twisting one end into a tight double loop using round-nose jewelry pliers to serve as the card clip. Roll a weighted ball of pale pink clay into a solid bell shape, inserting the straight bottom end of your wire clip three-quarters of the way down through the top center. Sculpt a large spherical head from matching pale pink clay, flattening the bottom slightly before sliding it over the wire stem down onto the body base using liquid clay for adhesion. Form a small oval of cream clay for the muzzle, pressing two shallow dots into the front with a fine ball stylus. Roll tiny flat patches of magenta clay into organic shapes, pressing them gently across the cow’s cheeks and back before attaching two small conical horns and drooping ears. Cure the sculpture in your dedicated craft oven, ensuring the wire remains perfectly vertical throughout the entire heating and cooling process.
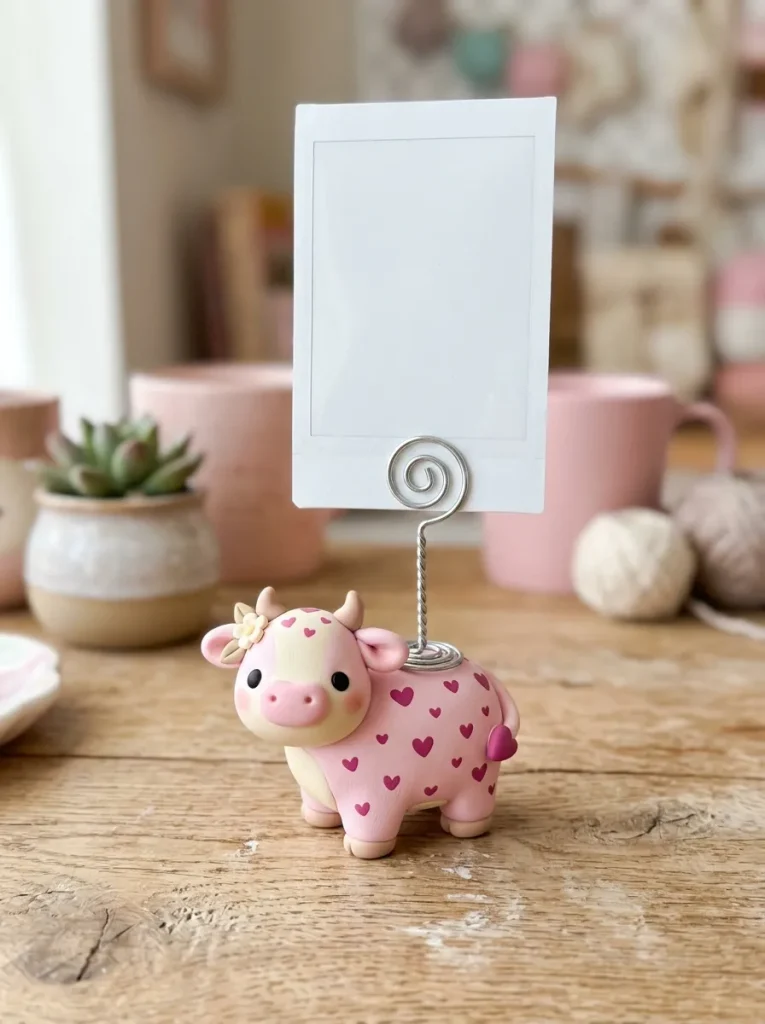
Golden Honey Bear Hugging a Ceramic-Style Honeycomb Pot
Execution Process
The golden honey bear desk buddy features a rounded, seated bear silhouette tightly clutching a textured hexagonal pot designed to hold paperclips and pushpins. Sculpted from warm caramel and ochre clay, the bear features oversized circular ears, tiny stubby feet, and a glossy black nose centered on a cream snout. The accompanying honeycomb pot is constructed with geometric side patterns and an open top cavity, functioning as a practical organizer for small metallic desk supplies. A tiny simulated honey drip crafted from translucent amber clay spills over the edge of the pot, adding playful tactile detail and visual movement to the piece. The wide base created by the connected pot and seated bear prevents tipping, making the sculpture durable for frequent daily desk use. This project blends functional desktop storage with a cozy, whimsical craft aesthetic that appeals to stationery lovers and miniature collectors.
To construct this honey bear organizer, roll a slab of pale yellow clay to a uniform four-millimeter thickness using guide rings on your acrylic roller. Cut six identical rectangular wall pieces and a hexagonal base plate, assembling them with liquid clay to form the open-topped honeycomb container before smoothing the corner joints. Shape a substantial ball of caramel-colored clay into a seated pear shape for the bear’s torso, positioning it directly adjacent to the yellow pot on your work tile. Create the chibi head by rolling a smooth sphere, attaching two flat circular ear discs with deep stylus center indents, and pressing a cream oval muzzle onto the lower face. Attach two cylindrical arms wrapped securely around the sides of the honeycomb pot, smoothing the shoulder seams seamlessly into the main torso. Use a needle tool to apply subtle fur texture across the bear’s ears before baking, finishing the honey drip accents with high-gloss liquid clay after the initial cure.
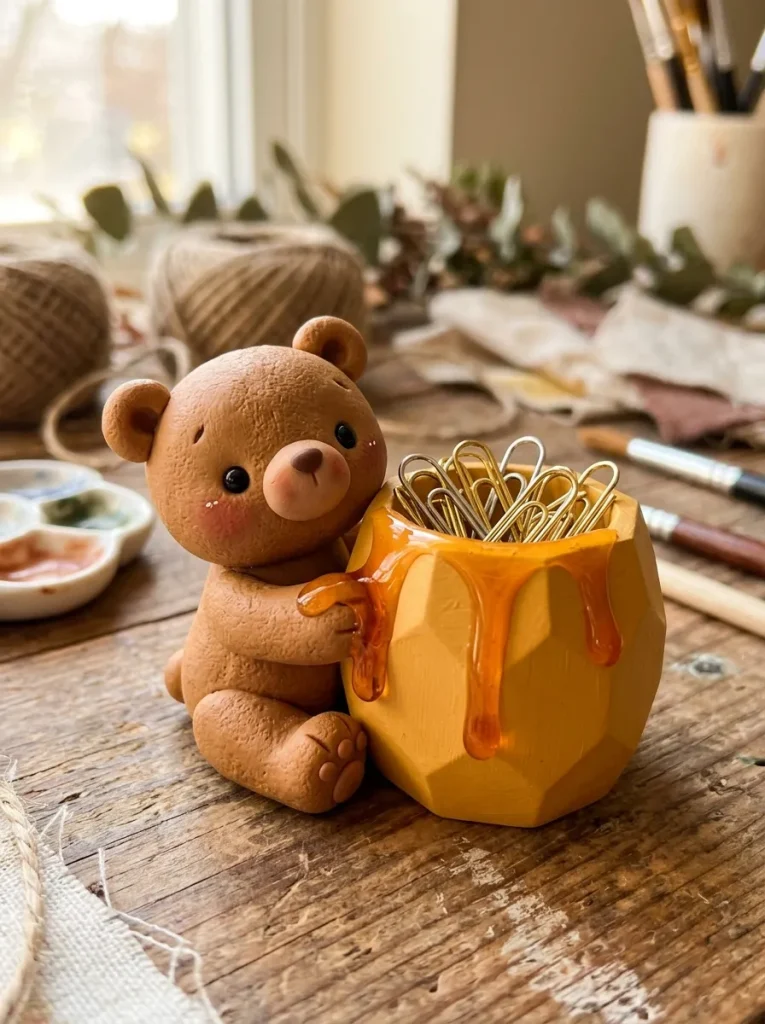
Chubby Calico Cat Curled into a Desktop Phone Rest
How to Make
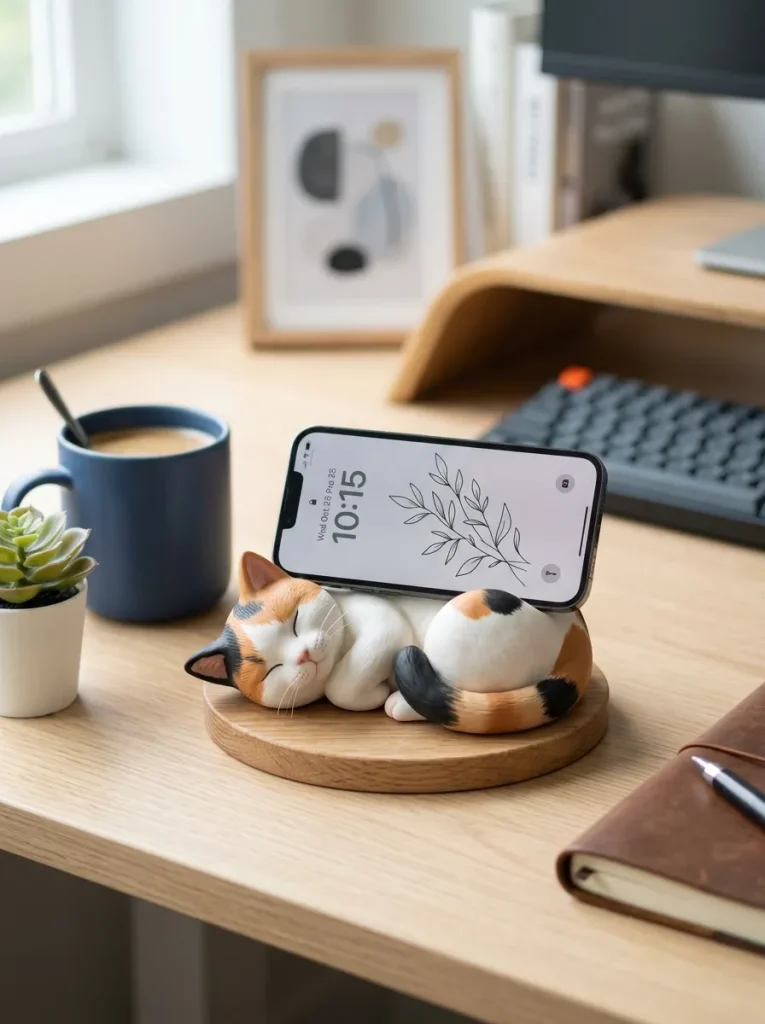
The chubby calico cat phone rest utilizes a broad, curved sleeping posture to provide ergonomic support for smartphones and small tablet devices. Sculpted with a low center of gravity, this sleeping feline features an elongated curved spine that cradles the lower edge of mobile devices at an optimal viewing angle. The primary body is rendered in smooth white clay, detailed with asymmetric patches of warm ginger orange and charcoal black across the back and ears. A curled tail hugs the outer perimeter of the figure, adding structural reinforcement while framing the front ledge where the phone rests securely. Tiny sleeping eye slits, delicate pink nose details, and tucked paws create a serene, tranquil appearance that brings a sense of calm to busy work environments. This design merges practical phone stand functionality with the popular aesthetic of minimalist sleeping animal desk sculptures.
Start by shaping a dense block of conditioned white clay into an ergonomic wedge measuring approximately three inches wide, two inches deep, and two inches tall. Carve a smooth, half-inch-deep horizontal groove along the front lower slope of the wedge using a wide sculpting spatula to create the device resting channel. Sculpt a large, slightly flattened oval for the sleeping cat head, positioning it resting sideways on one end of the channel ledge with liquid polymer adhesive. Roll out ultra-thin swatches of orange and black clay, tearing them into irregular patches and smoothing them flush onto the white clay body using a silicone blending tool. Roll a tapered cylinder for the tail, wrapping it tightly along the side and front edge to reinforce the mobile device retaining lip. Use a fine needle tool to gently score arched sleeping eye lines onto the face, inspect the resting channel for level alignment, and bake the figure thoroughly.
Whimsical Green Tree Frog Lounging on a Textured Lily Pad Dish
Step-by-Step Guide
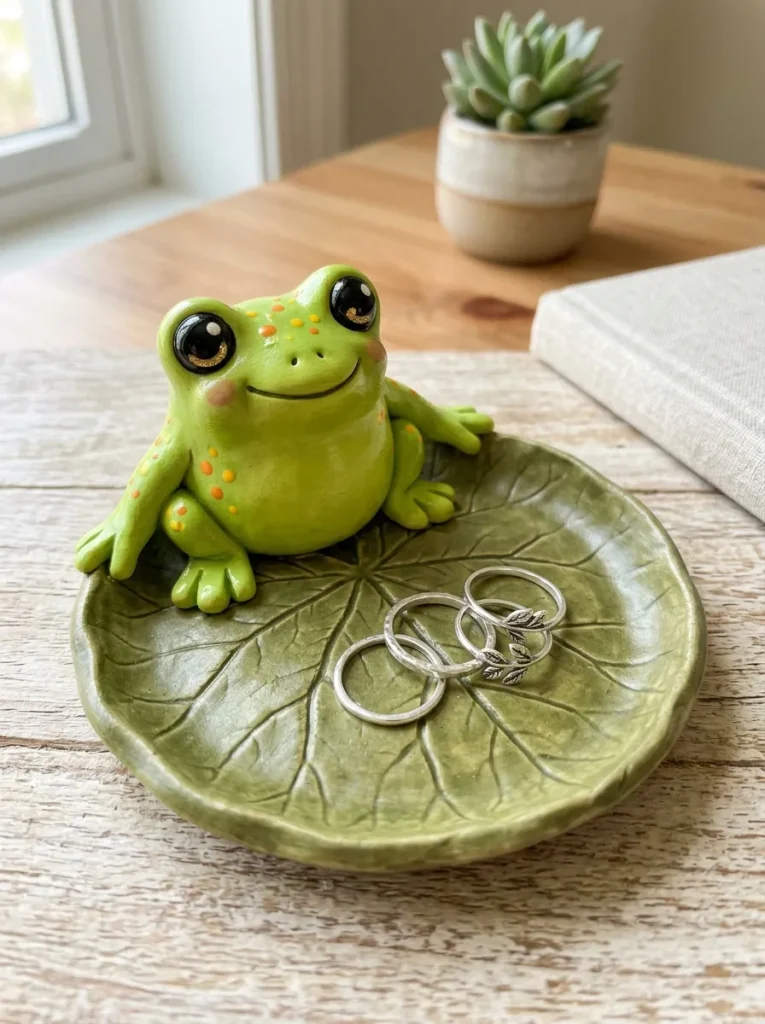
The green tree frog desk buddy features a vibrant lime-colored amphibian lounging casually across the edge of a shallow, textured lily pad catchall dish. The chibi frog is defined by bulbous black bead eyes with metallic gold rings, a wide smiling mouth line, and smooth, rounded webbed feet. The lily pad underneath is modeled with a subtle upward rim curvature, forming an organized tray suitable for holding rings, USB drives, or small eraser blocks. Soft olive and jade green hues on the leaf contrast against the bright neon lime of the frog, introducing fresh botanical color to plain wooden or white desktops. Delicate vein textures scored across the leaf surface provide realistic visual interest while enhancing the handmade charm of the piece. This dual-purpose clay creation keeps tiny, easily lost office supplies consolidated within a vibrant, nature-inspired decorative accent.
Begin by rolling out a three-inch circular slab of olive green clay to a consistent five-millimeter thickness on your non-stick baking tile. Cut a small triangular notch from the outer edge to form the classic lily pad shape, gently curling the outer perimeter upward using your fingertips to form a shallow dish. Texture the top surface of the leaf by lightly pressing natural leaf veins or scoring radiating lines from the center notch using a fine needle tool. Sculpt the frog by forming a plump oval body from lime green clay, attaching two large circular spheres atop the head for the oversized chibi eyes. Insert two small black clay rounds into the eye spheres, surrounding them with thin rings of metallic gold clay for vibrant contrast. Position the frog resting comfortably along the rear rim of the lily pad with its front legs draped over the edge, and cure the completed sculpture in the oven.
Dapper Penguin in a Bowtie with Magnetic Beak Memo Holder
Setup Method
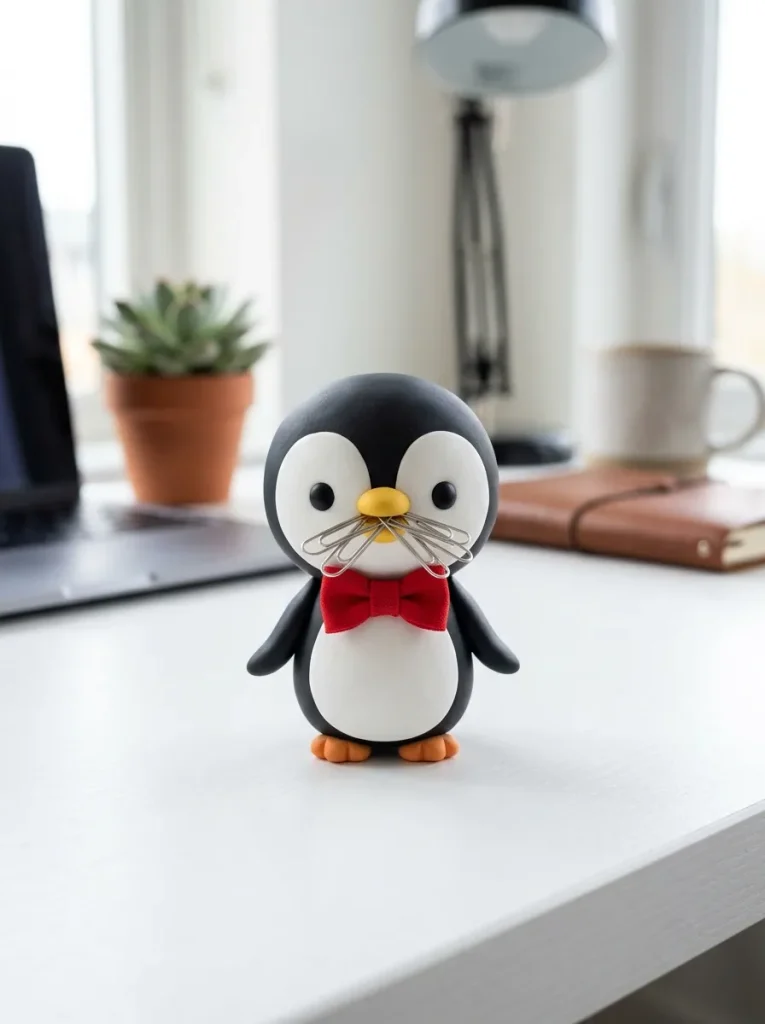
The dapper penguin desk buddy combines a classic tuxedo-inspired bird form with a clever concealed magnet system for holding paperclips and small notes. Styled with a teardrop-shaped body in deep matte black and a clean white belly patch, this penguin features an exaggerated chibi silhouette with tiny flippers. A bright canary yellow beak houses a powerful miniature neodymium magnet, allowing the penguin to hold metallic paperclips or small metal pins securely. A contrasting pastel blue or crimson bow tie sculpted at the neckline adds a touch of playful formality that suits professional office settings. The broad, flat yellow feet extend outward at the base, ensuring that the figurine remains stable even when several metallic items hang from its magnetic beak. This easy project delivers practical magnetic organization wrapped in a crisp, modern minimalist animal design.
To make the magnetic penguin, gather black, white, yellow, and red polymer clay alongside two small five-millimeter disc neodymium magnets. Shape the black clay into a solid pear shape measuring two and a half inches tall, flattening the bottom base completely against your work tile. Roll a thin oval of white clay, smoothing it flush across the front of the black body to establish the penguin’s chest and belly. Shape a small yellow cone for the beak, pressing one disc magnet firmly into the wide rear base of the beak before attaching it to the penguin’s face with liquid clay. Place the second magnet internally inside the head clay directly behind the first magnet location to maximize magnetic attraction through the cured surface. Add two flat tear-shaped black flippers to the sides, attach two orange paddle feet at the base, add a miniature red clay bow tie, and bake according to package directions.
Fluffy White Bunny Planter Hugger for Desktop Succulent Pots
Execution Process
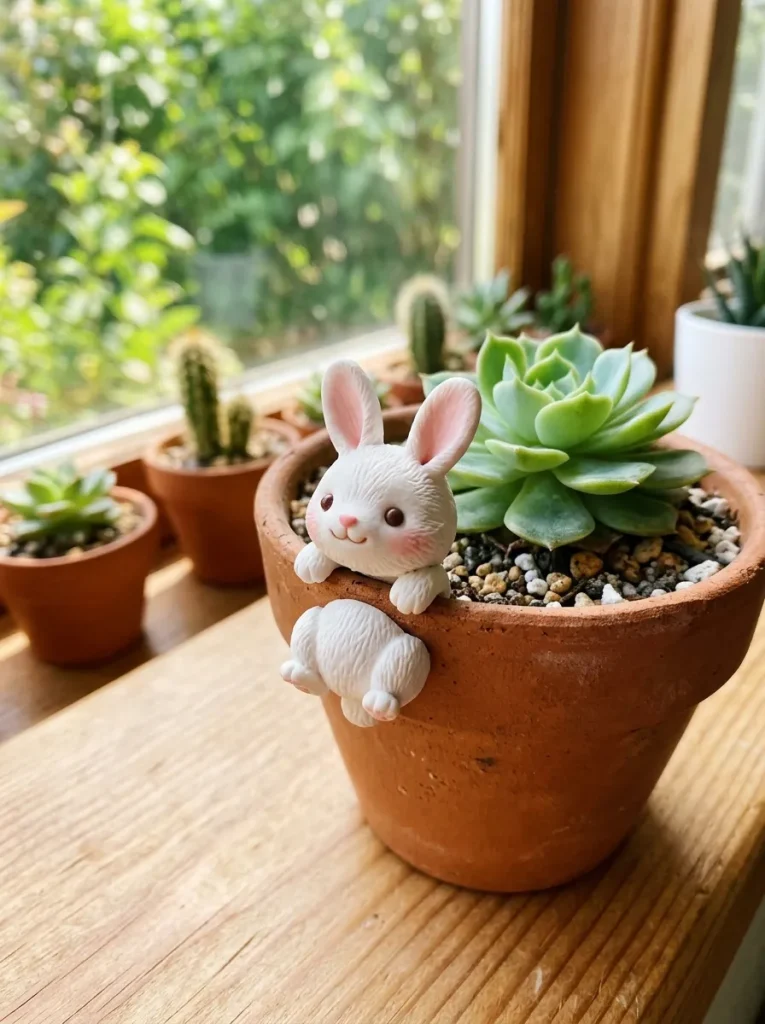
The fluffy white bunny planter hugger is an adaptable accessory designed to hang securely from the rim of small ceramic succulent pots or pencil cups. Sculpted with a curved front torso and hooked front paws, this chibi rabbit appears to climb curiously into your desktop plants. The design incorporates elongated rounded ears lined with soft pastel pink blush, an oversized round head, and a spherical cotton-ball tail at the rear. The white clay surface can be lightly textured with a stiff-bristled brush to mimic the appearance of soft fur without compromising clean lines. Hanging the figure directly onto desktop planters utilizes vertical rim space without taking up any additional square footage on crowded work tables. This charming botanical accessory personalizes standard indoor pots while adding vertical movement and playful dimension to your office greenery.
Measure the wall thickness of your target planter pot using a caliper or ruler to ensure the bunny’s hanging paws will fit precisely over the rim. Roll conditioned white clay into a sturdy oval for the body, bending the upper chest forward at a ninety-degree angle to hook cleanly over the measured rim thickness. Form two thick, short arms extending forward from the shoulders, curving the tiny paw tips downward to grip the interior wall of the pot securely. Sculpt an oversized spherical head, attaching two upright ears with shallow center grooves filled with soft pink clay, and blend the head securely onto the arched torso. Add a tiny pink nose, black clay dot eyes, and a textured round tail at the lower back before testing the hanging balance on a spare ceramic rim. Support the curved body on a crumpled piece of aluminum foil during baking to preserve its hooked posture through the curing process.
Pastel Blue Chibi Axolotl with Indented Desktop Cable Notch
How to Create
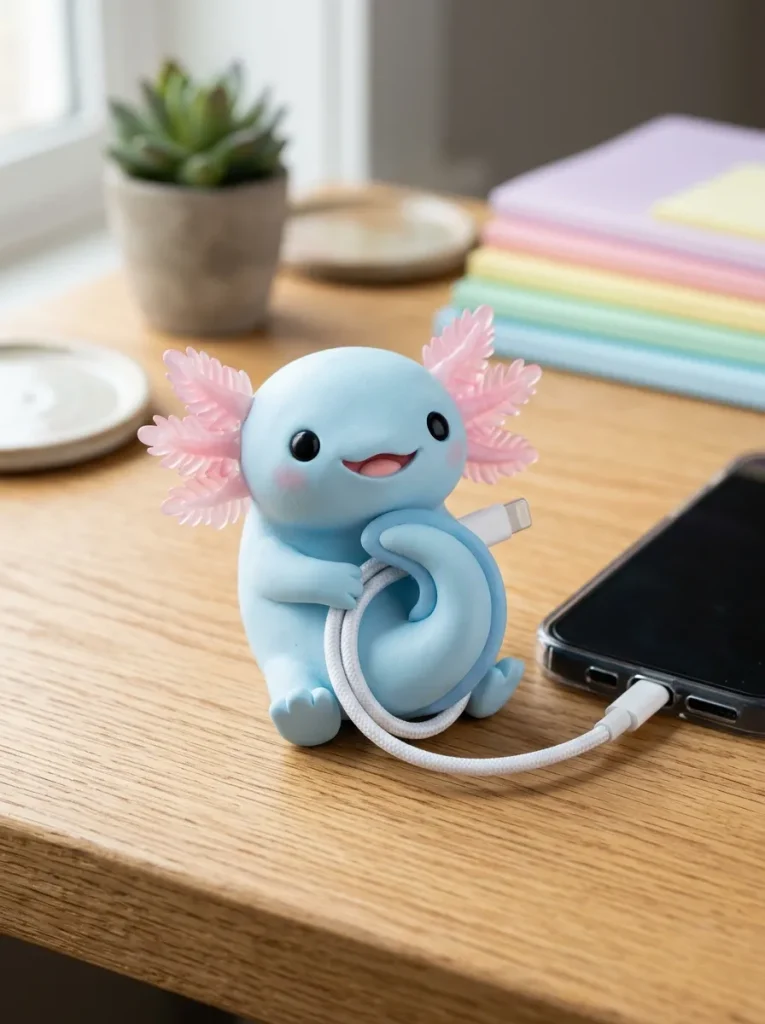
The pastel blue chibi axolotl transforms a popular aquatic creature into an ultra-functional desktop charging cable organizer. This design features a wide, smiling head framed by six feathery external gills sculpted in translucent baby pink clay with delicate texture lines. The elongated body curves around in a semi-circle, creating an internal channel designed to hold standard USB and phone charging cords firmly in place. Tiny rounded paws rest against the base, while glossy black eyes set wide apart capture the sweet, innocent expression characteristic of classic chibi art. The smooth, water-resistant finish of cured polymer clay ensures that cables glide through the channel without catching or abrading their protective outer sleeves. This functional sculpture prevents charging cords from slipping behind desks while introducing soft pastel tones and whimsical character to modern electronic workspaces.
Begin by rolling out a thick coil of pastel sky-blue clay, bending it into a horseshoe curve that leaves a five-millimeter channel gap sized for charging cables. Sculpt a broad, horizontally flattened oval for the axolotl head, using a rounded stylus tool to carve a wide, happy smile across the lower front face. Form six small teardrop shapes from translucent pink clay, flattening them into feathery gills and scoring fine vertical fringe marks along each edge with a craft blade. Attach three gills symmetrically to each side of the head using liquid polymer clay to ensure sturdy structural joints that resist handling stress. Press two small black clay spheres into the face for eyes, adding microscopic white highlight dots in the upper corners for an expressive shine. Secure the head to one end of the curved cable channel base, smooth all structural seams thoroughly, and bake the assembly on a flat ceramic baking tile.
Miniature Brown Hedgehog Holding a Metallic Pen Resting Loop
Step-by-Step Guide
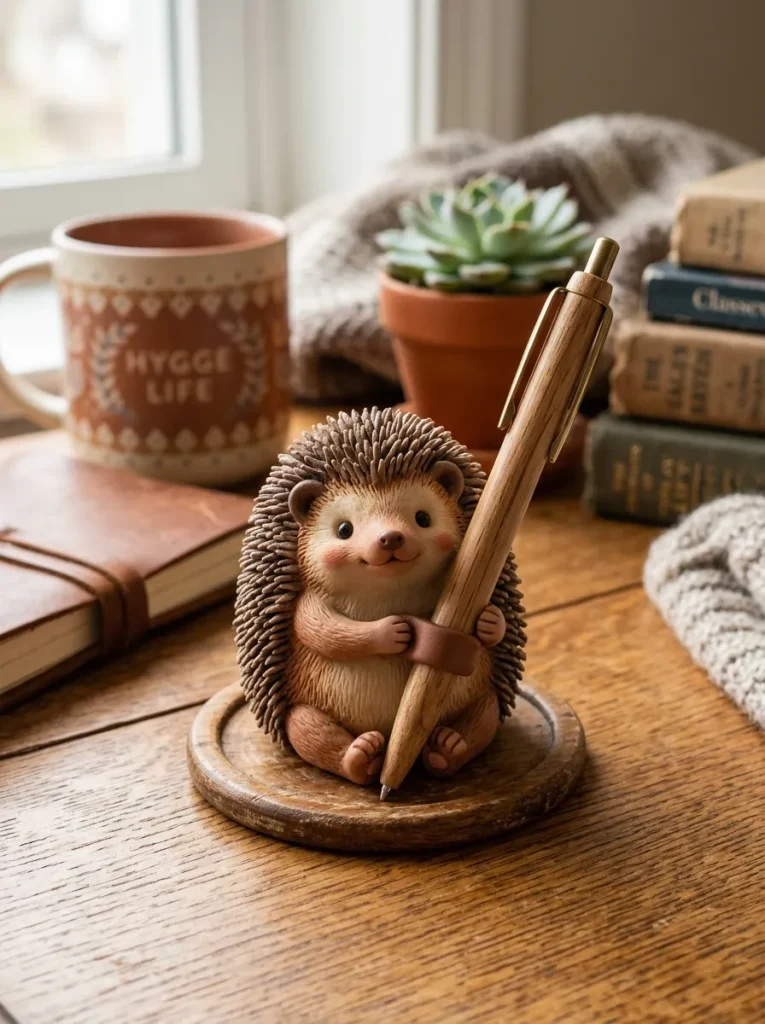
The miniature hedgehog desk buddy uses a textured coat of sculpted clay quills to create rich tactile interest in a compact, functional pen holder. Modeled in warm milk chocolate brown and soft tan clay, this chibi creature is depicted sitting upright on its hind legs while clutching a circular loop. The front paws wrap around a hollow cylindrical ring sized to hold a standard ballpoint pen or stylus in an upright vertical display position. The hedgehog’s smooth, tan-colored face contrasts against its spiky outer shell, which is hand-textured using alternating diagonal scissor snips across layered clay sheets. Tiny dark bead eyes and an upturned pointed snout give the hedgehog an alert, curious demeanor that brings life to clean, minimalist work surfaces. The weighted spherical base ensures that the upright pen does not tip the sculpture over during everyday desktop use.
To build this hedgehog pen holder, sculpt a dense, egg-shaped core from aluminum foil to reduce weight, coating it evenly in a four-millimeter layer of dark brown clay. Roll a separate cone of soft tan clay, blending the wide base seamlessly onto the front third of the brown egg to form the smooth face area. Using fine-tipped embroidery scissors, make small, alternating diagonal snips across the entire dark brown surface, lifting each cut slightly to create realistic dimensional quills. Form a ring of dark brown clay around a standard marker to create the pen loop, sliding the marker out before attaching the clay ring firmly to the hedgehog’s chest. Sculpt two tiny tan paws overlapping the front of the ring, smoothing the back seams with a silicone shaper tool. Add a tiny black sphere for the nose tip and two black bead eyes before baking the completed figure upright on a stable baking sheet.
Kawaii Shiba Inu Sitting Proudly on a Textured Wooden Coin Base
Setup Method
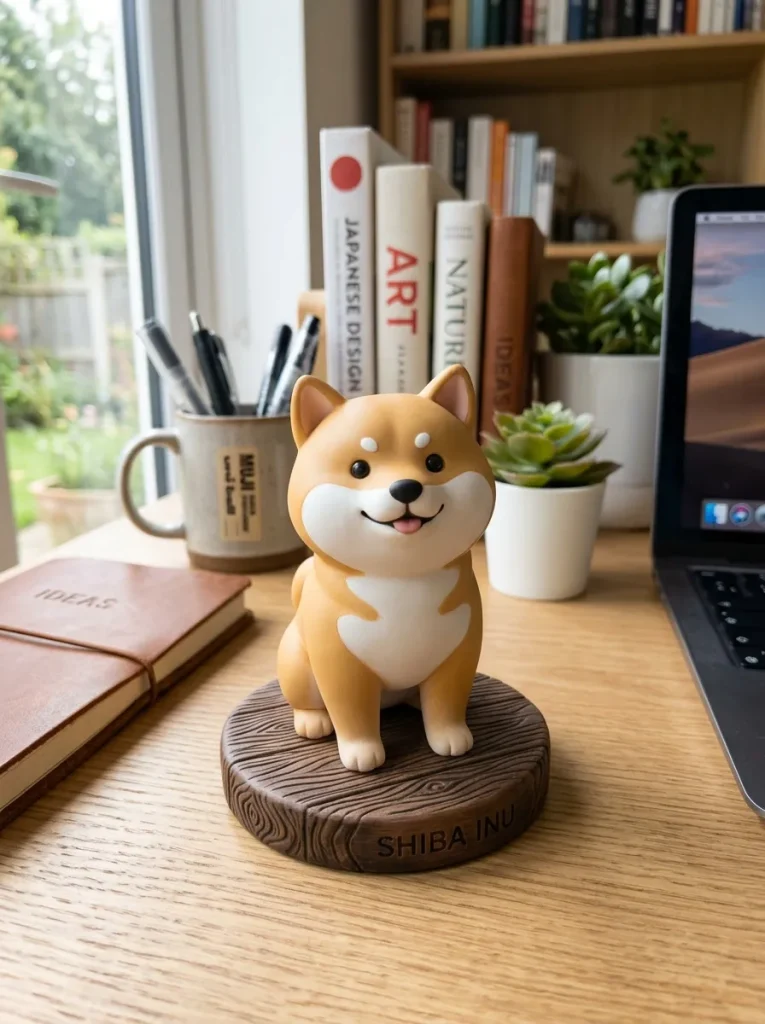
The kawaii Shiba Inu desk buddy celebrates the iconic Japanese dog breed with characteristic pointed triangular ears, a curled tail, and distinctive white facial markings. Sculpted in warm golden-tan clay, the dog sits in an upright, attentive pose with front legs planted squarely between its hind quarters. The figure is mounted permanently atop a faux wood-grain clay coin base that provides enhanced tipping resistance on slick desktop surfaces. White clay accents define the cheeks, chest, inner ears, and eyebrow dots, capturing the breed’s expressive personality in a clean chibi format. The tail curves tightly over the lower back, forming a natural arch that can hold small rubber bands or desktop accessories. This polished sculpture introduces a warm, loyal companion aesthetic to home offices and study areas while maintaining a clean, professional footprint.
Roll a thick disc of dark brown clay, texturing the top surface with a stiff wire brush and dragging a needle tool in circular patterns to simulate natural tree growth rings. Build the Shiba Inu body by shaping a cone of golden-tan clay, securing the bottom firmly to the center of the textured wooden base using liquid clay. Add a white clay patch over the chest and front belly, smoothing the outer edges into the tan body using a flat silicone blending tool. Sculpt a round head from tan clay, attaching two white teardrop patches on the cheeks and pressing two small white dots above the eye positions for eyebrows. Attach two pointed tan ears lined with white centers, insert two black bead eyes, and affix a curved coil tail tightly against the lower back. Inspect the entire figure for dust, smooth any fingerprints using a cotton swab dipped in rubbing alcohol, and cure the mounted sculpture in the oven.
Common Beginner Mistakes and How to Avoid Them
Sculpting miniature clay figures presents several common challenges that can compromise the structural strength, surface cleanliness, and visual appeal of the finished pieces. A frequent beginner mistake is failing to properly condition polymer clay, leading to internal air pockets that cause cracking or structural breakage during the baking cycle. Prevent this by thoroughly kneading clay until it is uniformly soft, warm, and pliable before attempting any delicate shaping steps. Another common issue is dust and lint contamination on light-colored clay surfaces, which ruins clean aesthetic finishes; prevent this by wiping hands and tools with wet wipes frequently and working on smooth ceramic tiles. Beginners also tend to make thin, unsupported limb attachments that snap easily once cured; always reinforce protruding appendages by inserting short wire armature pins and applying liquid polymer clay at every joint. Finally, improper baking temperatures can result in scorched colors or brittle under-cured clay. Use an independent, calibrated oven thermometer placed directly beside your baking tile to ensure your craft oven maintains an accurate, consistent temperature throughout the entire baking duration.
Practical Tips for Better Results
Achieving professional, gallery-quality results with miniature chibi clay figures requires attention to surface refinement, balanced proportions, and careful post-curing treatments. First, keep a bottle of isopropyl rubbing alcohol and a soft synthetic brush at your workbench to smooth away visible fingerprints and tool marks from raw clay before curing. The alcohol gently dissolves surface imperfections without altering fine sculpted details underneath. Second, when creating pairs of eyes or ears, use a precision digital scale or uniform clay measuring cutters to ensure identical clay volumes for perfect symmetry. Third, bake your clay figures on flat ceramic tiles covered with a sheet of plain printer paper to eliminate shiny flat spots on the underside of your sculptures. Fourth, enhance the depth of facial expressions by applying soft dry pastel powders with a fluffy makeup brush to cheeks and ears before baking, creating a soft, permanent airbrushed blush. Finally, protect finished pieces by applying two thin coats of high-grade water-based polyurethane varnish, alternating between matte finishes for animal fur and high-gloss glazes for eyes, noses, and water accents.
Styling, Presentation, or Organization Ideas
Presenting your handmade chibi animal figures effectively turns basic office desks into curated, visually engaging personal creative spaces. Arrange your desk buddies alongside complementary modern home decor elements, such as miniature concrete succulent planters, natural timber risers, and pastel stationery sets. When styling multiple clay figures together, group them in odd numbers using the classic interior design rule of threes to create a balanced, organic visual composition. Position functional figures like pen rests and cable holders near dominant workstations, keeping decorative companions on elevated monitor shelves where they remain visible without cluttering active mouse pathways. For gift presentations or craft fair displays, nestle individual clay figures inside miniature kraft paper boxes lined with crinkle-cut shredded paper and a custom hand-stamped label. Incorporating subtle LED task lighting directly above your desktop display highlights the fine textures, subtle pastel blushes, and glossy eye accents of your handmade clay sculptures.
Budget or Time Planning
Completing a collection of clay desk buddies within reasonable timeframes and financial budgets requires systematic batch processing and disciplined material sourcing. Begin by organizing your crafting schedule into three distinct phases: color preparation and armature building, detailed sculpting and texturing, and final baking, painting, and sealing. Allocating a two-hour crafting session allows you to sculpt three to four miniature figures efficiently when using pre-mixed color palettes. Sourcing multipacks of primary polymer clay colors and blending custom pastel shades yourself reduces material expenses significantly compared to buying specialized pre-mixed specialty tones. Basic household items—such as toothpicks, aluminum foil, old makeup brushes, and sewing needles—serve as exceptional sculpting tools, eliminating the need for expensive professional pottery equipment. Storing leftover raw clay in airtight polypropylene containers or plastic wrap prevents drying and contamination, ensuring zero material waste across multiple projects. This structured approach maximizes creative productivity while keeping overall project costs well within budget-friendly limits.
Creative Expansion and Advanced Inspiration
Once you master basic chibi sculpting techniques, you can explore advanced variations and functional upgrades that broaden the utility of your clay creations. Consider embedding small, strong neodymium magnets internally beneath the bases of your figures, allowing them to snap securely onto magnetic whiteboards, metal computer cases, or task lamp arms. Another engaging evolution involves creating seasonal interchangeable accessory packs—such as tiny sculpted winter scarves, graduation caps, or festive pumpkins—attached using micro-repositionable adhesive putty. You can also experiment with embedding small essential oil diffusing lava stones into the bases of your figures, turning desktop companions into functional aromatherapy diffusers for stress-free work environments. For advanced lighting effects, sculpt hollow figures from translucent polymer clay and embed micro-LED wire lights inside to create glowing nightlight desk companions. These creative expansions transform simple clay modeling projects into customizable, high-end desktop accessories tailored to evolving personal tastes and workspace requirements.