10 Vertical Floating Wall Shelf Storage Studio Apartment Ideas

Maximizing limited square footage while maintaining an open, uncluttered living environment is the central objective of contemporary studio apartment design. When floor space is constrained by essential furniture like beds, sofas, and dining tables, the surrounding vertical wall planes offer valuable storage potential. Installing vertical floating wall shelves allows urban dwellers to elevate functional storage off the floorboards, expanding both utility and visual space. This comprehensive design guide details ten distinct vertical floating shelf concepts specifically engineered for compact single-room layouts. Readers will explore structural shelf varieties ranging from slender ladder profiles and recessed corner columns to multi-tiered pegboard networks and integrated acoustic panels. The actionable techniques covered in this tutorial demonstrate how to choose proper mounting hardware, calculate weight capacities, curate display arrangements, and conceal mechanical fasteners across various wall substrates. Learning these spatial planning principles enables apartment owners and renters to resolve household clutter, establish customized decorative zones, and cultivate an inviting living aesthetic without encroaching on essential floor pathways or sacrificing individual decorative taste.
Why This Idea Is Trending or Useful
Vertical wall storage has emerged as a cornerstone of modern interior inspiration due to its high utility, clean lines, and ability to maximize tight residential footprints. In modern studio apartment living, every square foot must serve multiple purposes, making traditional bulky bookcases and heavy storage cabinets impractical. Vertical floating shelving provides substantial practical value by utilizing the full height of a room, drawing the eye upward to create the optical illusion of higher ceilings and larger spaces. The design relevance connects directly to modern minimalist style, which prioritizes clean lines, concealed brackets, and uncluttered surfaces. From a DIY perspective, vertical floating shelf installations offer exceptional appeal because they are beginner friendly, modular, and easily tailored to awkward alcoves or narrow wall gaps. Homeowners and apartment renters can install these systems using basic hardware tools without requiring professional carpentry skills. By turning empty vertical spans into functional architectural elements, these creative ideas provide smart home decor and studio organization solutions for urban residents seeking stylish living arrangements on a realistic budget.
Materials and Preparation
Proper preparation, accurate wall assessment, and precise tool selection are essential for building a safe, long-lasting vertical floating shelf system in a compact apartment. Essential materials include solid timber planks (such as oak, pine, or walnut), high-density fiberboard boards, heavy-duty concealed steel mounting rods, aluminum channel brackets, and specialized heavy-duty hollow-wall toggle anchors. Core tools required for installation comprise a digital stud finder, a long spirit level or multi-line laser level, a variable-speed power drill with masonry and wood drill bits, a measuring tape, masking tape, and a pencil. Preparation begins by thoroughly inspecting the chosen wall surface to identify electrical conduits, plumbing pipes, and structural framing studs. Clear the surrounding floor perimeter completely to establish a safe, unobstructed work zone before measuring vertical spacing between shelf tiers. Planning considerations require calculating the total anticipated weight of books, ceramics, and electronics to match the load capacity of your wall anchors. Marking reference lines with low-tack painter’s tape prevents surface scratching and guarantees straight, level shelf alignment across the entire installation.
Slender Floor-to-Ceiling Column Tower
Step-by-Step Guide
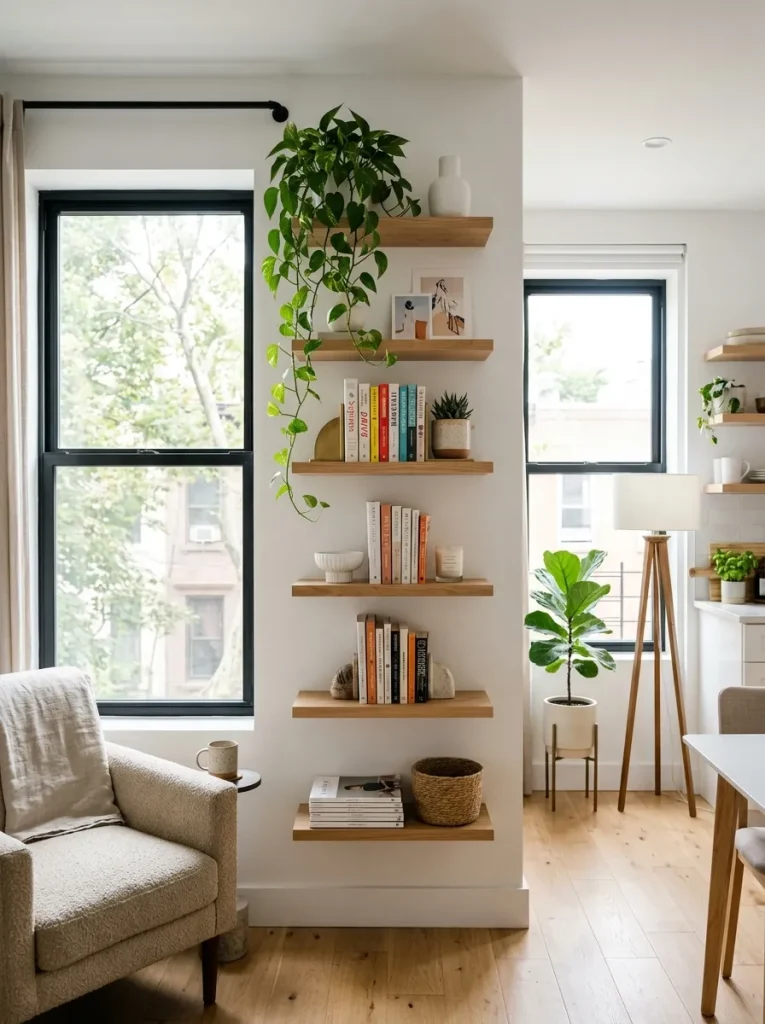
The slender floor-to-ceiling column tower optimizes narrow, unused wall segments by stacking five to seven individual floating shelves vertically along a single axis. This architectural approach utilizes wall spaces between window frames, alongside doorways, or next to wardrobe cabinets that are traditionally too tight for standalone furniture. By keeping each shelf depth between six and eight inches, the column provides practical storage for paperback books, small plants, audio speakers, and decorative vessels without obstructing foot traffic. The lack of visible side panels creates an open, floating appearance that visually elongates vertical room proportions. This design brings order to studio apartments by transforming overlooked structural dead zones into functional, high-density display columns that integrate seamlessly with the surrounding drywall.
       +---------------------------------------------+
       |   Upper Display Tier: Trailing Plants       |
       +---------------------------------------------+
                              |
       +---------------------------------------------+
       |   Mid-Level Tiers: Books & Audio Gear       |
       +---------------------------------------------+
                              |
       +---------------------------------------------+
       |   Lower Storage Tier: Small Catchall Bins   |
       +---------------------------------------------+
Executing this vertical column tower starts by using a digital stud finder to locate and mark the center of a single structural wall stud from floor to ceiling. Using a laser level, project a straight vertical line along the stud mark to establish the mounting centerline. Measure and mark uniform fourteen-inch intervals along the line, indicating the exact height for each floating shelf tier. Drill pilot holes directly into the wooden stud at each marked point, fastening heavy-duty blind shelf support rods using an impact driver. Slide pre-drilled, solid oak floating shelf boards over the steel rods until the back edges sit flush against the drywall surface. Secure the concealed locking screws beneath each shelf to prevent forward sliding, completing the tower by dusting the wood surfaces and stocking the lower tiers with heavier books and upper tiers with lightweight decorative ceramics.
Corner-Hugging Floating Wedge Shelves
Setup Method
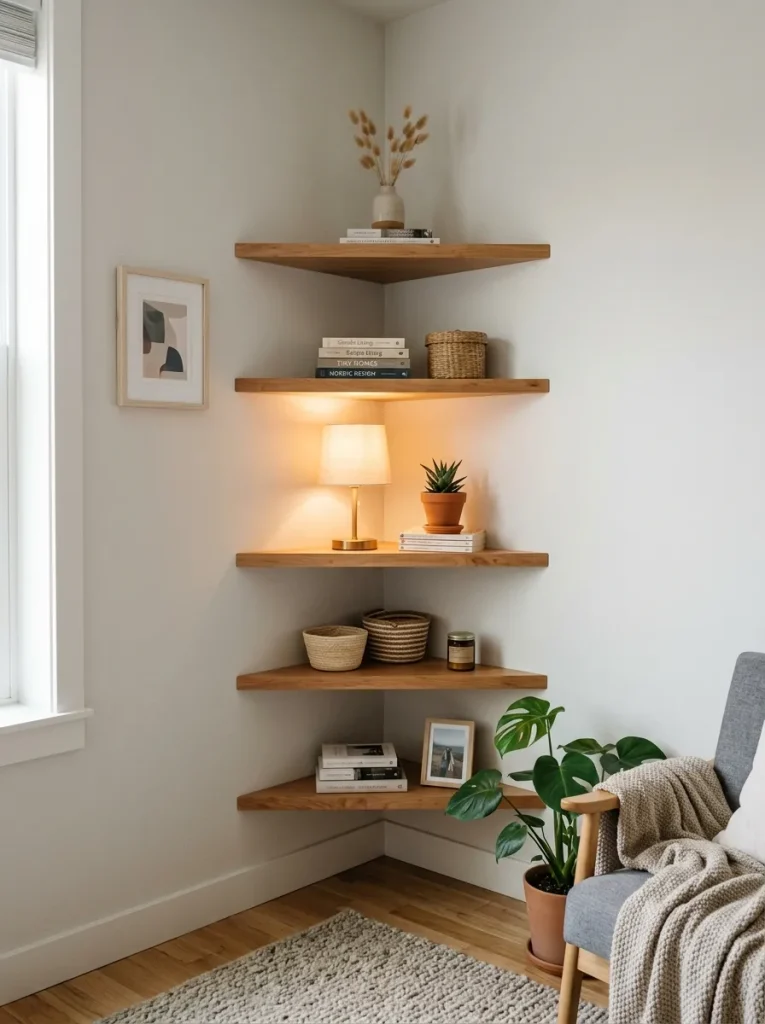
Corner-hugging floating wedge shelves transform neglected ninety-degree room intersections into functional, multi-tiered storage zones that leave the primary walls completely open. Standard furniture often leaves corners empty or awkwardly occupied, whereas custom-fitted floating wedge tiers utilize the structural strength of two intersecting walls for added weight capacity. Each triangular or radius-curved shelf tier provides a sturdy surface for folded linens, woven organizer baskets, kitchen spice jars, or ambient lighting fixtures. Because the shelves lack floor legs, the room perimeter remains visually unobstructed, making compact studio apartments appear significantly broader. This concept works well beside entryway doors, adjacent to kitchen counters, or tucked neatly behind reading armchairs.
| Structural Component | Recommended Material | Functional Purpose |
|---|---|---|
| Corner Shelf Base | 1.5-Inch Solid Maple or Birch | Delivers high rigidity and natural wood grain warmth |
| Concealed Cleats | Heavy-Duty Aluminum Angle Brackets | Anchors shelf edges flush against intersecting drywall |
| Wall Anchoring | 1/4-Inch Steel Snap Toggles | Provides exceptional pull-out resistance in hollow walls |
| Finish Treatment | Satin Polyurethane Clear Sealant | Protects timber surfaces against moisture and scuffs |
To install a vertical set of floating corner shelves, begin by marking five horizontal level lines across both intersecting walls at sixteen-inch vertical intervals. Mount two aluminum angle cleats per shelf level—one on each wall face—using heavy-duty drywall toggle anchors or direct stud screws, ensuring both cleats align horizontally. Cut triangular hardwood shelf blanks to match the exact corner angle, routing a concealed channel along the back two edges to fit over the aluminum wall cleats. Slide the routed wood shelf tightly onto the cleats, securing the assembly from underneath with countersunk wood screws. Repeat this procedure for each tier, finishing by placing heavy decorative storage boxes on the lower shelves and light, leafy pothos plants on the top shelf to drape over the corners.
Concealed-Hardware Book Spine Stack
Execution Process
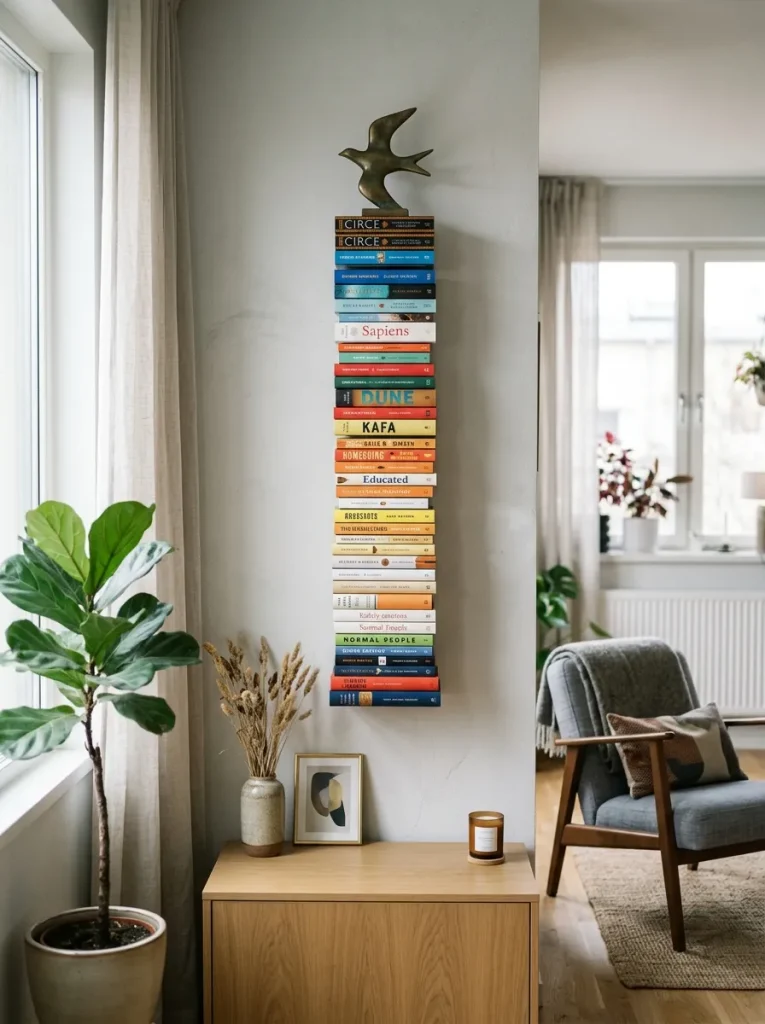
The concealed-hardware book spine stack creates the intriguing visual effect of a freestanding, vertical tower of books floating unsupported against a studio wall. This design utilizes ultra-thin, powder-coated steel L-shaped brackets mounted at vertical intervals, completely hidden once books are placed on them. The bottom cover of the lowest book slides into a dedicated base clip, concealing the metal shelf from view and turning everyday reading materials into a sculptural column. This layout frees up substantial floor space by replacing deep, traditional bookcases with a slender, vertical book stack that extends only eight inches from the wall surface. It delivers a clean, modern aesthetic that turns a personal reading collection into an engaging architectural feature.
                 +---------------------------------+
                 |  Top Tier: Accent Art Object    |
                 +---------------------------------+
                                  |
            +-------------------------------------------+
            |  Concealed Powder-Coated Steel L-Shelf    |
            +-------------------------------------------+
                                  |
            +-------------------------------------------+
            |  Stacked Books Concealing Lower Bracket   |
            +-------------------------------------------+
To create this invisible book stack, mark a vertical reference line on your studio wall using a spirit level, placing mounting marks every ten inches along the axis. Align the vertical plate of a specialized concealed steel book shelf bracket with each mark, securing the bracket into a wall stud or using two heavy-duty drywall anchors per tier. Ensure each bracket is level before tightening the mounting screws completely. To style each tier, take a large, hardcover book, open its back cover, and slide the cover into the bottom clips of the steel shelf so the pages rest flat on the horizontal ledge. Stack four to five additional books horizontally on top of the base book until the vertical steel stem is fully obscured, creating a clean, floating book tower that stores dozens of volumes within a minimal footprint.
Modular Slotted Wooden Pegboard Wall
How to Create
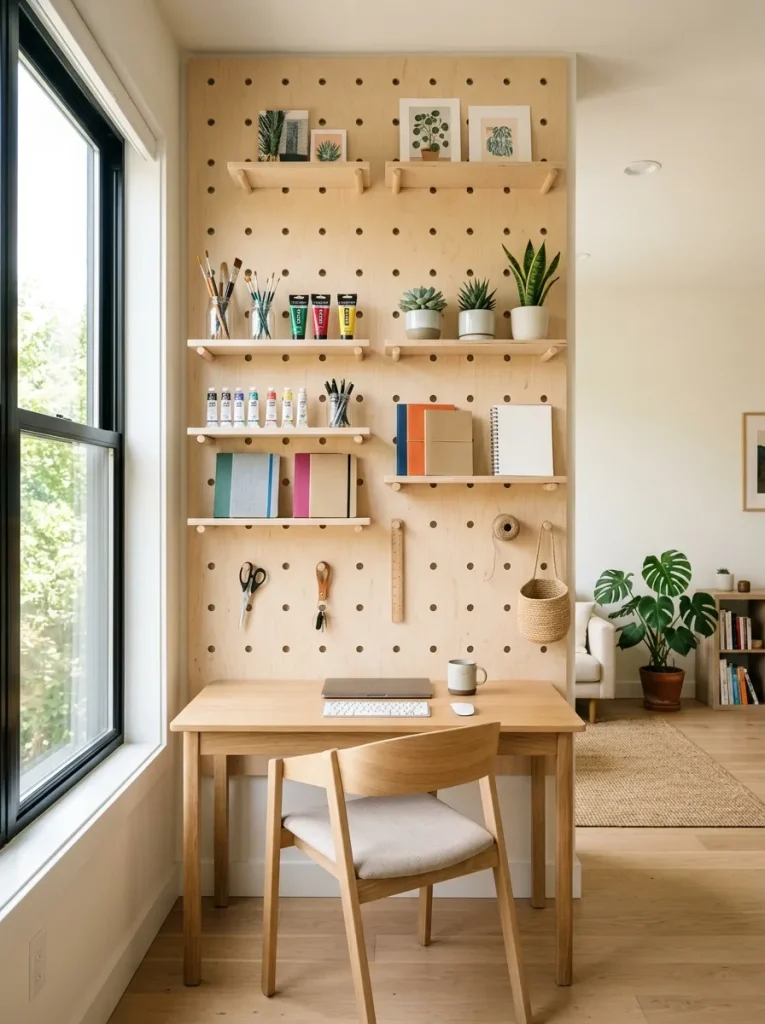
A modular slotted wooden pegboard wall provides dynamic vertical storage that can be reconfigured as apartment needs change throughout the week. Constructed from a large panel of furniture-grade birch plywood featuring evenly spaced CNC-routed holes, this vertical system accepts solid wood dowels that support floating shelf planks of varying lengths. Users can easily shift shelf heights, add hanging pegs for outerwear, or insert specialized caddies for art supplies and kitchen tools without drilling new holes in the drywall. This modular flexibility makes the system an exceptional storage solution for multi-functional studio apartments where a single wall may serve as a workspace, entertainment zone, and entryway organizer simultaneously.
Begin constructing this modular system by cutting a four-by-eight-foot sheet of three-quarter-inch birch plywood to fit your designated wall area. Measure and mark an even grid of holes spaced four inches apart across the panel, drilling through each mark with a one-inch Forstner drill bit to create clean, uniform peg holes. Sand the entire surface smooth and apply a protective natural matte wax or water-based polyurethane finish. Mount three horizontal French cleats across the back of the plywood panel and secure the matching wall cleats directly into the wall studs using heavy-duty lag screws. Hang the pegboard securely onto the cleats, then insert cut one-inch hardwood dowels into desired grid positions to support customized wooden floating shelf planks across multiple vertical levels.
Acoustic Felt-Backed Floating Slat Shelves
Step-by-Step Guide
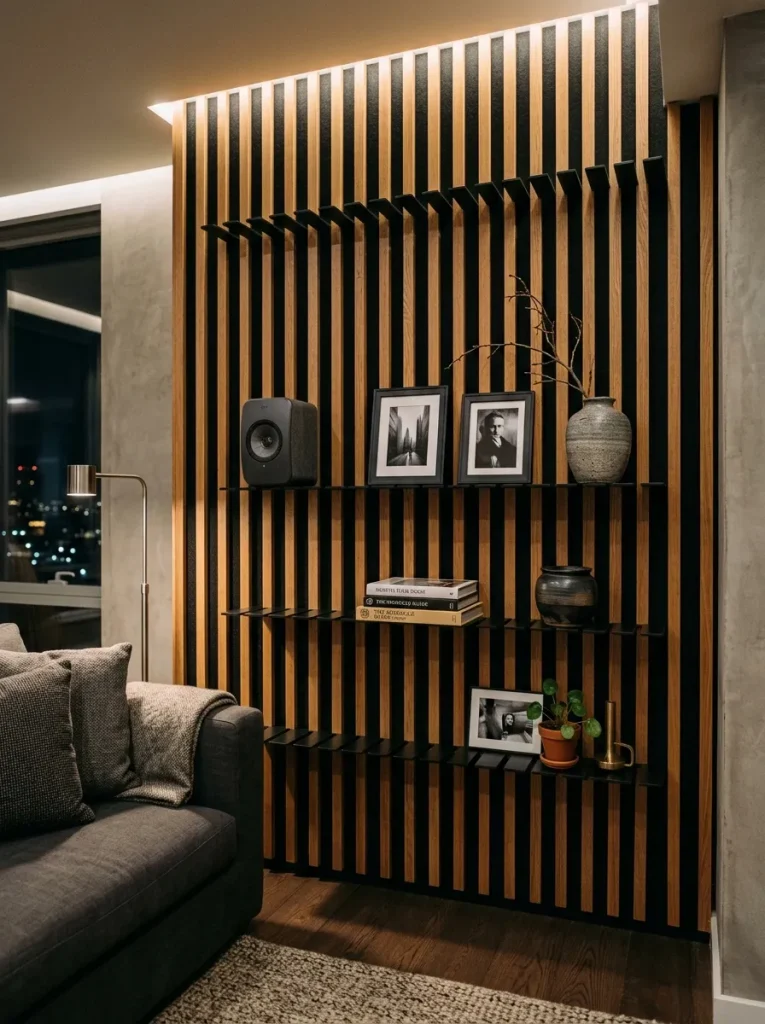
The acoustic felt-backed floating slat shelf concept combines vertical storage functionality with acoustic dampening properties, addressing both clutter and noise reverberation common in open studio apartments. This installation features vertical wood-veneer slats mounted over high-density recycled acoustic felt panels, with floating metal or wooden shelf ledges inserted horizontally across the slat channels. The thick felt backing absorbs ambient sound reflections from hard apartment floors, while the solid horizontal shelves provide durable surfaces for displaying framed photos, small electronics, and decorative stoneware. The vertical wood slats draw the eye upward toward the ceiling, creating an elegant architectural accent wall that adds warmth, texture, and practical storage to compact urban spaces.
| Component Layer | Optimal Material Choice | Key Practical Function |
|---|---|---|
| Acoustic Sub-Base | 9mm High-Density PET Felt | Absorbs ambient noise, echoes, and sound reflections |
| Vertical Slats | Real Oak Veneer over MDF Cores | Adds linear visual height and structural shelf support |
| Floating Ledges | 2mm Powder-Coated Steel Plates | Slides into slat grooves to hold display accessories |
| Wall Fasteners | Black Oxide Drywall Screws | Secures panels invisibly through the dark backing felt |
Installing this acoustic shelf system begins by measuring the vertical wall span and cutting the acoustic slat panels to length using a fine-tooth circular saw. Secure the panels to the drywall by driving black drywall screws directly through the black polyester felt between the wood slats into the studs or wall anchors. Select specialized cantilevered steel floating shelves designed with rear mounting lips that insert into the horizontal gaps between slats. Position the shelves at alternating vertical levels across the slatted panel, securing them with rear locking pins that grip behind the wood slats. Place small wireless desk speakers, ceramic succulent pots, and decorative stoneware pieces onto the steel ledges, creating a refined, multi-functional wall feature that improves apartment acoustics while organizing everyday items.
Staggered Asymmetrical Shadow Box Column
Execution Process
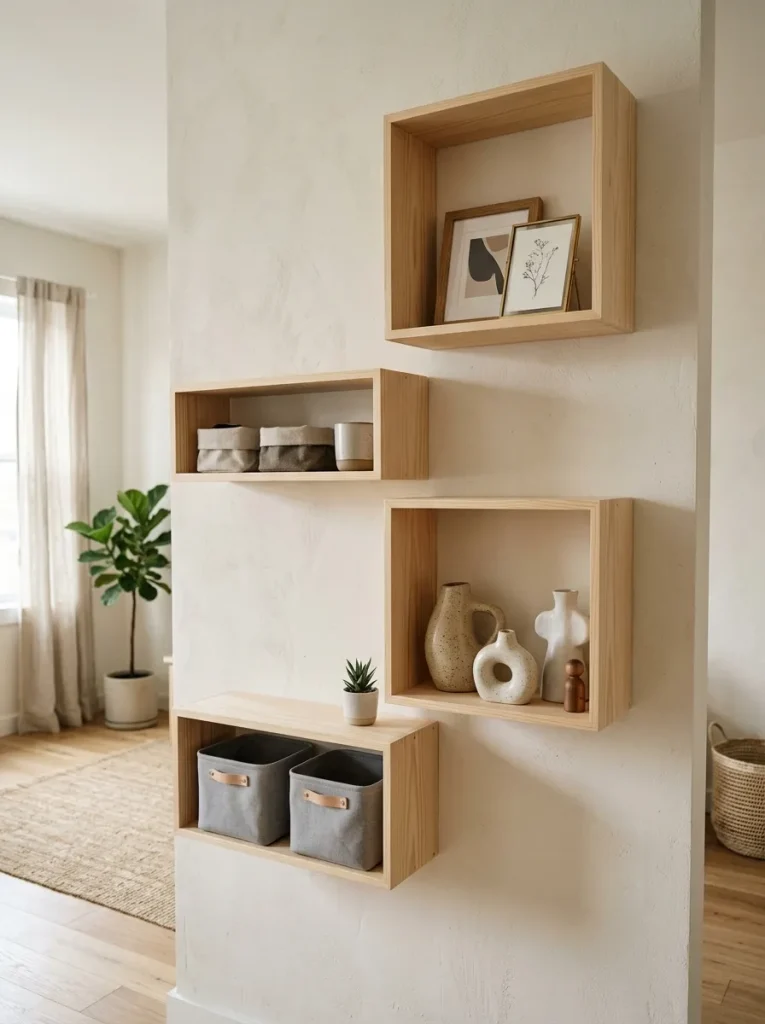
The staggered asymmetrical shadow box column utilizes enclosed rectangular and square wooden boxes mounted vertically in an alternating, offset arrangement. Unlike open horizontal planks, enclosed shadow boxes provide distinct interior compartments while offering an additional display ledge across their top surfaces. This staggered layout introduces architectural movement to flat drywall expanses, breaking up monotonous lines and creating dedicated storage niches for items of varying heights. The enclosed frames keep belongings contained, preventing items from being accidentally knocked off in high-traffic studio pathways. It provides a balanced combination of enclosed cubbies and open flat ledges, allowing apartment dwellers to mix hidden storage containers with open decorative displays.
       +---------------------------------------------+
       |   [ Upper Square Box: Fragile Ceramics ]    |
       +---------------------------------------------+
                              |
       +-------------------------------------------------+
       |      [ Wide Rectangular Box: Book Volumes ]     |
       +-------------------------------------------------+
                              |
       +---------------------------------------------+
       |   [ Lower Offset Square: Woven Storage Bin] |
       +---------------------------------------------+
To build this staggered column, assemble three to four wooden shadow boxes of varying dimensions (such as two twelve-inch squares and two eighteen-inch rectangles) from three-quarter-inch pine boards, joining corners with pocket holes and wood glue. Rout a recessed French cleat system into the top back interior edge of each shadow box. Secure the coordinating wooden wall cleats to the wall at alternating vertical heights and horizontal offsets using a spirit level and heavy-duty drywall anchors. Hang the shadow boxes onto their respective cleats, ensuring each box seats firmly against the wall surface. Place small canvas storage bins inside the lower enclosed boxes to conceal clutter like cables and chargers, reserving the upper interior compartments and top ledges for framed art prints and small sculptures.
Live-Edge Timber Wall Tier
Setup Method
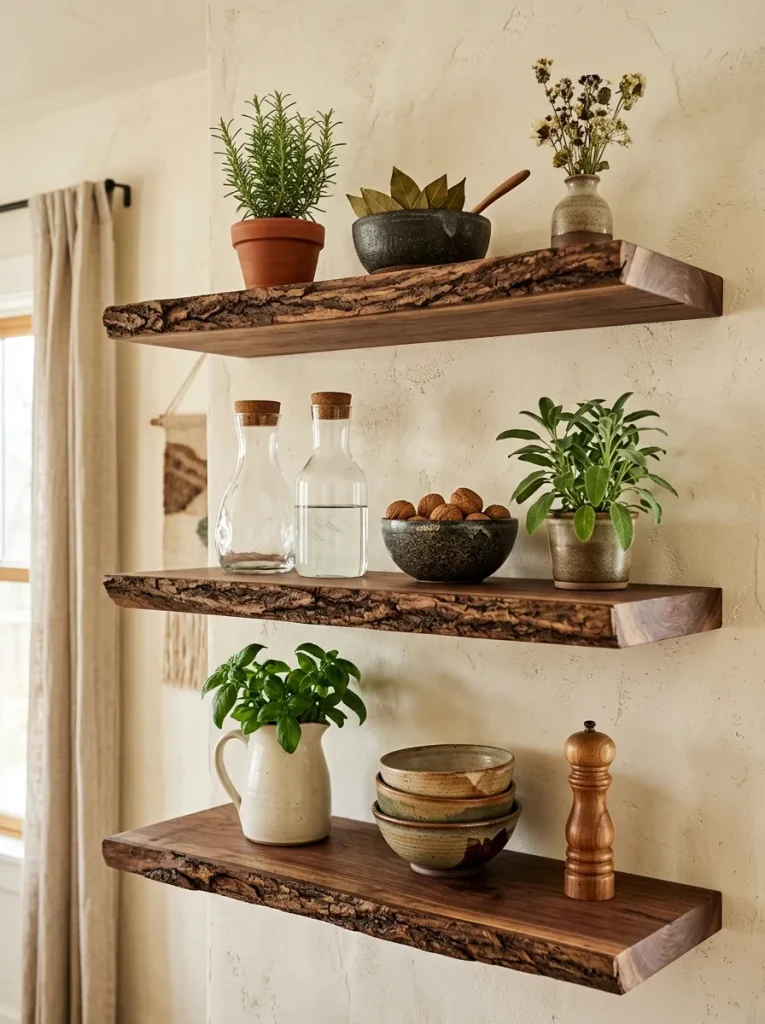
A live-edge timber wall tier introduces organic shapes and natural textures into contemporary studio apartments, softening rigid drywall planes and metal furniture frames. These shelves utilize thick hardwood slabs that retain the tree’s natural outer bark contour along their front exposed edge, while the back edge is cut straight for flush wall mounting. Stacked vertically in sets of three or four tiers, the natural curves of the wood grain create a warm visual anchor that complements indoor house plants, artisanal pottery, and glassware. The thick slab profile provides exceptional structural strength, making these shelves capable of supporting heavy cookware in kitchen zones or dense reference books beside a workspace.
Begin setting up this live-edge tier by selecting three matched slabs of kiln-dried walnut, cherry, or ash timber cut to identical lengths with flattened back mounting edges. Sand the wood surfaces smooth through progressive grits from 120 to 320, applying three coats of food-safe hardwax oil to enhance the natural grain. Drill deep, precise horizontal holes into the back edge of each timber slab using a drill press jig to ensure straight alignment. Mount heavy-duty solid steel floating shelf mounting brackets into wall studs at eighteen-inch vertical intervals, checking that all bracket prongs are level. Slide the live-edge timber slabs over the steel mounting prongs until they sit firmly against the wall, finishing by styling the shelves with clear glass carafes, stacked ceramic bowls, and small potted herbs.
Integrated Task-Light Under-Cabinet Floating System
How to Create
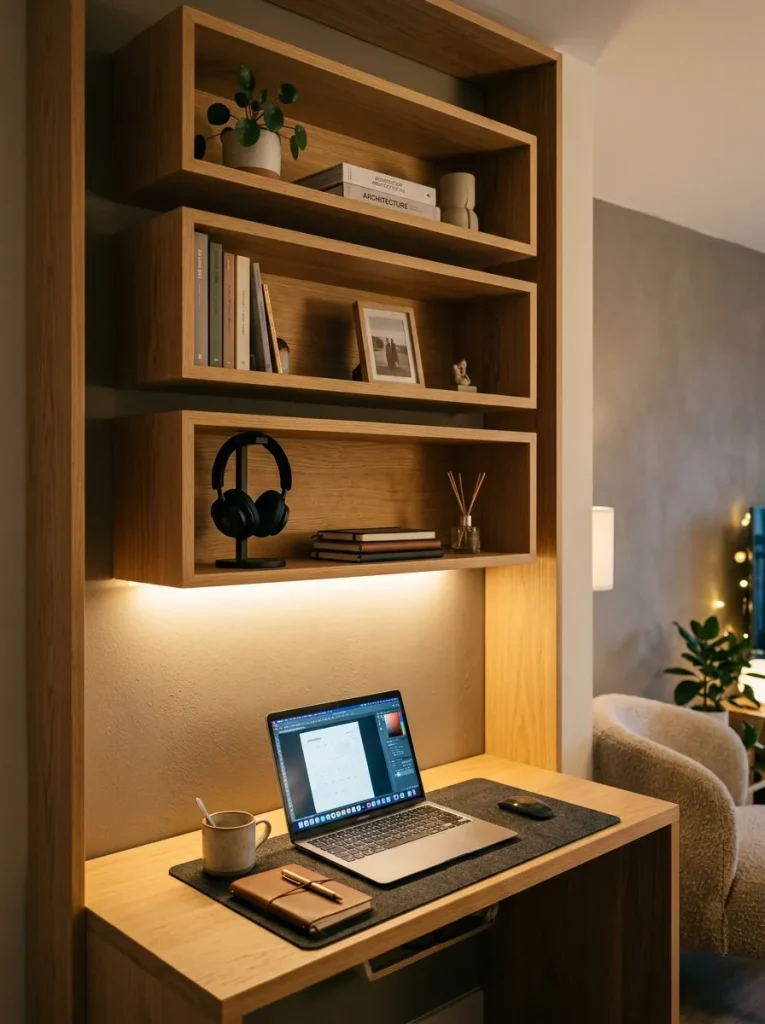
The integrated task-light floating shelf system merges vertical wall storage with concealed illumination, making it a functional upgrade for studio desk alcoves and mini-kitchenettes. This design features floating wood box shelves with recessed aluminum channels routed directly into their underside surfaces to house diffused warm LED strip lights. The vertical stack of shelves provides multi-level storage for work supplies, dishes, or toiletries, while the downward-facing light strips illuminate the countertop or desk surface below. This dual-purpose design eliminates the need for bulky desktop task lamps, keeping horizontal work surfaces completely open for daily activities.
                 +---------------------------------+
                 |  Top Storage Tier: Storage Bins |
                 +---------------------------------+
                                  |
            +-------------------------------------------+
            |  Mid Tier Shelf with Concealed LED Channel|
            +-------------------------------------------+
                                  |
            +-------------------------------------------+
            |  Illuminated Desktop / Counter Workspace  |
            +-------------------------------------------+
Building this illuminated shelf system begins by routing a half-inch-wide by quarter-inch-deep channel along the underside of two hollow-core floating wooden shelves, two inches from the front edge. Press aluminum LED channel profiles into the routed grooves, sticking warm 2700K LED ribbon light strips inside the channels and snapping on frosted diffuser covers. Drill a small exit hole through the back of each shelf to route the thin power wires invisibly behind the mounting bracket into a low-profile wall conduit. Fasten the steel wall mounting brackets to the studs, connect the low-voltage lighting wires to a compact dimmer switch, and slide the shelves onto the wall brackets. Turn on the integrated LED lights to enjoy a brightly lit, shadow-free desktop workspace below a multi-tiered vertical storage stack.
Industrial Pipe and Suspended Floating Plank Stack
Step-by-Step Guide
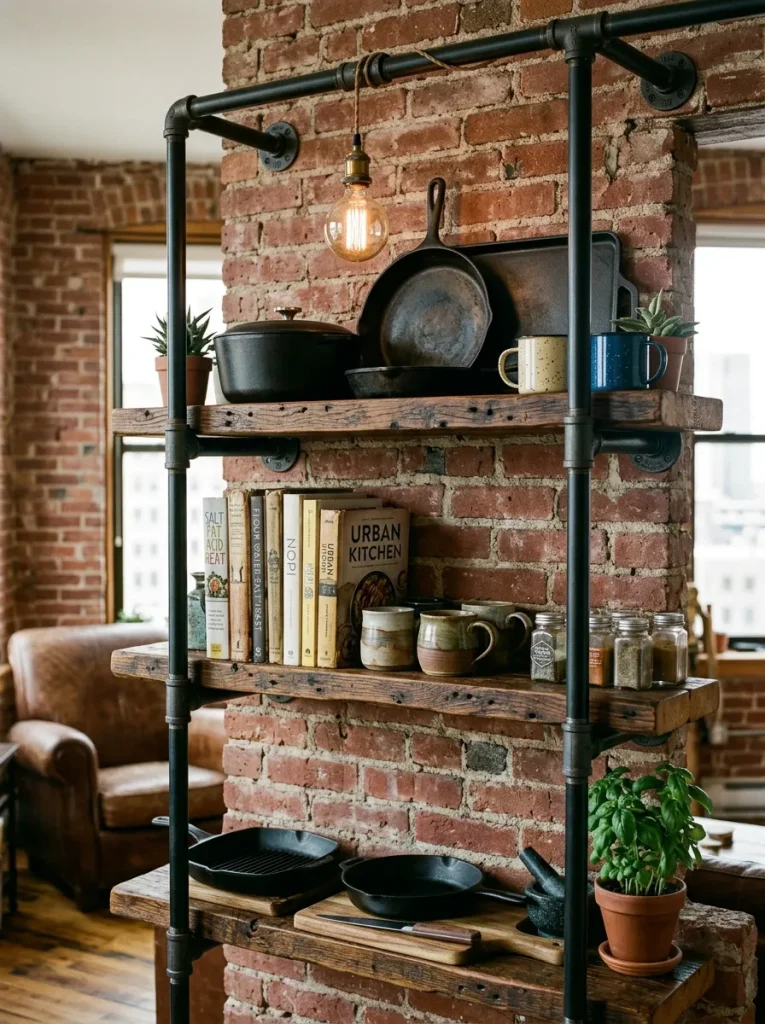
The industrial pipe and suspended floating plank stack pairs matte black iron fittings with solid reclaimed wood planks to create a rugged, urban aesthetic. This vertical system utilizes black iron floor flanges anchored to the upper wall or ceiling, with vertical threaded iron pipes descending through pre-drilled holes in multiple floating wood planks. Threaded pipe couplings or locking collar rings positioned beneath each wooden tier support the shelf planks without requiring visible brackets underneath. The open iron framework provides exceptional structural stability while maintaining an open, airy appearance that allows ambient natural light to pass freely between the shelves.
| Assembly Element | Hardware Specification | Structural Role |
|---|---|---|
| Top Flanges | 3/4-Inch Black Malleable Iron Flanges | Anchors the top of the entire vertical pipe assembly |
| Vertical Rods | 3/4-Inch Threaded Black Steel Pipes | Suspends and aligns multiple wood tiers vertically |
| Shelf Tiers | 2-Inch Thick Reclaimed Scaffold Boards | Provides durable, heavy-load horizontal surfaces |
| Support Rings | 3/4-Inch Iron Pipe Split Collars | Locks each wooden shelf securely at precise heights |
To construct this industrial pipe stack, start by cutting two identical reclaimed wood planks to four-foot lengths, drilling two three-quarter-inch holes through each plank three inches from the side edges. Clean black steel pipe lengths and fittings with mineral spirits to remove industrial grease, applying a matte black rust-inhibiting clear coat. Fasten two iron floor flanges into ceiling joists or high on the wall studs using heavy wood screws. Thread the vertical pipe rods into the mounted flanges, sliding the pre-drilled wooden planks upward along the pipes and securing them at eighteen-inch vertical intervals using locking pipe collars. Tighten all set screws firmly, checking that both planks sit level before stocking the durable wooden surfaces with heavy kitchen appliances, cast iron pans, or studio entertainment media.
Narrow Picture Ledge Multi-Tier Ribbon
Execution Process
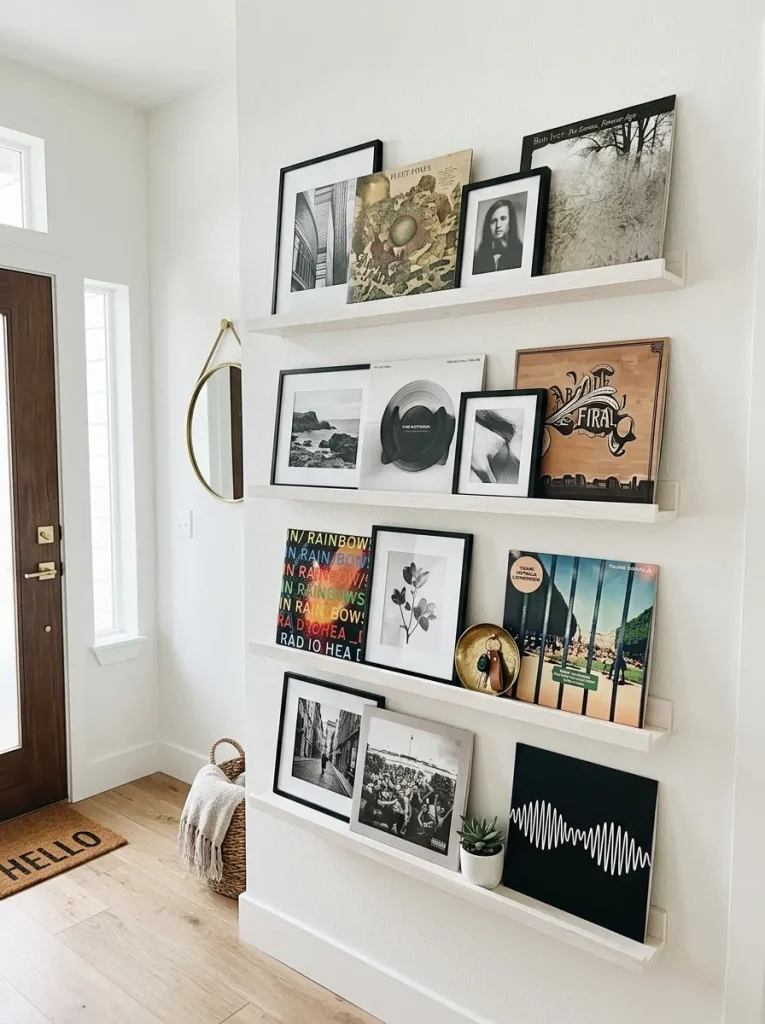
The narrow picture ledge multi-tier ribbon utilizes shallow wooden display ledges stacked vertically to display framed art prints, vinyl record covers, and magazine collections. Measuring only three to four inches in depth, these ledges feature a raised front lip that prevents propped frames from slipping off. Stacking four to six narrow ledges vertically along an entryway or hallway wall creates a dynamic display that occupies almost zero floor area. This setup allows apartment dwellers to easily swap out artwork, records, and seasonal decor without drilling new holes or damaging drywall, making it an adaptable decorative solution for compact living spaces.
       +---------------------------------------------+
       |   Top Ledge: Framed Art Prints & Postcards  |
       +---------------------------------------------+
                              |
       +---------------------------------------------+
       |   Mid Ledges: Curated Vinyl Record Sleeves  |
       +---------------------------------------------+
                              |
       +---------------------------------------------+
       |   Bottom Ledge: Keys, Mail & Framed Photos  |
       +---------------------------------------------+
Executing this picture ledge ribbon begins by marking four to five level lines spaced twelve to fourteen inches apart along a narrow, open wall space. Align pre-fabricated or custom-built wooden picture ledges along each marked line, drilling pilot holes through the rear mounting flange into the wall studs or heavy-duty hollow-wall drywall anchors. Fasten the ledges securely using countersunk wood screws, covering the screw heads with matching wood grain plugs or paint. Arrange framed photography prints, vinyl record albums, and thin botanical illustrations along the ledges, overlapping the frame edges slightly to build visual depth. Place a small decorative brass dish on the lowest ledge to serve as an entryway catchall for daily mail and keys.
Common Beginner Mistakes and How to Avoid Them
When installing vertical floating wall shelves in a studio apartment, beginners often make several common mistakes that can compromise both wall safety and visual harmony. The most frequent and hazardous error is relying on standard plastic expansion anchors in hollow drywall to support heavy floating shelves. Standard plastic wall plugs are designed for light picture frames and often pull out of gypsum board under the heavy forward leverage of a loaded floating shelf; always secure brackets directly into solid wood studs or use steel toggle bolts rated for heavy loads. Another common mistake is mounting shelves too deep in narrow pathways, which crowds walking areas and makes the room feel cramped. Keep shelf depths between six and ten inches in compact studio apartments to preserve open walkways.
+-------------------------------------------------------------+
|              Common Error: Plastic Expansion Anchors        |
|        (Fails under forward leverage of loaded shelves)     |
+-------------------------------------------------------------+
                               |
                               v
+-------------------------------------------------------------+
|        Solution: Direct Stud Mounting or Steel Toggles      |
|         (Provides secure, long-term load-bearing support)   |
+-------------------------------------------------------------+
Beginners also frequently overlook vertical spacing, placing shelves too close together or mounting the top tier out of comfortable reach. Maintain at least twelve to sixteen inches of clearance between shelf tiers to accommodate books and decor items comfortably. Finally, overloading a floating shelf with too many small, cluttered objects creates visual noise that disrupts the clean lines of a studio apartment. Avoid overcrowding by leaving open gaps between items and grouping smaller accessories into solid-colored storage bins.
Practical Tips for Better Results
Achieving a professional, long-lasting vertical floating shelf installation requires careful attention to leveling, bracket alignment, and balanced styling techniques. Always use a long spirit level or a cross-line laser level when marking bracket positions across multiple vertical tiers; even a slight half-degree tilt becomes noticeable when shelves are stacked vertically above one another. When preparing floating shelves, select kiln-dried hardwoods with minimal warping, such as white oak, ash, or hard maple, as moist timber can twist over time and loosen wall anchors.
+-------------------------------------------------------------+
|          Use Multi-Line Laser Level for True Alignment      |
|             (Guarantees consistent vertical spacing)        |
+-------------------------------------------------------------+
                               |
                               v
+-------------------------------------------------------------+
|         Select Stable Kiln-Dried Hardwood Planks            |
|           (Prevents wood warping and bracket strain)        |
+-------------------------------------------------------------+
                               |
                               v
+-------------------------------------------------------------+
|         Apply the 60-30-10 Visual Weight Styling Rule       |
|            (Distributes books, decor, and negative space)   |
+-------------------------------------------------------------+
When styling your vertical shelves, apply the 60-30-10 rule to maintain visual balance and keep the installation looking organized. Allocate sixty percent of the shelf space to functional items like books and storage boxes, thirty percent to decorative objects like ceramic vases and framed art, and leave the remaining ten percent as open space. Place heavier books and opaque storage boxes on the lower tiers to anchor the column visually, reserving the upper tiers for lighter glassware, small art prints, and trailing plants that drape naturally over the edges.
Styling, Presentation, or Organization Ideas
Organizing a vertical floating shelf system effectively turns functional storage into an attractive design element that complements your studio decor. Group books using varied orientations—stacking some vertically between stone bookends and laying others horizontally in neat piles to create varied display pedestals. Use matching opaque fabric, woven rattan, or matte white paperboard storage boxes on the lower shelves to conceal daily essentials like cables, office supplies, and paperwork.
+-------------------------------------------------------------------+
|               VERTICAL SHELF STORAGE & STYLING MAP                |
+-------------------------------------------------------------------+
|   [ Top Tier ]          [ Middle Tiers ]        [ Bottom Tier ]   |
|   - Trailing Pothos     - Vertical Book Sets    - Opaque Storage  |
|   - Light Ceramics      - Horizontal Stacks     - Woven Baskets   |
|   - Small Framed Art    - Framed Photos         - Heavy Cookware  |
|                                                                   |
|   [================= Visual Clutter Suppression ==================]|
|   - Heavy items grounded at base; light, open items at eye level  |
+-------------------------------------------------------------------+
Enhance the presentation of your vertical shelves by incorporating warm accent lighting and metallic textures. Position small battery-operated LED spotlights or cordless rechargeable table lamps on middle tiers to cast a warm, ambient glow across the wall during evening hours. Intersperse warm metallic accents, such as brushed brass bookends or small copper dishes, between matte ceramic vessels to reflect light and add subtle shine. Introducing trailing greenery, like string-of-pearls or heartleaf philodendron, adds organic movement that softens the straight horizontal lines of the wood planks.
Budget or Time Planning
Installing vertical floating wall shelves is an economical home improvement project that provides high storage value for a reasonable investment of time and money. Studio apartment residents can complete a high-impact shelf installation over a single weekend using affordable hardware and basic tools. Budget-conscious decorators can keep costs low by purchasing unfinished lumber boards, cutting them to size at home, and applying stains or protective sealants themselves rather than purchasing expensive pre-finished designer units.
| Project Scope | Active Timeline | Estimated Cost Window | Key Materials & Deliverables |
|---|---|---|---|
| Weekend Picture Ledges | 2 to 3 Hours | $40 – $90 | Pine ledges, wall anchors, wood screws |
| Intermediate Wood Tower | 4 to 6 Hours | $100 – $250 | Hardwood planks, blind steel rods, wood stain |
| Custom Modular Wall Unit | 1 to 2 Days | $300 – $700+ | Birch plywood, French cleats, LED channels |
To make the most of your budget and time, plan the entire layout on paper before purchasing lumber and mounting hardware. Take accurate wall measurements and sketch your planned shelf spacing to buy the exact materials needed, minimizing waste. Completing wall prep, stud location, and hole drilling in an organized sequence ensures your vertical floating shelves are installed efficiently and securely in just a few hours.
Creative Expansion and Advanced Inspiration
Once you have mastered the basics of vertical floating shelf installation, advanced creative variations can turn simple shelves into dynamic architectural statements. Consider extending vertical shelf columns across the corner of a room, wrapping the wood planks around the corner to create a continuous, wraparound floating shelf system. This design connects adjacent walls visually and turns underutilized room corners into a continuous, wraparound storage feature.
Key Takeaway: Extending floating shelves around room corners or integrating smart LED channels elevates simple wall shelving into a custom architectural feature that expands storage capacity seamlessly.
Another creative approach is routing hidden wireless charging pads directly into the upper surface of a bedside or desk-side floating shelf tier. By hollowing out a shallow pocket on the underside of a hardwood shelf and embedding a slim inductive charging coil, you can set smartphones and accessories on top of the bare wood to charge without visible cords. You can also integrate smart lighting automation by wiring micro LED strip channels to motion sensors or smart home systems, illuminating your vertical shelves automatically as you enter the room to create a functional and stylish home environment.