
10 Whimsical Mini Tree Ornament Empty Pill Bottle Crafts Ideas
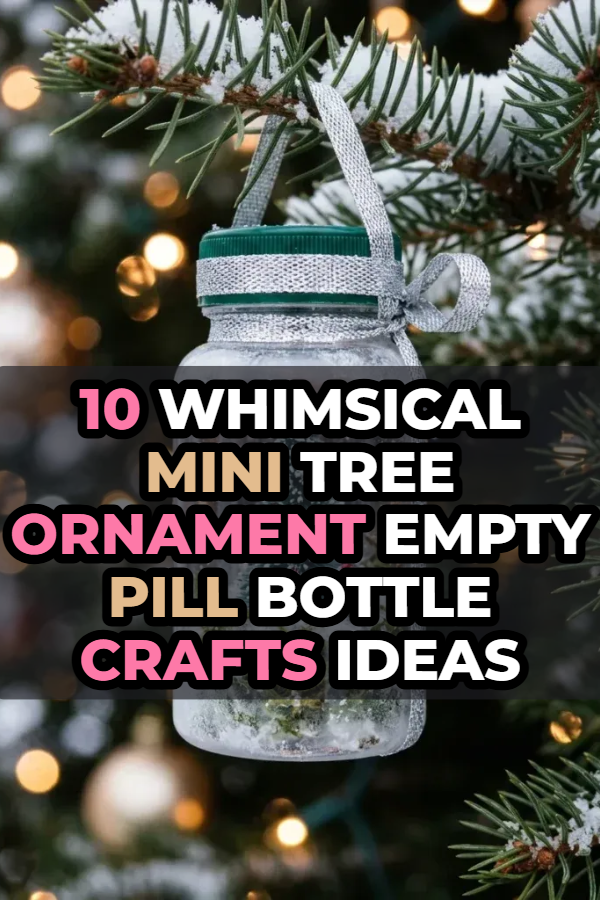
Transforming empty prescription pill containers into whimsical miniature tree ornaments offers an innovative, eco-conscious approach to holiday crafting, seasonal home decor, and creative upcycling. By repurposing standard plastic medicine bottles into charming decorative accents, crafters can produce intricate, lightweight hanging ornaments that mimic high-end blown glass, rustic woodland terrariums, and vintage holiday keepsakes. Readers will learn detailed step-by-step assembly methods, surface preparation techniques, paint application guidelines, and decorative encapsulation styles across ten original design projects. This guide delivers clear, practical instructions for transforming household plastic waste into durable, shatterproof miniature displays suitable for holiday trees, garland displays, and seasonal mantel arrangements. Mastering these upcycling concepts allows makers to customize miniature tree ornaments to match any aesthetic, ranging from minimalist modern aesthetics to nostalgic vintage charm. With accessible household supplies, simple hand tools, and straightforward crafting methods, this comprehensive guide provides all the foundational knowledge required to execute a rewarding creative project that elevates everyday holiday decoration.
Why This Idea Is Trending or Useful
Upcycled pill bottle crafts have gained substantial popularity across modern Pinterest inspiration channels due to their seamless combination of sustainable living, low material costs, and high visual appeal. Plastic medication vials possess inherent structural benefits for ornament making, including lightweight durability, uniform cylindrical proportions, and secure snap or screw-top lids that easily accommodate hanging loops and interior anchoring. For beginner crafters and budget-conscious decorators, repurposing these widely discarded vessels eliminates the need to purchase costly clear acrylic craft domes or fragile glass bulbs. The trend also aligns with the modern minimalist style and maximalist holiday trends alike, as the smooth plastic exterior serves as a blank canvas for multi-surface acrylics, faux snow flocking, metallic leafing, and delicate miniature scenic arrangements. Furthermore, these compact containers provide an accessible, beginner friendly DIY format that allows makers of all skill levels to practice micro-crafting without demanding specialized workshop machinery or advanced sculpting expertise.
Materials and Preparation
Successfully crafting miniature tree ornaments from recycled pill bottles requires methodical preparation and the gathering of specific crafting supplies before starting assembly. Essential materials include empty plastic pill bottles in amber, translucent, or opaque white finishes, fine-grit sandpaper, multi-surface acrylic craft paints, clear gloss sealer, fast-setting craft adhesive, hot glue sticks, and decorative metallic hanging cord or ribbon. Interior scenic embellishments require miniature artificial evergreen sprigs, preserved moss, micro faux pearls, iridescent glitter, craft wire, and tiny holiday figurines. Preparation begins by thoroughly washing each container with warm water and degreasing dish soap to remove pharmaceutical residues, followed by soaking the plastic in warm water mixed with rubbing alcohol to dissolve outer label adhesives completely. Once clean and fully dry, lightly scuff the exterior plastic with 400-grit sandpaper to create mechanical tooth for paint adhesion, and pre-drill a small hole through the center of each plastic lid using a micro hand drill to anchor your hanging hardware securely.
10 Whimsical Mini Tree Ornament Empty Pill Bottle Crafts Ideas
Idea 1: Frosted Winter Woodland Bell Jar Ornament
Step-by-Step Guide
The frosted winter woodland bell jar ornament repurposes a clear or translucent plastic pill bottle into an inverted micro-terrarium featuring a snowy evergreen scene. Inverting the bottle positions the white plastic cap as a sturdy snowdrift pedestal, while the cylindrical body acts as an airtight, shatterproof protective cloche. The interior holds a miniature faux pine sprig dusted with white paint, nestled into a bed of preserved reindeer moss and iridescent mica flakes that catch seasonal tree lights. A soft dusting of artificial snow spray along the upper curve gives the finished piece a vintage frosted glass aesthetic that complements traditional holiday decor.
To construct this ornament, detach the clean cap and apply a thick circle of fast-setting clear craft glue to its inner rim. Press a one-inch miniature sisal evergreen tree and a small tuft of dried green moss firmly onto the wet adhesive inside the cap base, holding the elements in place until set. Scatter a quarter teaspoon of fine synthetic glitter snow inside the inverted bottle chamber before threading a twelve-inch silver hanging loop through a pre-drilled hole at the rounded bottom of the vial. Secure the cord with an internal knot and a dab of hot glue to prevent slippage. Apply adhesive around the inner threads of the bottle, screw the cap securely onto the body, and seal the outer seam with a narrow strip of metallic velvet ribbon.
          [ Top: Drilled Hole + Metallic Hanging Loop ]
                               |
         [ Cylinder: Inverted Clear Pill Bottle Shell ]
                               |
      [ Inside: Mini Sisal Tree + Faux Snow + Preserved Moss ]
                               |
            [ Base: Clean Plastic Cap Sealed with Ribbon ]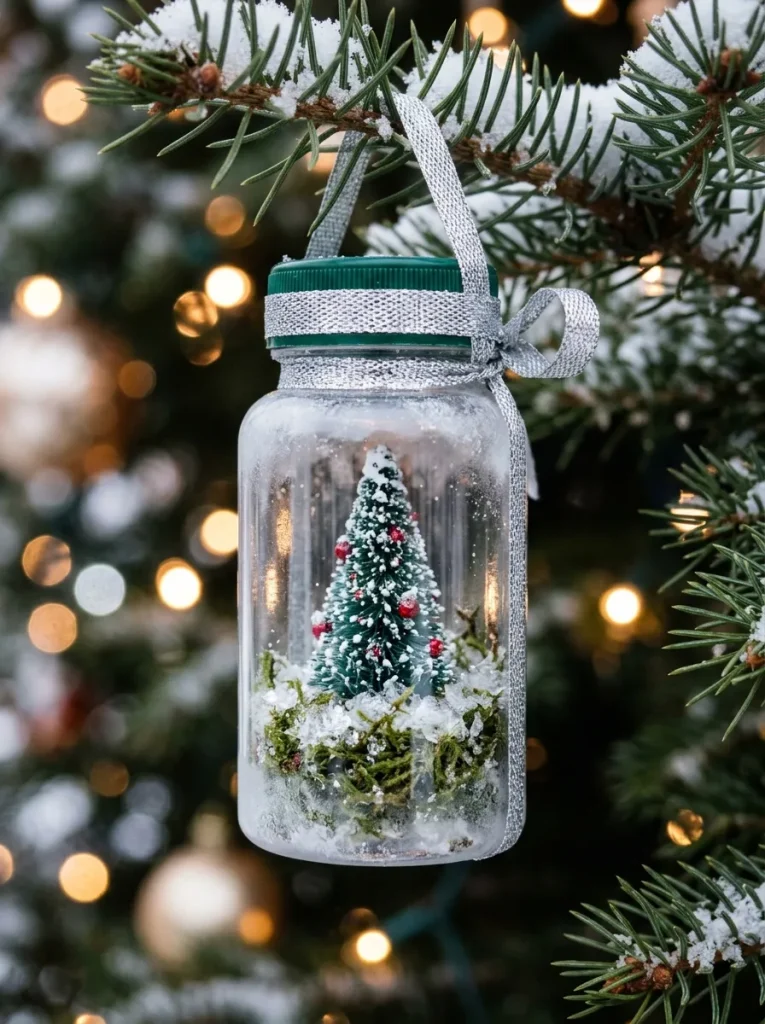
Idea 2: Vintage Gilded Nutcracker Miniature Capsule
How to Make
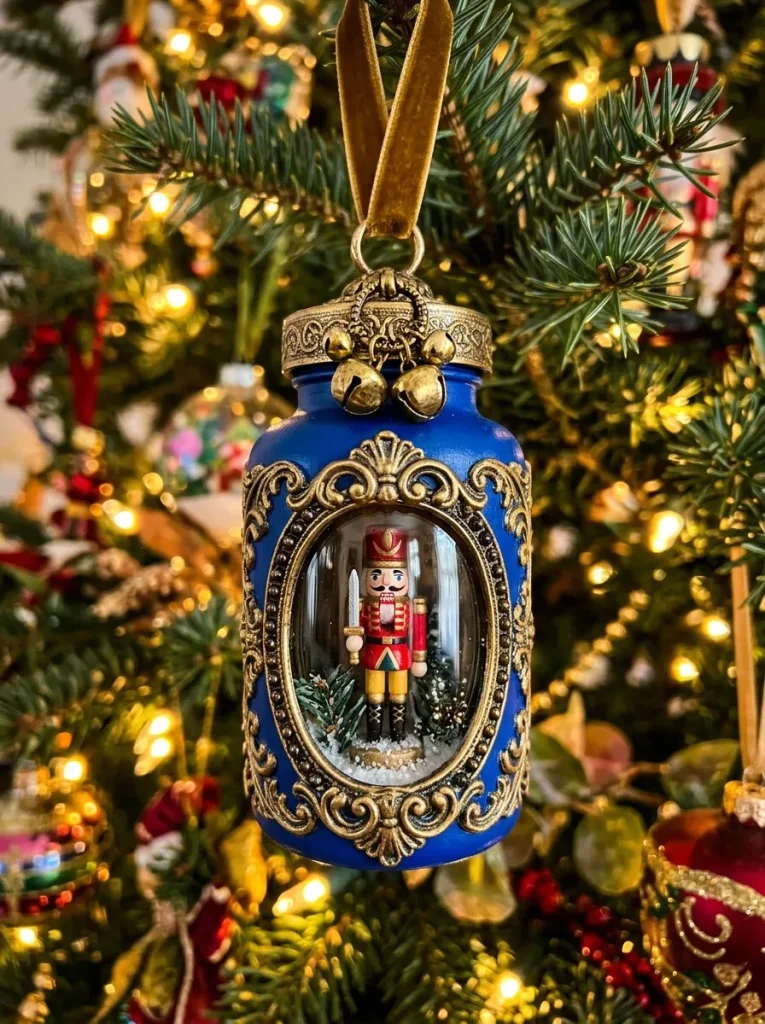
This ornate keepsake concept transforms an opaque white medication container into a regal vintage nutcracker display accented with metallic gold leaf and deep jewel tones. The exterior plastic shell is painted in rich royal blue, emerald green, or crimson red acrylics, framed by raised dimensional filigree created with hot glue and finished in lustrous antique gold paste. A clear viewing portal cut into the front wall reveals a micro painted wooden nutcracker figure standing at attention inside. This design mimics high-end European glass heirloom ornaments while providing complete shatterproof resilience for homes with pets or small children.
Begin by using a precision craft knife to cut an oval-shaped viewing window measuring one inch wide into the front side of a clean white pill container. Smooth the cut plastic edges with fine sandpaper, then apply two smooth coats of matte royal blue acrylic paint across the outer surface, avoiding the open window. Trace ornamental swirl patterns around the window frame using a fine-tip glue pen, allowing the glue lines to harden before rubbing metallic gold gilding wax over the raised borders. Anchor a miniature three-quarter-inch wooden nutcracker figurine onto the inner bottom base with industrial craft adhesive. Thread a metallic gold cord through the lid, seal the cap onto the top of the bottle, and accent the neckline with a tiny gold jingle bell.
Idea 3: Luminescent Fairy Light Micro Lantern
Execution Process
The luminescent fairy light micro lantern converts an amber or translucent pill vial into an illuminating vintage lantern that casts a warm, atmospheric glow across tree boughs. The naturally warm tint of amber medicine plastic diffuses LED light beautifully, softening the harshness of modern micro diodes into a nostalgic, candle-like radiance. The exterior is fitted with a distressed faux-iron cage made from crisscrossed cardstock strips or bendable craft wire, painted in textured matte charcoal paint. Powered by a single micro coin-cell LED unit concealed within the cap assembly, this hanging ornament acts as an independent accent light that enhances tree depth.
Start by wiping an amber pill container clean with isopropyl alcohol to ensure a pristine, fingerprint-free surface across the translucent cylinder. Cut narrow one-sixteenth-inch strips of black craft foam or cardstock, gluing them in a vertical crisscross cage pattern around the outer circumference of the amber vial using clear craft glue. Paint the bottom cap and outer strips with a mix of black acrylic and baking soda to create a cast-iron cast texture, dry-brushing lightly with silver paint for aged metal patina. Insert a micro submersible warm-white LED tea light into the bottle cavity, or thread a single bulb from your existing tree strand through a precision hole in the cap. Secure the wire bail handle to the upper rim using twisted craft wire to hang the finished lantern effortlessly.

Idea 4: Miniature Coastal Sea Glass and Pearl Terrarium
Setup Method
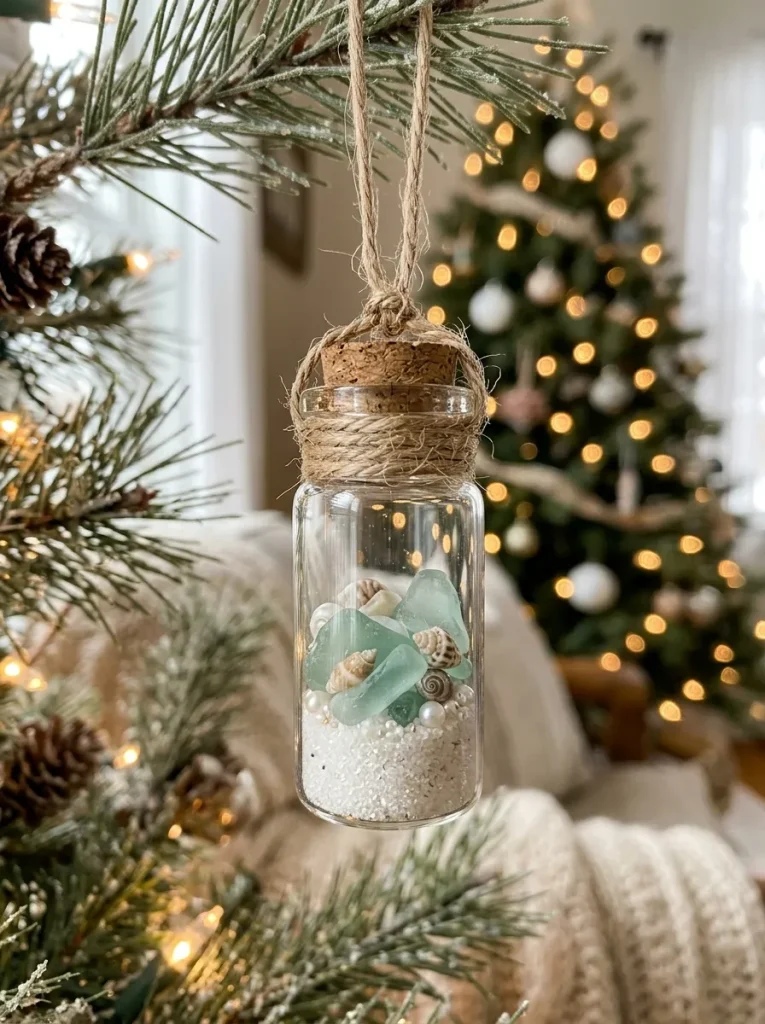
Capturing coastal holiday charm, this delicate ornament showcases genuine beach treasures, crushed sea glass, and micro faux pearls encased within a crystal-clear pill bottle cloche. The soft aquatic palette of seafoam green, aqua, and frosted white glass pieces rests atop a clean white quartz sand layer, introducing an airy, modern design aesthetic to seasonal decorating. The outer cap is wrapped in tightly coiled natural jute twine, grounding the luminous glass contents with organic rustic texture. This lightweight project offers a modern coastal alternative to traditional holiday motifs, celebrating seaside natural beauty through clean encapsulated craftsmanship.
Prepare an ultra-clear plastic medication bottle by removing all labeling and polishing the surface with a microfiber cloth. Pour a half-inch layer of fine white decorative sand into the base of the container using a small paper funnel to avoid dusting the inner walls. Layer three miniature pieces of tumbled seafoam green sea glass, two tiny natural spiral seashells, and three iridescent micro faux pearls carefully over the sand bed using long tweezers. Secure the plastic cap tightly, then wrap the exterior cap band in natural hemp twine, applying dots of hot glue every half-turn to keep the wrap flush and neat. Form a three-inch hanging loop from the remaining twine at the top apex, trimming any excess frayed fibers with craft scissors.
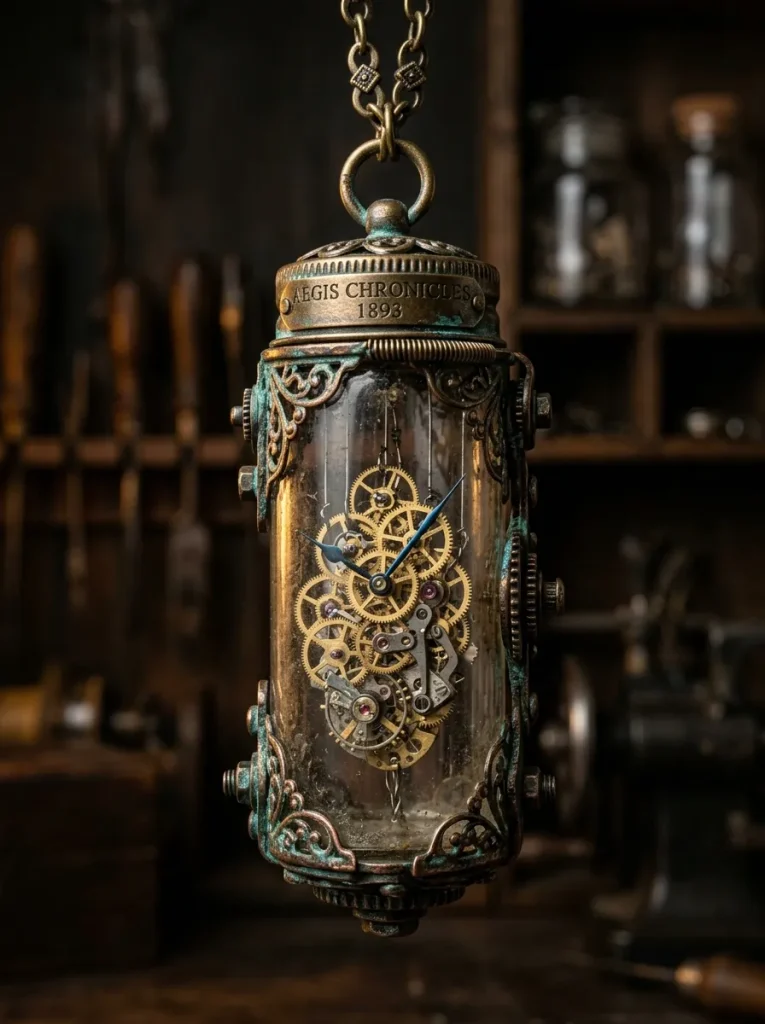
Idea 5: Steampunk Industrial Watchwork Time Capsule
How to Create
The steampunk industrial watchwork time capsule turns an ordinary cylindrical container into an antique metallic relic filled with vintage horological machinery, exposed brass gears, and oxidized copper finishes. The smooth outer plastic is textured with multi-surface metallic bronze paint and darkened with black acrylic washes to simulate centuries-old patinated metal. Tiny mechanical watch movements, miniature brass cogs, and oxidized clock hands are layered inside the clear capsule, suspended in clear setting gel or arranged in a dynamic vertical relief. This aesthetic appeals strongly to fans of industrial design, offering a sophisticated, masculine edge that balances traditional holiday softness.
To build this industrial ornament, coat the exterior cap and lower base rim of a clean pill bottle with dark bronze metallic craft paint, stippling the wet surface with a dry sea sponge to build dimensional texture. Once dry, brush a thin wash of turquoise acrylic paint into the crevices to create an authentic verdigris patina, wiping high points clean with a damp paper towel. Arrange five micro brass clock gears of varying diameters onto a central vertical piece of rigid copper wire using jewelry glue, sliding the assembly into the clean center of the bottle. Seal the cap permanently onto the vial using industrial adhesive. Wrap a three-inch length of antique brass jewelry chain around the cap rim, joining the ends at the top center with a split ring to create an authentic industrial hanging loop.
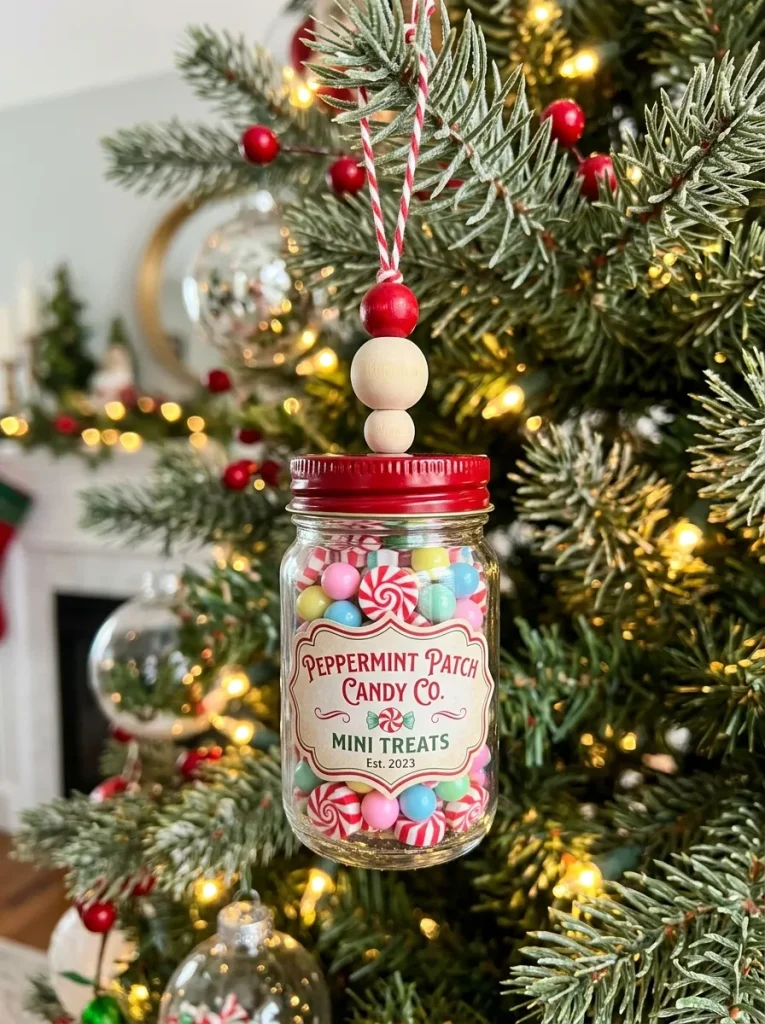
Idea 6: Whimsical Candy Cane Sweets Dispenser
Step-by-Step Guide
This bright, playful holiday ornament reinterprets the medicine bottle silhouette into a miniature retro candy jar filled with handmade polymer clay peppermint candies and micro gumballs. The top cap is painted in high-gloss cherry red enamel, accented with a sculpted polymer clay finial that resembles a classic glass candy container lid. The transparent body reveals a festive mix of hand-rolled red-and-white striped candy rounds and pastel faux sprinkles that bring cheerful color and nostalgia to holiday boughs. This beginner friendly concept is an easy project for family crafting sessions, producing lightweight ornaments that withstand frequent handling.
Begin by rolling red, white, and mint green polymer clay into thin ropes, twisting them together to form striped peppermint canes before slicing them into tiny one-eighth-inch candy rounds with a craft blade. Bake the clay pieces on a foil-lined sheet at the temperature specified on the package, allowing the miniatures to cool completely. Fill a thoroughly cleaned, clear plastic pill container three-quarters full with the baked clay candies and a pinch of white faux pearl beads. Paint the container cap with two coats of bright red gloss acrylic paint, gluing a small wooden bead to the center top to mimic an apothecary lid handle. Loop a red-and-white baker twine through a small eyelet screw driven into the wooden bead, securing the cap onto the filled container with a thin bead of craft glue.
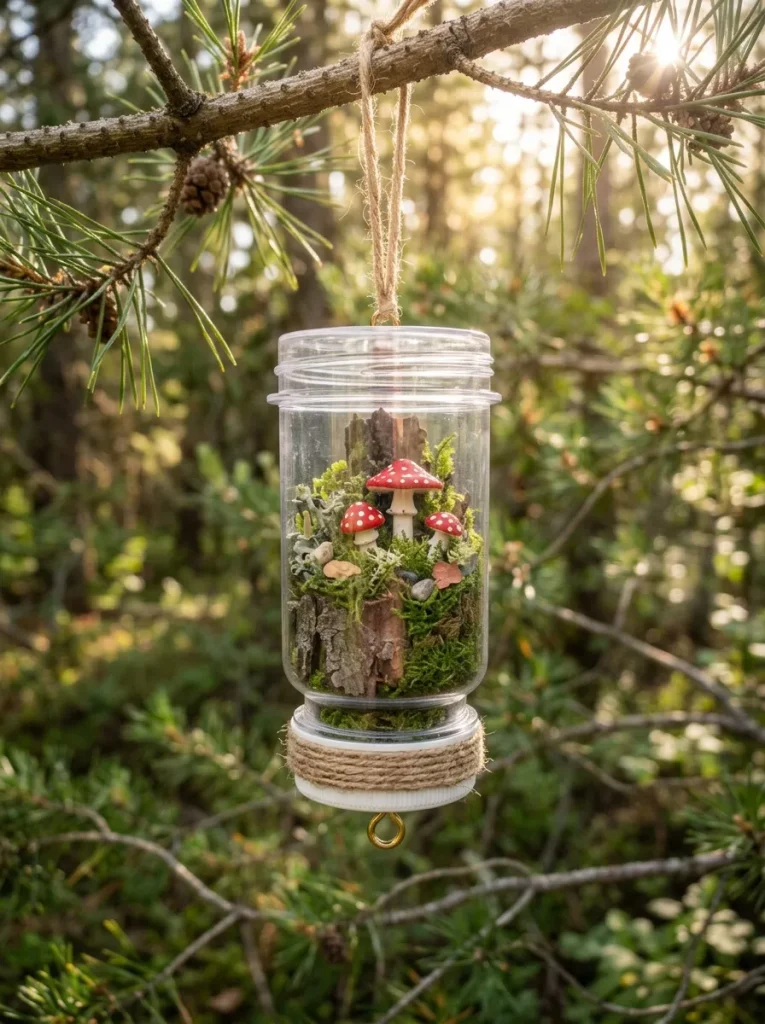
Idea 7: Enchanted Cottage Mushroom and Lichen Diorama
Execution Process
The enchanted cottage mushroom diorama crafts a miniature fairy garden scene complete with hand-sculpted red toadstools, dried lichen sprigs, and natural wood slice foundations enclosed in a pill bottle dome. The natural elements contrast with the smooth plastic exterior, evoking the cozy, earthy charm of woodland folklore and nature-inspired home decor. Fine preserved forest moss stabilizes the base, while hand-painted miniature clay mushrooms with bright white spots emerge naturally from the green undergrowth. The finished piece acts as an intricate forest snapshot, bringing rich natural textures and botanical beauty to indoor tree displays.
Sculpt three tiny mushroom caps ranging from one-quarter to one-half inch wide using vibrant red oven-bake polymer clay, attaching them to thin white clay stems before baking until firm. Once cooled, paint microscopic white dots onto the mushroom caps using the tip of a wooden toothpick dipped in white acrylic paint. Apply clear tacky glue across the inner surface of the pill bottle cap, pressing a dense pad of preserved forest moss and a small piece of natural tree bark firmly into the adhesive. Mount the clay mushrooms within the moss base using drops of super glue, angled slightly toward the center. Invert the clean clear pill bottle over the completed forest arrangement, screwing the bottle firmly into the cap, and wrap the exterior base in dark brown jute cord to finish the display.
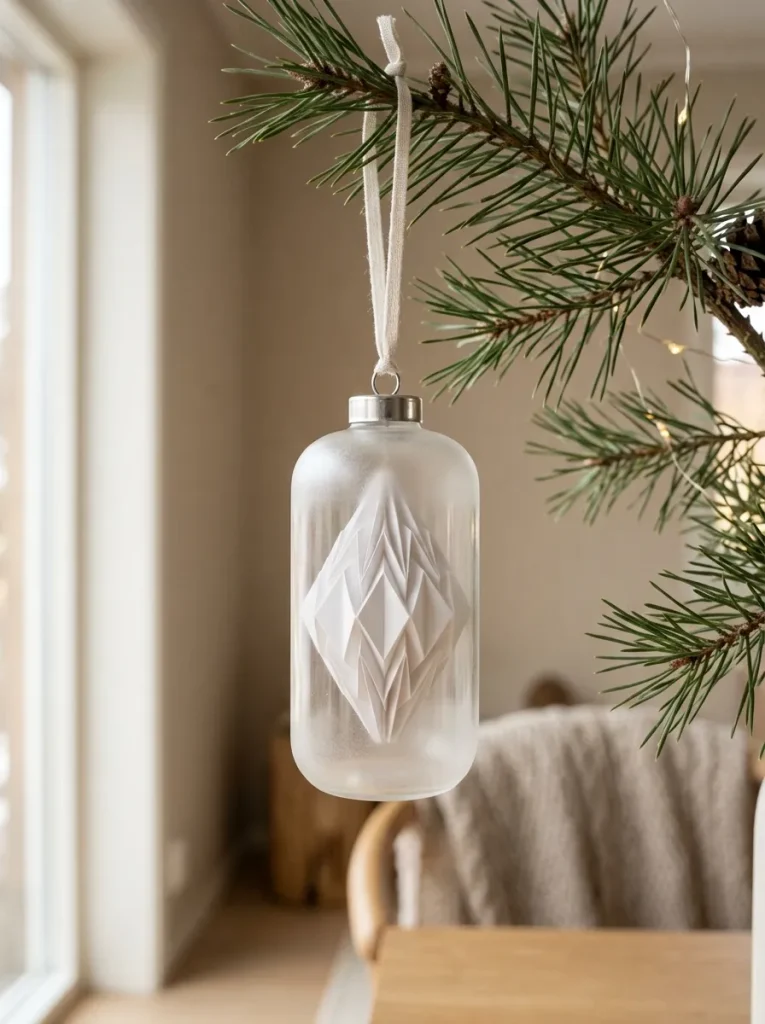
Idea 8: Scandinavian Minimalist Paper Spire Ornament
Setup Method
Embracing clean lines and neutral aesthetics, the Scandinavian minimalist paper spire ornament encases an intricate geometric accordion-folded paper sculpture inside a matte-finished pill container. The exterior of the bottle is sprayed with a translucent frosted glass coating, diffusing the delicate interior paper folds into soft geometric shadows. Inside, crisp white or kraft paper is folded into sharp architectural diamond patterns, creating a contemporary minimalist style statement. This design celebrates restraint, symmetry, and architectural form, offering a modern decoration concept that complements Scandinavian, Japandi, and contemporary holiday themes.
Cut a strip of heavyweight white parchment or cardstock measuring one inch wide by six inches long using a craft ruler and precision cutting mat. Score the paper strip vertically at precise one-quarter-inch intervals, folding the paper back and forth into a tight, crisp accordion fan. Join the outer ends of the folded strip with double-sided tape to form a symmetrical cylindrical spire, compressing the center slightly to create an elegant diamond silhouette. Suspend the paper spire inside an inverted, lightly frosted pill vial by threading a thin white linen thread through the center of the paper structure and out through the pre-drilled top hole of the bottle. Tie the hanging thread at the top with a clean knot, securing the bottom cap smoothly into place to seal the minimalist capsule.
Idea 9: Celestial Midnight Star Constellation Tube
How to Make
The celestial midnight star constellation tube uses a deep navy-to-black gradient exterior and precision micro-perforations to create a miniature starry night sky inside a medicine vial. The exterior of the container is painted in midnight blue and obsidian black acrylics, speckled with fine metallic gold mist to resemble the Milky Way galaxy. Microscopic holes pierced through the bottle walls allow internal light to shine through in exact alignments of famous constellations like Orion or the Big Dipper. When hung near holiday tree lights, the ornament glimmers like a pocket observatory, adding cosmic mystery to seasonal displays.
Thoroughly paint the entire exterior of a plastic pill bottle with opaque matte midnight-navy acrylic paint, layering black paint near the base and blending upward with a sponge for a smooth dark gradient. Once dry, use an awl or a heated sewing needle held with pliers to pierce tiny pinholes through the plastic walls in the pattern of your chosen star constellations. Spatter the painted surface lightly with metallic gold paint using an old toothbrush to create microscopic background star clusters. Insert a tiny battery-powered micro LED bulb or position the ornament directly over an existing tree light branch so light streams through the pierced star holes. Seal the cap securely, attaching a metallic navy satin ribbon around the neck for graceful branch placement.

Idea 10: Botanical Dried Floral and Gold Leaf Specimen Tube
Execution Process
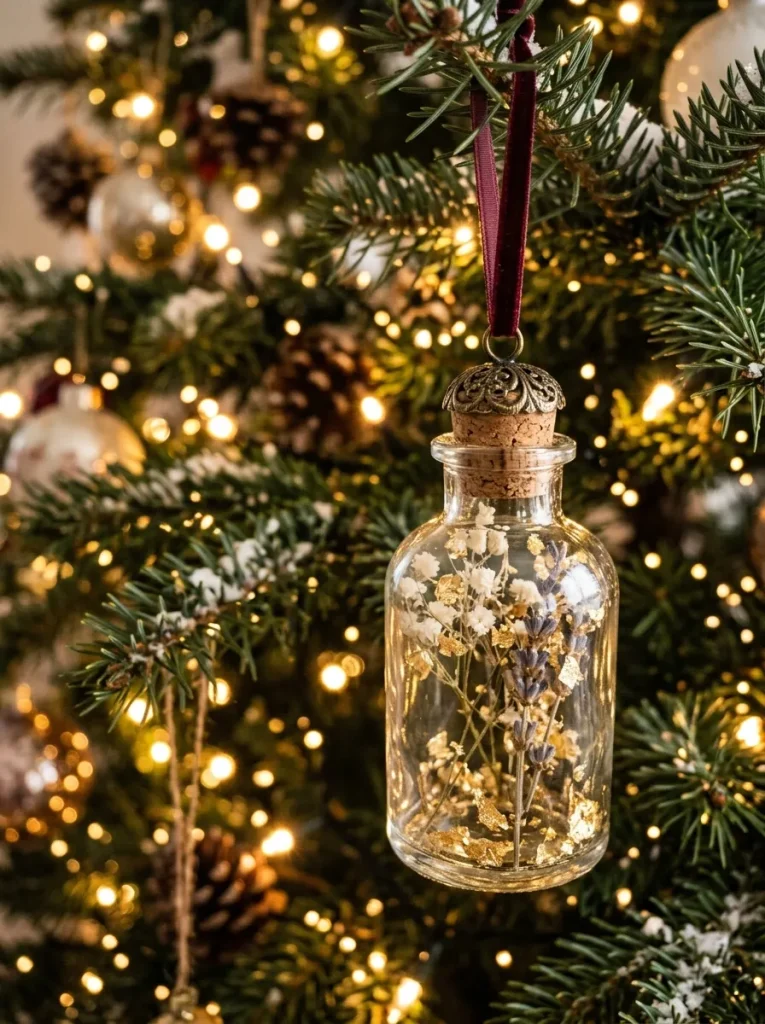
This refined botanical ornament encapsulates preserved baby’s breath blossoms, pressed goldenrod florets, and floating fragments of genuine gold leaf inside a clear apothecary-style vial. The delicate floral specimens are suspended in clear, non-yellowing mineral oil or preserved dry within the airtight chamber, allowing the natural organic textures to remain pristine for years. The top cap is transformed with a hand-painted antique brass finish, detailed with fine twine wraps and a customized calligraphic paper specimen label. This design appeals to nature lovers and vintage collectors, introducing an elegant, museum-quality botanical aesthetic to holiday tree branches.
Begin by arranging dried micro-botanicals, selecting two stems of preserved white baby’s breath, a small sprig of dried lavender, and a tiny pinch of loose gold leaf flakes. Carefully insert the botanical stems into a spotless clear pill bottle using long tweezers, ensuring the delicate blossom heads remain intact and upright along the vertical axis. If creating a floating liquid display, fill the bottle to the brim with high-clarity light mineral oil, which suspends the gold leaf flakes permanently in slow motion; otherwise, leave the chamber dry for a classic pressed herbarium look. Apply waterproof silicone glue to the cap threads and twist the lid tightly shut to prevent leaks. Wrap the plastic lid in metallic copper craft tape, distressing the edges with brown ink, and attach a fine velvet cord for branch hanging.
Common Beginner Mistakes and How to Avoid Them
When crafting miniature ornaments from empty pill bottles, several common technical errors can compromise the durability and aesthetic quality of the finished pieces. One frequent mistake is failing to remove pharmaceutical adhesive residue completely before painting, which causes craft acrylics to peel, bubble, and crack over time. To avoid this issue, always soak containers in warm soapy water and use isopropyl alcohol or mineral spirits to lift sticky adhesives before scuffing the plastic with sandpaper. Another common problem is applying thick, uneven coats of hot glue, which create messy strings, distort plastic walls from excessive heat, and obscure delicate miniature scenery. Use low-temperature glue guns or precision-tip craft adhesives, applying small, deliberate dots rather than heavy pools. Crafters also frequently forget to secure interior elements firmly, resulting in dislodged miniature trees or displaced sand when the ornament is moved or packed away in seasonal storage. Ensure every base component is anchored directly to the cap or floor using industrial-grade adhesives, allowing a full twenty-four-hour curing cycle before sealing the container.
Practical Tips for Better Results
Achieving professional, boutique-quality results with upcycled pill bottle ornaments relies on precise material handling, smart tool usage, and disciplined finishing techniques. When drilling hanging holes in plastic caps, place a scrap block of wood beneath the cap and use a low-speed hand drill with a one-sixteenth-inch bit to prevent cracking the brittle plastic rim. To achieve a perfectly smooth, stroke-free paint finish on slick plastic surfaces, apply a dedicated plastic bonding primer first, followed by two thin coats of chalk or multi-surface acrylic paint applied with a high-density foam roller or damp sponge. When sealing glitter or faux snow inside clear containers, mist the interior walls very lightly with anti-static spray before assembly; this prevents fine particles from clinging electrostatically to the viewing window and obscuring your miniature diorama. Finally, always seal your painted exterior finishes with two coats of UV-resistant clear matte or gloss acrylic varnish, which protects delicate paint layers from chipping during seasonal handling, hanging, and yearly attic storage.
+--------------------------------------------------------------------+
|                  ORNAMENT CRAFTING QUALITY CHECK                   |
+--------------------------------------------------------------------+
| Step 1: Strip labels & clean adhesive completely with alcohol.     |
| Step 2: Scuff plastic with 400-grit sandpaper for paint grip.      |
| Step 3: Anchor internal scenic elements with industrial adhesive.  |
| Step 4: Seal lid tightly & apply protective UV clear coat.         |
+--------------------------------------------------------------------+
Styling, Presentation, or Organization Ideas
Styling and presenting handmade pill bottle ornaments allows for extensive creative expression across holiday trees, seasonal vignettes, and gift packaging concepts. When decorating a holiday tree, cluster these miniature capsules near the tips of upper branches where ambient room lighting or warm tree diodes can illuminate the clear viewing windows and metallic accents. You can also string a series of ten themed capsules along a six-foot length of natural jute twine or velvet ribbon to create a charming, lightweight mantel garland or window valance display. For festive gift presentations, use these handmade capsules as elevated, reusable gift tags attached to wrapped packages, writing the recipient’s name across a mini calligraphic paper label adhered to the bottle body. When organizing and storing your collection post-holiday, repurpose standard cardboard egg cartons or partitioned craft hardware boxes lined with tissue paper, which provide the exact dimensions needed to keep these delicate micro-dioramas cushioned and dust-free until next season.
Budget or Time Planning
Creating a complete collection of ten upcycled pill bottle tree ornaments represents an exceptionally cost-effective, time-efficient crafting project suitable for a single weekend. The total financial expenditure remains minimal because the primary structural material consists entirely of upcycled household medicine containers collected over time at zero additional cost. Basic multi-surface acrylic paints, craft brushes, miniature sisal trees, faux snow, preserved moss, and decorative ribbon can be purchased in bulk craft packs for a combined total of fifteen to twenty-five dollars, providing enough surplus materials to assemble multiple ornament sets. Time planning is equally manageable; dedicated makers can complete a batch of ten ornaments in approximately three to four hours of active work time. Structuring your creative process into dedicated stages—batch cleaning and drilling on day one, followed by scenic assembly, gluing, painting, and ribbon finishing on day two—maximizes workspace efficiency and ensures all adhesives and sealants cure fully between construction phases.
Creative Expansion and Advanced Inspiration
Once you have mastered the foundational assembly of pill bottle ornaments, several advanced techniques and creative expansions can elevate your handmade projects even further. Experienced crafters can experiment with pouring two-part high-clarity epoxy resin into the inverted vials, permanently suspending botanical specimens, glitter flakes, and micro figurines in crystal-clear glass-like blocks. Another creative expansion involves using micro rotary cutting tools to carve intricate lattice patterns, filigree cutouts, or miniature Gothic window arches directly into the plastic cylinder walls before painting them in antique pewter or bronze finishes. You can also explore themed collections beyond traditional holiday themes, such as crafting miniature potion bottles for Halloween displays, tiny sandy beach capsules for summer decor, or miniature terrariums featuring preserved succulent cuttings for year-round botanical home styling. Adding micro-sculpted polymer clay toppers, such as tiny vintage pinecones, acorn caps, or miniature crowns, provides endless opportunities to transform simple plastic containers into collectible works of decorative art.