10 Cute Glitter String Light Garland Empty Pill Bottle Crafts Ideas
Transforming everyday prescription containers into luminous, decorative accents is one of the most resourceful creative ideas currently circulating in modern home decor spaces. Upcycling empty plastic medication vials into sparkling light strands combines sustainability with an inviting, handcrafted aesthetic that elevates any living room, bedroom, or patio. In this detailed tutorial, you will explore comprehensive methods to safely clean, coat, illuminate, and arrange standard amber or translucent pharmacy containers into radiant glitter garlands. Repurposing these durable containers keeps rigid plastics out of local waste streams while providing a versatile foundation for custom lighting displays. Whether you seek a warm festive glow for a seasonal celebration or a permanent, minimalist ambient fixture for an accent wall, these techniques offer structured guidance for crafters of all skill levels. By understanding how light interacts with internal glitter coatings, adhesive layers, and translucent plastic walls, you can craft professional-quality string light garlands using basic household items. This project demonstrates how systematic preparation, thoughtful color coordination, and precise assembly transform plain utilitarian objects into striking, customized illuminated art pieces for modern indoor environments.
Why This Upcycled Lighting Trend Continues to Grow
Repurposing household plastics into decorative illumination aligns perfectly with contemporary sustainable living practices and budget-conscious DIY design philosophies. Empty prescription bottles offer consistent geometric dimensions, impact-resistant durability, and lightweight profiles that make them structurally ideal for suspended garland displays. Unlike fragile glass globes, modified plastic containers withstand routine handling, outdoor breezes, and indoor temperature fluctuations without cracking or shattering. Crafters frequently look to popular Pinterest ideas for inventive ways to disguise medical containers, and applying fine glitter particles delivers an immediate visual transformation that diffuses harsh light points into soft ambient glows. The low barrier to entry makes this a genuinely beginner friendly creative project, requiring no specialized machinery, advanced electrical knowledge, or expensive crafting supplies. The compact size of pharmacy vials allows them to clip or slide securely over standard battery-operated or plug-in fairy lights without adding excessive tension to the primary wiring. By adopting this practical approach to upcycling, decorators can customize color palettes to suit rustic, modern, or whimsical interior aesthetics while turning routine waste into durable, decorative illumination.
Essential Materials and Initial Preparation
Proper preliminary preparation ensures that the finished string light garland remains safe, visually consistent, and structurally stable throughout prolonged display periods. The primary materials required include thoroughly sanitized empty plastic pill bottles with labels removed, ultra-fine polyester craft glitter in your preferred shades, clear water-based decoupage medium, a durable string of low-heat LED fairy lights, a craft hobby knife or heavy-duty hole punch, and protective parchment paper. Begin by soaking the plastic bottles in hot water mixed with standard dish soap and baking soda to soften the label adhesive completely. Peel away the paper backing, then rub any remaining residue off using vegetable oil or isopropyl alcohol until the outer and inner plastic surfaces are spotless and clear. Allow every bottle to dry fully before applying any adhesives, as trapped moisture prevents the internal glue layer from bonding correctly to the smooth plastic walls. Measure the spacing between the LED bulbs on your light strand to determine the exact number of containers needed for an evenly balanced horizontal presentation.
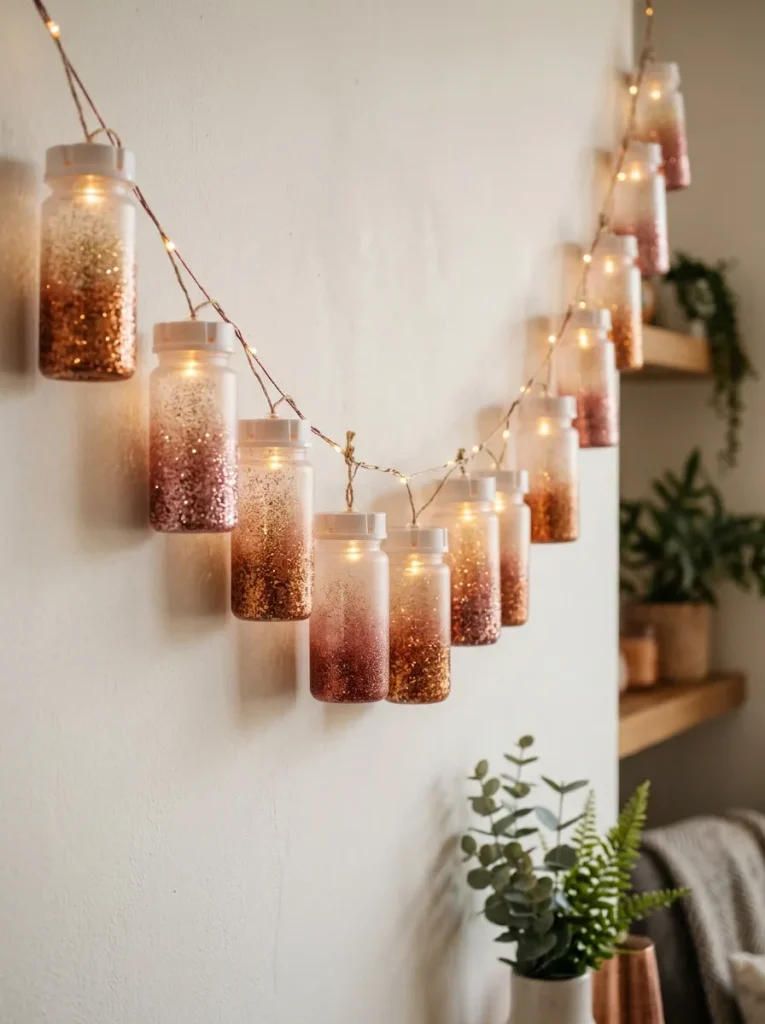
1. Rose Gold Ombre Glow Bottles
Step-by-Step Guide
The rose gold ombre aesthetic combines warm metallic glitter transitions with the soft illumination of modern interior fairy lights. This concept utilizes a gentle color gradient inside each pill bottle, moving smoothly from a dense, concentrated metallic copper base to a delicate, shimmering champagne pink at the opening. When the LED bulb rests within the container, the light disperses downward, highlighting the gradual change in particle size and hue while casting a romantic, warm ambient tone across surrounding surfaces. This style is exceptionally effective against neutral wall backdrops, woven tapestries, or minimalist bedroom headboards. The semi-translucent plastic casing of standard clear or lightly frosted bottles naturally softens the metallic sheen, preventing harsh reflections and generating a balanced, cozy visual glow. The uniform size of standard prescription vials ensures that each gradient step aligns horizontally along the garland, creating a sophisticated rhythm across the entire suspended length.
Begin the fabrication process by preparing a diluted water-based decoupage adhesive mixed with a small amount of liquid gloss medium. Pour approximately one teaspoon of the adhesive mixture into an empty bottle, rotating the container at an angle so the liquid coats only the bottom two-thirds of the inner plastic wall. Invert the bottle over a collection tray to drain excess glue, then immediately pour in a blend of fine rose gold and deep copper glitter. Shake the container firmly with the cap temporarily secured, then remove the cap and tap out the loose particles onto clean scrap paper. Using a handheld craft tool, carefully slice an X-shaped slit directly into the center of each plastic snap-on lid. Insert a single low-voltage LED bulb through the slit until the bulb is suspended midway inside the vial, then press the lid tightly back onto the container. Repeat this sequence across the remaining bottles along the wire strand to complete the garland.
2. Frosted Iridescent Snow Vials
Execution Process
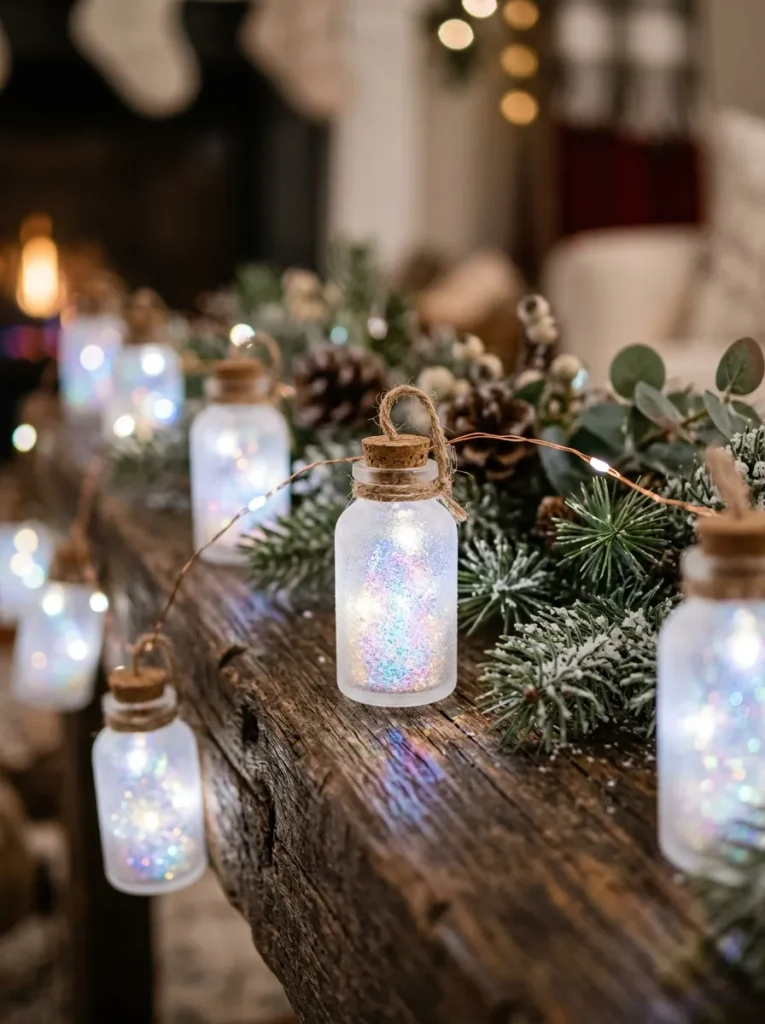
Frosted iridescent snow vials bring a crisp, winter-inspired look to decorative lighting schemes through subtle textures and multi-dimensional light refraction. This design relies on micro-fine white and opalescent glitter flakes adhered to the inside surface of translucent white pharmacy containers. The interaction between cool-toned LED lighting and opalescent flakes creates a soft prismatic effect, shifting between pale blue, lavender, and soft gold tones depending on the viewer’s angle. This minimalist style works exceptionally well for seasonal holiday mantels, nursery nightlights, or modern Scandinavian-inspired living spaces where clean lines and subtle sparkle are preferred. The frosted exterior of the plastic vial acts as an integrated light diffuser, ensuring that individual glitter flakes appear integrated into the structural body of the container rather than looking like an applied surface layer.
To execute this design, coat the entire interior surface of a clean, translucent pill bottle with an even, thin layer of clear acrylic sealer using a soft foam brush. Before the acrylic medium sets, pour a generous tablespoon of extra-fine iridescent diamond dust glitter into the vial. Roll the bottle horizontally between your hands to distribute the glitter evenly over the entire internal surface, ensuring complete coverage from the bottom base to the upper neck rim. Invert the container over clean parchment paper for fifteen minutes to allow excess glitter to fall away, then let the inner surface cure completely for two hours. Drill a precise five-millimeter hole through the center of the plastic bottle cap using a standard handheld drill bit. Push an individual cool-white micro LED bulb through the opening from the top of the cap, apply a tiny drop of clear silicone craft adhesive around the wire collar, and twist the cap securely onto the vial body.
3. Celestial Midnight Starlight Lanterns
How to Create
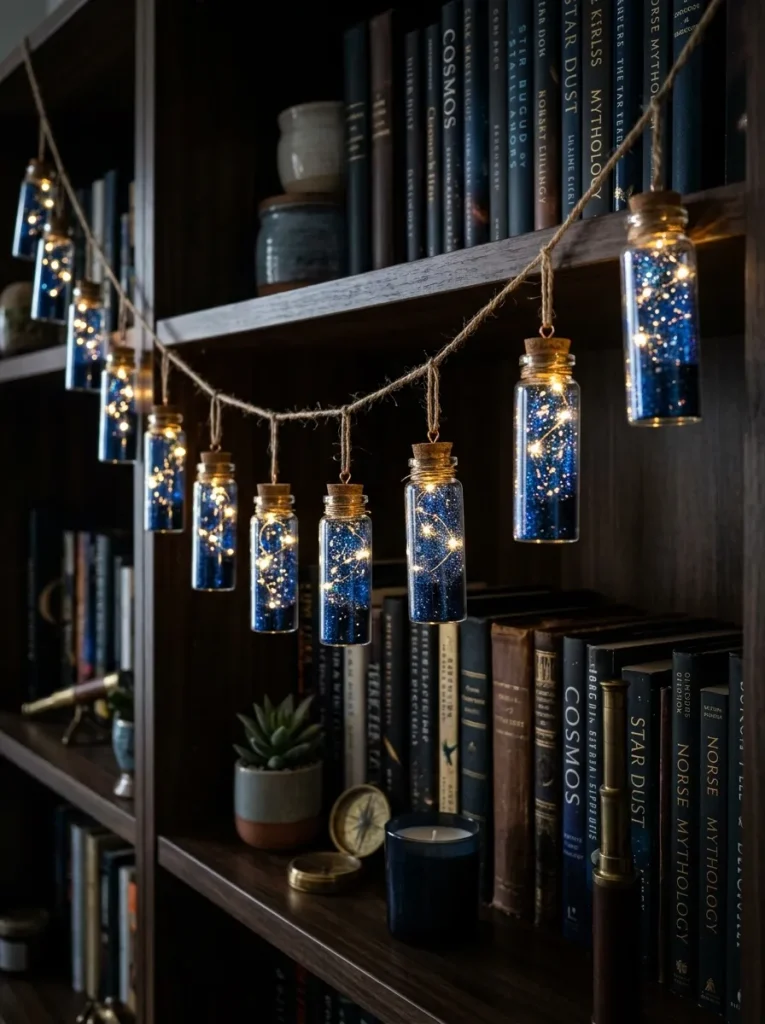
Celestial midnight starlight lanterns capture the depth of a dark evening sky punctuated by sharp pinpoints of suspended light. This design uses an internal combination of midnight navy, rich indigo, and holographic silver glitter applied selectively to create the illusion of cosmic clusters. When back-lit by warm LED bulbs, the light penetrates the thinner sections of the glitter matrix while remaining partially blocked by denser concentrations, creating organic constellations across the surface of the bottle. This design offers a dramatic accent for reading corners, home office shelving, and modern entertainment centers. The visual contrast between dark pigmented glitter and the bright core of the internal LED bulb gives each plastic container the appearance of a heavy glass lantern, effectively concealing the medical origin of the upcycled containers while creating an intriguing ambient light feature.
Start by mixing a dark blue alcohol ink directly with clear decoupage glue in a small mixing container until you achieve a rich, translucent navy paste. Swirl this tinted adhesive around the interior walls of the bottle, deliberately leaving small, irregular clear patches where the light can shine through at full intensity. While the tinted adhesive remains tacky, deposit a blend of ultra-fine holographic silver and deep sapphire glitter inside the bottle, rolling it gently to cover the wet areas. Tap out any loose dry glitter, then let the container dry fully under ambient room airflow. Create a small circular aperture in the base of the bottle rather than the cap, using a heated metal punch tool to melt a smooth opening without cracking the rigid plastic. Thread the LED bulb through this bottom port, securing the wire flush against the bottom rim using a small strip of transparent jewelry tape.
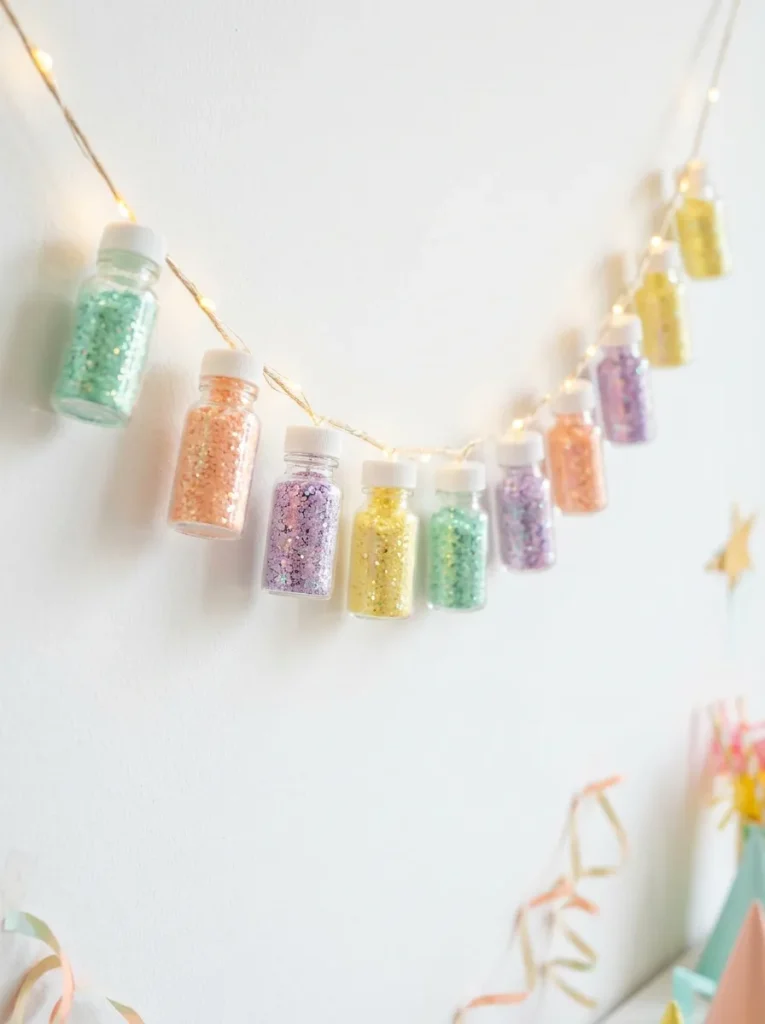
4. Pastel Confetti Party Garland
Step-by-Step Guide
The pastel confetti party garland utilizes vibrant, multi-colored pastel glitter mixes to establish an energetic and cheerful interior atmosphere. This concept features a mixture of pale mint, soft peach, lavender, and butter yellow micro-glitters distributed throughout clear plastic pill containers. When illuminated, the light highlights each individual pastel speck, producing a warm, dispersed mosaic effect suitable for celebration backdrops, craft rooms, or colorful patio gatherings. The lighthearted visual character of the multi-toned glitter softens the utilitarian geometry of the cylindrical containers, turning a plain string of utility lights into a customized decorative installation. The brightness of the pastel palette keeps the containers looking colorful and decorative even when the string lights are switched off during daylight hours, ensuring daytime aesthetic value alongside nighttime functionality.
To assemble this festive garland, thoroughly clean ten to twelve clear medicine vials and set out your pre-mixed assortment of pastel polyester glitters. Coat the inside of each bottle with a water-based craft glue diluted with a few drops of water to ensure a perfectly smooth, streak-free internal coating. Pour two tablespoons of the mixed pastel glitter into the wet container, replace the cap, and shake vigorously in all directions for ten seconds to ensure complete coverage. Remove the cap, discard excess glitter back into your storage container, and place the bottles upside down on a drying rack for sixty minutes. Prepare the container caps by scoring a clean three-way star pattern in the center of each plastic disc with a sharp utility blade. Insert the LED bulbs through these slit caps from the outside surface, ensure the bulb sits firmly upright, and screw or snap the caps firmly onto the dried, glitter-lined vials.
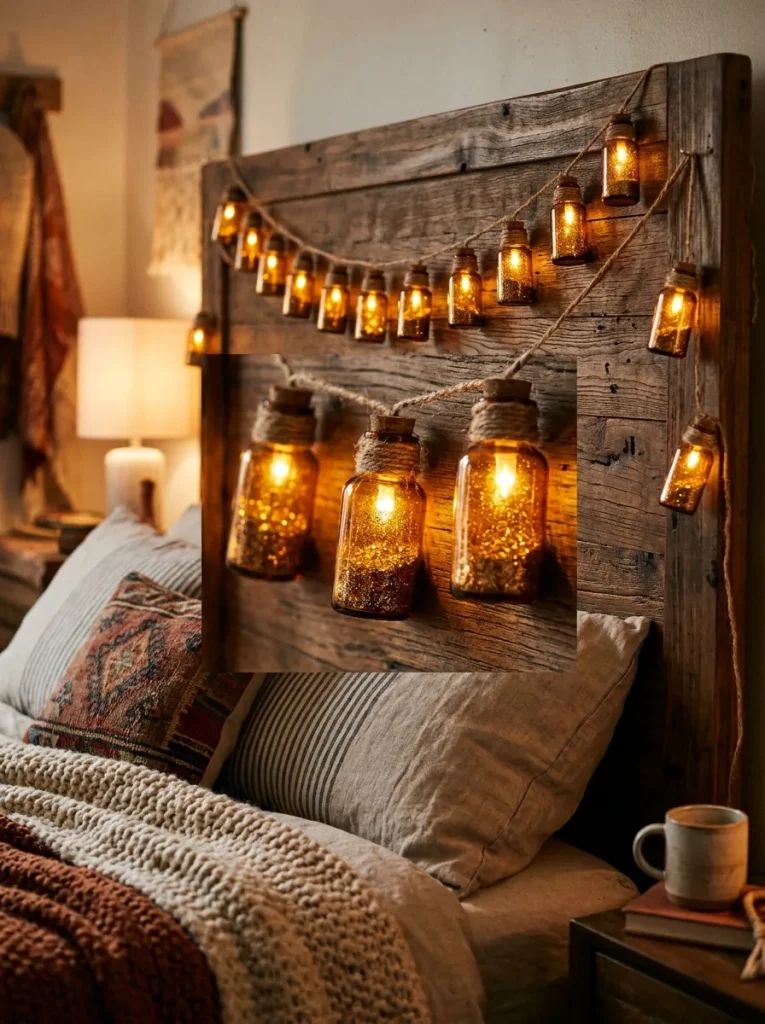
5. Golden Honeycomb Amber Lanterns
How to Create
Golden honeycomb amber lanterns leverage the natural amber tint of standard prescription bottles to create a deeply warm, vintage-inspired lighting effect. Rather than attempting to disguise the amber plastic, this design enhances it by pairing the warm base material with fine metallic gold, bronze, and copper glitters. When the interior light illuminates the amber plastic through the fine metallic particles, it produces a rich, candle-like glow that mimics antique glass apothecary jars. This approach is suited for rustic interior themes, autumn mantle arrangements, or bohemian bedroom accents where warm, golden lighting is preferred. The natural tint of the amber plastic filters out any harsh blue frequencies from standard LED bulbs, converting standard cold lighting into an exceptionally soft, relaxing luminescence without requiring specialty colored bulbs.
Begin by selecting an array of identical amber-tinted medicine containers and cleaning their outer surfaces thoroughly with isopropyl alcohol to remove oil residues. Coat the internal wall with a gloss varnish, working the medium up to the top lip using a small synthetic brush. Introduce a rich blend of Aztec gold and antique bronze fine glitter into the bottle, rotating the container at an angle so the particles adhere in an organic, textured pattern along the internal sides. Allow the adhesive to cure thoroughly so no loose particles dislodge during the wiring phase. Modify the original amber caps by drilling a central hole matching the exact diameter of your light sockets. Thread each LED light module securely through the top hole, anchoring the wire with a tiny drop of solvent-free craft adhesive to prevent internal shifting. Fasten the caps tightly to finish the rich, honey-toned garland strand.
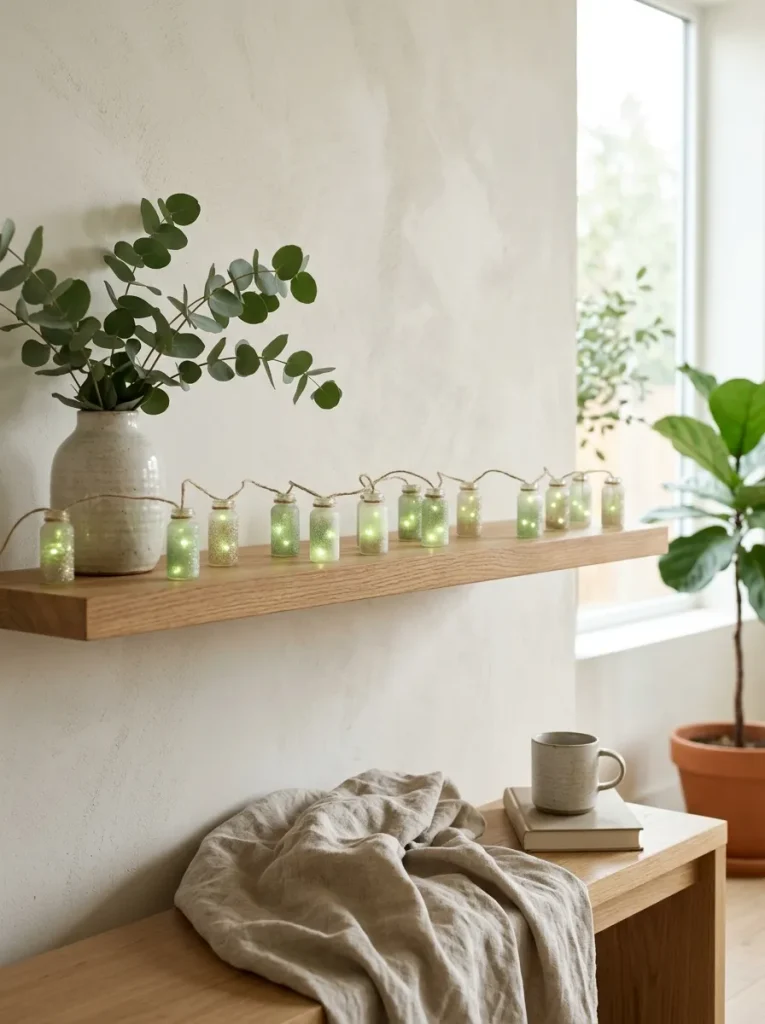
6. Minimalist Frosted Sage Illumination
Setup Method
Minimalist frosted sage illumination provides an understated, nature-inspired decorative accent that integrates seamlessly with contemporary minimalist interiors. This design relies on a blend of pale sage green, eucalyptus, and champagne micro-glitters applied thinly inside frosted or clear pharmacy bottles. The muted green tone offers an earthy, botanical aesthetic that complements indoor houseplants, wooden shelving, and natural linen textiles. When powered on, the light filters through the subtle green mineral tones, creating a calming, organic glow that feels grounded and serene. The restrained application of glitter avoids excessive sparkle, maintaining a sophisticated, matte-like presence that enhances contemporary spaces without overwhelming other design elements in the room.
To execute this refined botanical style, mix a tiny drop of sage green acrylic craft paint into clear decoupage glue until the mixture becomes pale and uniform. Swirl this tinted adhesive around the interior of each pill bottle until the surface is thinly coated, allowing excess liquid to pour out completely into a collection dish. Lightly dust the interior with ultra-fine champagne and pale olive glitters, using a dry fan brush to tap the glitter in lightly so it remains semi-sheer rather than fully opaque. Let the bottles dry thoroughly overnight in a well-ventilated space. Using a precision punch, create a neat entry port on the side of each bottle cap rather than the center, allowing the garland cord to run horizontally and flat against a wall when mounted. Snap the prepared caps onto the bottles and secure the LED light strand firmly into place along the line.
7. Geometric Color-Blocked Glitter Bottles
Step-by-Step Guide
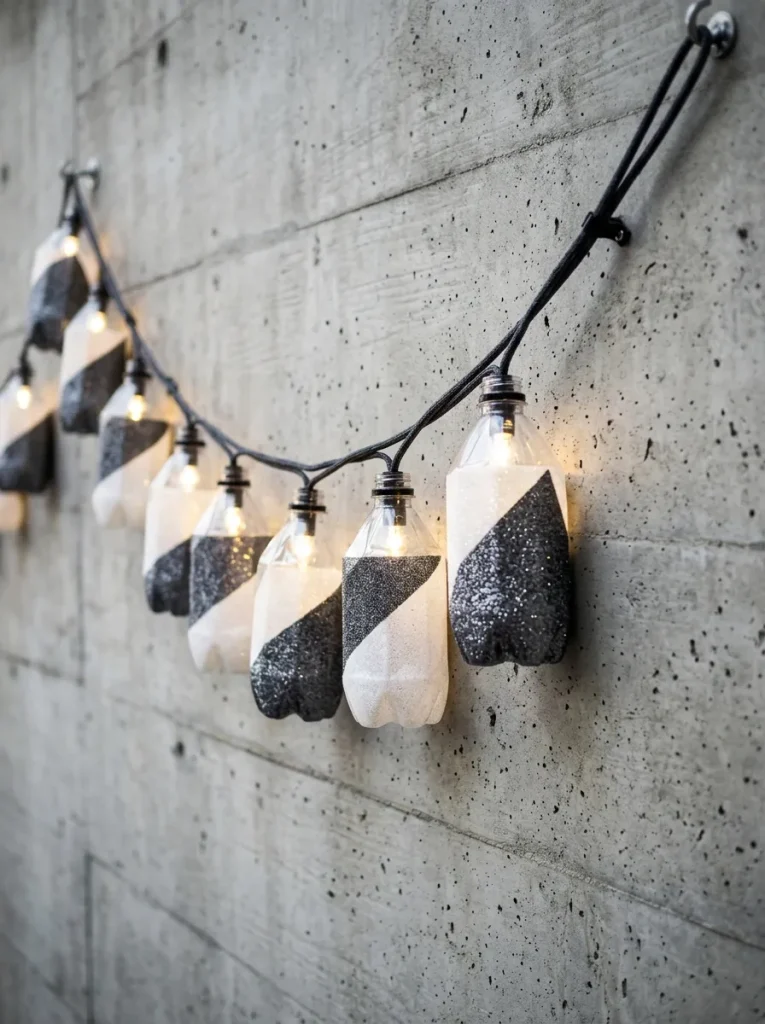
Geometric color-blocked glitter bottles introduce structured, modern graphic design into upcycled lighting crafts through crisp, segmented color lines. This approach uses precision masking tape applied to the outer or inner surface of the bottle during adhesive application, creating sharp visual divisions between contrasting glitter colors. For example, a crisp diagonal line separating crisp white glitter from rich charcoal or metallic gold produces a striking modern accent. When the internal bulb illuminates the bottle, the clear contrast between the dense dark zone and the luminous light zone creates an architectural silhouette. This style fits well into modern industrial apartments, contemporary work spaces, and graphic gallery wall displays where structured patterns are prioritized over traditional uniform sparkle.
Begin by cutting thin strips of low-tack painter’s tape and applying them smoothly inside the clean bottle along a precise diagonal or horizontal line. Apply a water-based adhesive exclusively to the exposed plastic section below the tape line, using a small angled detail brush for crisp edge control. Pour your primary dark or metallic glitter over the adhesive, tap out the excess, and carefully peel away the tape strip using fine tweezers while the glue is still slightly damp. Once the first section dries completely, apply a secondary layer of clear adhesive across the remaining untreated interior surface and coat it with a lighter contrasting glitter, such as pearl or silver. After both sections have cured fully, drill a clean opening into the bottle cap, slide the LED bulb inside, and lock the cap onto the finished geometric container.
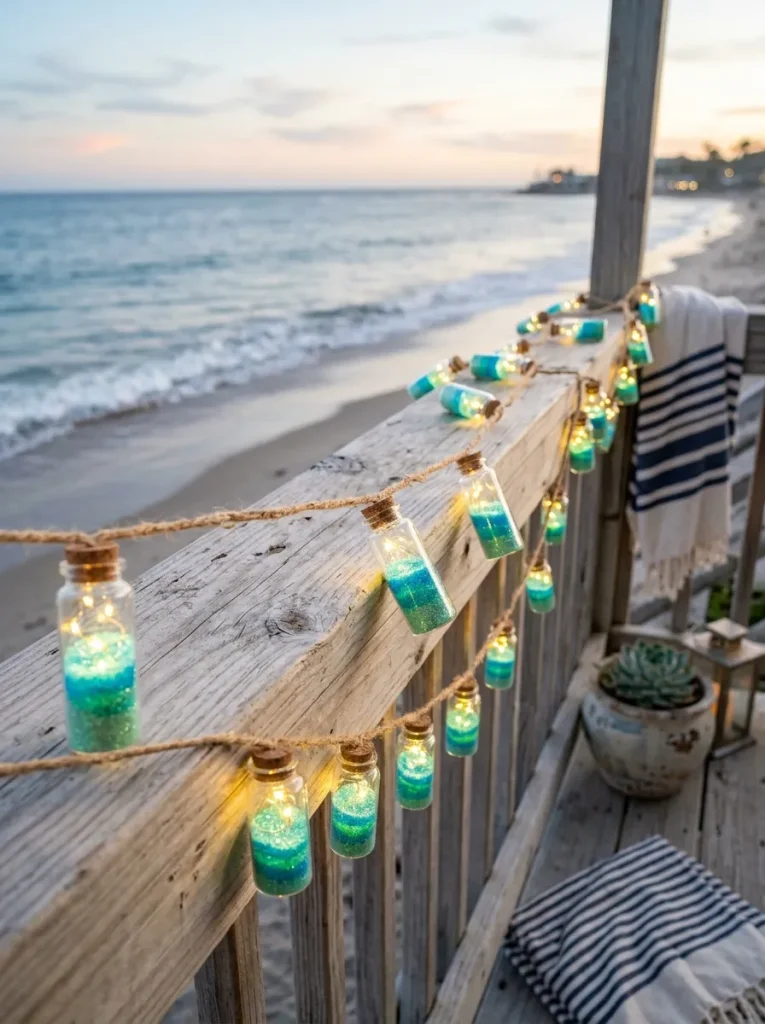
8. Ocean Wave Aquamarine Vials
Execution Process
Ocean wave aquamarine vials evoke the dynamic color transitions of coastal waters through layered oceanic pigments and fine shimmering glitter. This design incorporates a multi-tonal mix of seafoam green, deep turquoise, and brilliant aqua glitters layered inside clear plastic pharmacy cylinders. When suspended across an indoor space, the varied cool tones filter the LED illumination into relaxing aquatic hues, casting gentle maritime reflections onto adjacent surfaces. This concept works effectively for coastal-themed bathrooms, summer patio gatherings, or vibrant sunrooms filled with natural light. The smooth cylindrical profile of the containers allows the aqua layers to form natural horizontal rings that suggest moving water, turning ordinary utility plastics into decorative marine art pieces with high aesthetic charm.
To build these coastal light vials, prepare three separate adhesive mixtures in small cups, tinting each with a microscopic drop of cyan or emerald alcohol ink. Apply the deepest turquoise mixture along the bottom base of the bottle using a cotton swab, immediately dusting it with deep teal glitter. Next, brush the medium cyan adhesive around the middle section of the bottle wall and coat it with brilliant aqua particles. Finally, apply clear untinted adhesive around the top rim and coat it with ultra-fine seafoam or diamond glitter, gently feathering the borders between the wet zones using a clean brush. Let the layered application cure for three full hours. Prepare the caps by cutting clean circular holes, thread the LED garland lights through the caps, and attach the bottles sequentially to establish a fluid, wave-like color progression across the entire strand.
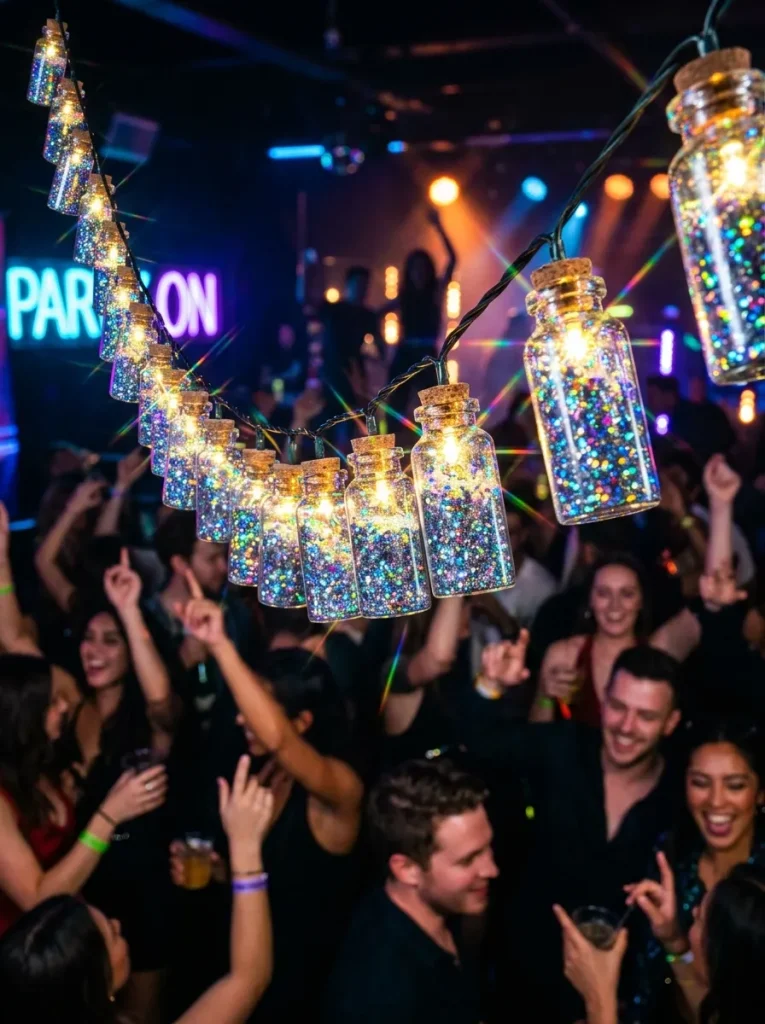
9. Holographic Prism Disco Cylinders
How to Create
Holographic prism disco cylinders maximize light dispersion and vibrant color reflection by pairing high-grade holographic glitter with clear, high-clarity plastic containers. This concept uses multi-faceted silver holographic glitter particles that split single rays of LED light into vibrant rainbow spectra across the full interior surface of the vial. The result is a high-energy, sparkling accent piece ideal for holiday parties, festive studio spaces, and celebration backdrops. Unlike standard metallic glitters that simply reflect a single color tone, holographic particles actively scatter light in multiple directions, creating an eye-catching, dynamic shimmer that shifts continuously as people walk past the garland. The high reflectivity of the internal surface ensures that even lower-lumen battery-operated fairy lights produce a brilliant, dazzling output across the entire room.
Start by applying a high-gloss, ultra-clear acrylic adhesive across the entire inside wall of each sanitized plastic medicine bottle. Pour an ample amount of precision-cut holographic silver micro-glitter into the container, rotating the bottle slowly until every square millimeter of the clear plastic is covered with a dense, uniform layer of reflective flakes. Shake out any loose, unbonded glitter onto a sheet of paper to return it to the storage container. Allow the inner lining to set undisturbed until the milky adhesive turns completely transparent and hard. Cut an X-shaped slit into each snap-cap using a sharp hobby knife on a cutting mat. Push the fairy light bulbs through the slits until the glass element sits directly in the center of the holographic chamber. Fasten the caps tightly to the bottle bodies, creating an exceptionally bright and radiant party garland.
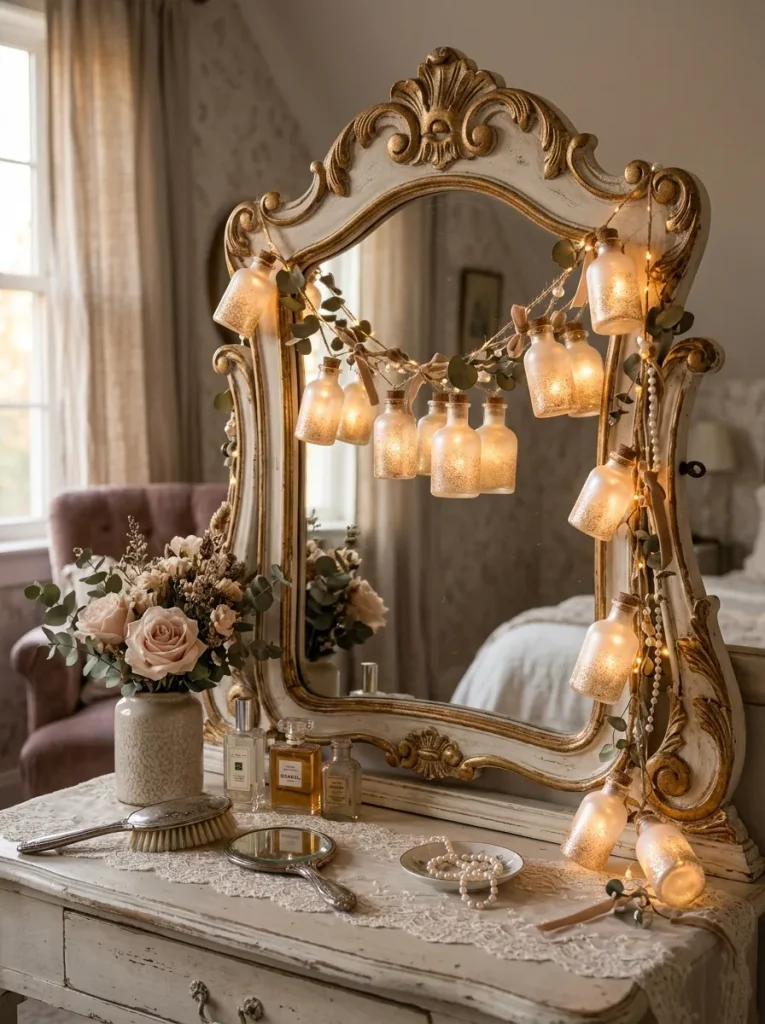
10. Vintage Champagne Pearl Lanterns
Step-by-Step Guide
Vintage champagne pearl lanterns offer an elegant, sophisticated lighting solution that blends creamy pearl finishes with fine soft-gold glitter accents. This design uses a base coating of pearlescent white medium dusted lightly with warm champagne micro-particles, yielding an antique, opalescent visual texture. When illuminated, the light produces a gentle, diffused radiance similar to vintage satin-glass lamps, creating a luxurious and serene atmosphere. This style matches neutral, French country, traditional, and upscale minimalist interior schemes where vibrant primary colors or intense glitter reflections might feel out of place. The soft, luminous finish conceals the utilitarian plastic entirely, leaving only a refined, uniformly glowing capsule that looks like high-end designer lighting when displayed along a mantel, mirror, or decorative shelf.
To create this sophisticated finish, blend two parts clear decoupage glue with one part pearlescent white acrylic craft paint in a small container. Brush this shimmering mixture smoothly over the inside of a clear medicine container, maintaining an even, streak-free layer across the plastic surface. While the milky mixture is still wet, lightly sprinkle a minimal dusting of champagne gold micro-glitter into the bottle, shaking it gently so the particles suspend lightly within the pearlescent base rather than forming an opaque glitter crust. Allow the bottle to dry for four hours until the finish becomes durable and translucent. Drill a clean five-millimeter hole through the center of the bottle caps, thread each warm-white LED light module into the container, and secure the wiring neatly. Snap the caps firmly closed to finish a timeless, glowing strand.
Common Mistakes and Prevention Strategies
Crafting illuminated garlands from upcycled medicine bottles requires attention to detail to avoid structural and visual defects. One frequent error is failing to remove adhesive label residue completely from the exterior plastic before painting or sealing. Leftover adhesive attracts airborne dust, resulting in dark, unsightly smudges once the garland is illuminated from within. Always use isopropyl alcohol or mineral oil to dissolve residual tackiness completely before proceeding with decorative steps. Another common issue is using heavy, water-heavy glues that puddle at the bottom of the bottle, creating uneven, clumpy glitter patches that block light transmission. Prevent this by applying thin, uniform coats using a foam brush and immediately inverting the bottles to drain excess liquid. Additionally, crafters must avoid using incandescent or high-heat light bulbs inside enclosed plastic containers. Always choose low-voltage, cool-burning LED fairy lights to eliminate heat buildup and protect the structural integrity of the plastic bottles over long periods of continuous display.
+------------------------------------+---------------------------------------+
| Potential Crafting Mistake         | Practical Prevention Strategy         |
+------------------------------------+---------------------------------------+
| Residual label adhesive on plastic | Clean surfaces with isopropyl alcohol |
| Clumpy, uneven glitter layers      | Apply thin glue coats and drain vials |
| Heat buildup inside closed bottles | Use certified cool-burning LED lights |
| Loose caps detaching from garland  | Secure closures with craft adhesive   |
+------------------------------------+---------------------------------------+
Practical Methods for Enhanced Finishing
Achieving a clean, store-bought finish on your handcrafted glitter light garland comes down to consistent technique and careful material handling. When applying fine polyester glitter, work over a clean, folded sheet of smooth parchment paper so that excess dry particles can be funneled back into your storage container without waste. To create exceptionally durable internal coatings that will not flake off over time, apply a secondary misting of clear spray sealer or dilute gloss varnish over the dried glitter layer before inserting the electrical components. If you are working with semi-rigid plastic caps that resist cutting, submerge them in warm water for two minutes to soften the polymer, making it easier to slice precise openings without cracking the edges. Uniformity in bulb depth also impacts the visual quality of the final piece; ensure that each LED bulb is suspended at the exact vertical midpoint inside its respective bottle for balanced light dispersion across the entire garland.
Styling and Presentation Strategies
The versatility of lightweight plastic bottle garlands allows for diverse hanging arrangements across various living spaces. For an impactful living room statement, drape the illuminated strand across a wooden fireplace mantel, interweaving the glitter bottles with faux eucalyptus garlands or dried botanical branches to conceal the primary electrical wiring. In bedroom environments, hang the strand vertically alongside a full-length floor mirror or loop it gently across an open headboard to provide soft, ambient evening illumination. The lightweight nature of plastic vials means they can be secured safely using clear adhesive wall hooks or delicate push pins without requiring heavy-duty mounting hardware. When styling for temporary parties or outdoor covered patio gatherings, suspend the garland along porch railings or across the front of a dessert table, ensuring the battery pack remains safely tucked out of sight inside a decorative basket or small fabric pouch.
Project Budgeting and Time Management
Completing a full ten-to-twelve bottle glitter garland is an economical, time-efficient DIY project that can easily be finished over the course of a single afternoon. Because the core structural components are sourced from household medicine containers, the primary financial investment is limited to an inexpensive string of LED fairy lights, craft glitter, and standard decoupage glue. Crafters can complete the entire project for a minimal cost while producing a reusable decorative fixture that lasts for years. To optimize your crafting schedule, execute the steps in systematic batches rather than finishing one bottle at a time. Clean and sanitize all plastic containers simultaneously, apply the adhesive coatings in a single continuous session, and allow all bottles to cure together over a designated two-hour drying window. This assembly-line workflow minimizes mess, reduces cleanup time, and ensures identical decorative consistency across the entire finished light strand.
Creative Expansions and Advanced Variations
Once you have mastered the foundational technique of internal glitter coating, you can explore sophisticated design variations to further elevate your upcycled lighting displays. Experiment with etching the outer plastic casing using fine-grit sandpaper to create an ultra-matte sea-glass texture that complements the internal glitter reflections. Advanced crafters can also apply precision vinyl decals, botanical silhouettes, or numerical stencils to the exterior surface of the bottles before adding the internal glitter layer, creating detailed shadow-puppet projections when the LEDs are switched on. For a larger multi-tiered installation, connect multiple light strands together and suspend them from a natural driftwood branch or a painted wooden dowel to create a customized illuminated chandelier. You can also mix different container shapes and sizes from various safe household bottles, arranging them in a cascading vertical pattern to produce a dynamic, multi-dimensional lighting installation for any modern interior space.