Designing a whimsical fairy garden within an infant nursery introduces a tranquil, imaginative environment that combines botanical beauty with gentle storybook charm. This styling concept uses muted pastel flower beds, delicate miniature architecture, and layered natural textures to produce a calming room visual suitable for early childhood spaces. In this detailed guide, you will learn how to design, assemble, and position charming floral arrangements, miniature decorative structures, and soft ambient lighting elements safely inside a nursery setting. Understanding spatial proportion, child-safe material selection, and harmonious color balancing allows parents and decorators to turn standard nursery corners, shelving units, or wall alcoves into captivating visual accents. Incorporating botanical fairy garden themes encourages visual sensory development while establishing a soothing atmosphere that supports healthy sleep routines for babies. By following the structured methods outlined below, you will gain the practical skills needed to curate balanced pastel color schemes, assemble durable DIY garden installations, and implement low-maintenance faux or live flora without compromising room functionality, safety codes, or floor space.
Pastel fairy garden floral themes consistently rank among the most sought-after nursery styling trends on visual platforms like Pinterest due to their adaptability, soft visual presence, and versatile aesthetic value. Modern interior styling emphasizes gentle, muted color palettes—such as blush pink, soft lavender, mint green, and pale buttercup yellow—which provide subtle visual stimulation without overwhelming an infant’s developing eyesight. The concept appeals strongly to DIY decorators because it allows for extensive creative customization, ranging from wall-mounted vertical planters to enclosed glass terrariums and upcycled wooden flower boxes. Beginners can easily achieve professional-grade results using accessible craft supplies, preserved greenery, and lightweight miniature accessories without requiring advanced carpentry or horticultural skills. Furthermore, the theme bridges traditional nursery softness with modern nature-inspired trends, making it easy to integrate with existing minimalist, Scandinavian, or vintage nursery furnishings. By focusing on modular, customizable decorative elements, this styling approach adapts effortlessly as the child grows from an infant into a toddler, offering lasting decorative utility.
Careful preparation, rigorous safety vetting, and strategic material sourcing are vital steps before assembling any nursery fairy garden display. Primary materials include non-toxic preserved moss, high-density floral foam blocks, premium pastel silk blossoms, lightweight miniature resin figurines, unpainted balsa wood, and child-safe LED micro-fairy lights. Required tools generally consist of wire cutters, a low-temperature glue gun, floral shears, non-toxic water-based acrylic paint, and measuring tape. Safety and planning considerations must remain the top priority; all miniature elements, small pebbles, or loose moss must be securely adhered to containers or installed well out of reach of cribs, changing stations, and crawling areas. When planning the layout, measure wall clearances, inspect natural light exposure, and evaluate room airflow to choose between preserved botanicals, silk flowers, or low-light, non-toxic live plants like baby tears or parlor palms. Sand all rough wooden surfaces, ensure all electrical lighting operates on low-voltage battery packs with screwed-down compartments, and plan a balanced spatial layout before permanently assembling your garden display.
Suspended Floating Blossom Cloud Basin
Design Foundations
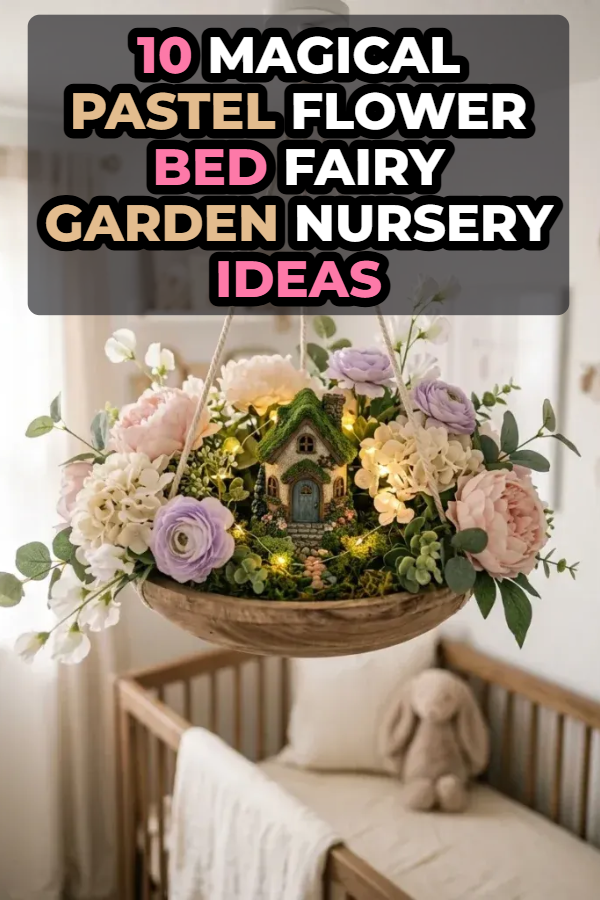
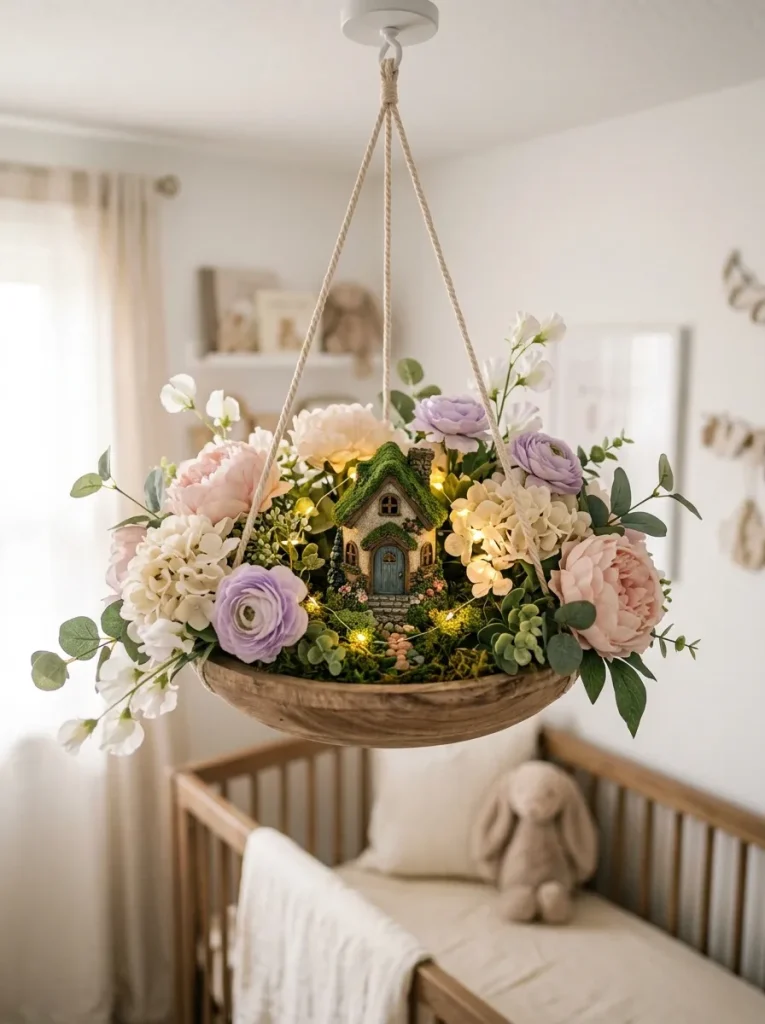
The suspended floating blossom cloud basin utilizes a ceiling-mounted or high wall-bracketed structure to create an elevated botanical display that stays completely beyond an infant’s reach. This design relies on a shallow, lightweight wooden or woven bowl filled with soft pastel artificial florals, trailing faux ivy, and miniature fairy figurines set amidst miniature pathways. The visual composition emphasizes soft transitions between blush peonies, cream hydrangeas, and pale lilac blossoms, which spill gently over the vessel edges to simulate a floating garden bed. Because the container hangs from a fixed anchor point, it preserves valuable floor and dresser surface area while adding vertical dimension to the nursery layout. The elevated positioning also creates a captivating overhead visual that gently holds a baby’s attention during quiet resting moments without introducing loose decor items near the sleeping zone.
Step-by-Step Guide
Begin by securing a heavy-duty ceiling hook into a solid ceiling joist well away from the direct footprint of the crib, ensuring the anchor holds at least twenty pounds. Take a wide, shallow Paulownia wood bowl or a flat-bottomed macrame hanging tray and line the interior base with a fitted circular block of high-density floral foam. Fasten the foam securely to the bowl using non-toxic wood glue or low-temperature hot glue dots around the perimeter. Insert short-stemmed silk pastel flowers—such as blush spray roses, white cosmos, and soft periwinkle ranunculus—firmly into the foam base until the surface is densely covered. Weave a battery-operated warm white micro-wire light strand throughout the stems, hiding the battery box underneath the foam layer with an accessible switch. Place a tiny miniature resin fairy cottage and two small wooden bench figures in a central clearing lined with preserved sheet moss, using hot glue to lock every small piece permanently to the base.
Tiered Vintage Planter Box Village
Design Foundations
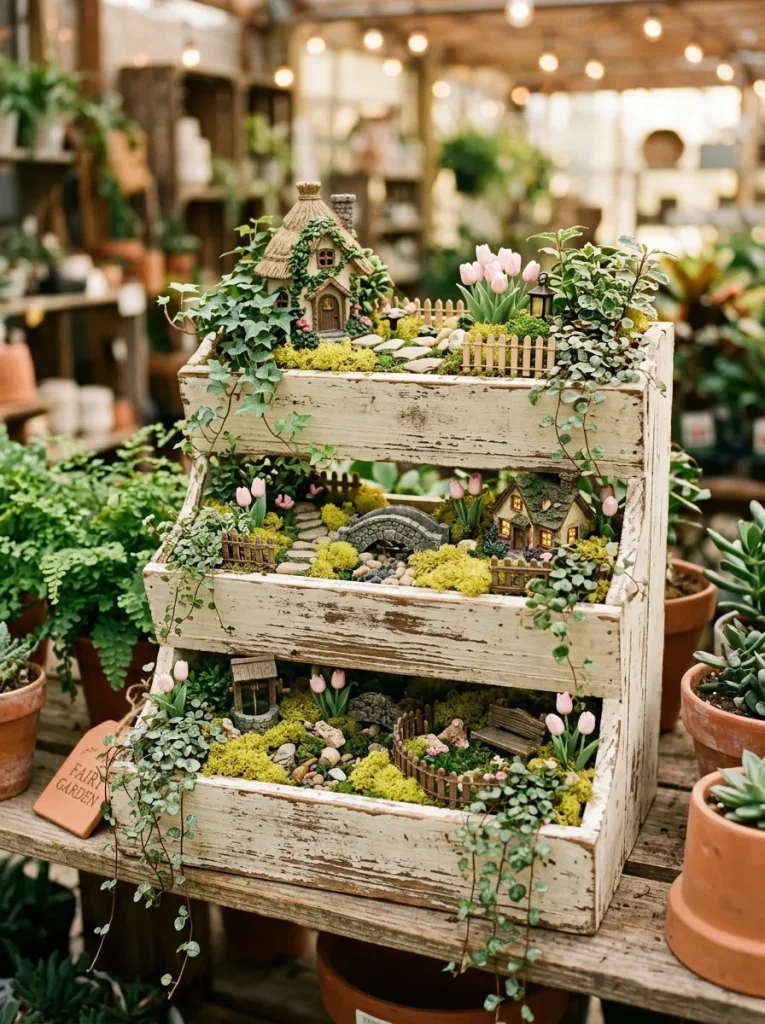
The tiered vintage planter box village organizes miniature fairy landscapes across multiple stepped levels using a small, painted wooden step planter positioned securely atop a deep nursery bookshelf or anchored directly to the wall. This multi-level approach allows decorators to separate different miniature scenes—such as a tiny woodland bridge, a cobblestone pathway, and a pastel flower patch—into distinct vertical zones. The exterior woodwork is typically finished in a distressed chalk white, soft sage, or washed ivory tone to complement classic French country or cottagecore nursery decor. By utilizing stepped elevations, the arrangement creates structural depth and shadows, allowing ambient nursery lighting to showcase the individual floral textures, tiny fence lines, and miniature garden elements across every tier of the unit.
Execution Process
Select a three-tiered freestanding or wall-hung wooden planter box and sand all exterior surfaces using 220-grit sandpaper to remove rough splinters. Apply two coats of non-toxic, zero-VOC chalk paint in a soft off-white shade, sealing the wood with an organic beeswax finish once dry. Cut custom blocks of green dry floral foam to fit snugly into each individual tier cavity, trimming the top flush with the container lips. Cover the exposed foam surfaces with preserved reindeer moss in soft chartreuse and pale cream shades, fixing the moss down with floral U-pins. On the top tier, insert pastel silk lavender sprigs and miniature pink tulip stems around a small resin stone fairy cottage. In the middle and bottom tiers, construct a winding pathway using flat faux pebbles glued firmly to the foam, flanking the path with tiny wooden picket fences, miniature pastel mushrooms, and trailing silk thyme greenery that drapes gracefully down the tier fronts.
Recessed Wall Niche Botanical Meadow
Design Foundations
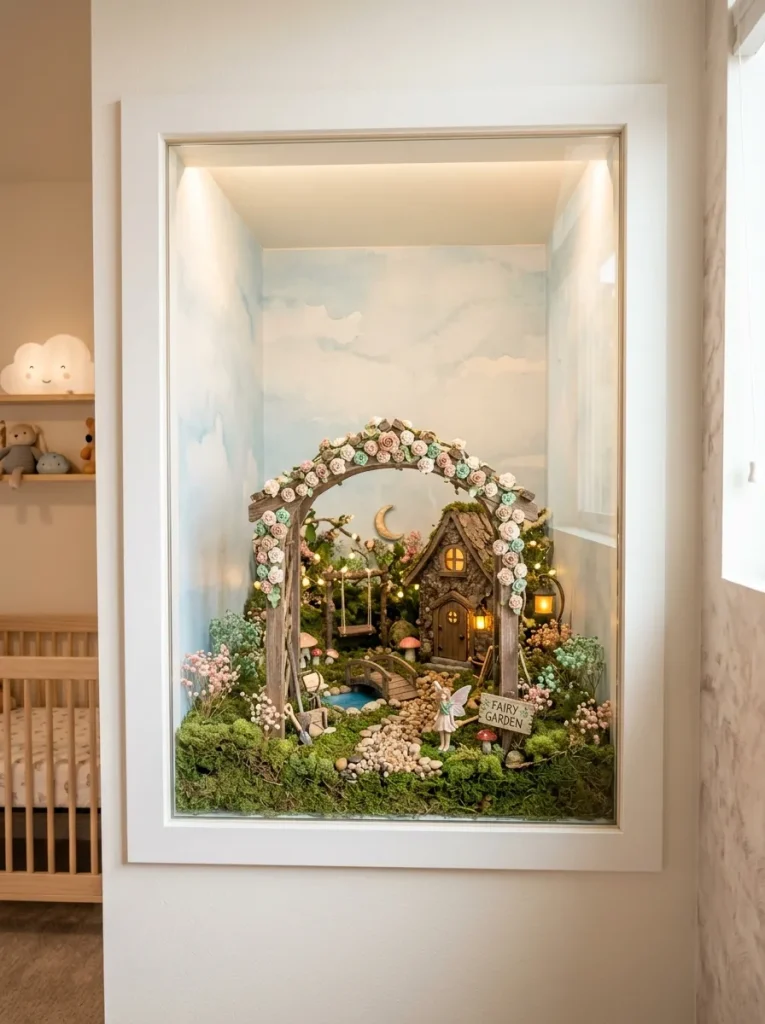
Converting a built-in wall niche or an inset shadow box into an enclosed fairy garden creates a seamless, architectural focal point that integrates directly into the room’s structural footprint. This concept builds a three-dimensional miniature landscape framed by the clean lines of drywall or molded wood framing, keeping the decorative elements flush against the wall plane. The background is often detailed with soft pastel watercolor murals, removable woodland wallpaper, or pale blue ombré paint, providing an expansive sense of sky behind the foreground garden. Recessed designs provide superior safety benefits for infant rooms because the entire fairy garden assembly can be protected behind an acrylic glass sheet, completely preventing dust accumulation and eliminating any accidental access to small decorative components.
Setup Method
Prepare the interior of the wall niche by wiping the drywall clean and applying a background layer of peel-and-stick pastel botanical wallpaper or soft sky-blue paint. Measure the bottom sill depth and cut a rigid piece of lightweight plywood or foam board to serve as a removable landscape tray base. Cover this base tray with an assortment of soft preserved mood moss and pastel green faux turf, securing the textiles with spray adhesive. Embed tiny preserved pastel dried flowers, such as baby’s breath dyed in blush pink, pale mint, and soft butter yellow, into the moss base in loose organic clusters. Position a miniature wooden arbor covered with tiny paper roses in the center, framing a tiny pathway made of pressed craft sand mixed with clear drying craft sealer. Once all miniature garden pieces are glued securely in place, slide the tray into the niche and install an optional clear plexiglass front panel secured with decorative corner screws.
Distressed Window Frame Floral Alcove
Design Foundations
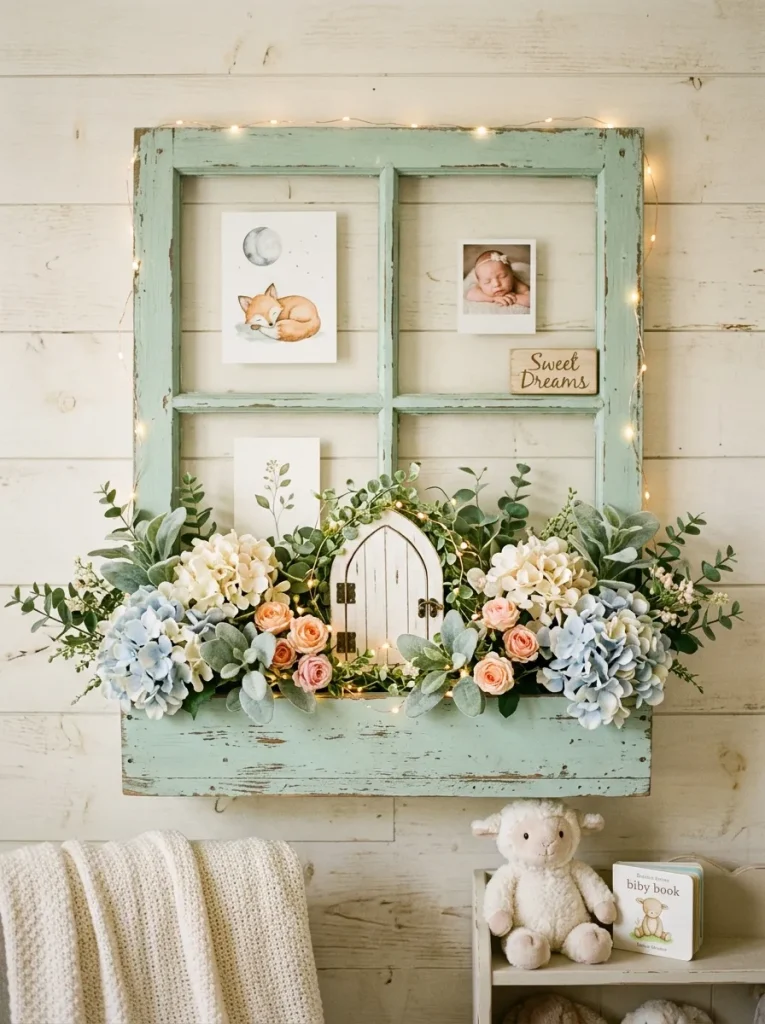
Repurposing an antique or reproduction multi-pane wooden window frame as a backdrop for a projecting windowsill fairy garden adds architectural character and rustic elegance to the nursery walls. The divided glass or open window panes serve as a decorative grid that frames wall decals or soft pastel landscape paintings placed directly behind the frame. Attached to the bottom of the window frame is a shallow wooden window box filled with overflowing pastel silk flora, miniature fairy gates, and tiny illuminated lanterns. This layout provides a defined focal point on large blank walls, functioning simultaneously as wall art and three-dimensional dimensional garden decor that elevates traditional nursery artwork into an interactive visual installation.
Step-by-Step Guide
Procure a lightweight wooden four-pane window frame without glass, and clean the wood thoroughly using a damp cloth and mild soap. Paint the frame with a non-toxic milk paint in soft seafoam green or pale blush, gently distressing the edges with sandpaper for an aged farmhouse finish. Fasten a small wooden trough planter box to the lower bottom edge of the frame using wood screws and mounting brackets. Fit custom-cut floral foam blocks into the attached planter box, pressing them firmly into place until they are level with the upper rim. Insert dense clusters of silk pastel hydrangea florets, miniature English roses, and soft faux lamb’s ear foliage into the foam to create a lush, full garden bed. Fasten a tiny white wooden gate to the front center of the box, weaving thin copper wire micro-lights throughout the flower stems to illuminate the window box display in the evening. Mount the completed window frame securely to wall studs using heavy-duty flush-mount D-ring hangers.
Glass Cloche Enclosed Pastel Wonderland
Design Foundations
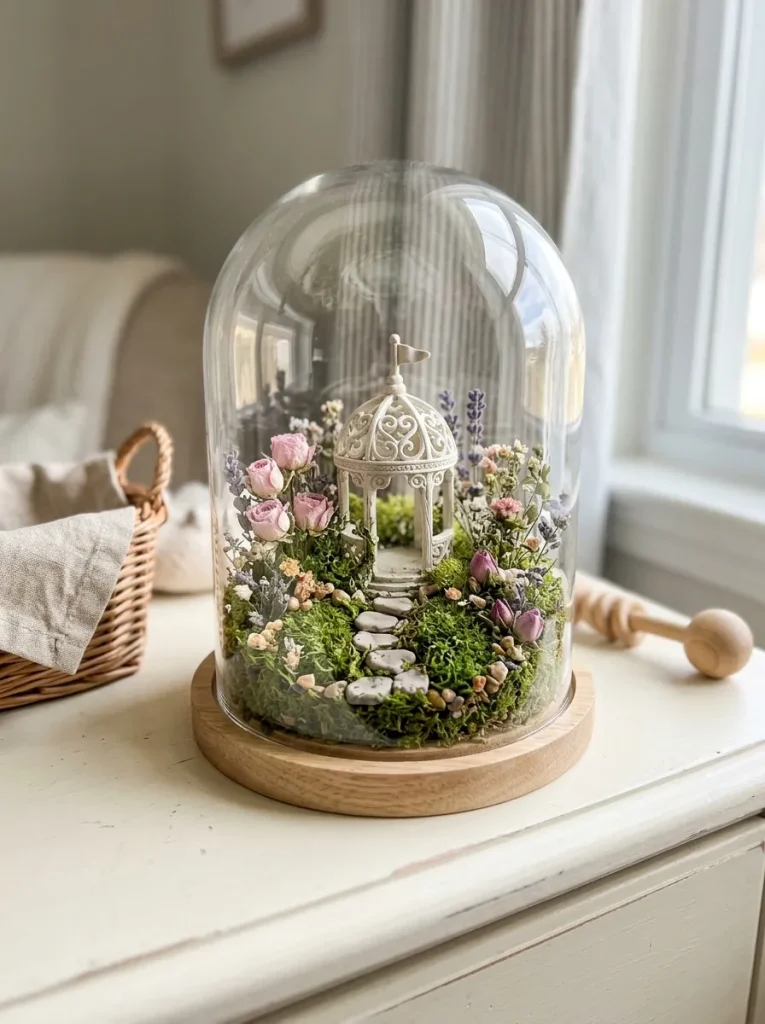
Utilizing large glass or clear acrylic display cloches with natural wooden bases provides an elegant, dust-proof method for incorporating fairy gardens on nursery dressers, high shelving, or armoire tops. The bell-shaped glass dome creates an enclosed micro-environment that magnifies the delicate details of miniature pastel flowers, tiny resin creatures, and intricate moss paths inside. Because the fragile components remain fully contained under the dome, the setup remains protected from airborne dust, accidental bumps, and curious toddler hands. The crystal-clear transparency of the cloche reflects soft nursery light, making the interior pastel hues of soft peach, powder blue, and cream appear vibrant, luminous, and refined within a modern minimalist nursery aesthetic.
How to Create
Select a large glass cloche featuring a grooved, circular wooden base measuring at least eight to ten inches in diameter. Sand the wooden base lightly and apply a coat of clear matte sealant to protect the wood from humidity or moisture. Cut a thin circular disc of green craft foam to fit precisely inside the recessed inner groove of the base, gluing it down with a thin layer of craft adhesive. Cover the foam surface with a mixture of preserved cushion moss, dried pastel pink rosebuds, and tiny sprigs of dried preserved statice in pale lilac. Build a central focal point using a small resin fairy gazebo, anchoring it into the foam with clear drying adhesive. Position tiny miniature rabbit or fawn figurines beside a miniature stepping stone path made of flattened modeling clay discs. Carefully wipe the interior glass surface with an anti-static cloth to remove lint, then lower the cloche dome over the landscape, sealing it into the base groove.
Tree Stump Woodland Flower Bed
Design Foundations
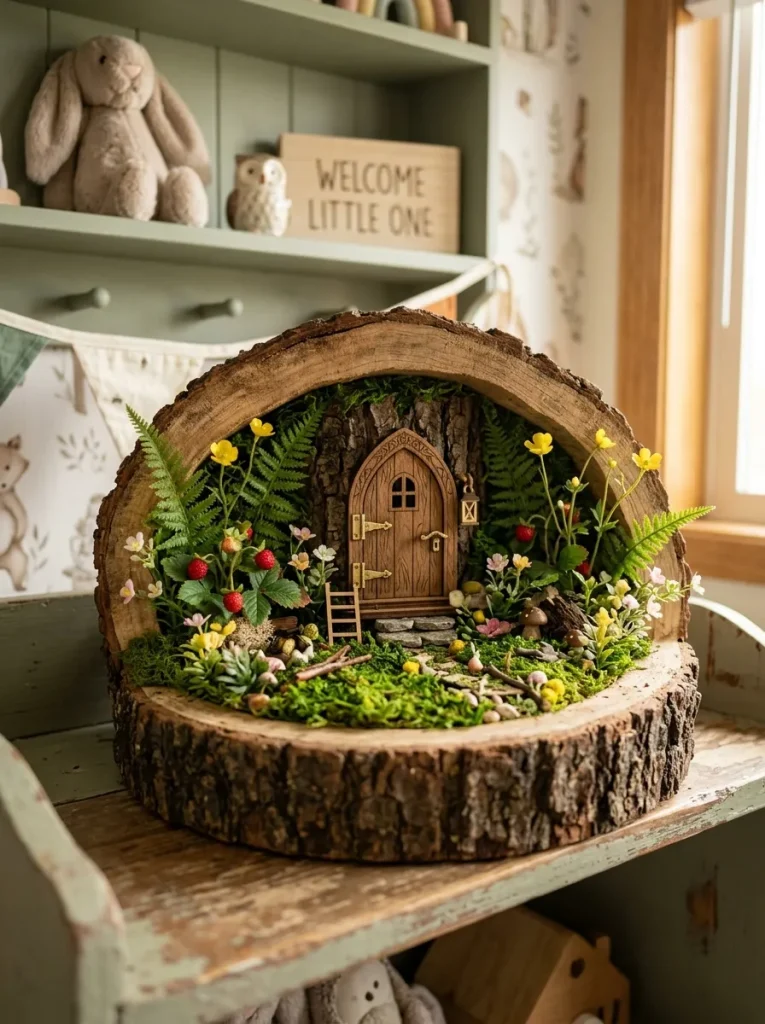
The tree stump woodland flower bed incorporates organic, natural tree trunk slices or hollowed faux birch logs to create an earthy, storybook woodland nursery accent. This concept emphasizes the raw textures of tree bark paired with the delicate softness of pastel silk florals, establishing a grounding natural focal point within the room. The contrast between rugged exterior bark and velvety pastel petals reflects classic forest fairy aesthetics while maintaining a neutral, gender-neutral color balance. Utilizing a low, wide log vessel allows the arrangement to sit securely on deep shelving or wide changing table organizers without wobbling, providing structural stability alongside rich visual texture that complements natural wicker and wooden nursery furniture.
Setup Method
Source a dried, treated Paulownia wood log slice with a hollowed center cavity, ensuring the bark is intact, completely dry, and free of natural pests or sap. Line the hollow interior cavity with a light coat of non-toxic sealant to prevent any lingering natural wood dust from shedding into the nursery environment. Cut a dense block of dry floral foam to fit tightly within the cavity, positioning it roughly one half-inch below the bark lip. Cover the foam with preserved flat moss and clusters of pale green Spanish moss draped over the exterior bark edges. Insert faux pastel woodland botanicals—such as miniature wild strawberries, pale buttercup blossoms, and tiny silk ferns—around the circumference of the opening. Embed a tiny carved wood fairy door against the inner back wall of the cavity, adding a miniature resin mushroom cluster and a tiny gravel path at the entrance to finish the woodland scene.
Pastel Botanical Shadow Box Habitat
Design Foundations
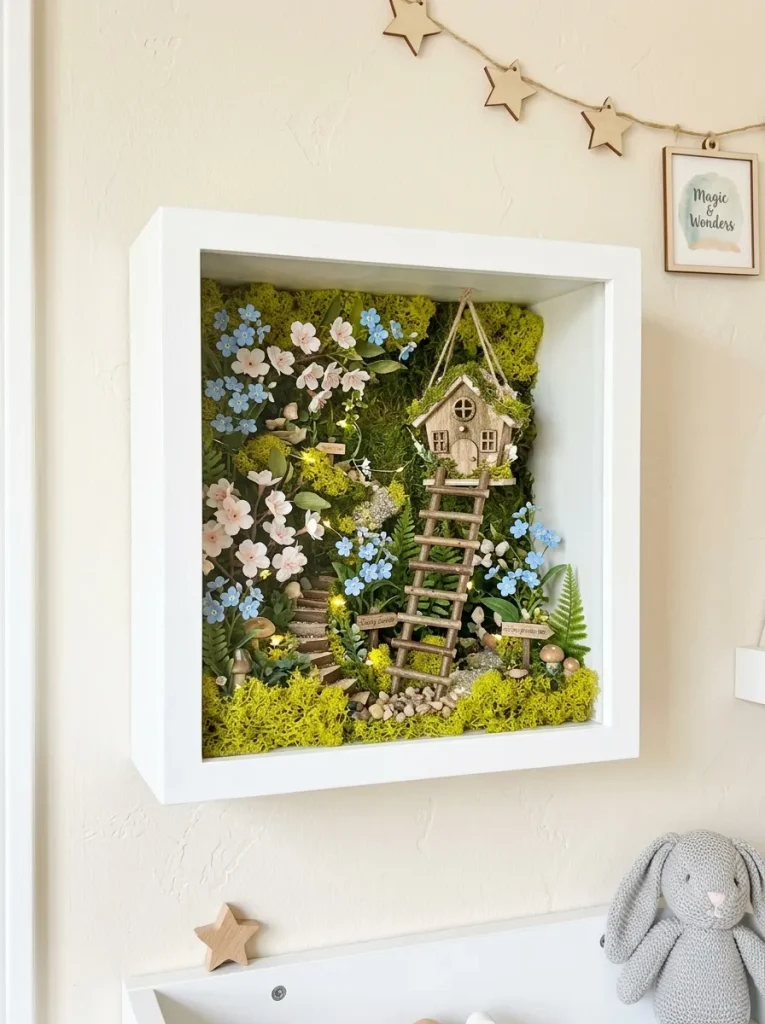
A deep-set botanical shadow box provides a streamlined, wall-mounted display that protects delicate miniature crafts while saving floor and tabletop space in small nursery layouts. This design approach arranges fairy garden components vertically against the interior backboard and floor of a framed display case, creating a framed living picture aesthetic. The clean outer lines of the wooden frame provide a modern, organized boundary that keeps whimsical elements feeling intentional and structured. Shadow boxes can be hung in vertical pairs or triptychs to frame a nursing chair or accent a gallery wall, using coordinated pastel color schemes that tie together nursery crib sheets, curtains, and wall art into a cohesive design story.
Execution Process
Select a deep wooden shadow box frame measuring at least twelve by twelve inches with an interior depth of at least three inches, removing the rear backing board. Paint the inside frame walls with a gentle wash of pastel mint or warm cream acrylic paint, allowing the finish to dry completely. Reattach a piece of pastel floral scrapbooking paper or natural unbleached linen fabric to the backing board using double-sided craft tape. Along the interior bottom ledge of the shadow box, glue a narrow strip of high-density craft foam concealed beneath a layer of chartreuse sheet moss. Insert tiny silk pastel blossoms—such as miniature forget-me-nots, blush cherry blossoms, and white baby’s breath—into the foam to form a dense miniature ground cover. Adhere a miniature wooden ladder climbing up toward a tiny hanging fairy birdhouse suspended from the top inner frame with clear monofilament line, then secure the front glass panel.
Woven Basket Cottage Garden Basin
Design Foundations
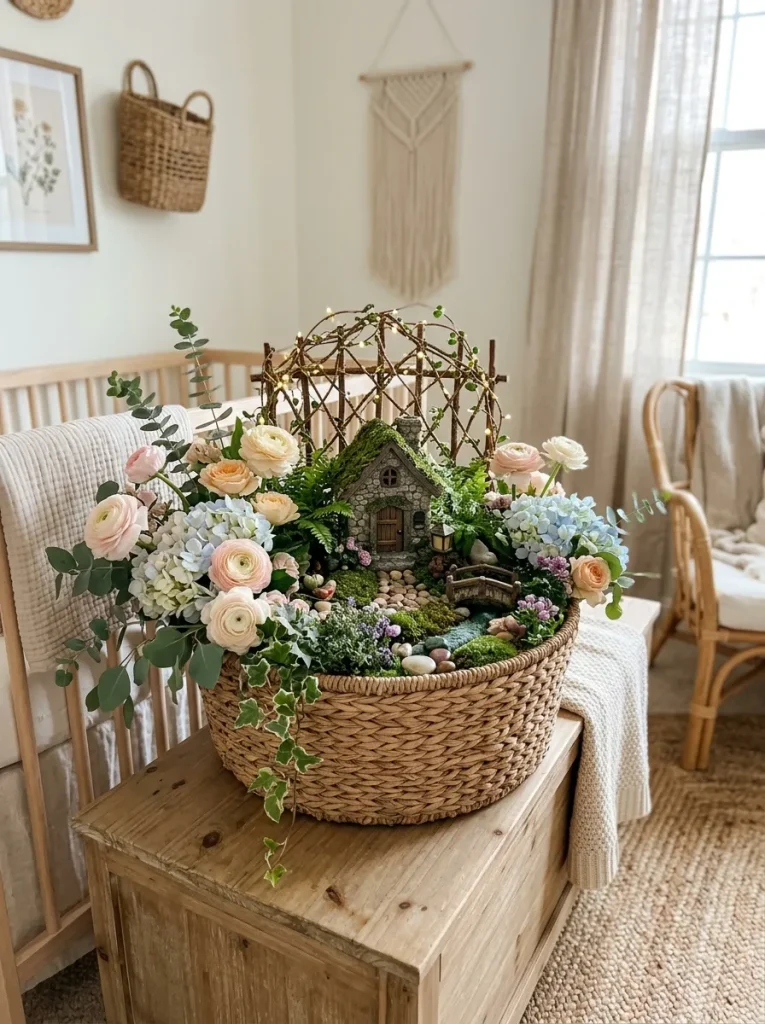
Integrating woven seagrass, rattan, or wicker storage baskets as the base for a nursery fairy garden infuses the room with warmth, coastal texture, and rustic bohemian appeal. The natural tan tones of braided fibers provide an ideal earthy frame that accentuates soft pastel pinks, baby blues, and creamy whites in the floral arrangement. Baskets with sturdy side handles offer functional transportability, allowing parents to move the display easily between high bookshelves, dressers, or decorative storage benches during room cleanings. This concept balances the delicate charm of fairy motifs with durable, organic materials that blend seamlessly into popular neutral and Scandinavian nursery decor themes.
How to Create
Choose a sturdy, flat-bottomed round woven seagrass basket with a shallow height profile of roughly four to six inches. Place a heavy circular wooden disc inside the bottom of the basket to provide structural weight and prevent the flexible woven base from bowing or tipping. Insert a tailored block of floral foam on top of the wooden disc, filling any side voids with recycled craft paper to keep the foam immobile. Secure a blanket of soft green preserved moss across the top surface using green wire floral pins. Plant an assortment of high-quality faux pastel ranunculus, pale blue hydrangeas, and trailing eucalyptus stems deeply into the foam, allowing the leaves to cascade over the woven rim. Install a miniature stone cottage figurine in the center, framing the entrance with a miniature arched trellis woven from thin willow twigs and decorated with micro-sized silk blossoms.
Repurposed Vintage Dollhouse Conservatory
Design Foundations
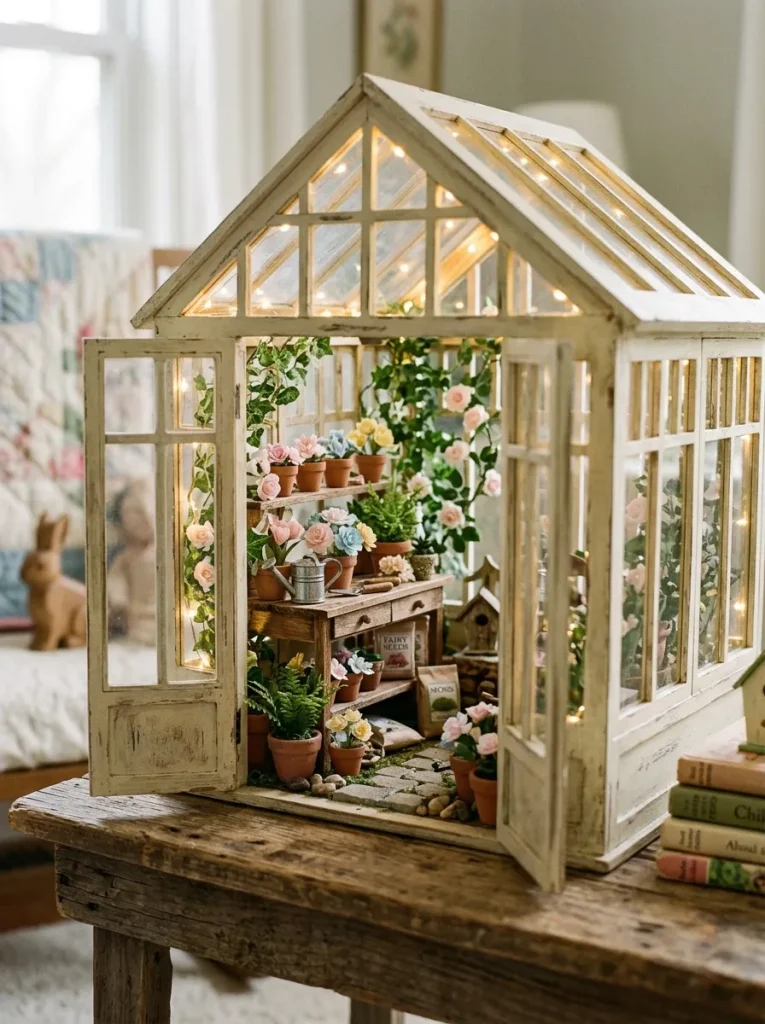
Transforming a miniature wooden greenhouse or an open-sided dollhouse frame into a pastel botanical conservatory creates an expansive, architectural statement piece for a nursery corner. This concept utilizes structural roof lines, miniature window mullions, and open archways to frame an elaborate indoor fairy garden filled with pastel flora, miniature potting benches, and tiny watering cans. Painting the dollhouse frame in soft tones like dusty rose, French blue, or antique white transforms standard play furniture into an elegant decorative sculpture. The defined architectural boundaries provide ample vertical space for climbing silk vines and hanging miniature floral baskets, generating exceptional visual depth and timeless heirloom charm.
Step-by-Step Guide
Procure an unfinished wooden dollhouse frame or miniature conservatory structure, ensuring all surfaces are sanded smooth to eliminate splinters. Paint the entire structure inside and out with two coats of zero-VOC satin paint in a pale dove gray or antique ivory shade. Line the base interior floor with a thin sheet of green felt, topped with glued preserved sheet moss and tiny faux terracotta floor tiles arranged in a grid pattern. Craft tiny miniature plant displays by gluing micro-sized clay pots filled with preserved moss and tiny pastel paper flowers onto a small wooden potting bench. Train artificial micro-ivy and pale pink climbing roses up the structural window mullions and roof beams using tiny dabs of clear hot glue. Install a string of warm white micro-LED fairy lights along the inner roofline, running the wiring down the back corner to an exterior battery pack affixed under the base.
Vertical Wall Sconce Miniature Garden
Design Foundations
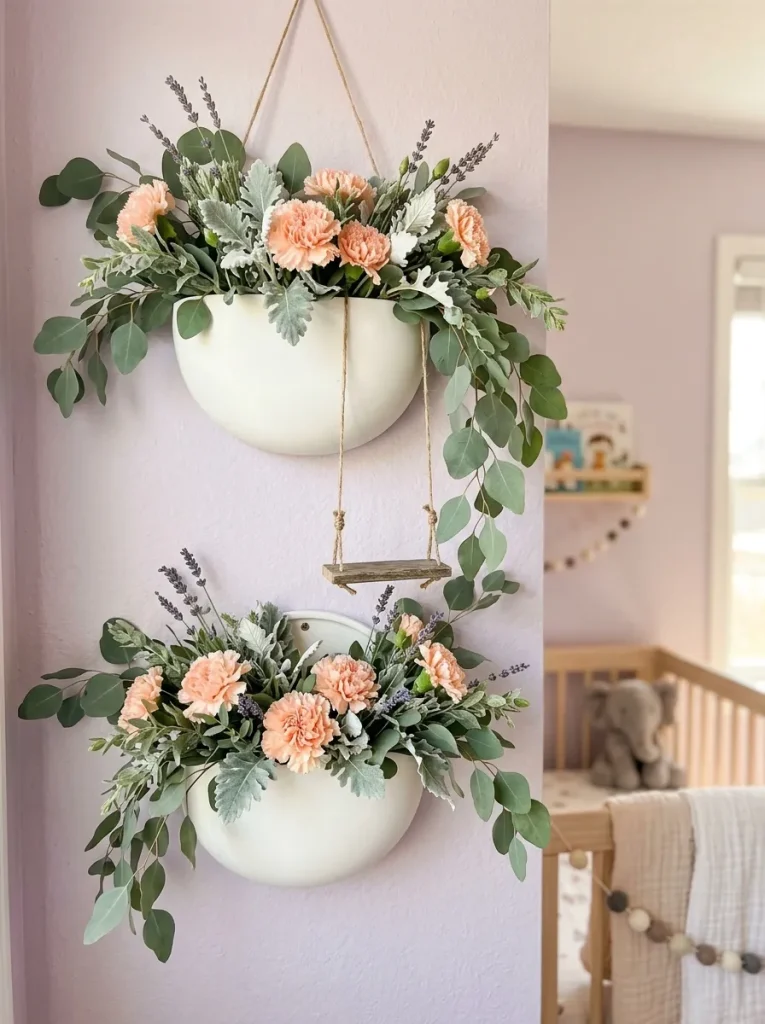
Vertical wall sconce fairy gardens utilize decorative wall-mounted pocket planters, half-round metal troughs, or wooden wall pockets to create elevated floral arrangements directly on drywall surfaces. This format maximizes functional nursery space by removing decorative items from flat furniture surfaces entirely, creating an eye-level artistic feature. The vertical orientation allows trailing pastel greenery and delicate silk blossoms to cascade downwards, softening wall edges and adding organic movement to the nursery perimeter. Wall sconce gardens can be installed in symmetrical pairs flanking a large window, dresser mirror, or wall quote, framing architectural elements with soft pastel color blocking and charming storybook accents.
Setup Method
Select a pair of semi-circular wooden or matte-white metal wall pockets designed for interior wall hanging, ensuring each has integrated mounting holes. Secure a tailored block of floral foam inside each pocket, trimming the foam to sit one half-inch below the front lip of the container. Push dense trailing faux greenery—such as silver dollar eucalyptus, string of pearls, and pale maidenhair fern—into the front edge of the foam so it drapes naturally down the front. Fill the upper center of the foam block with clustered pastel silk florals, including pale peach carnations, cream daisies, and soft lavender sprigs. Position a tiny wooden fairy swing suspended by jute twine from the upper floral stems, seating a miniature resin fairy figurine securely onto the swing base with glue. Mount the pocket planters to the wall using drywall anchors and decorative screws, positioning them well above crib height for optimal visibility and safety.
Common Beginner Mistakes and How to Avoid Them
A frequent mistake when designing a nursery fairy garden is failing to secure small decorative items, loose stones, and preserved moss properly to the container base. In an infant or toddler environment, unsecured components present severe choking hazards if the display is accidentally bumped or reached; every miniature component must be permanently anchored using non-toxic adhesives or enclosed behind protective transparent cloches. Another widespread error is utilizing live, moisture-dependent plants without proper drainage or pest management protocols, which can lead to mold growth, standing water hazards, and elevated nursery humidity. To prevent this issue, opt for high-grade preserved botanicals or realistic silk florals that require zero watering and produce no organic decay. Additionally, decorators often choose overly saturated, bright primary colors that disrupt the serene, calming ambiance required in an infant sleep environment. Always select desaturated, soft pastel shades such as blush, mint, lavender, and buttercup, which harmonize naturally with neutral room furnishings while fostering a relaxing and peaceful atmosphere for your baby.
Practical Tips for Better Results
Achieving a polished, professional look in your nursery fairy garden requires meticulous attention to scale, proportion, and lighting integration. Always select miniature accessories that adhere to a consistent scale—such as standard 1:12 dollhouse scale—to ensure that cottages, benches, fences, and figurines appear natural and harmonious when placed side by side. When arranging floral components, layer varying petal textures and foliage sizes, placing larger blossoms near the back or base and delicate micro-blooms along the perimeter to create natural depth. Incorporate warm-temperature LED lighting (between 2700K and 3000K) rather than cool white or blue-tinted lights to maintain a warm, inviting glow that functions effectively as a gentle nightlight during late-night feedings. Ensure that all electrical wiring remains completely hidden beneath moss or within container cavities, utilizing battery-operated light sets equipped with automated six-hour timers to conserve battery life and ensure effortless daily operation without disturbing a sleeping child.
Styling, Presentation, or Organization Ideas
Integrating a fairy garden into your overall nursery aesthetic requires thoughtful spatial placement and visual coordination with surrounding furniture and textiles. Position your primary garden display on a high floating shelf, wide dresser top, or secure wall niche where it can be appreciated from the room entrance and nursing chair without obstructing daily care routines. Echo the pastel tones of your fairy garden across room textiles by choosing crib sheets, muslin swaddles, window drapes, and floor rugs in matching blush, sage, and pale lavender shades. For a cohesive thematic presentation, style surrounding wall areas with delicate watercolor botanical prints, framed pressed flower art, or minimalist wooden wall hooks holding pastel swaddle blankets. Group smaller decor items on adjacent shelving in odd numbers—such as pairing a small cloche garden with two ceramic bunny figurines—to establish balanced visual weight and maintain an uncluttered, modern nursery environment.
Budget or Time Planning
Creating an enchanting pastel fairy garden for your nursery is an exceptionally cost-effective DIY project that can be completed over a single weekend with minimal financial investment. Basic supplies—such as high-density floral foam, preserved moss, silk pastel flowers, and miniature wooden accessories—can be sourced affordably from local craft stores, thrift outlets, or online suppliers for a total project cost ranging between twenty-five and sixty dollars. In terms of scheduling, dedicate two hours on the first day to cleaning vessels, painting wooden structures with non-toxic finishes, and allowing all base coats to cure fully. On the second day, spend approximately one to two hours cutting foam, inserting floral stems, adhering miniature figurines, and weaving micro-LED lighting through the botanical base. Batching the project across two short afternoon sessions prevents rushing and ensures all glues, paints, and structural mounts set with maximum strength and durability before final installation in the room.
Creative Expansion and Advanced Inspiration
Once you have mastered basic nursery fairy garden construction, you can expand the concept into dynamic seasonal variations and interactive child-safe nursery features. Consider updating the floral elements seasonally by swapping soft spring pastels for warm peach and cream blooms in the summer, or integrating frosted miniature evergreen sprigs and tiny faux pinecones during winter months. Advanced decorators can build integrated sound modules into large wooden planter displays, concealing a miniature white noise machine or soothing lullaby speaker within the moss base to assist with infant sleep routines. As your child transitions from an infant into a toddler, you can convert high-wall displays into an interactive sensory table by mounting larger, non-toxic wooden fairy elements and felt flowers onto a low play table for supervised imaginative play. Furthermore, carrying the pastel botanical aesthetic onto adjacent closet doors using hand-painted floral trim or pastel botanical stencils unifies the entire room into an immersive, storybook garden environment.