
10 Privacy Screen and Divider Hacks for Bedroom Workspaces
Creating a dedicated workspace within a personal bedroom requires balancing functionality, privacy, and aesthetic harmony. As remote work and flexible study environments become standard home requirements, dividing multi-purpose sleeping areas has become a central challenge for modern interior planning. A privacy screen or room divider serves as a physical barrier that defines boundaries, reduces visual clutter during virtual meetings, and isolates work-related stress from rest areas. Incorporating structured layout strategies helps maximize limited floor space without requiring permanent structural alterations or high costs. This comprehensive guide details practical DIY tutorials, aesthetic design strategies, and beginner-friendly material choices aimed at establishing a distinct, focused workspace inside any bedroom setup. Readers will gain actionable step-by-step instructions for constructing custom partition systems, selecting appropriate textiles and structural frames, and maintaining visual flow across both functional zones. By using accessible tools, lightweight lumber, and versatile home decor elements, transforming an open bedroom into a dual-purpose retreat becomes a straightforward project that yields long-term daily productivity and organizational benefits.
Why Workspace Dividers Are Trending in Modern Home Decor
The rising popularity of bedroom workspace partitions on platforms like Pinterest reflects a growing demand for adaptable, space-efficient living arrangements. Modern aesthetic trends prioritize clean visual boundaries and multifunctional room designs, making stylish dividers essential features rather than mere quick fixes. Beyond visual appeal, room screens serve vital practical roles by minimizing visual distractions from ambient living spaces, shielding background clutter during video conferences, and supporting mental transitions between work routines and personal relaxation. For renters and individuals in smaller living spaces, temporary or mobile divider systems offer an accessible path to functional zoning without structural wall construction. The DIY appeal of these projects stems from their versatility, as basic wood frames, fabric panels, or hanging tracking hardware can be customized to match any interior theme—from minimalist style to warm organic aesthetics. With clear planning, basic tools, and budget-friendly materials, creating custom workspace dividers remains an approachable project for builders of all skill levels seeking tailored interior organization.
Essential Materials and Project Preparation
Executing a successful privacy screen build requires careful site measurement, thorough material assessment, and deliberate workspace setup before construction begins. First, measure floor space and ceiling height accurately to determine screen dimensions, ensuring appropriate clearance for lighting fixtures, ceiling fans, and clear walking paths. Choose structural materials based on desired mobility, light transmission, and privacy levels; common options include light timber studs, aluminum curtain tracks, stretched canvas, woven bamboo panels, or freestanding room dividers. Essential assembly tools include a tape measure, spirit level, hand saw or miter saw, cordless power drill, appropriate fasteners, wood glue, sanding blocks, and mounting hardware tailored to specific wall or ceiling types. Surface prep work, such as sanding raw lumber to a smooth finish and applying protective paints, stains, or fabric treatments, should always take place before final installation. Organizing all structural parts, fasteners, and safety gear beforehand ensures an efficient assembly process, minimizing unexpected layout issues and leading to a durable workspace partition.
Free-Standing Wooden Lath Partition
Natural Timber Slat Design Concept
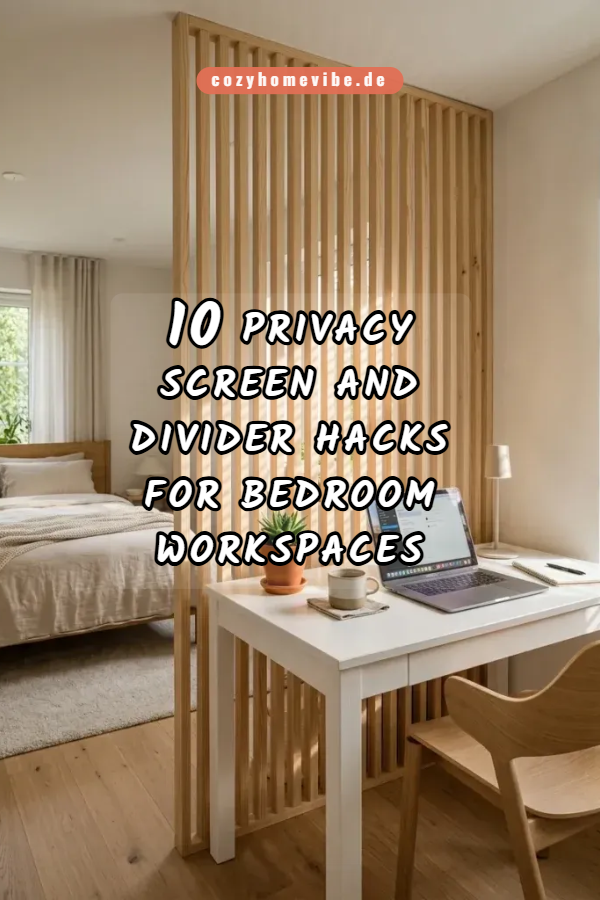
A free-standing wooden lath partition offers a clean, architectural approach to dividing a bedroom workspace while preserving continuous light flow throughout the room. Built from tall, vertical timber slats secured to top and bottom horizontal rails, this design provides effective visual separation without completely darkening the adjacent desk area. The rhythmic spacing between the slats creates an open, textured barrier that fits seamlessly into modern minimalist or Scandinavian-inspired decor schemes. Using lightweight softwoods like pine, fir, or poplar keeps the structure stable yet light enough to position or shift without damaging floor surfaces. The natural wood grain introduces warmth and texture to personal sleeping areas, softening the technical look of computer monitors, desk cables, and office equipment. Beyond its visual appeal, the spaced-slat design allows air to circulate freely across zones, preventing heat buildup around electronics and maintaining a comfortable working climate. Customizing slat width, thickness, and finish colors allows this project to adapt easily to varying room scales and interior palettes.
Step-by-Step Construction Guide
To construct a free-standing wooden lath partition, begin by measuring room height to establish total divider dimensions, deducting two inches to ensure adequate ceiling clearance during movement. Cut two matching horizontal base rails and two top rails from solid two-by-four timber to define the overall panel width. Measure, mark, and cut vertical wooden laths of equal length, using a spacer block to ensure uniform distance between each vertical timber slat along the frame. Secure each lath flush between the top and bottom support rails using wood glue and countersunk wood screws, checking frame squareness continuously with a carpenter square. Sand all wooden surfaces thoroughly with medium-grit followed by fine-grit sandpaper to remove rough edges, preparing the timber for uniform stain or paint application. Seal the completed assembly with clear polyurethane, matte lacquer, or protective furniture wax to preserve the finish against dust and daily contact. Attach heavy-duty felt pads or rubber non-slip feet to the underside of the bottom base rail to protect bedroom flooring from scratches and maintain structural stability during daily use.
Suspended Textile Curtain Barrier
Fabric Divider Design Concept
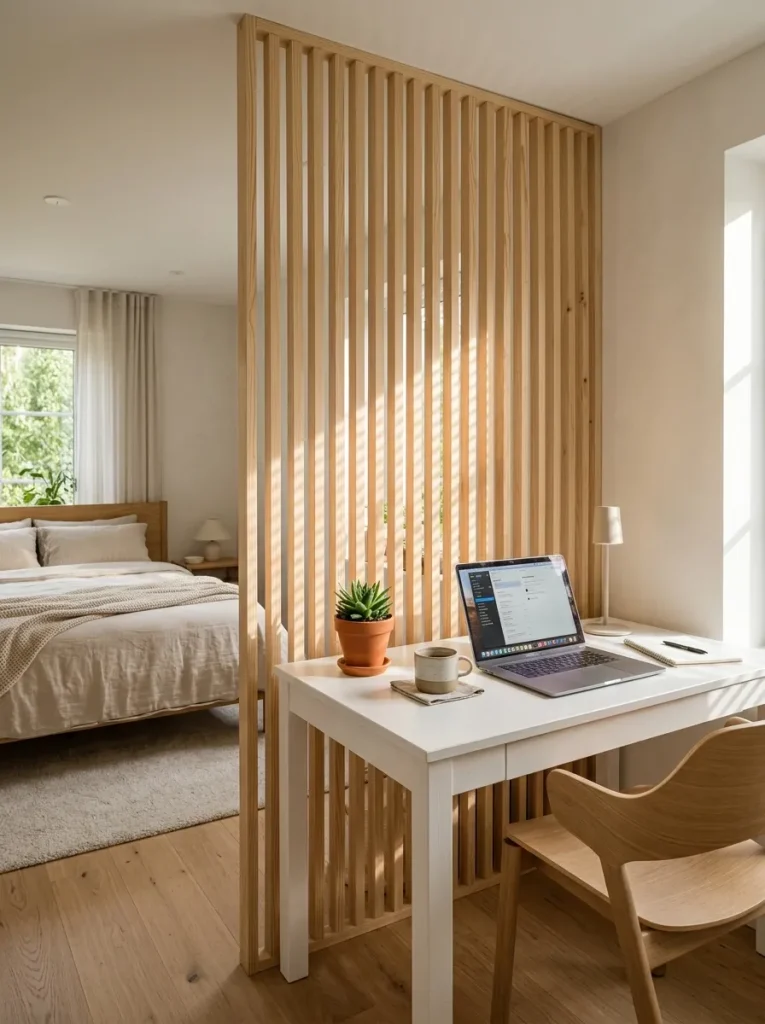
A suspended textile curtain barrier provides a flexible, soft-structured method for separating a bedroom workspace without taking up valuable floor space. Utilizing ceiling-mounted tracking or sturdy tension rods, this approach enables instant transition between an open, unified room layout and a completely private office zone. Heavyweight fabrics like linen, canvas, velvet, or dense cotton block visual clutter and help dampen ambient sound, creating a quieter, more focused micro-office environment. Light-toned fabrics maintain an airy, expansive feel within compact bedrooms, while darker or textured textiles add a striking focal point that anchors the work zone. Suspended textile screens excel in rental spaces, as track hardware requires minimal wall drilling and can be uninstalled cleanly when moving. Because fabric hangs loosely from above, it avoids interrupting floor paths and accommodates tight desk configurations where traditional floor screens might prove too bulky. Combining shear inner layers with opaque outer drapes gives users multi-tiered control over privacy, ambient light diffusion, and overall visual balance.
Ceiling Mounting Process
Begin the suspended textile barrier project by marking a straight reference line across the bedroom ceiling using a tape measure, chalk line, and spirit level to ensure precise parallel placement relative to the desk setup. Secure heavy-duty aluminum curtain track sections or ceiling flanges into solid ceiling joists using strong wood screws and washers. When joists are unavailable at the preferred location, install toggle bolts or heavy-duty drywall anchors capable of supporting continuous fabric weight without sagging or pulling free over time. Trim fabric panels to the required length, allowing a one-inch hover above the floor line to keep hem edges clean and prevent dust accumulation during daily operation. Hem all cut edges neatly with high-strength thread, sewing heavy curtain tape, grommets, or durable hanging rings directly along the top border of the fabric. Attach rolling track gliders or curtain rings securely to the installed top track, then slide curtain hangers into place to test operation smooth across the track span. Finish by steaming or ironing out fabric wrinkles, ensuring the curtain hangs straight, slides easily, and provides full visual privacy when drawn around the workspace.
Hanging Rattan and Macrame Screen
Bohemian Textured Divider Concept
A hanging rattan or macrame screen brings an organic, craft-inspired feel to bedroom workspace organization, blending functional space separation with artistic visual appeal. Handcrafted textile patterns, open-weave fiber panels, and natural rattan frames filter bright sunlight softly, reducing glare on computer screens without casting dark shadows over the desk area. This lightweight design hangs securely from ceiling hooks or a slender overhead wooden beam, floating gracefully above the floor to maintain an open, spacious room layout. The intricate knots and woven fibers bring rich textural interest into the bedroom, softening sharp desk geometry and electronic devices behind a natural craft screen. Rattan and macrame components integrate easily with indoor plants, warm wood accents, and neutral color schemes, making them an ideal choice for relaxed home decor styles. Because these screens are semi-opaque, they provide a gentle visual boundary that clearly marks workspace limits while preserving the overall airiness and light of the surrounding room.
Assembly and Hanging Technique
Constructing a hanging rattan and macrame screen starts with securing a smooth hardwood dowel or thick bamboo pole that spans the intended width of your workspace separation zone. Knot high-quality cotton cord or jute rope along the main horizontal dowel using simple larks head knots to establish the foundation for woven decorative macrame panels. Work downwards across the cord array, knotting alternating square knots and spiral patterns to form a sturdy, structured geometric grid that offers balanced privacy and decorative detail. Integrate lightweight framed rattan rings or pre-cut woven cane webbing sheets into the lower cord sections, securing them with tight cord wraps or sturdy binding twine. Measure ceiling anchor points carefully above the workspace edge, drilling deep pilot holes directly into ceiling joists to install strong steel screw hooks securely. Fasten heavy-duty hanging ropes or solid brass chains to each end of the top support dowel, lifting the woven assembly onto the ceiling hooks with helper assistance to verify balanced leveling. Trim excess hanging cord ends uniformly, finish lower fringe edges with a comb, and apply a light misting of textile protector to resist dust accumulation over time.

Folding Louvre Shutter Screen
Classical Louvered Screen Concept
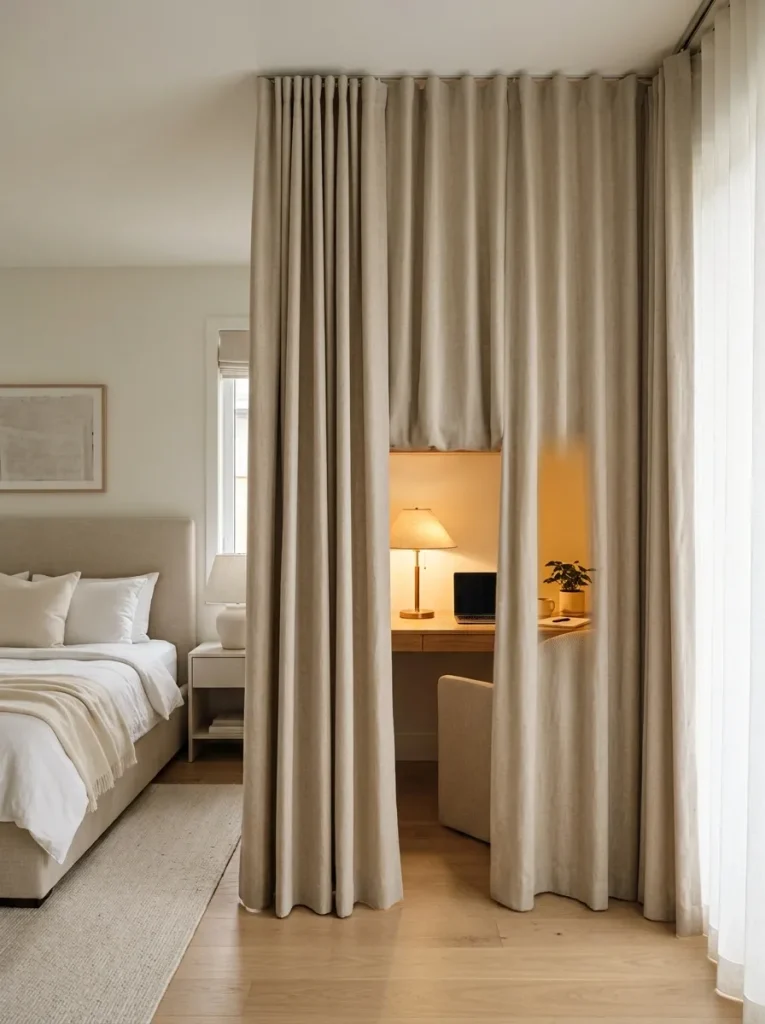
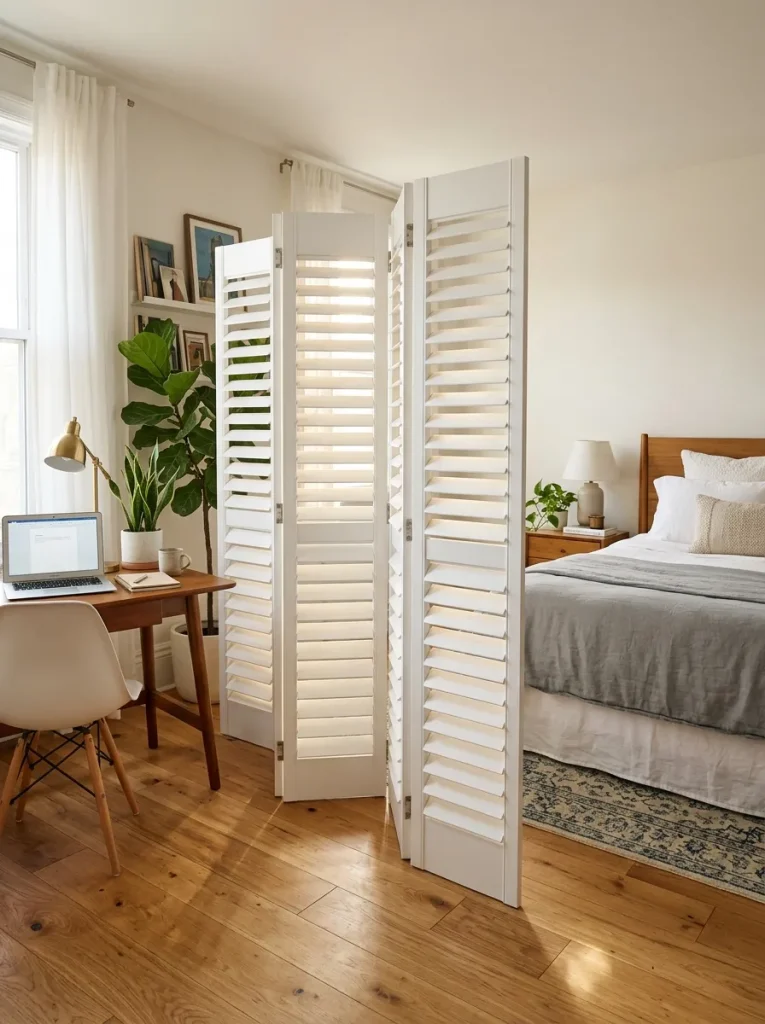
A folding louvre shutter screen brings timeless architectural character, versatile ventilation, and reliable privacy to bedroom workspace configurations. Built using hinged traditional louvered door panels, this classic room divider offers adjustable angle control over natural light transmission, airflow, and line-of-sight protection. Angled horizontal slats block direct view of work-related clutter from the bed area while allowing natural breezes and ambient light to filter through cleanly. The folding design allows users to collapse the entire divider stack against an adjacent wall when the desk is not in use, instantly restoring the open bedroom environment. Durable wooden or composite louvered screens provide solid physical separation, dampening desk acoustics and blocking background room movement during video calls. The panel surfaces accept various paint finishes, allowing easy styling with crisp whites, deep accent colors, or distressed vintage washes that complement surrounding bedroom furnishings. This modular multi-panel setup works well across diverse space shapes, making it a flexible investment for temporary living setups and long-term home offices alike.
Panel Assembly and Hinging Guide
To assemble a custom folding louvre shutter screen, acquire three or four standardized solid wood shutter panels of matching height, width, and frame thickness from a local building supply center. Lightly sand all panel surfaces, louvers, and frame edges using fine-grit sandpaper to remove rough spots, clear manufacturing dust, and ensure optimal paint or stain adhesion. Apply two coats of high-quality interior paint, wood stain, or protective seal coating, allowing thorough drying time between coats to create a smooth, durable, moisture-resistant finish. Lay the dry panels flat on a clean padded floor surface, aligning bottom edges precisely to ensure smooth movement across the floor once hinged together. Mark hinge placements approximately six inches from top and bottom panel edges, positioning three double-acting or bi-fold hinges evenly along each connecting side seam. Secure hinges using included wood screws, ensuring alternating hinge directions between adjacent panels to enable smooth accordion folding upon completion. Stand the connected shutter assembly upright, adjust panel angles into a stable zig-zag position across the floor, and fit non-marring rubber bumpers under outer corners to guard against floor sliding.
Modular Cube Storage Partition
Functional Shelving Screen Concept
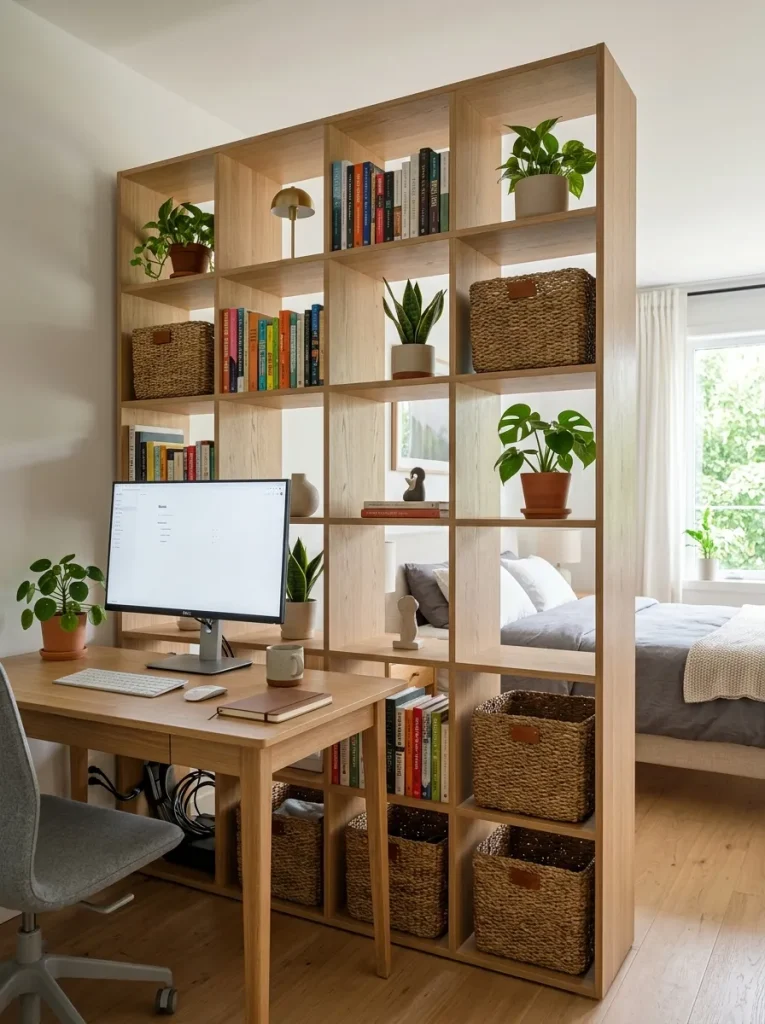
A modular cube storage partition serves as a double-sided functional divider, combining effective workspace privacy with practical storage space for books, craft materials, and decorative accessories. Positioned perpendicular to an exterior wall, open-back cube shelves clearly separate sleeping and working zones while keeping both areas open, bright, and uncluttered. Open shelving allows light to pass through while offering versatile storage spaces accessible from both sides of the divider screen. Office supplies, file binders, and reference materials fit neatly on lower shelves near the desk, while decorative items, trailing plants, and warm ambient lamps fit beautifully on top surfaces. Modern manufactured laminate finishes and solid timber options ensure this divider style pairs easily with contemporary bedroom furniture and minimalist styling themes. By using removable storage bins, canvas baskets, or decorative inserts within selected cube openings, users can adjust screen transparency levels to fit changing privacy needs.
Assembly and Anchoring Tutorial
Construct a modular cube storage partition by assembling pre-cut engineered wood shelf components using manufacturer hardware, wood glue, and a rubber mallet following included structural assembly diagrams. Place the assembled shelving unit in position perpendicular to the chosen bedroom anchor wall, using a spirit level to verify vertical plumbing and horizontal surface alignment. Because free-standing cube units present tipping risks when fully loaded, anchor the assembly securely to wall studs using heavy-duty L-brackets or safety anti-tip furniture straps attached near top corners. Conceal hardware using matching screw covers, veneer edge tapes, or hidden corner bracing behind interior shelf walls for a neat finish. Populate lower shelves with heavier items such as books, file boxes, and storage bins to lower the unit center of gravity and maximize structural stability. Organize upper shelf cubes with light decor pieces, decorative glass vases, trailing plants, and framed artwork to maintain visual lightness across the top half of the divider. Check all anchoring hardware annually to ensure screws remain tight, keeping the functional storage partition secure and stable during daily use.
Framed Canvas Art Screen
Architectural Canvas Screen Concept
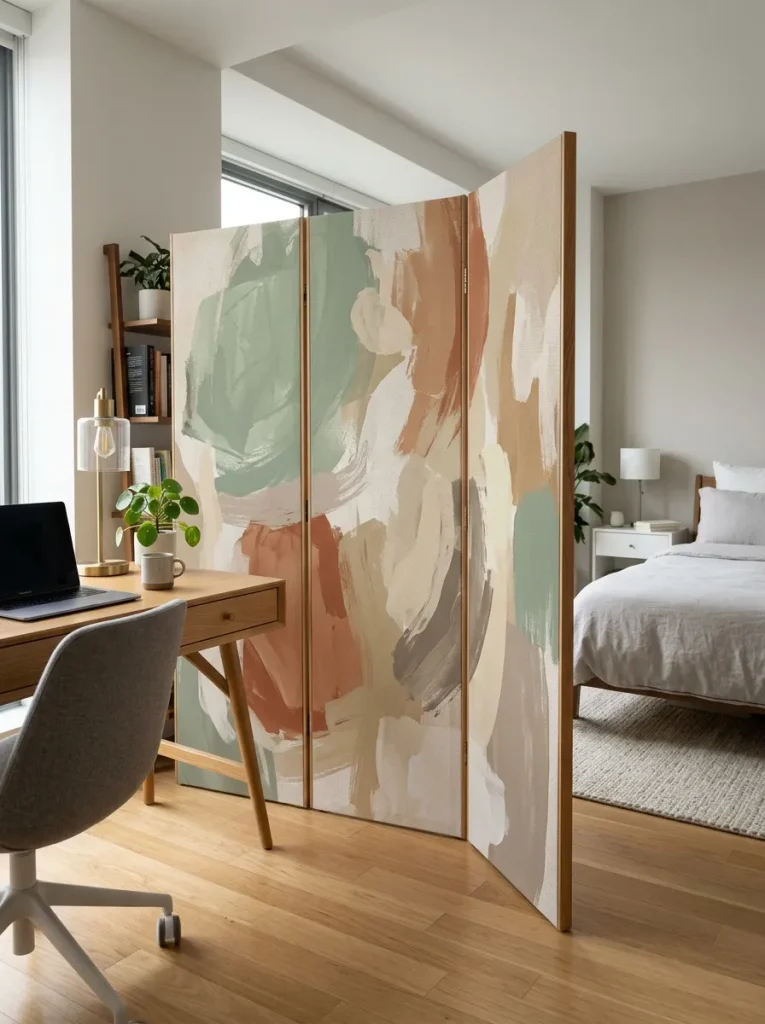
A framed canvas art screen acts as a bold architectural barrier, providing complete visual privacy between a bedroom workspace and sleeping areas while serving as large-scale artwork. Constructed with stretched artist canvas mounted over tall lightweight wooden frames, this divider blocks direct line of sight completely, hiding office clutter and video call backgrounds effectively. Smooth canvas surfaces offer endless customization options, from hand-painted abstract murals and geometric color blocking to simple neutral fabric wrapping that matches surrounding bedroom decor. The lightweight frame construction makes moving or repositioning the panel effortless, allowing quick layout shifts whenever bedroom needs change. Double-sided stretching techniques let you feature custom painted designs facing the bedroom relaxation side, while keeping the desk-facing side plain, functional, or pin-ready for notes. Additionally, the taut canvas fabric helps absorb high-frequency sound reflections, improving microphone audio quality during virtual meetings and calls.
Frame Building and Canvas Stretching
Build a custom canvas art screen by constructing three light wood outer frames using clear two-by-two pine studs cut cleanly to chosen height and width specifications. Join frame corners securely using pocket-hole screws, wood glue, and right-angle corner clamps, verifying squareness by measuring diagonal distances across opposite corners. Sand raw wood frames smooth, then apply light upholstery batting across front surfaces to create a padded backdrop under the canvas overlay. Unroll heavy cotton duck canvas over a clean surface, place a wood frame face down on top, and pull the canvas taut over frame edges using specialized canvas stretching pliers. Secure canvas edges to the back of the timber frame using a heavy-duty staple gun, working outward from center points to corners while maintaining even tension across the face. Fold corner canvas folds cleanly to prevent bulky seams, securing trailing edges with additional industrial staples along back frame margins. Connect individual stretched canvas panels using bi-fold door hinges, and apply custom interior acrylic paints or canvas sealer before placing the screen between your workspace and bedroom.
Industrial Pipe and Sheer Curtain Framework
Modern Industrial Partition Concept
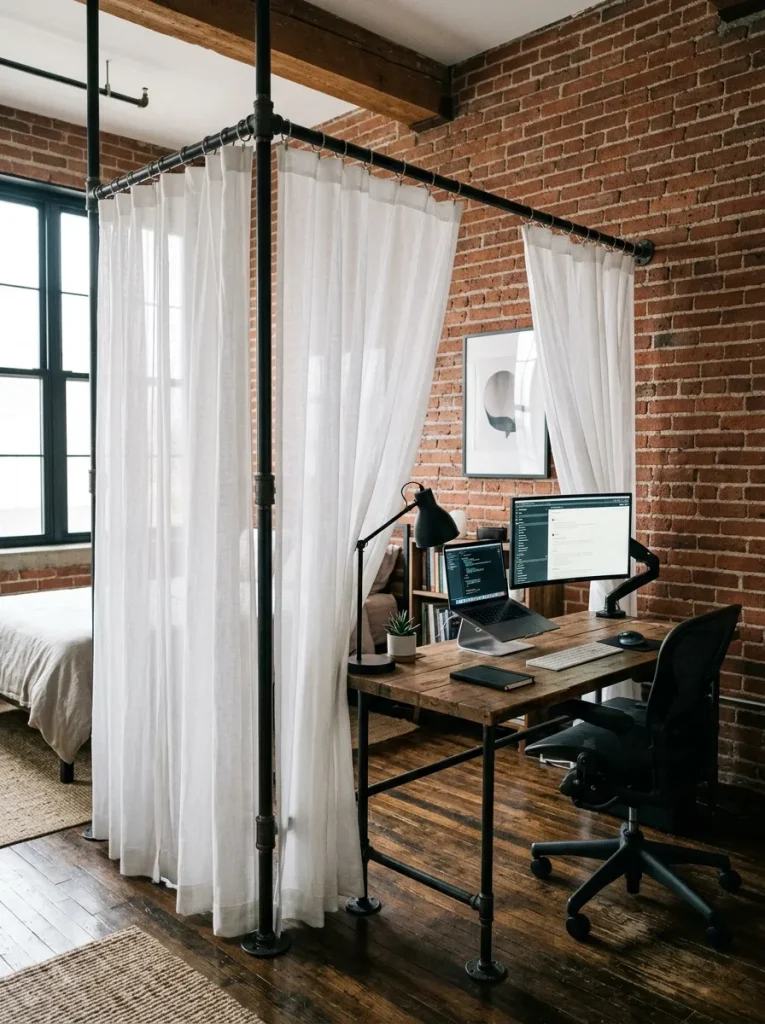
An industrial pipe and sheer curtain framework introduces an urban, architectural accent to bedroom workspaces while creating a light, flexible partition system. Built from metal plumbing pipes, malleable iron fittings, and lightweight sheer curtain panels, this divider frame offers exceptional strength, structural stability, and a modern aesthetic. The matte black or metallic pipe framework provides sharp, clean outlines, offsetting soft woven drapery to complement modern, loft-style, or industrial interior themes. Sheer fabric panels soften harsh sunlight, diffusing glow over computer screens while maintaining visibility across the room so sleeping spaces do not feel small or enclosed. Pipe frame systems customize easily to fit specific ceiling heights, floor lengths, and layout angles, making them a strong solution for unusual room shapes. Simple threaded fitting connections allow for straightforward assembly, adjustment, or disassembly, offering renters and homeowners a durable, customizable workspace division option.
Pipe Framing and Hanging Setup
Construct an industrial pipe divider by threading black iron or galvanized steel pipe lengths into three-way tees, ninety-degree elbows, and solid floor flanges to form a sturdy rectangular frame. Secure floor flanges tightly to round wooden floor pads or rubber bases to prevent metal pipes from scratching floor surfaces or sliding out of alignment. Lightly sand all metal pipe surfaces with steel wool, wipe away oil residue with isopropyl alcohol, and spray on two coats of matte black metal paint for a clean, rust-resistant finish. Allow paint to cure fully before sliding sewn sheer curtain panels onto top horizontal pipe runs, gathering fabric evenly across the span to create elegant visual folds. Thread remaining elbow joints and vertical support legs together tightly using pipe wrenches, verifying overall structural squareness with a spirit level throughout assembly. Position the heavy pipe divider securely along the workspace perimeter, using small wall-clamping brackets attached to wall studs near top frame corners to prevent accidental tipping. Adjust curtain gathers evenly across upper pipe rods, ensuring smooth movement when opening or closing the sheer divider screen around your workspace.
Hanging Greenery Wall Screen
Botanical Divider Concept
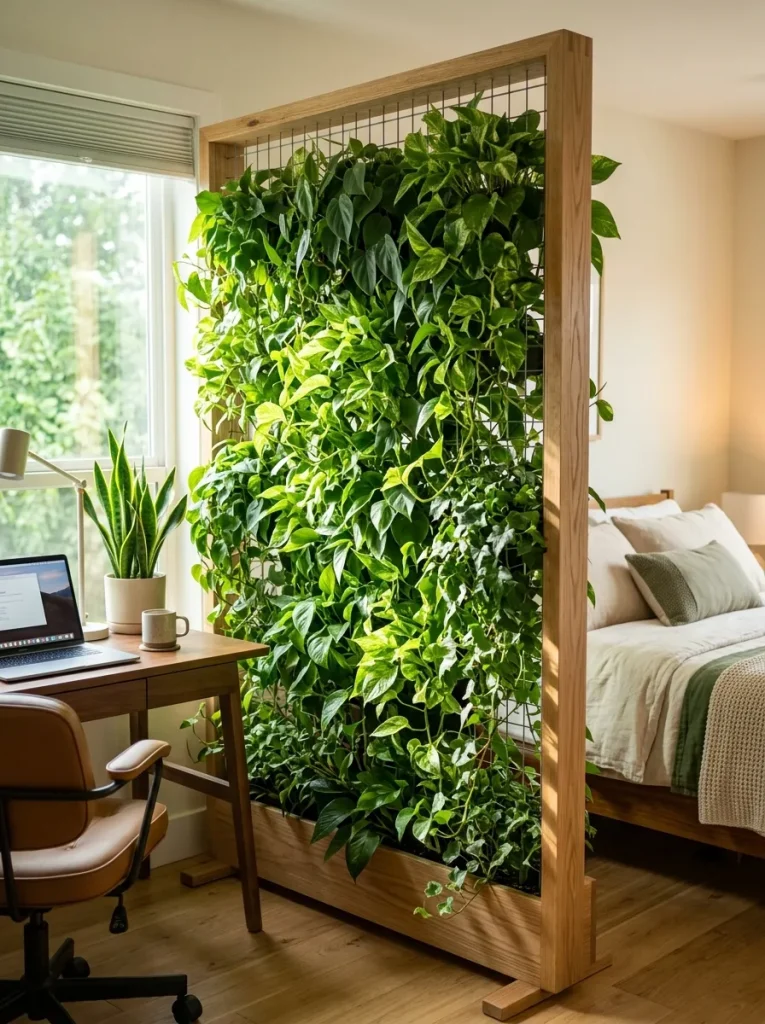
A hanging greenery wall screen establishes a vibrant, living barrier between a bedroom workspace and sleeping quarters, introducing natural elements that boost mood, air quality, and visual comfort. Using cascading indoor plants, hanging planter boxes, or high-quality faux botanical panels suspended within a wooden or metal frame, this design transforms standard space division into a lush feature wall. Living plants improve indoor air quality by absorbing pollutants and producing oxygen, creating a healthier, more energizing work environment within compact living spaces. The natural density of foliage absorbs ambient sound, reducing echoes during phone calls and softening machinery noise from desktop computers and printers. Densely packed leaves filter sunlight softly, casting gentle shadows across the desk area while completely blocking direct views of work papers and computer screens from the bed. Whether using living tropical vines like pothos and philodendrons or low-maintenance artificial foliage panels, a green screen wall brings natural beauty, privacy, and calm to multi-purpose bedroom layouts.
Frame Construction and Plant Installation
Build a hanging greenery wall screen by constructing a tall timber outline frame using pressure-treated or sealed cedar two-by-four posts assembled with heavy-duty wood screws and metal corner brackets. Mount rigid metal mesh fencing or heavy-duty wire grid panels securely inside the inner perimeter of the wooden frame using insulated metal staples or pipe clamps. Secure the framed assembly vertically by attaching top corners to ceiling joists using strong eye-bolts and steel support chains, or set the frame into a weighted floor base box for stability. Attach lightweight plastic planter boxes or ceramic hanging pots across the wire grid matrix using sturdy S-hooks, stainless steel cable ties, or custom wire hangers. Fill planters with well-draining potting mix and cascading tropical plants like ivy, pothos, or heartleaf philodendron, spacing plant pots evenly to encourage dense leaf growth across grid surfaces. Install a shallow drainage tray or drip catch pan beneath the bottom planter tier to catch excess water during plant care, keeping bedroom flooring dry and clean. Alternatively, attach pre-assembled artificial hedge mats directly onto the wire matrix using matching green cable ties for an instant, maintenance-free privacy barrier.
Pegboard Utility Screen
Functional Tool Wall Concept
A pegboard utility screen combines adaptable privacy screening with high-capacity tool and office storage, turning an empty space divider into an efficient workspace backdrop. Built from thick perforated hardboard or metal pegboard sheets mounted within a self-supporting wooden frame, this system provides a sturdy barrier that completely blocks visual distractions between sleep and work zones. Thousands of uniform peg holes allow easy mounting of movable hooks, metal shelves, hanging baskets, and task lighting fixtures directly onto the screen surface facing the desk. The desk-facing side organizes office supplies, hardware cables, reference notes, and headphones, while the back surface can display framed photos, art prints, or woven tapestries facing the rest of the bedroom. This double-sided versatility maximizes vertical wall space in small apartments, eliminating desk clutter and maintaining clean, organized surfaces for daily tasks. The solid wood framing prevents panel flexing, creating a reliable, long-lasting storage and privacy system tailored to busy creative professionals, students, and home crafters.
Frame Assembly and Hook Layout
Begin constructing a pegboard utility screen by cutting a standard four-by-eight-foot sheet of heavy-duty perforated pegboard to match your calculated workspace width and height requirements. Build a sturdy surrounding base frame using clear pine two-by-four timber, incorporating a continuous center groove or rear offset furring strips to ensure half-an-inch of clearance behind peg holes for hook insertion. Attach the pegboard panel securely to the timber frame using wood screws and wide washers spaced every eight inches along outer margins, checking squareness throughout installation. Paint or stain the frame and pegboard using durable enamel paints, allowing surfaces to cure completely before mounting hardware or accessories. Attach wide horizontal foot assemblies perpendicular to the bottom frame, reinforcing connections with heavy steel corner braces to build a stable freestanding screen structure. Place the screen alongside your desk, arranging metal pegboard hooks, hanging shelf brackets, and wire baskets to store office supplies within easy reach. Hang decorative framed art or lightweight wooden display crates on the bedroom-facing side using specialized pegboard anchors, completing a practical, double-sided utility divider.

Sliding Barn Door Style Divider
Track-Mounted Sliding Barrier Concept
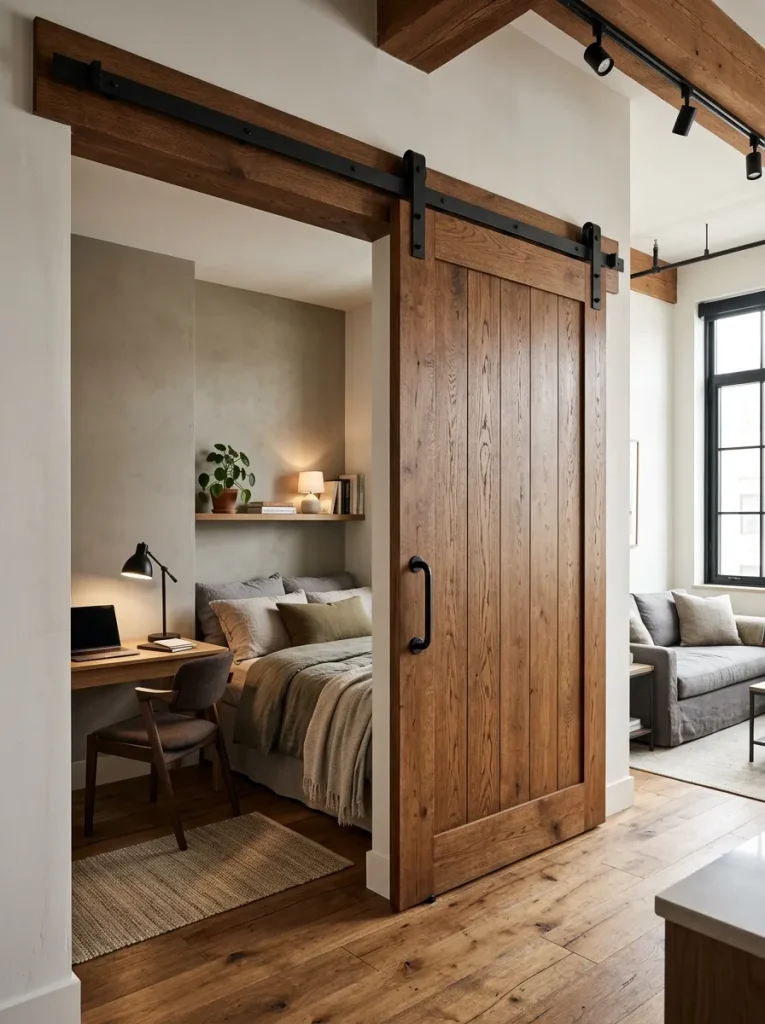
A sliding barn door style divider offers a smooth, high-impact architectural solution for enclosing a bedroom workspace, combining solid structural isolation with effortless space manipulation. Mounted on an overhead steel track anchored to ceiling joists or structural wall framing, solid wood or composite door panels slide smoothly parallel to desk borders without taking up floor space. When closed, solid door panels form a full physical wall that blocks desk clutter, dampens equipment noise, and creates complete visual privacy during rest hours. During non-work hours or when continuous light is preferred, the door glides open smoothly along the top track, re-establishing an open, spacious bedroom layout. Heavy timber finishes add a rustic, industrial, or modern architectural focal point, while lighter painted panels blend seamlessly into existing wall colors. This sliding design eliminates swing clearance demands of traditional hinged doors, making it an ideal choice for tight bedroom corners and narrow home office layouts where space management is critical.
Overhead Track Installation Guide
To install a sliding barn door workspace divider, locate structural ceiling joists or wall studs along the divider path using an electronic stud finder, marking anchor points with a pencil line. Secure a solid wood backing board tightly into studs using heavy-duty lag bolts, creating a flat mounting platform for metal sliding door hardware. Fasten the steel sliding track level onto the backing board using included spacers, lag screws, and heavy washers, ensuring smooth, unhindered roller wheel movement along the track span. Assemble or paint solid wood door panels, fastening top roller wheel brackets through upper door edges using included bolts and locknuts tightened securely with wrenches. Lift the door panel carefully with helper assistance, hanging roller wheels onto the steel track, and attach bottom anti-jump discs to prevent accidental track derailment during operation. Fasten a adjustable floor guide bracket directly into the floor surface at the outer movement boundary, keeping sliding panels plumb and preventing swinging during motion. Position adjustable rubber door stops at both ends of the top steel track, tightening set screws to secure door travel within safe limits.
Common Beginner Mistakes and How to Avoid Them
Constructing workspace screens often involves simple errors that affect structural stability, overall utility, and bedroom appearance. A frequent mistake is taking inaccurate ceiling and floor measurements, which leads to ill-fitting partitions that tip over easily or scrape ceiling surfaces during movement. Always double-check measurements, account for carpet depth or floor unevenness, and leave necessary operational clearances before cutting framing timber or ordering hardware tracks. Another common oversight is failing to anchor tall freestanding screens securely, creating safety risks in high-traffic room areas. Prevent stability issues by adding wide base feet, securing top frames to wall studs, or using rated ceiling toggle anchors. Builders also frequently overlook light diffusion, inadvertently choosing dark, heavy panels that block natural light and leave desk areas uncomfortably dim. To avoid dark workspaces, combine solid privacy bases with semi-transparent upper sections like open slats, sheer fabrics, or glass panels to balance light and privacy. Finally, skipping surface sanding and sealing treatments leaves raw wood prone to splintering, warping, and moisture damage over time.
Practical Tips for Better Results
Achieving professional results with DIY workspace screens requires careful attention to detail, proper surface preparation, and quality construction practices. Select straight, kiln-dried timber studs at the hardware store to prevent screen warping, twisting, or panel bowing after home installation. Sand all wooden components with progressively finer sandpaper grits, removing surface imperfections before applying paints, stains, or protective clear coats. Incorporate felt padding or non-slip rubber mats underneath bottom base frames to protect hardwood and carpeted floors from scratches, scuffs, and shifting during daily use. When installing ceiling-mounted track hardware or heavy hanging screens, anchor fittings directly into structural joists, or use high-capacity toggle anchors to prevent pull-out under heavy loads. Balance functional privacy needs against room brightness by combining opaque lower materials with open slat, woven textile, or sheer fabric upper panels. Finally, paint or stain your custom divider screen using colors that complement existing bedroom furniture, unifying your workspace layout and enhancing overall room aesthetic harmony.
Styling, Presentation, and Organization Ideas
Styling your workspace screen thoughtfully transforms a basic utility divider into an appealing aesthetic feature within your bedroom. Paint the bedroom-facing side in soft, relaxing shades like muted sage green, warm beige, or gentle off-white to create a tranquil background that encourages restful sleep. Use the desk-facing side as an efficient productivity surface, mounting task lighting fixtures, pin boards, floating shelves, and cable channels directly onto screen framing. Hang lightweight framed artwork, woven wall hangings, or small mirror arrays on solid screen panels to soften large flat surfaces and reflect ambient light across sleeping areas. Incorporate trailing indoor plants like pothos or English ivy along top edges or shelf ledges, allowing leaves to cascade down and create a soft, natural accent. Keep power cables and charger cords organized by running them along the lower inside edges of the divider frame with adhesive cable clips, preventing tangled clutter on both sides of the screen. Matching your divider material finishes to existing bed frames, nightstands, and desk wood tones unifies the room into a polished interior layout.
Budget and Time Planning Strategies
Careful budget and schedule planning keeps your DIY workspace screen project affordable, efficient, and stress-free from start to finish. Simple fabric curtain tracking systems and wooden lath screens offer cost-effective privacy solutions, usually requiring only basic timber, canvas textiles, and standard hardware fasteners. Higher-end sliding door track hardware, thick acrylic sheets, and heavy hardwood lumber increase project costs, but deliver greater durability and sound dampening performance over time. Plan your project timeline across a single weekend, using Saturday for precise site measuring, material purchasing, wood cutting, and base priming or staining. Reserve Sunday for final frame assembly, mounting track hardware, installing screens, and organizing your new micro-office layout. Save money by purchasing standard lumber dimensions, upcycling vintage louvered doors or wood shutters, and buying basic hardware items in bulk at local home centers. Keeping your design simple, using accessible tools, and preparing materials in organized phases avoids wasted resources and ensures a durable, budget-friendly workspace divider.
Creative Expansion and Advanced Inspiration
Once your primary workspace screen is built and installed, incorporating advanced features can boost both functional utility and interior visual appeal. Integrate dimmable LED strip lighting or recessed puck lights directly into upper screen frames, creating task lighting over your desk without taking up valuable desktop space. Install acoustic foam insulation panels or sound-dampening felt layers between double-sided canvas or wood screens to reduce room echoes during video meetings and calls. Add fold-down desk surfaces or hinged side tables directly onto sturdy screen frames, building a fully self-contained fold-away office station within tiny bedroom footprints. Expand storage capabilities by adding concealed shallow drawers, magnetic tool strips, or dry-erase planning boards onto interior desk-facing panel surfaces. For renters, design modular freestanding screen frames with quick-release locking hinges, allowing the divider system to disassemble easily, move flat, and adapt to future living spaces. Continually updating and refining your workspace screen ensures your dual-purpose bedroom stays organized, productive, and visually comfortable over time.