
10 Fold-Down Wall Mounted Desk Setups for Tiny Bedrooms
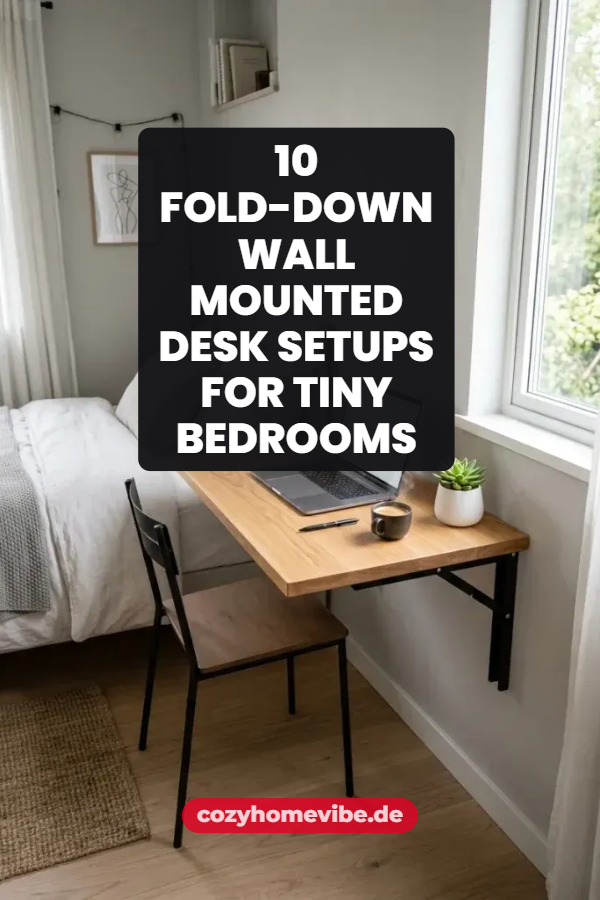
Maximizing limited square footage in small bedrooms requires creative spatial solutions that balance functionality with aesthetic appeal. A fold-down wall mounted desk serves as an exceptional DIY project designed to reclaim valuable floor space while providing a fully operational surface for working, studying, or crafting. When space is constrained, traditional furniture often creates visual clutter and obstructs physical pathways. Integrating a drop-leaf or hinge-supported surface directly onto a wall provides a seamless transition between a functional workspace and an open, uncluttered room environment. Readers exploring this tutorial will discover comprehensive step-by-step methods to design, construct, and mount various space-saving desk configurations tailored to specific room layouts. Understanding structural anchoring, hardware selection, and material weight limits ensures that any home decor modification remains structurally safe and aesthetically pleasing. A well-planned wall desk offers an accessible, beginner friendly approach to custom furniture design that elevates daily productivity without sacrificing bedroom comfort. By reading through these trending ideas, homeowners and renters alike can transform underutilized wall space into a multi-purpose workstation that effortlessly folds away when not in use.
Why Fold-Down Wall Desks Are Trending for Modern Bedrooms
The popularity of fold-down wall desks on popular inspiration platforms stems directly from the growing demand for minimalist style living and multi-functional residential environments. As remote work and flexible study arrangements become standard, finding dedicated office areas within compact bedrooms has shifted from a luxury to an absolute necessity. A drop-leaf wall desk offers an ideal solution by occupying zero floor footprint when stowed, maintaining clear line-of-sight across small spaces. The aesthetic versatility of these setups allows them to blend harmoniously with contemporary, Scandinavian, industrial, or traditional interior design themes. From a DIY perspective, constructing a wall-mounted surface provides an approachable entry point for beginner woodworkers and budget-conscious decorators seeking custom results without expensive contractor costs. The inherent flexibility of these creative ideas allows users to adjust mounting height for ergonomic comfort, incorporate integrated storage channels, and customize surface finishes according to personal taste. Furthermore, modern mounting hardware makes these installations exceptionally secure, durable, and straightforward to implement using basic handheld tools.
Essential Materials and Preparation Steps Before Assembly
Successful execution of a wall-mounted desk project depends entirely on thorough planning, accurate structural assessment, and proper material selection. Before starting assembly, measure the available wall space carefully, taking into account light switch placements, electrical outlets, window casing clearances, and swing paths for surrounding doors. Identifying wall stud locations using an electronic stud finder is an indispensable first step, as heavy-duty folding brackets must be securely anchored into solid structural framing rather than drywall alone. Essential materials include high-quality hardwood or pre-cut furniture-grade plywood boards, heavy-duty locking folding shelf brackets, wood screws, heavy-duty wall anchors, sandpaper, wood stain or paint, and clear protective sealant. Required tools generally consist of a power drill with driver bits, a bubble level, a tape measure, a pencil, and safety gear. Proper surface preparation involves sanding all wooden components thoroughly along the natural grain, applying appropriate primers or base coats, and allowing finishing seals to cure completely before hardware attachment. Establishing a clean, well-lit assembly area ensures precision alignment and smooth operational execution during the installation phase.
1. Minimalist Floating Wood Slab Fold-Down Desk
How to Create
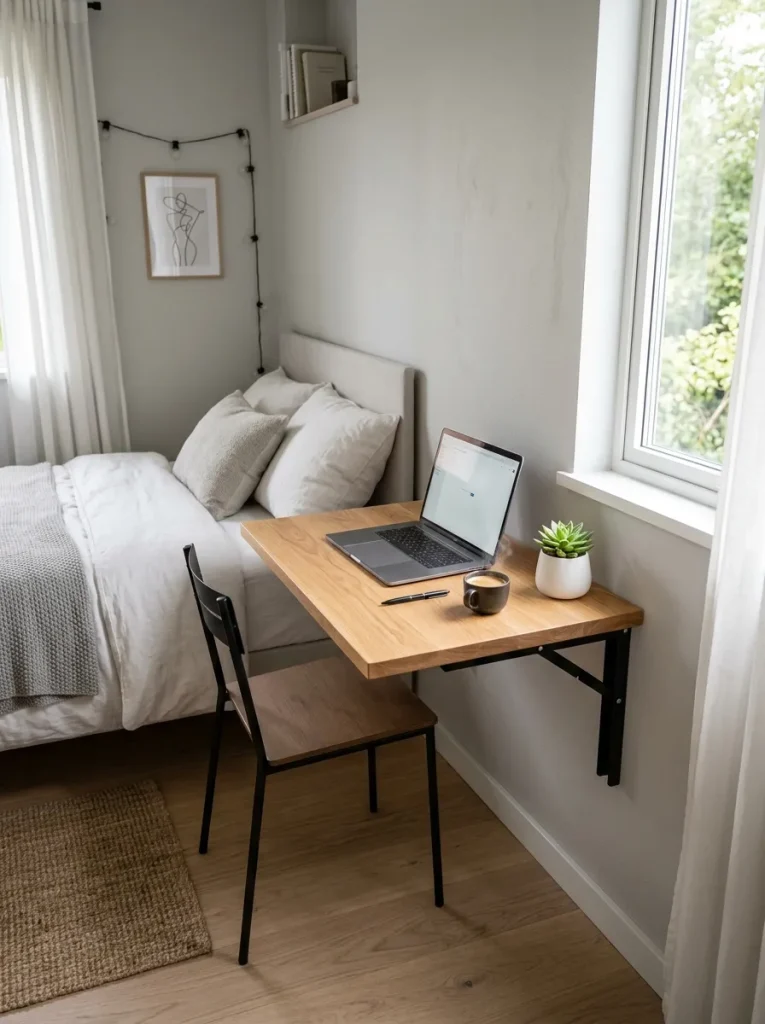
The minimalist floating wood slab fold-down desk focuses on clean lines, natural textures, and unobtrusive structural support. This design utilizes a solid piece of finished hardwood, such as oak, walnut, or pine, paired with low-profile heavy-duty folding brackets mounted directly to wall studs. The primary appeal of this aesthetic lies in its simplicity, making it an exceptional choice for tiny bedrooms where visual bulk must be minimized. When the surface is in its raised position, it acts as an elegant architectural ledge; when collapsed, it hangs flush against the wall surface, taking up less than two inches of depth. The raw wood grain brings warmth to modern design schemes while offering a smooth, stable workspace suitable for laptops, notebooks, and compact task lighting. By keeping visible hardware to a minimum, the setup maintains an airy atmosphere, preventing small spaces from feeling overcrowded.
Step-by-Step Guide
Begin by acquiring a pre-milled wooden board measuring thirty-six inches in width by eighteen inches in depth. Sand the top surface and all edges using progressively finer sandpaper grits, finishing with a smooth two-hundred-forty-grit polish to prevent splinters. Coat the wood with a natural wood stain followed by a durable satin polyurethane coat, allowing sufficient drying time between applications. Locate two adjacent wall studs using an electronic stud finder and mark their centerlines clearly at your desired desk height, typically twenty-nine inches from the floor for standard seating. Attach heavy-duty locking folding brackets securely into the studs using three-inch heavy-duty wood screws, ensuring both bracket arms are perfectly level horizontally and vertically aligned. Position the prepared wooden slab on top of the extended bracket arms, verify alignment, and drive shorter wood screws through the bracket mounting holes into the underside of the slab. Test the folding mechanism repeatedly to ensure smooth operation, secure locking action, and flush alignment against the wall when dropped down.
2. Wall-Cabinet Fold-Out Secretary Desk Setup
How to Create
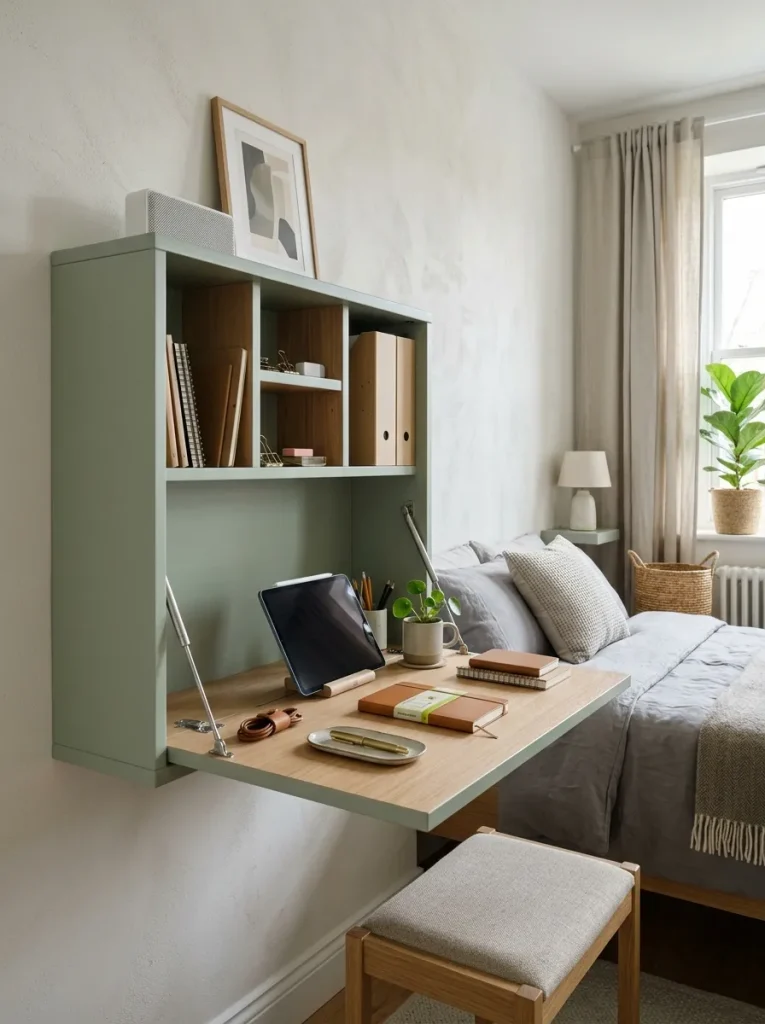
A wall-cabinet fold-out secretary desk combines hidden storage with a functional writing surface enclosed within a compact vertical cabinet structure. This concept features a shallow box mounted to the wall, fronted by a hinged panel that lowers ninety degrees to form the desktop surface. Inside the cabinet interior, small cubbies, vertical mail sorters, and integrated wire management channels keep stationery and small accessories neatly organized and hidden from view when closed. This design is particularly well-suited for bedrooms requiring clean aesthetic boundaries, as closing the desk hides all active paperwork and electronic accessories instantaneously. The exterior door panel can be customized with decorative paint, wood trim moldings, or a subtle handle pull that coordinates with existing bedroom furnishings. This project bridges the gap between traditional furniture styling and modern space optimization, offering a multi-tiered organization solution for busy working environments.
Execution Process
Construct a shallow wooden rectangular box frame measuring twenty-four inches wide, thirty inches high, and six inches deep using three-quarter-inch cabinet-grade plywood. Assemble the perimeter frame using wood glue and pocket hole screws, then attach a quarter-inch plywood back panel to ensure frame squareness. Install internal partition shelves inside the upper two-thirds of the cabinet frame to create custom storage compartments for pens, paper, and small electronics. Cut a solid front panel to match the outer cabinet dimensions precisely, securing it to the bottom front edge using a continuous heavy-duty piano hinge. Attach adjustable folding support arms or drop-down lid stays on both internal side walls to support the front panel securely at a perfectly level horizontal position when opened. Drill a three-inch heavy-duty mounting cleat into the back panel and secure the cabinet assembly firmly to two wall studs using heavy-duty wall anchors. Finish the entire cabinet exterior and interior with durable cabinet paint, install a magnetic catch at the top edge, and mount decorative hardware.
3. Corner-Mounted Drop-Leaf Workstation
How to Create
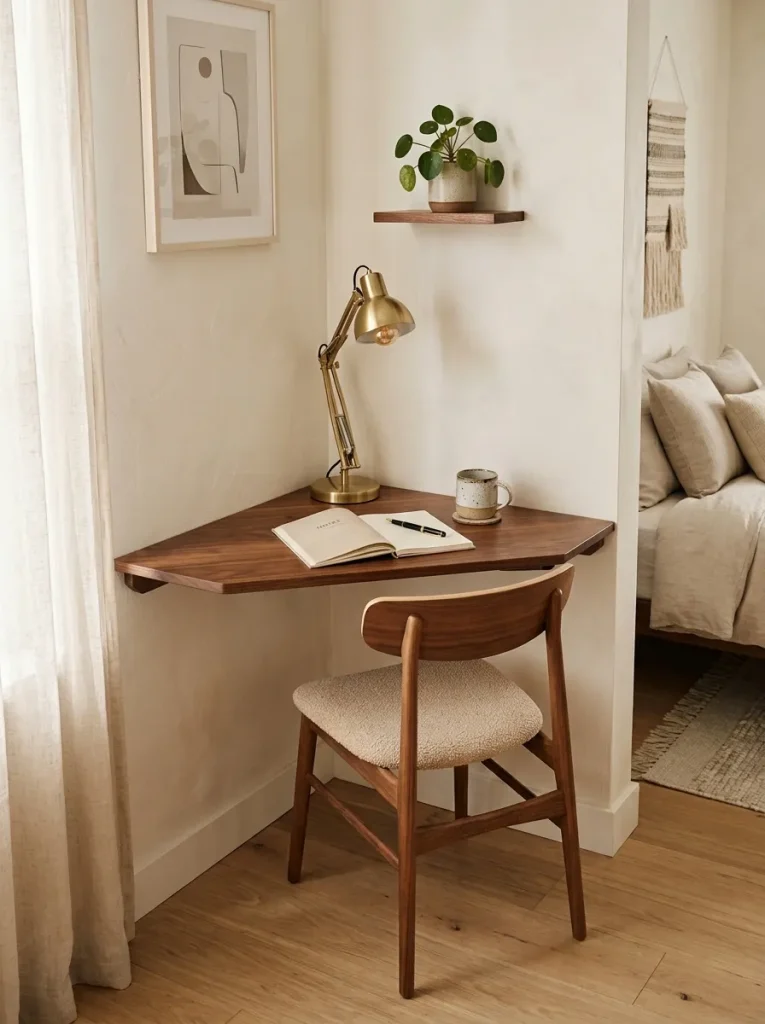
Corner spaces in tiny bedrooms often remain completely unutilized, making a corner-mounted drop-leaf workstation a smart spatial intervention. This design features a customized triangular or L-shaped surface fitted precisely into a ninety-degree wall corner, supported by specialized wall-mounted hinges. By utilizing an otherwise dead angle of the room, this setup leaves primary wall segments free for beds, wardrobes, or artwork while providing a spacious workspace. The drop-leaf action allows the surface panel to lower smoothly against one or both meeting walls, clearing floor access entirely during non-working hours. The ergonomic nature of a corner desk places materials within easy arm’s reach, creating a comfortable and private working alcove. This approach is ideal for studio apartments or compact rooms where every square inch of layout planning matters.
Setup Method
Measure the corner convergence walls carefully, marking out a three-sided or custom five-sided desk profile onto a piece of three-quarter-inch birch plywood. Cut the panel using a circular saw guided by a straight edge, sanding all cut edges smooth with a medium and fine sanding block. Attach solid wood edge banding along the exposed outer profile to conceal the raw plywood layers and create a clean, finished appearance. Position specialized corner folding brackets or dual heavy-duty drop-leaf hinges along the two meeting wall surfaces, anchoring them directly into structural studs using lag screws. Check the brackets thoroughly with a corner level to guarantee that both supporting arms sit in the exact same horizontal plane. Lower the prepared triangular surface onto the support hardware and drive wood screws securely from underneath into the board. Test the drop-leaf swing mechanism to ensure the panel folds down without rubbing against adjacent baseboards, applying clear protective rubber bumpers on contact points to safeguard wall paint.
4. Pegboard Integrated Fold-Down Craft Desk
How to Create
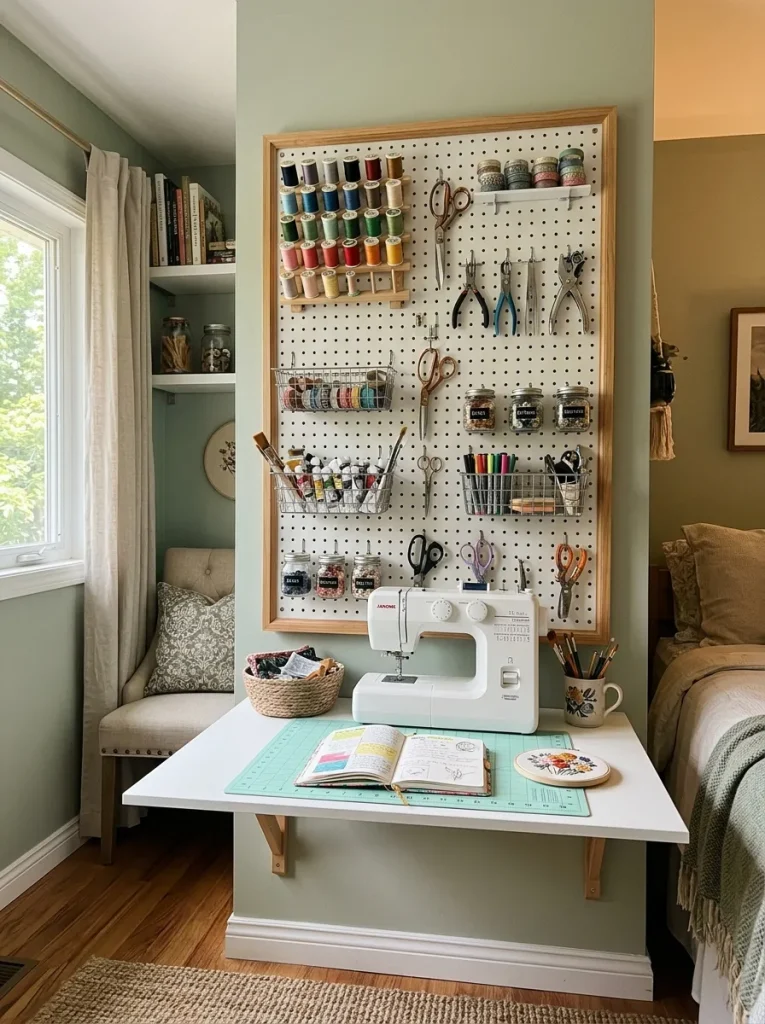
Integrating a heavy-duty pegboard back panel with a fold-down desktop creates a highly functional, creative workstation tailored for crafting, hobby work, or detailed task organization. This design utilizes a wall-anchored steel or wooden pegboard framed by a perimeter casing, with a collapsible desk surface mounted right below or directly onto the frame base. Tools, scissors, thread spools, power cables, and storage baskets hang systematically on the vertical board, keeping the main work surface clear of clutter. The fold-down panel provides an immediate, flat work platform that easily collapses when craft projects are completed for the day. This setup maximizes vertical storage efficiency while maintaining a minimal depth profile into the bedroom layout. The combination of custom hanging organization and immediate surface availability makes this project a standout option for creative enthusiasts living in compact quarters.
How to Make
Mount a thirty-six-inch by twenty-four-inch heavy-duty metal or wooden pegboard panel to wall studs using wooden furring strips to allow appropriate hook clearance behind the panel. Construct a simple, sturdy wooden frame around the perimeter of the pegboard using one-by-three-inch pine boards to create a unified, custom furniture appearance. Beneath the lower horizontal edge of the pegboard frame, install two heavy-duty locking folding brackets spaced twenty-four inches apart onto wall studs. Prepare a smooth, laminate-topped or hardwood desk panel measuring thirty-six inches wide by twenty inches deep, sanding and sealing all exposed edges. Secure the desk panel to the top arms of the folding brackets, leaving a quarter-inch expansion gap between the back edge of the desk and the wall frame. Install a varied assortment of pegboard hooks, wire baskets, and shelf attachments onto the vertical pegboard to organize tools logically above the desktop. Test the combined setup for weight tolerance, smooth folding movement, and structural stability under active working conditions.
5. Recessed Nook Folding Laptop Table
How to Create
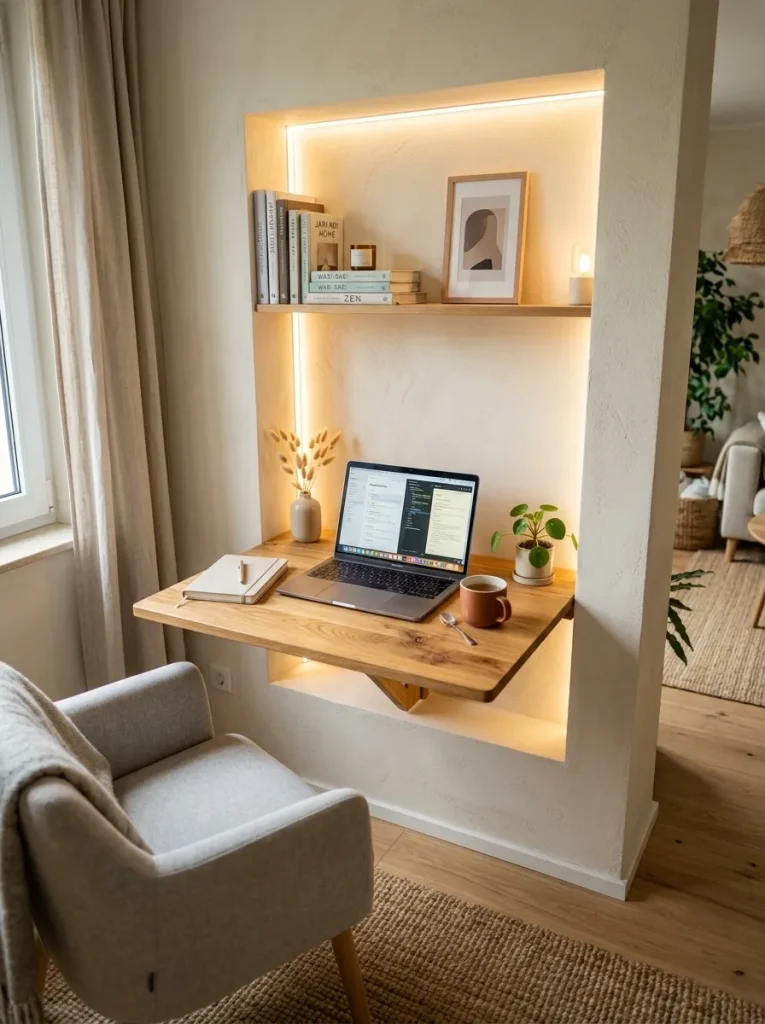
A recessed nook folding laptop table transforms shallow alcoves, unused architectural cutouts, or space between structural pillars into a fully functional workspace. Instead of leaving small wall indents empty, this design fits a custom-sized drop-leaf desk panel directly within the side dimensions of the nook. When elevated, the table bridges the opening to offer a sturdy surface for laptop use and writing; when folded down, it sits flat within the depth of the alcove structure. This approach integrates seamlessly into existing architecture, preserving all open floor area in the main bedroom footprint. Because the desk surface is protected on one or both sides by the alcove walls, it creates a cozy, distraction-free environment that feels like a built-in architectural feature rather than an added furniture piece.
Execution Process
Accurately measure the interior width and depth of the wall nook using a tape measure at multiple height points to account for wall variances. Cut a three-quarter-inch hardwood board to match the width of the alcove, deducting three-eighths of an inch overall to allow smooth clearance during folding movements. Sand the surface smooth and apply a high-durability finish, such as hardwax oil or enamel paint, to withstand daily laptop placement and friction. Mount two side support cleats or heavy-duty folding locking hinges onto the interior side walls or back wall of the nook, ensuring absolute level alignment using a digital level. Position the prepared desk board onto the support hardware and secure it from below using heavy-duty wood screws. Install small magnetic catches or friction latches along the top edge of the side walls to keep the desk panel stowed securely when folded down. Finish the surrounding nook wall area with contrasting paint or textured wallpaper to frame the compact workstation as an intentional design feature.
6. Chalkboard Cabinet Drop-Down Wall Desk
How to Create
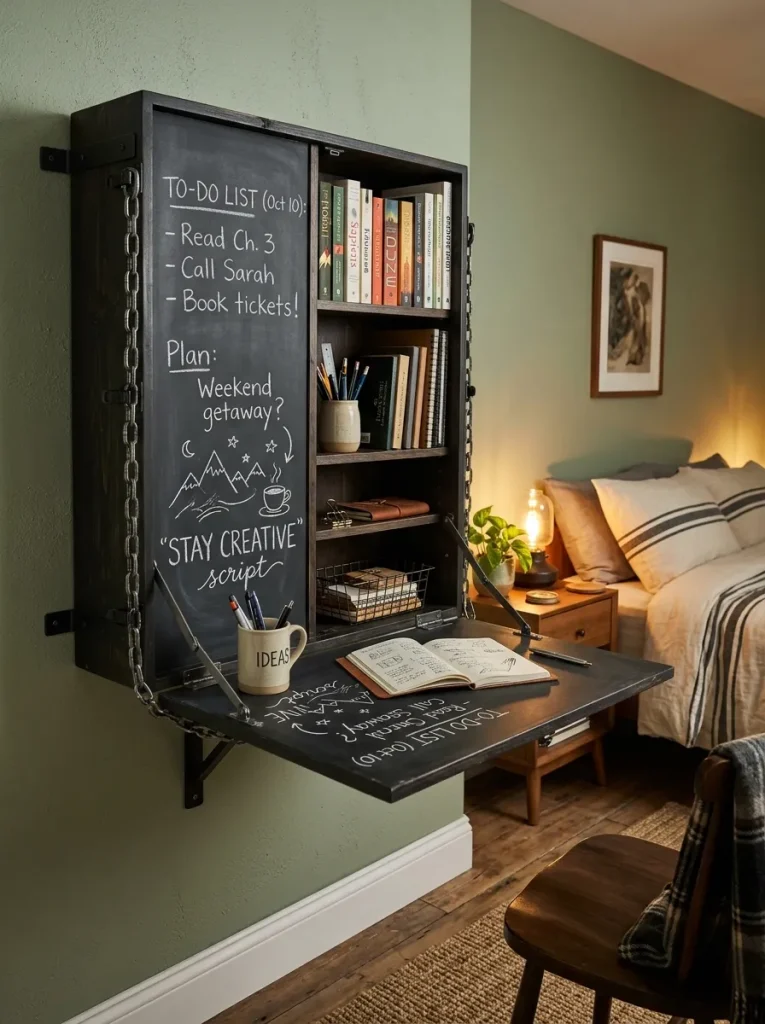
The chalkboard cabinet drop-down wall desk offers dual-purpose utility by functioning as a memo board when closed and a spacious workstation when opened. This creative design consists of a shallow wall-hung box whose exterior panel is painted with high-grade chalkboard paint or lined with a magnetic slate sheet. In its closed position, the unit serves as an interactive surface for daily task tracking, scheduling notes, or creative drawing within the bedroom. Opening the top cabinet latch lowers the board horizontally on strong support chains or mechanical stays, exposing the internal desk area and storage compartments. This setup is particularly effective for students and working professionals who benefit from visual organization systems combined with a hidden workspace. The dark chalkboard surface adds an appealing, modern contrast against light-colored bedroom walls.
Step-by-Step Guide
Build a box frame measuring twenty-eight inches wide by thirty-six inches high by five inches deep using durable one-by-six-inch select pine boards. Frame the interior with thin cross-shelves to store chalk, markers, notebooks, and small desk accessories cleanly. Prepare the front door panel from smooth medium-density fiberboard, sanding the edges and applying three coats of specialized chalkboard paint, allowing complete drying between coats. Attach the chalkboard panel to the bottom of the main cabinet box frame using a continuous steel piano hinge for maximum weight distribution. Attach braided steel support cables or locking pneumatic lid struts between the internal cabinet sides and the drop-down desk panel to support up to fifty pounds of working weight horizontally. Secure the entire cabinet housing to two wall studs using three-inch heavy-duty cabinet screws inserted through a thick rear mounting rail. Season the chalkboard surface by rubbing loose chalk across the entire area and wiping it clean before writing your initial organization notes.
7. Mirror-Front Fold-Down Dressing and Work Desk
How to Create
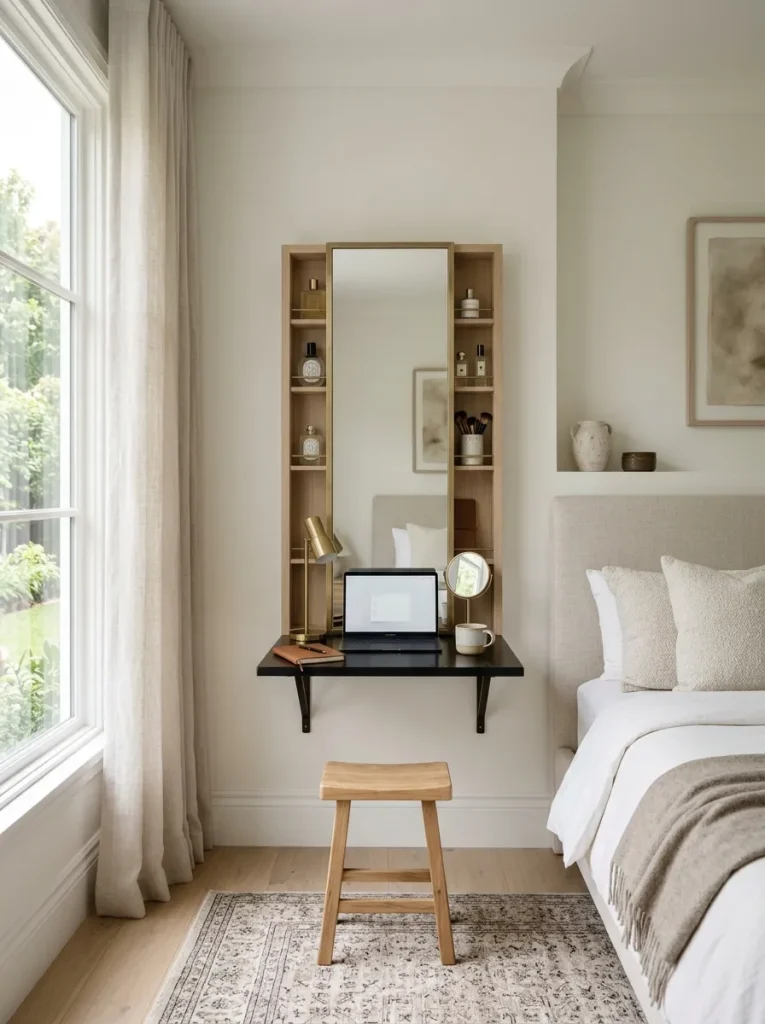
A mirror-front fold-down dressing and work desk combines a full-length or half-length mirror frame with a fully functional drop-leaf desktop system. This multi-functional design addresses two major bedroom requirements simultaneously: a preparation mirror for daily routines and a dedicated work surface for modern tasks. When closed, the assembly presents a sleek, framed mirror that reflects light and expands the visual sense of space in a small bedroom. When the front frame or inner shelf is released and lowered, it transitions smoothly into a sturdy surface for a laptop or cosmetic vanity setup. Internal storage shelves behind the mirror hide beauty supplies, chargers, and stationery out of view. The reflective glass front makes small rooms appear brighter and significantly larger, maximizing both spatial functionality and light distribution.
Setup Method
Assemble a shallow outer wooden frame measuring twenty-four inches wide, thirty-six inches tall, and four inches deep using high-grade maple or oak boards. Install internal partition shelves inside the frame to hold small organizers, charging cables, and personal items securely. Prepare a heavy-duty front panel framed with solid wood moulding, embedding a shatter-resistant mirror securely within the front recess using mirror adhesive and backing clips. Join the mirrored front frame to the lower edge of the wall cabinet using a heavy-duty stainless steel hinge assembly. Install strong side support straps or mechanical locking drop-leaf stays to ensure the panel rests perfectly horizontal at a twenty-nine-inch working height. Drill through the upper and lower mounting cleats on the cabinet back, anchoring the unit directly into structural studs using wall anchors. Add a discreet touch-latch or magnetic catch at the top frame seam to allow smooth opening and closing without placing finger smudges on the mirror glass.
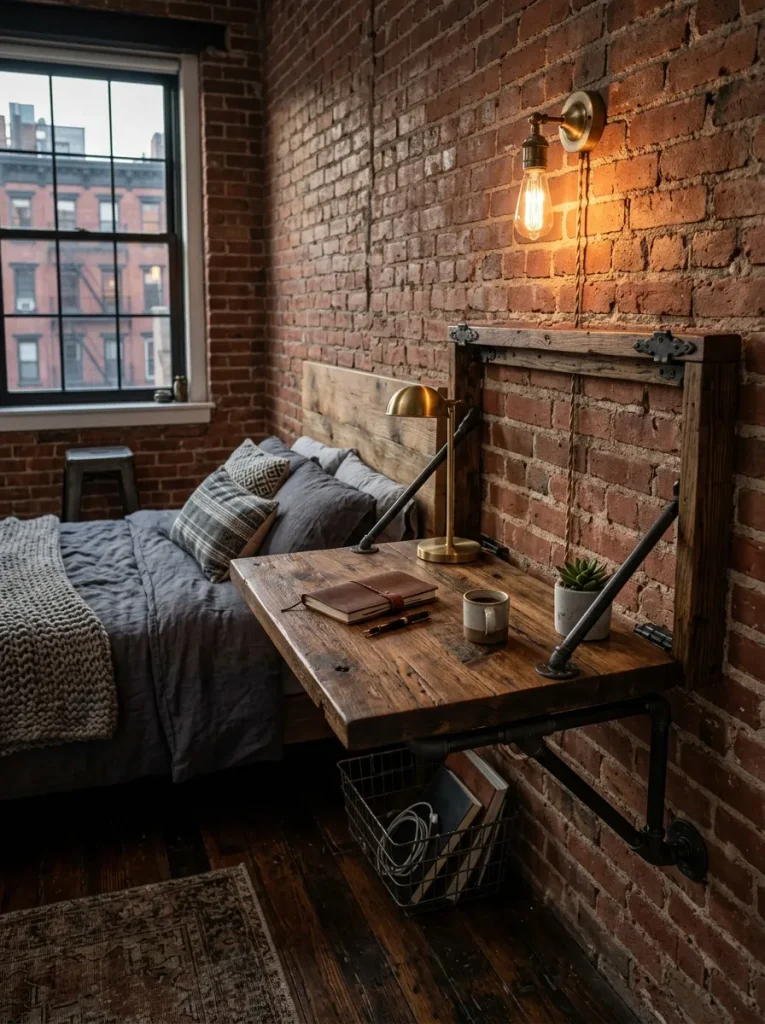
8. Industrial Pipe Latch Drop-Leaf Desk
How to Create
The industrial pipe latch drop-leaf desk combines rugged structural hardware with natural timber surfaces, appealing to contemporary urban design themes. This concept uses threaded black iron or galvanized pipe fittings as both decorative accents and mechanical locking stops for a thick wood desk surface. The desk board is mounted to the wall with heavy-duty folding hinges, while pipe flanges and elbow fittings attached to the wall or desk underside act as support anchors. The industrial hardware delivers exceptional weight-bearing capacity while introducing a bold, tactile architectural aesthetic to bedroom decor. The contrast between dark iron components and warm wood finishes adds character to small spaces, transforming a simple functional desk into an eye-catching design statement.
Execution Process
Select a thick piece of solid butcher block wood or reclaimed timber measuring forty inches long by twenty inches wide and one-and-a-half inches thick. Sand the wood thoroughly, rounding the outer corners slightly, and finish with a rich oil-based stain followed by a protective coat of clear matte wax. Attach two industrial-grade folding shelf brackets underneath the wooden slab, aligning them precisely with the standard sixteen-inch spacing of wall studs. Secure two short black iron pipe assemblies, consisting of a wall flange, a four-inch pipe nipple, and a ninety-degree elbow, directly above the folded desk profile to act as retro-styled retaining latches when stowed. Mount the main bracket system into wall studs using heavy lag bolts to guarantee maximum weight tolerance for heavy equipment. Verify that the table unfolds smoothly down to a flat, level position and locks into place with complete structural rigidity. Wipe down all metal pipe hardware with a thin coat of clear lacquer to protect the iron finish against moisture and surface oxidation over time.
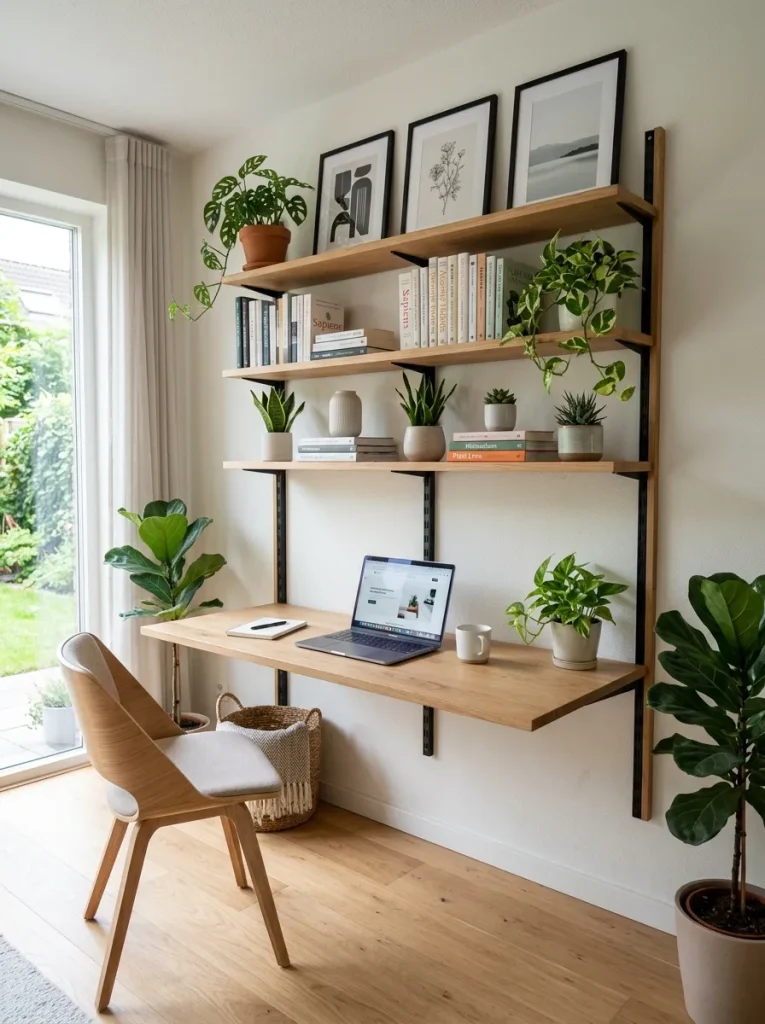
9. Shelving Unit Combination Fold-Down Table
How to Create
A shelving unit combination fold-down table merges open vertical wall storage with an integrated collapsible work surface. This design features multiple tiered wall shelves fixed above a central fold-down desk panel, creating a continuous vertical storage system. Books, decorative plants, storage boxes, and framed art sit permanently on the upper open shelves, while the main work surface remains clear for daily tasks. When work is finished, the main surface drops down flat against the wall, leaving the upper display shelves fully intact and visible. This multi-tiered setup is an outstanding spatial solution for small bedrooms, as it consolidates display, storage, and study capabilities within a single vertical footprint.
Setup Method
Install two vertical wooden or metal wall tracks onto two structural wall studs using heavy-duty mounting screws and a long bubble level to ensure parallelism. Insert adjustable shelf brackets into the upper track slots at desired heights, placing pre-cut solid wood shelves across them to hold books and decorative accessories. Mount a set of heavy-duty folding table hinges onto the lower section of the wall tracks at standard desk height. Secure a three-quarter-inch thick wooden desk panel measuring thirty-six inches wide by twenty-two inches deep onto the lower folding hinge arms. Ensure that the distance between the lowest fixed shelf and the desktop surface allows ample clearance for open laptop screens or tall desk lamps. Sand all timber elements smooth and seal them with an identical finish to ensure visual consistency across the entire shelving setup. Test the raise-and-lower folding cycle of the main table panel to verify that upper shelf contents remain completely undisturbed during operation.
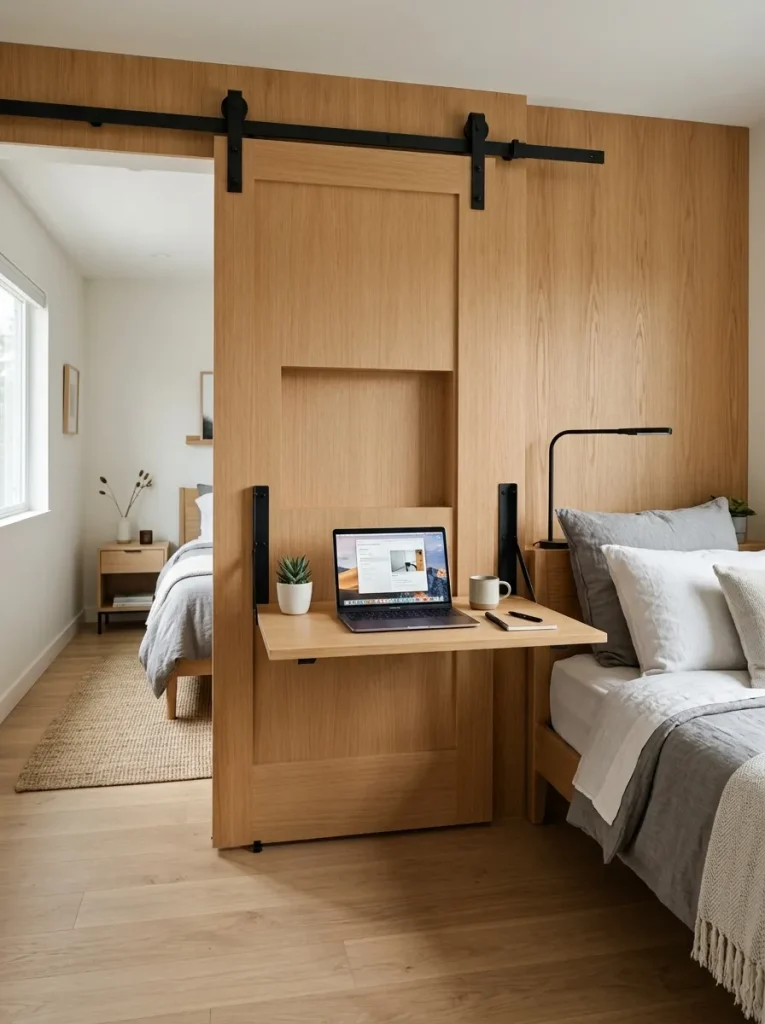
10. Sliding Barn Door Folding Desk System
How to Create
The sliding barn door folding desk system combines a horizontal wall-mounted track mechanism with a drop-leaf desk panel, offering maximum placement flexibility. This design allows the entire desk assembly to slide horizontally along a wall track, enabling users to shift their workspace left or right depending on bedroom layout needs. For example, the desk can slide toward the center of the room during study sessions and slide away behind a door or adjacent wardrobe when stowed. The desk panel itself incorporates heavy-duty drop-leaf hinges, allowing it to collapse flat against the sliding carriage frame when not in use. This highly adaptable setup solves layout challenges in narrow bedrooms where furniture placement must adjust to changing space demands.
Step-by-Step Guide
Mount a steel sliding barn door track horizontally across a designated wall segment, securing lag bolts directly into at least three wall studs for high load capacity. Assemble a flat wooden carriage frame fitted with top-mounted ball-bearing pulley wheels designed to ride smoothly along the steel track. Attach two heavy-duty locking drop-leaf brackets onto the front face of the wooden sliding carriage frame, ensuring precise horizontal alignment. Secure a finished furniture-grade wood panel measuring thirty-four inches wide by eighteen inches deep to the folding bracket arms. Install rubber floor guides and end stops on the track to restrict horizontal travel within safe boundaries along the wall. Slide the desk assembly along the track to your preferred position, unfold the desktop panel until it locks horizontally, and test stability under load. When work is complete, fold the desk surface down flat against the carriage frame and slide the entire unit toward the corner of the room to restore open floor space.
Common Beginner Mistakes and How to Avoid Them
Constructing a fold-down wall mounted desk requires careful attention to structural mechanics and spatial measurements. A frequent mistake among beginners is attempting to anchor heavy-duty folding brackets into hollow drywall using standard plastic expansion anchors. Heavy desktop surfaces and applied arm pressure require lag screws driven directly into solid wood wall studs to prevent sudden wall failure or structural detachment. Another common oversight is failing to verify level alignment across both bracket arms simultaneously, resulting in a sloped work surface that causes objects to slide off. Builders should always use a long bubble level or digital laser level across the entire mounting span before driving final screws. Additionally, forgetting to account for the thickness of baseboards or electrical outlets can prevent the desk panel from folding down completely flush against the wall. To avoid operational issues, always measure clearances carefully, allowance for cable pass-through gaps, and select hardware rated for at least twice the intended working weight capacity.
Practical Tips for Better Results
To achieve professional quality in your DIY wall mounted desk project, focus on precise surface finishing and ergonomic planning. Spend adequate time sanding all wooden edges, using progressively finer sandpaper grits up to two-hundred-forty-grit to create smooth touch surfaces that will not snag clothing or paper. Applying a durable protective finish, such as hardwax oil, polyurethane, or furniture-grade lacquer, shields the wood from moisture, ink stains, and daily wear. When determining the mounting height, sit in your primary office chair and measure from the floor to the undersides of your elbows; this ensures a customized ergonomic setup that reduces strain on shoulders and wrists during extended working hours. Incorporating rounded or chamfered corners on the front edges of the desk board improves safety in tight bedroom quarters, preventing painful collisions when navigating small walkways. Finally, adding small felt pads or clear silicone bumpers behind contact points protects decorative wall paint from friction marks during repeated folding movements.
Styling, Presentation, and Organization Ideas
Styling a fold-down desk setup involves balancing practical workspace requirements with clean bedroom aesthetics. When the desk is folded away, the visible underside panel can be decorated with framed artwork, shallow picture ledges, or custom wood paneling that enhances surrounding decor. Integrating wireless LED strip lighting beneath overhead shelves or behind the desk panel provides excellent task lighting without cluttering the desktop with bulky lamps. Utilize vertical space above the desk area by installing thin wire grid panels, magnetic strip boards, or shallow floating ledges to hold essential pens, note pads, and phones. Cable management clips or flexible neoprene sleeves attached along the rear mounting board keep power cords routed neatly along the wall, preventing tangled cords when the surface collapses down. Choosing a fold-away chair, a sleek rolling stool that slides under adjacent furniture, or an accent chair that matches your bedroom style ensures that seating does not clutter the floor footprint when the desk is stowed.
Budget and Time Planning Strategies
Planning a fold-down wall desk project efficiently allows for clear management of time and material costs. A basic floating slab drop-leaf desk using off-the-shelf pre-milled lumber and standard folding brackets can typically be completed within three to five hours across a single weekend, with material expenses remaining modest. More complex builds, such as integrated cabinet secretary desks or sliding track systems, require detailed joinery, additional hardware components, and extended finishing processes that may span two days. To optimize your budget, source standard dimensional lumber or cabinet-grade plywood cut to size at local supply yards rather than purchasing expensive specialty wood slabs. Investing in high-grade hardware, such as certified heavy-duty locking folding brackets or solid continuous hinges, is essential for structural longevity and safety, making it a priority over costly decorative flourishes. Pre-purchasing all necessary fasteners, drill bits, wall anchors, and finishing supplies before starting guarantees an uninterrupted construction workflow and successful project execution.
Creative Expansion and Advanced Inspiration
Once the foundational fold-down desk setup is constructed, advanced variations can expand its functional capabilities even further. Integrating hidden power distribution modules with flush-mounted USB charging ports directly into the desktop panel creates an efficient charging station for mobile devices and laptops. Advanced woodworkers can explore building dual-panel flip-out extensions that double the available surface area when fully deployed, offering extra room for large-scale creative projects. Installing pneumatic gas struts or soft-close dampening hinges ensures that the desk panel lowers smoothly and silently without dropping suddenly under its own weight. For rental apartments where wall modifications are restricted, building a freestanding vertical lean-to ladder frame with an integrated drop-leaf desk provides the same space-saving advantages without drilling into structural walls. Exploring custom finishes, such as two-tone paint schemes, laser-etched geometric patterns, or brass inlay accents, transforms functional utility items into custom interior design statements.