
10 Charming DIY Pill Bottle Mini Flower Vases Ideas
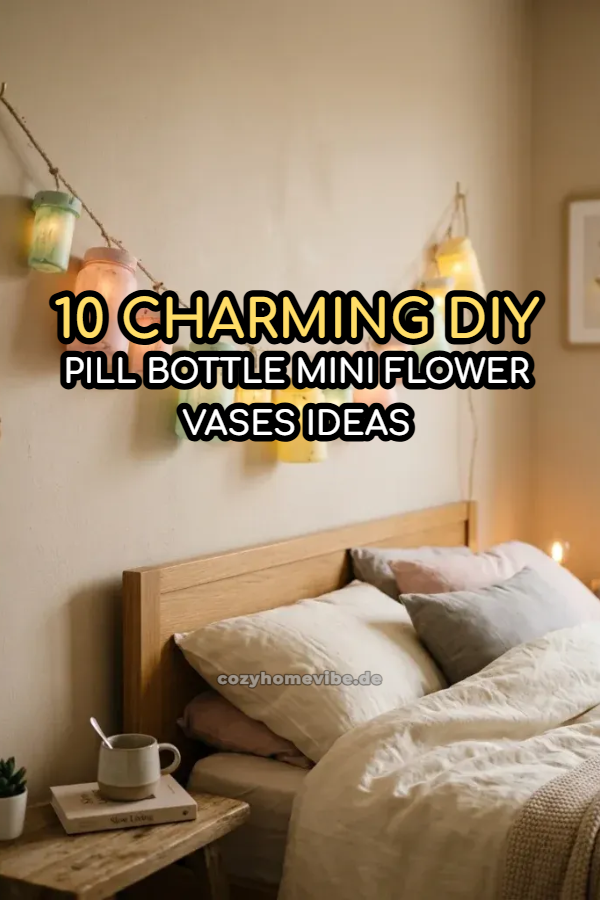
Upcycling plastic medicine containers into aesthetic home decor represents a highly functional approach to modern sustainable crafting. Empty pill bottles present an ideal cylindrical shape and durable structure for crafting miniature accent vases. This comprehensive tutorial explores how simple crafting techniques transform disposable containers into sophisticated, functional art pieces suitable for displays on windowsills, desks, or dining tables. Readers will learn practical methods for removing stubborn sticky labels, preparing smooth surfaces for superior paint adhesion, and applying diverse artistic textures ranging from textured plaster finishes to woven jute cordage. Beyond simple aesthetic improvements, this beginner friendly project demonstrates how basic budget ideas can elevate small interior spaces without requiring expensive materials or complex artistic skills. By repurposing household plastic into elegant miniature displays, crafters can safely showcase small floral stems, dried botanicals, propagate plant cuttings, and add subtle pops of color to any room. Mastering these versatile craft techniques provides actionable inspiration for transforming everyday items into cohesive, beautiful decor collections that align seamlessly with minimalist style and contemporary interior design trends.
Why This Idea Is Trending or Useful
The popularity of upcycled pill bottle mini vases stems from the intersection of modern aesthetic design, zero-waste living, and accessible DIY crafting. Pinterest ideas frequently feature minimalist decor, and these miniature vessels perfectly align with current interior design trends that emphasize subtle detailing and botanical elements. From a practical perspective, small flower vases are exceptionally versatile, filling delicate display niches like narrow floating shelves, tier trays, or compact bedside tables where standard floral arrangements cannot fit. This easy project offers instant satisfaction for beginners because the foundational plastic structures require minimal physical alteration before surface customization begins. Crafters do not need specialized workshop tools, expensive chemical mediums, or advanced artistic experience to achieve professional results. Repurposing rigid plastic containers prevents non-biodegradable waste from entering landfills, offering an eco-friendly crafting pathway. Furthermore, the small scale allows individuals to experiment with new painting textures, wrapping materials, or sculptural elements on a low-risk canvas. Ultimately, these tiny vessels demonstrate how thoughtful planning and simple creative ideas can convert industrial plastic storage into delicate, handmade decoration pieces that elevate residential interiors.
Materials and Preparation
Proper surface preparation and gathering correct supplies are critical steps for ensuring paint durability and professional finish quality on smooth plastic surfaces. Essential materials for this upcycling craft include clean empty pill bottles, fine-grit sandpaper, universal plastic primer, acrylic paints, waterproof sealant, hot glue, natural jute twine, and lightweight clay. Before beginning any structural or decorative work, thorough sanitation and label removal are mandatory. Submerge the plastic containers in warm water mixed with liquid dish soap and baking soda for thirty minutes to loosen adhesive backings completely. Residual sticky residue can be completely dissolved using isopropyl alcohol or household cooking oil rubbed gently across the surface with a soft paper towel. Once clean and completely dry, lightly abrade the entire exterior surface using 220-grit sandpaper to create subtle micro-grooves that allow paint and adhesives to bond permanently. Wipe away all plastic dust with a damp microfiber cloth and allow the containers to dry completely. Planning your visual theme in advance ensures a cohesive collection, whether aiming for raw matte stone finishes or rich textured wraps.
1. Matte Terracotta Texture Vessel
Design Concept and Aesthetic Appeal
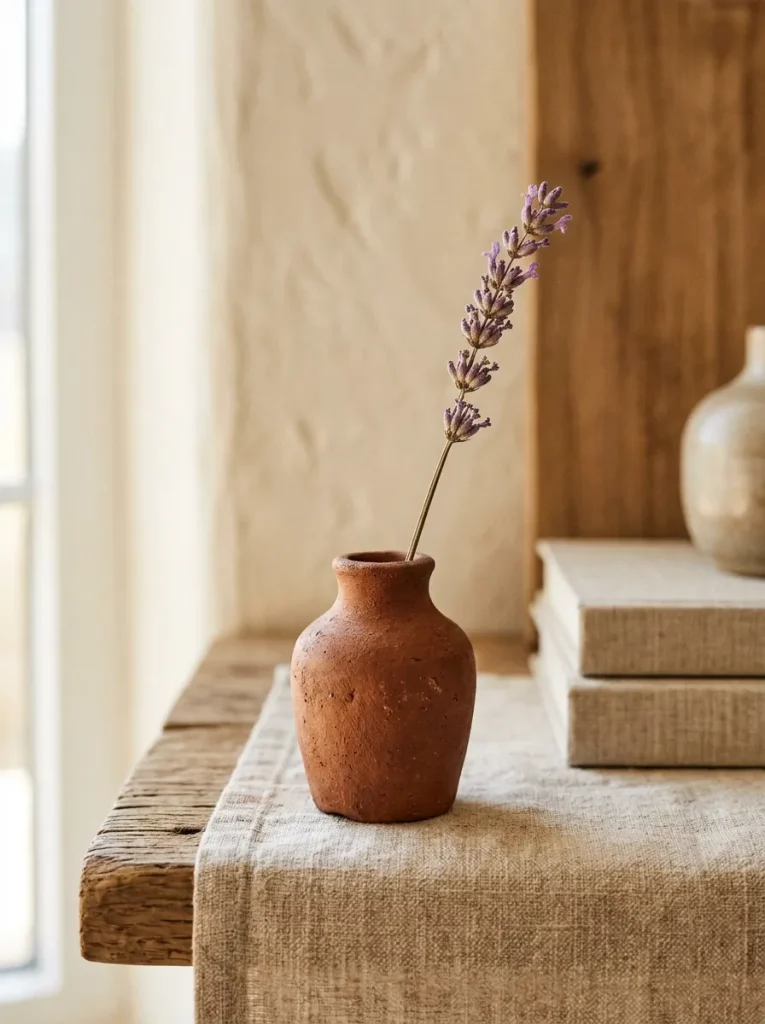
The matte terracotta mini vase transforms a standard rigid prescription bottle into an earthy, Mediterranean-inspired ceramic accent piece. This specific design relies on creating a gritty, organic texture that mimics real kiln-fired earthenware clay, disguising the smooth plastic surface underneath entirely. By blending acrylic paint with common household baking soda, you form a thick, tactile medium that dries with a porous, non-reflective matte finish. The resulting vessel possesses an authentic structural look that works exceptionally well with minimalist style, boho interiors, or warm rustic decor themes. The warm, sun-baked tone of terracotta provides an appealing visual contrast against green foliage, making it a popular choice for showcasing dried floral stems, single botanical sprigs, or delicate dried lavender stalks. Because the original plastic vessel is completely waterproof, this finished vase easily supports real stems submerged in small amounts of fresh water without degrading the exterior paint.
Step-by-Step Creation Method
To execute this project, begin with a thoroughly sanded and primed pill bottle to ensure maximum paint adhesion. In a small mixing bowl, combine two tablespoons of terracotta-colored acrylic paint with one teaspoon of baking soda, stirring thoroughly until the mixture becomes thick and slightly grainy. Using a stiff-bristled brush or a dense synthetic foam sponge, dabbing the textured paint mixture onto the plastic exterior using firm, upward strokes. Avoid long, smooth brush strokes, as stippling or dabbing creates a natural clay-like surface irregularity. Allow the first coat to dry completely for roughly forty-five minutes before applying a second generous layer to eliminate any remaining plastic transparency. Once the paint is fully cured and dry to the touch, apply a light layer of clear matte sealant spray outdoors to protect the textured surface from water droplets, dust, and fingerprint oils during routine handling and maintenance.
2. Rustic Jute Twine Wrap
Design Concept and Aesthetic Appeal
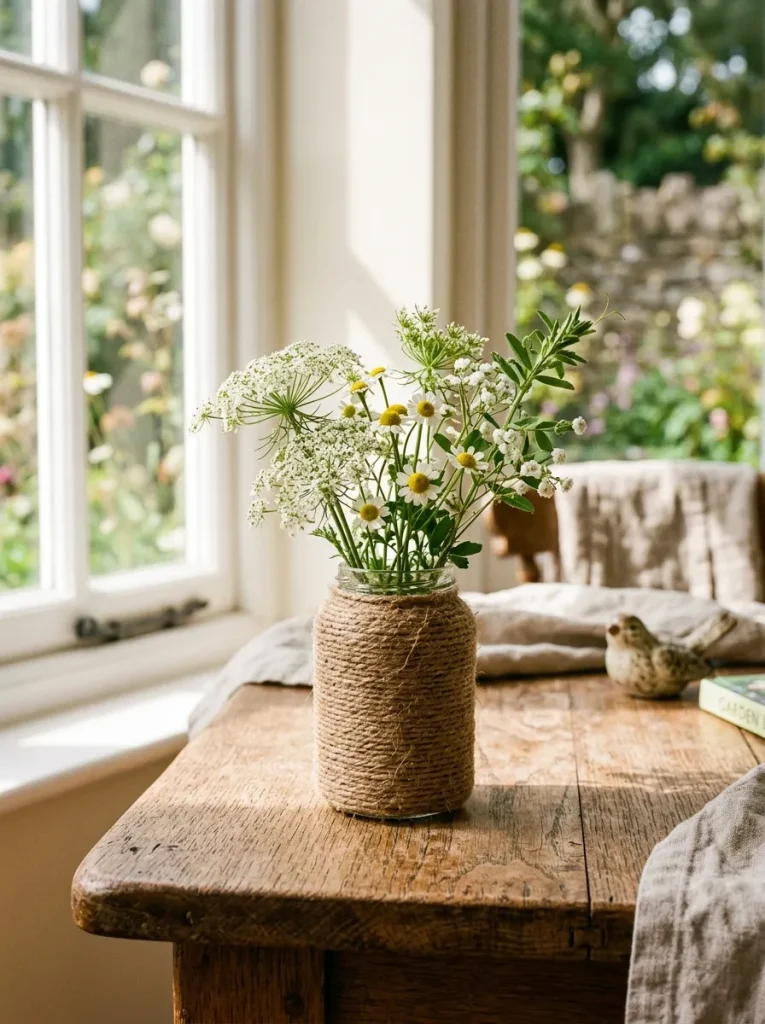
Wrapping small plastic containers in natural fibers offers a clean, rustic visual appeal that introduces organic texture into modern living spaces. The jute twine wrap completely encases the bright plastic shell, providing an approachable DIY path toward warm, farmhouse-inspired tabletop accents. Natural jute, hemp, or cotton cordage adds tactile warmth and neutral color variations that pair effortlessly with other natural materials like wooden trays, linen tablecloths, and stone surfaces. This execution relies heavily on precise alignment and tension, converting an industrial shape into a soft, handcrafted visual asset. The simplicity of wrapped cordage makes it ideal for crafters who prefer working without liquid paints, messy chemical sealants, or extended drying times. These wrapped mini vases excel as casual table settings, rustic wedding accents, or small window sill displays featuring delicate wildflowers or dried wheat stems.
Step-by-Step Creation Method
Begin by securing the end of a roll of fine natural jute twine near the bottom edge of a clean pill bottle using a small dab of clear hot glue. Allow the initial glue placement to cool for five seconds before beginning the continuous wrapping process. Apply thin vertical lines of hot glue every half-inch along the plastic surface, pressing the twine firmly into the adhesive as you wrap it upward around the circumference in a tight, uniform spiral. Ensure that each consecutive row of twine rests snugly against the previous loop without overlapping or leaving visible gaps where the underlying plastic could show through. Continue this methodical wrapping process until you reach the very top lip of the container. Cut the end of the twine cleanly with sharp scissors and secure the final tail inside the top inner rim with a final drop of hot glue for a seamless finish.
3. Pressed Flower Resin Glass Effect
Design Concept and Aesthetic Appeal
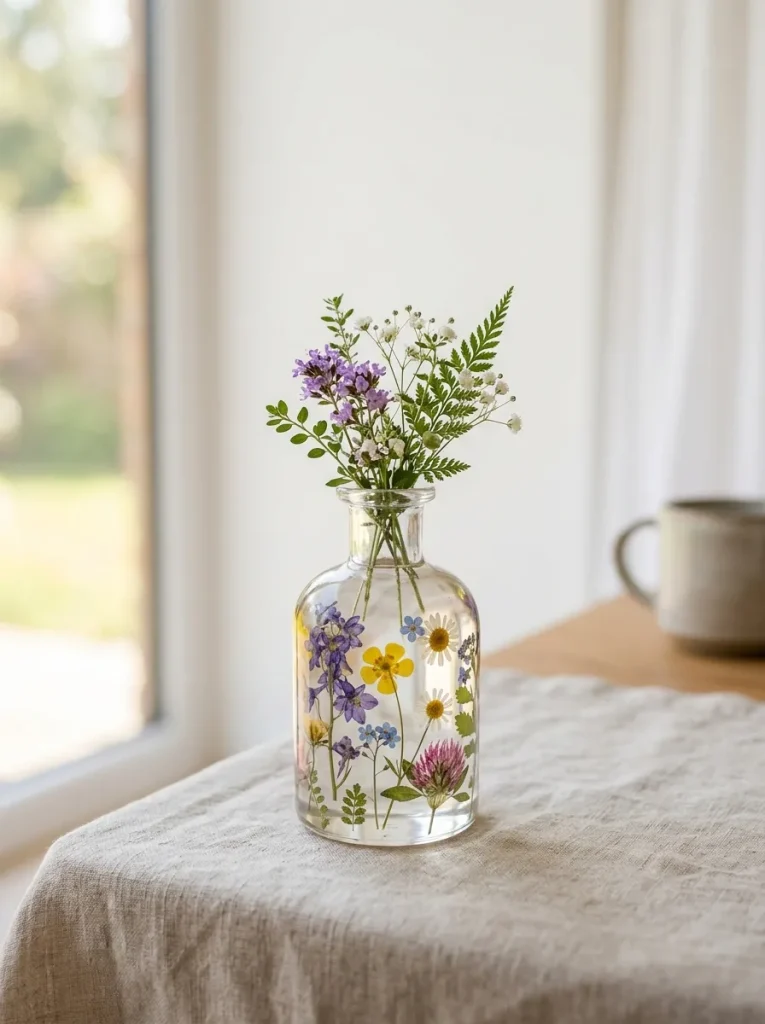
The pressed flower resin effect transforms standard clear or translucent pill bottles into delicate glass-like vessels featuring preserved real flora. This design strategy emphasizes soft botanical aesthetics, making it a standout project for modern spring and summer home decor displays. By securing delicate dried blossoms, small ferns, or single petals directly onto the vessel walls, you capture the timeless elegance of vintage botanical specimens. Applying a high-gloss Mod Podge or clear epoxy coat over the floral elements creates a smooth, glass-like encapsulation that protects fragile organic materials from atmospheric moisture and decay. The translucent nature of specific plastic containers allows natural sunlight to filter through the vessel, illuminating the intricate veins of the pressed petals and creating ethereal lighting effects on nearby surfaces.
Step-by-Step Creation Method
Start with a clean, clear pill bottle, ensuring all factory print and glue residue are fully eradicated. Collect delicate wildflowers or small leaves and press them flat inside a heavy book between two sheets of parchment paper for several days until completely dehydrated. Brush a ultra-thin, even layer of gloss decoupage medium directly onto the exterior surface of the plastic container using a soft flat brush. Using fine tweezers, carefully place the pressed botanicals onto the wet adhesive, pressing gently from the center outward to smooth out air bubbles and prevent paper creases. Allow the initial placement to dry for fifteen minutes before brushing a second protective coat of decoupage sealer across the entire exterior surface. For an even glossier, durable clear finish that mimics solid glass, finish the project with a high-shine clear acrylic seal spray, ensuring full protection against environmental humidity.
4. Faux Ribbed Ceramic Finish
Design Concept and Aesthetic Appeal
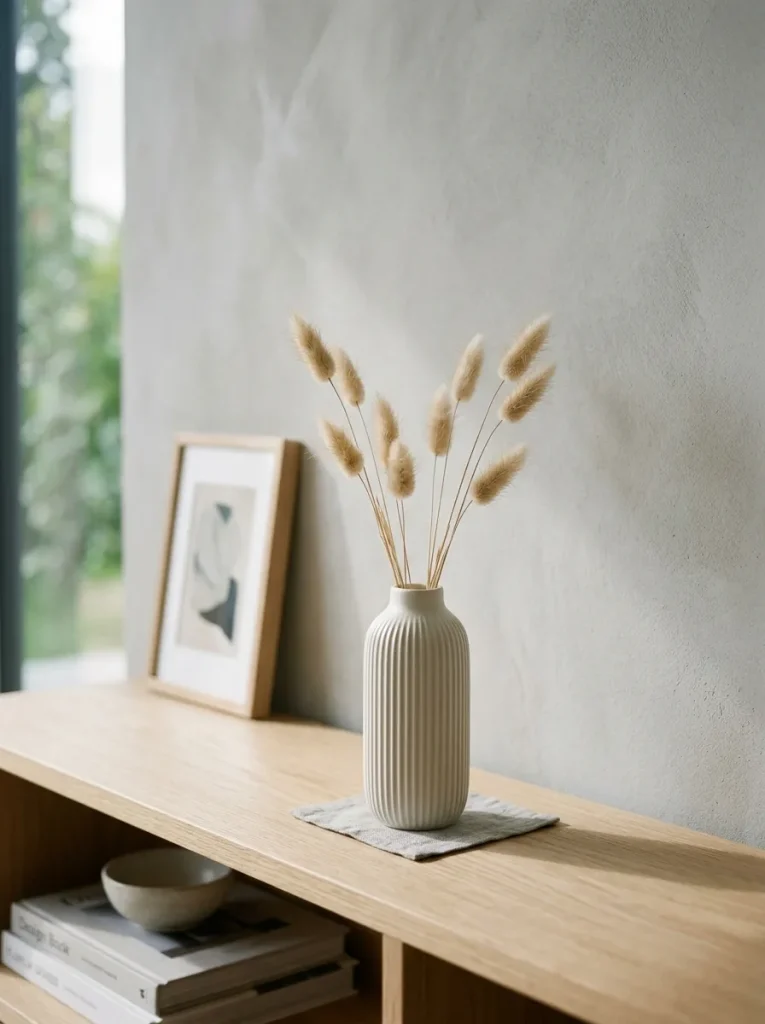
The faux ribbed ceramic design introduces sophisticated architectural lines and sculptural depth to modest plastic prescription bottles. Ribbed, fluted, and grooved ceramic decor represents a major contemporary interior trend, bringing dynamic light and shadow interplay to desktop displays. By attaching thin wooden dowels, cotton piping cord, or rolled paper strips vertically along the exterior walls, you create a distinct structural texture prior to painting. When finished in a uniform monochromatic tone, the underlying plastic container is rendered entirely unrecognizable, successfully imitating high-end designer ceramic homewares. The structured vertical lines visually elongate the small container, making it look taller and more substantial on display. This sophisticated approach fits exceptionally well within modern minimalist style interiors, contemporary office spaces, and curated architectural shelf displays.
Step-by-Step Creation Method
To build the ribbed structural base, cut multiple equal lengths of thin round wooden dowels or heavy cotton cord matching the precise height of your pill bottle. Apply a straight line of multi-purpose craft adhesive or hot glue vertically from the base of the container up to the top rim, pressing the first dowel firmly into position. Repeat this placement continuously around the full outer circumference, placing each vertical strip immediately adjacent to the previous one without leaving uneven gaps. Once the adhesive has cured completely, apply a coat of white multi-surface primer over the entire assembly to unify the mixed materials. Follow the primer with two even coats of satin or semi-gloss acrylic paint in a sophisticated neutral tone like cream, soft charcoal, or sage green, using a small detail brush to ensure paint fills all internal grooves between the ribs evenly.
5. Architectural Concrete Stone Look
Design Concept and Aesthetic Appeal
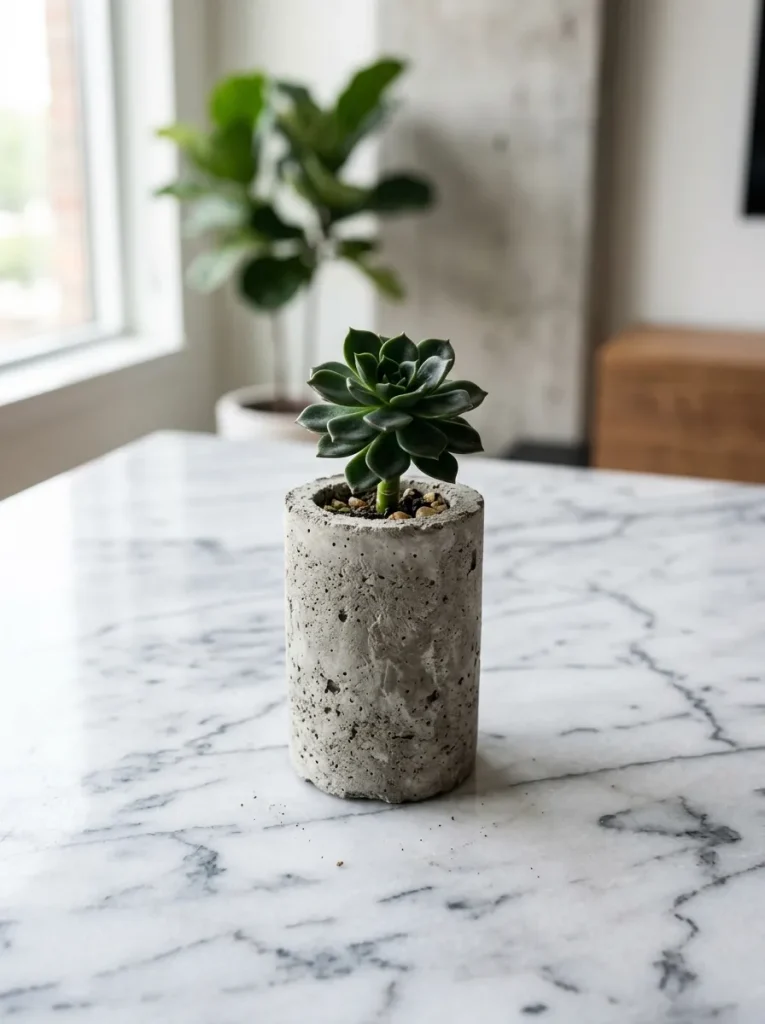
Embracing modern industrial aesthetics, the concrete stone effect transforms lightweight plastic into heavy-looking mini architectural pottery. Industrial design accents rely on raw texture, neutral slate tones, and subtle surface imperfections to create visual contrast against delicate living plants. By applying a stone-textured spray paint or blending fine craft sand directly into matte grey acrylic paint, crafters can easily achieve an authentic poured-concrete or carved granite appearance. This finish is exceptionally durable, highly tactile, and provides a grounded visual weight that makes small decor arrangements feel purposeful and solid. Concrete-style mini vases serve as striking accent pieces when paired with dark succulent cuttings, bright air plants, or minimalist dried botanicals on timber, glass, or polished marble surfaces.
Step-by-Step Creation Method
Begin by thoroughly sanding the entire plastic exterior with coarse-grit sandpaper to build rough surface tooth, then wipe away any plastic dust particles. Mix light grey acrylic paint with fine art sand or baking powder in a three-to-one ratio until a thick paste forms. Using a stiff palette knife or dense stippling sponge, dab the thick paint mixture unevenly across the plastic container, intentionally leaving small raised bumps, ridges, and pits that mimic natural air bubbles found in cast concrete. Allow the base layer to dry completely for one hour. To enhance depth, take a dry paintbrush with a tiny amount of darker charcoal paint and lightly drag it across the raised surface highlights to create natural dimensional shading. Finish the cured stone surface with a flat, non-glossy clear spray sealer to protect the delicate textured finish.
6. Delicate Lace Decoupage Elegance
Design Concept and Aesthetic Appeal
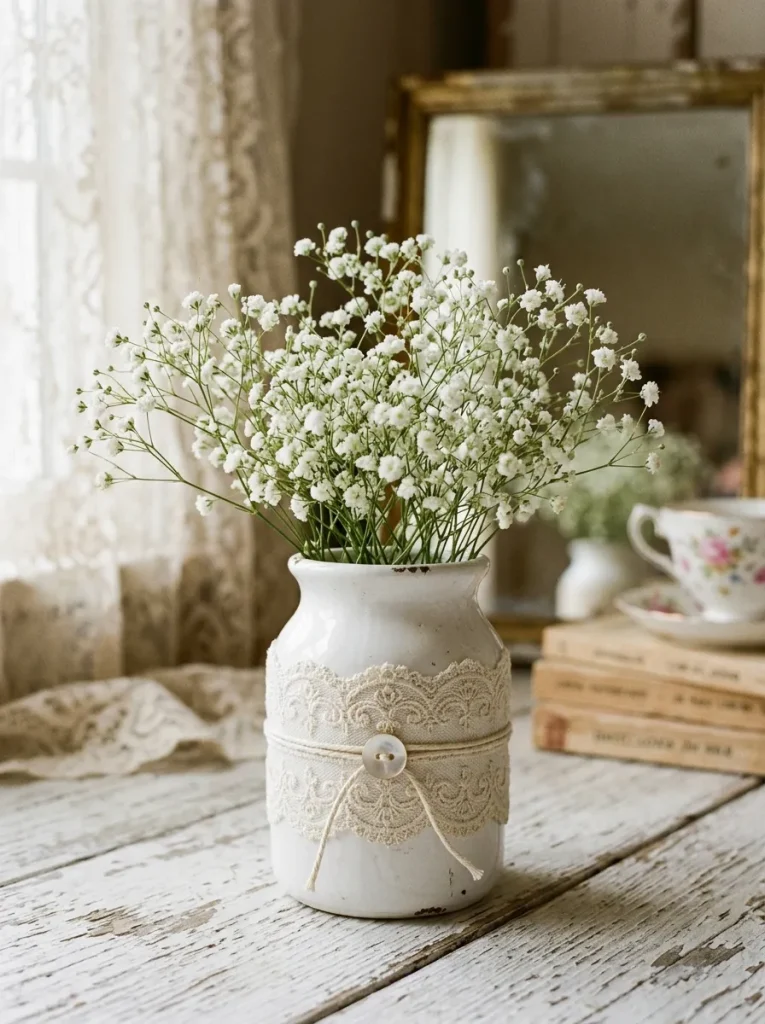
The delicate lace decoupage style offers a romantic, vintage-inspired design approach that softens rigid container profiles with intricate fabric patterns. This aesthetic centers on layering real fabric lace or patterned paper lace over light-toned backgrounds to construct sophisticated, textile-wrapped pottery effects. The detailed floral or geometric motifs within lace trim introduce intricate visual interest without cluttering small spaces, making these vessels perfect for Victorian, shabby chic, or soft farmhouse decor settings. The interplay between soft textile patterns and structured form creates a unique visual balance. These romantic mini vases are well-suited for displaying delicate baby’s breath, small spray roses, or fresh spring blooms on vanity tables, wedding guestbooks, or decorative tier trays.
Step-by-Step Creation Method
First, apply two coats of chalky white or soft ivory acrylic paint to the exterior of the plastic pill bottle, allowing full drying time between coats to form an opaque base. Measure the height and circumference of the bottle, then cut a piece of cotton lace trim to match those exact dimensions using sharp fabric scissors. Brush a smooth, liberal coat of decoupage glue directly over the painted container. Wrap the lace trim carefully around the sticky surface, pulling it taut to eliminate wrinkles, overlaps, or loose edges while ensuring the lace pattern aligns correctly. Apply a second layer of decoupage medium directly over the top of the fabric lace, pressing it down into the mesh to seal all open fabric threads firmly to the underlying plastic shell, and allow it to dry overnight into a hard, protective shell.
7. Gold Leaf Minimalist Accent
Design Concept and Aesthetic Appeal
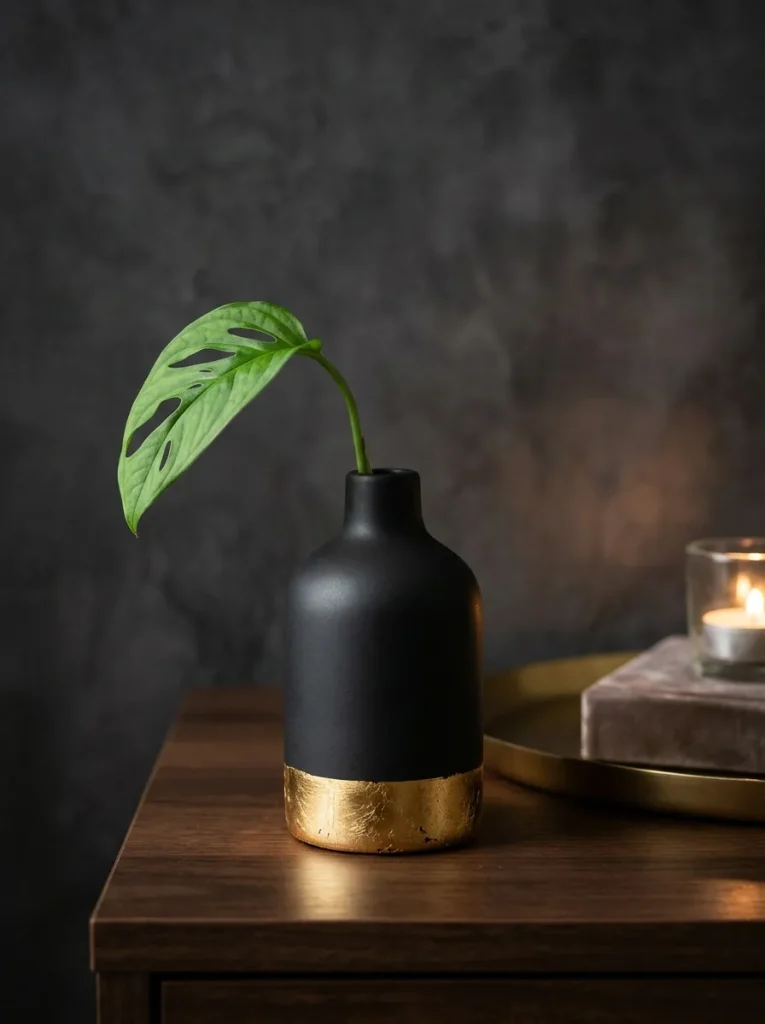
The gold leaf minimalist accent style blends high-contrast metallic sophistication with clean contemporary color blocking. By pairing a smooth, matte monochromatic base coat with gleaming metallic leafing along the rim or lower base, you convert an ordinary upcycled object into an elegant art piece. Metallic accents reflect ambient room light, instantly drawing attention to small botanical arrangements on display shelves or sideboards. The contrast between soft matte paint and radiant metallic foil produces an expensive aesthetic that complements modern design, glam decor, and minimalist style homes effortlessly. This technique is highly adaptable, allowing crafters to apply metallic detailing in clean geometric diagonal lines, organic dipping effects, or delicate speckled flecks depending on personal preference.
Step-by-Step Creation Method
Prepare the plastic pill bottle by applying two coats of high-grade matte black or deep navy blue acrylic paint, allowing each layer to dry thoroughly for a smooth, streak-free surface. Once the base coat is completely cured, use low-tack painter’s tape to section off the bottom third or top rim of the container, pressing the tape edge down firmly to establish a sharp line. Brush a thin layer of specialized gilding adhesive size onto the exposed section and wait approximately five minutes until the glue turns clear and feels tacky to the touch. Carefully lay small sheets of gold or brass leaf foil over the tacky area, using a soft, dry mop brush to burnish the metal leaf gently into place while brushing away excess metallic flakes. Carefully peel away the painter’s tape to reveal the clean, sharp metallic edge, then seal the entire vessel with clear gloss varnish.
8. Hand-Painted Botanical Motifs
Design Concept and Aesthetic Appeal
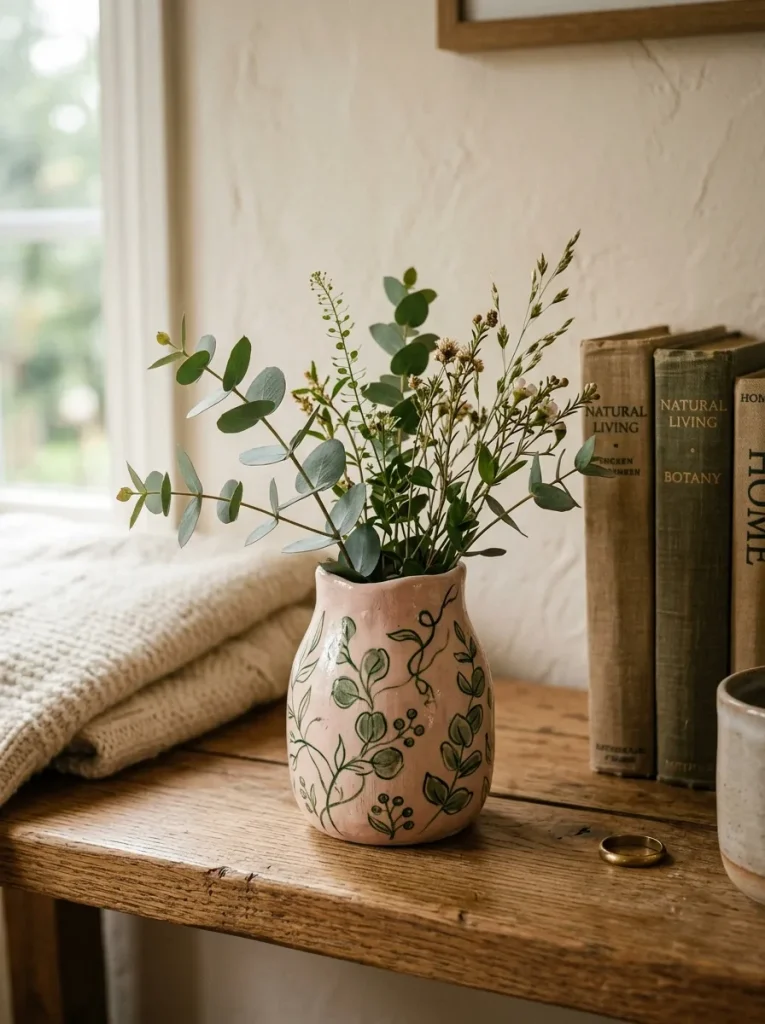
Hand-painted botanical motifs offer a highly customizable and artistic route for personalizing miniature flower vases with delicate floral illustrations. This creative project allows crafters to turn tiny plastic containers into mini hand-painted canvases featuring simple leafy vines, delicate eucalyptus sprigs, or abstract floral petals. Painted botanical art adds personal charm and soft organic color palettes to interior spaces, blending seamlessly with Scandinavian, modern rustic, or artistic home decor styles. Using fine detail brushes and acrylic paints, even beginners can render simple plant forms using basic brush strokes. These personalized art vessels make charming handmade gifts, party favors, or desktop accessories that showcase tiny living cuttings or delicate dried wildflower arrangements.
Step-by-Step Creation Method
Coat the plastic container with an even layer of multi-surface primer followed by two coats of neutral background paint, such as off-white, light sage, or pale blush pink, creating a clean canvas. Once dry, use a soft graphite pencil to trace delicate outlines of simple leaf shapes, stems, or small floral clusters onto the painted surface. Using a fine detail brush and artist-grade acrylic paints, carefully fill in the penciled botanical designs with controlled, light strokes, alternating between dark and light green shades to give leaves natural depth. Allow the detailed illustration work to dry completely for thirty minutes. To prevent hand oils, dust, or water drops from smudging or damaging the original hand-painted artwork, apply a smooth, even coat of satin finish spray varnish over the entire exterior surface.
9. Geometric Color-Blocked Modernist
Design Concept and Aesthetic Appeal
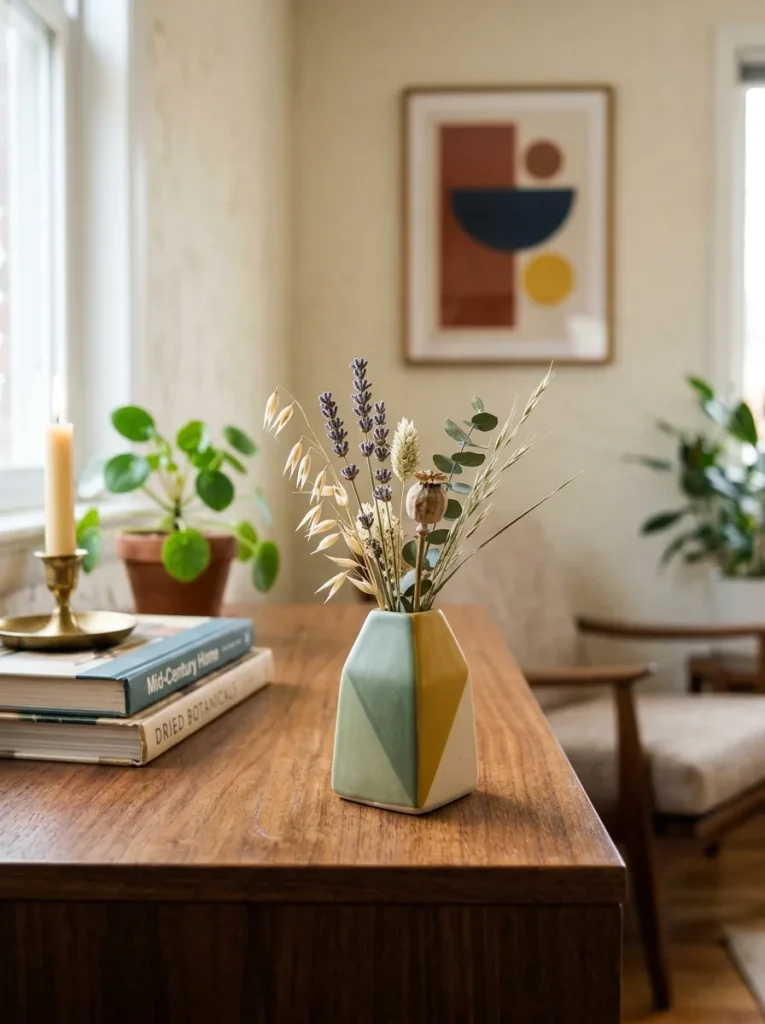
Geometric color blocking utilizes crisp lines, bold color contrast, and graphic layouts to build dynamic modern accent pieces out of simple plastic forms. This style relies on dividing the vessel into sharp, asymmetric segments painted in complementary or contrasting color schemes. Color blocking brings an energetic, contemporary feel to residential interiors, fitting perfectly into mid-century modern, Scandinavian, or minimalist style rooms. By selecting modern color palettes such as terracotta paired with cream, mustard yellow with muted teal, or sage green with dusty rose, you create an eye-catching visual statement. These vibrant mini vases serve as effective desk accessories, bookshelf pop accents, or contemporary windowsill displays that elevate simple dried stems or propagating cuttings.
Step-by-Step Creation Method
Begin by painting the entire pill bottle in a smooth coat of light-colored matte acrylic paint to serve as your foundational base layer, allowing it to dry fully for at least one hour. Apply low-tack precision painter’s tape securely across the bottle in clean diagonal, horizontal, or intersecting angular lines, rubbing the tape edges firmly with a fingernail to prevent liquid paint from bleeding underneath. Apply a contrasting paint color generously over one masked section using a flat synthetic brush, applying two coats for complete opacity. Wait roughly fifteen minutes until the paint is dry to the touch but still flexible, then carefully peel the painter’s tape away at a forty-five-degree angle to reveal exceptionally sharp, straight geometric lines. Allow the completed color blocks to cure fully before applying a clear acrylic topcoat for ultimate durability.
10. Mosaic Cracked Eggshell Texture
Design Concept and Aesthetic Appeal
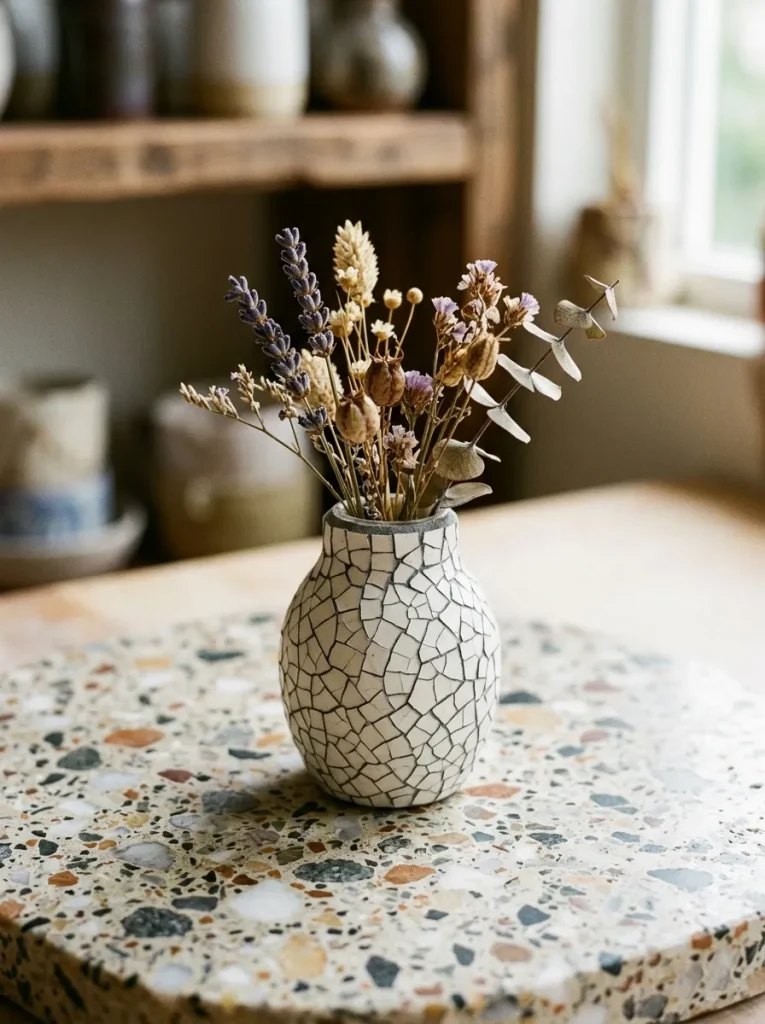
The mosaic cracked eggshell technique is a clever, eco-friendly crafting strategy that creates a sophisticated organic cracked ceramic texture on small surfaces. By adhering washed, crushed eggshell fragments onto the exterior of a plastic container, crafters create a detailed mosaic matrix resembling expensive terrazzo or cracked porcelain tile. The irregular natural cracks between shell fragments absorb dark paint glazes or grout washes selectively, highlighting intricate geometric line patterns across the small vessel surface. This creative project turns discarded kitchen waste and plastic bottles into unique art pieces with remarkable visual depth and tactile texture. These mosaic mini vases serve as striking conversation pieces on coffee tables, floating shelves, or vanity displays.
Step-by-Step Creation Method
Collect clean, dry eggshells and remove their inner membranes completely before breaking the shells into small, flat fragments ranging from one-quarter to one-half inch in size. Apply a liberal, thick layer of heavy-duty craft glue or decoupage medium onto a primed pill bottle. Using the flat pad of your thumb, press an eggshell fragment firmly onto the wet glue until it crackles and flattens against the curved plastic surface, leaving tiny natural gaps between the shattered pieces. Repeat this mosaic placement process until the entire container surface is covered in crackled shell fragments, then allow the glue to cure overnight. Brush a thin layer of dark acrylic paint over the entire shell matrix, then immediately wipe the surface with a damp paper towel so paint remains only within the recessed cracks, highlighting the dynamic mosaic texture before sealing with clear lacquer.
Common Beginner Mistakes and How to Avoid Them
| Common Mistake | Root Cause | Practical Prevention Strategy |
|---|---|---|
| Paint Peeling or Flaking | Applying paint directly to smooth, unprimed plastic surfaces. | Lightly sand the bottle with 220-grit sandpaper and apply a dedicated plastic primer coat first. |
| Visible Surface Lumps | Leaving glue or adhesive label residue on the container wall. | Soak bottles in warm soapy water and dissolve residual glue using isopropyl alcohol before crafting. |
| Bleeding Paint Lines | Using poor quality tape or removing painter’s tape too late. | Press tape edges down firmly with a fingernail and peel away at a 45-degree angle while paint is slightly damp. |
| Vessel Tipping Over | Light weight of plastic containers combined with tall stems. | Glue a heavy metal washer or small stones inside the base to establish a stable low center of gravity. |
Practical Tips for Better Results
Achieving professional, long-lasting craft results requires attention to small construction details and proper material handling techniques throughout the build. Always work in a well-ventilated space when applying spray primers, paints, or liquid acrylic sealants to protect your workspace air quality. To enhance physical stability and prevent lightweight plastic vases from tipping over under the weight of floral stems, consider gluing a heavy metal washer or a few smooth gravel pebbles inside the internal base before adding water or stems. When using real flower stems, ensure that your paint and decorative wraps stop slightly below the inner lip or are sealed thoroughly with waterproof varnish so water changes do not compromise the exterior artwork. Utilizing foam paint brushes rather than low-quality synthetic bristle brushes helps eliminate unsightly brush streaks, yielding smoother matte or gloss finishes. Furthermore, allowing proper drying times between paint application layers prevents underlying wet paint from clumping or tearing under subsequent brush strokes.
Styling, Presentation, or Organization Ideas
Group miniature pill bottle vases in odd numbers, such as clusters of three or five, to create visually balanced and dynamic decor arrangements across your home. Displaying vessels of varying heights and complementary color tones on a narrow wooden tray, marble slab, or decorative tier tray builds depth and artistic interest. These compact vessels excel when placed on narrow architectural ledges that cannot accommodate full-sized decor, such as window sills, floating bathroom shelves, kitchen splashback ledges, or bedside tables. Pair these upcycled vessels with delicate botanicals that match their miniature scale, such as dried baby’s breath, small eucalyptus sprigs, single wheat stalks, artificial succulents, or fresh wildflower cuttings. For seasonal updates, switch out display stems regularly, transitioning from vibrant fresh spring blooms to rich autumn dried grasses, ensuring your handmade displays remain fresh and engaging throughout the year.
Budget or Time Planning
Upcycling plastic medicine containers into decorative flower vases represents an exceptionally cost-effective crafting activity, with most projects requiring less than five dollars in new materials. The majority of necessary items, including empty plastic bottles, baking soda, eggshells, scissors, and paper towels, are readily available household items. Basic craft supplies like acrylic paint tubes, hot glue sticks, jute twine, and sandpaper can be purchased economically at local dollar stores or craft shops, often yielding enough materials to complete dozens of vessels. In terms of time investment, an individual mini vase typically requires approximately thirty to forty-five minutes of active crafting time, spread across a few short sessions to allow for drying between paint or adhesive coats. Planning a batch crafting session where you prepare, prime, and paint multiple pill bottles simultaneously maximizes your time efficiency, allowing you to produce a cohesive set of decorative vases in a single afternoon.
Creative Expansion and Advanced Inspiration
Once you have mastered basic painting, wrapping, and texturing methods, consider expanding your creative horizons by introducing advanced structural modifications and multi-vessel assemblies. Experiment with air-dry clay or polymer clay wrapped around the plastic core to sculpt custom organic vessel shapes, handles, pedestal bases, or arched necks before painting. You can also connect multiple pill bottles together side-by-side using strong epoxy adhesive to construct multi-tube propagation stations or continuous linear floral displays. Integrating small LED micro-string lights or warm fairy lights inside translucent painted containers creates glowing accent lamps for evening ambiance on nightstands or outdoor patio tables. Furthermore, converting these mini vessels into functional magnetic wall planters by securing strong neodymium magnets to one flat side allows you to mount lightweight botanical displays directly onto magnetic boards or refrigerator doors.