
10 Bedazzled Pill Bottle Ideas
Transforming everyday plastic medicine containers into glittering, functional storage vessels represents a creative approach to upcycling discarded household materials. Bedazzling prescription bottles combines plastic repurposing with detailed embellishment techniques, converting plain amber or white cylinders into eye-catching containers for small items. Readers exploring this tutorial will discover ten innovative decorative concepts, structural prep steps, stone attachment methods, and practical storage uses for finished jewel-encrusted containers. Adopting this upcycling technique prevents single-use plastics from entering waste streams while providing customized organizational solutions for travel, home decor, and craft storage. Mastering rhinestone application methods allows crafters to create secure bonds on smooth cylindrical surfaces using accessible materials and straightforward procedures. Understanding how surface preparation, adhesive selection, gem sizing, and pattern alignment interact ensures that embellished containers remain durable during routine daily handling. This guide provides step-by-step instructions and practical design frameworks tailored to help crafters of all skill levels execute polished, professional upcycling projects. By following these clear methods, individuals can turn standard prescription packaging into secure, stylish storage units that serve both decorative and organizational purposes across various spaces in the home.
Why This Idea Is Trending or Useful
Bedazzled plastic container crafts have achieved considerable popularity across visual discovery platforms due to their combination of functional utility, artistic customization, and accessible entry points for crafters. From an environmental standpoint, repurposing empty prescription bottles offers an effective way to redirect durable, food-grade plastics away from landfills through practical upcycling. For individuals seeking a beginner friendly easy project, embellishing small cylinders requires minimal technical skill while delivering high visual impact through reflective sparkle and rich surface texture. The practical value lies in organized containment; these compact containers feature moisture-resistant walls and secure press-and-turn or snap-top lids that protect delicate contents like jewelry, sewing pins, small electronics, or craft supplies. From a modern design perspective, covering industrial amber plastic with rhinestones, pearls, or glitter transforms medical packaging into glamorous home decor accents that fit seamlessly onto vanity tables, desks, or travel bags. The trend reflects a growing interest in creative ideas that pair sustainable crafting principles with glamourous, customized organization solutions accessible on realistic budget ideas.
Materials and Preparation
Achieving a durable finish on plastic bottle projects requires assembling appropriate tools, selecting strong adhesives, and completing thorough surface prep prior to applying decorative gems. Essential materials for these projects include empty plastic prescription bottles, flatback rhinestones, artificial pearls, loose glitter, decorative chains, and pre-strung gem ribbons. Key tools include fine-tip precision tweezers, wax-tipped rhinestone applicator pens, fine-grit sandpaper, rubbing alcohol, cotton swabs, and a silicone crafting mat to catch loose supplies. For adhesives, select specialized industrial craft glues or heavy-duty jewelry resins that form flexible, waterproof bonds on non-porous plastics like polypropylene. Surface preparation is critical for longevity; start by removing all paper prescription labels, soaking bottles in warm soapy water to loosen glue residue, and wiping the exterior clean with rubbing alcohol. Once dry, lightly scuff the smooth plastic surface using 220-grit sandpaper to create micro-grooves that enhance mechanical adhesion for glue bonds. Planning considerations involve measuring bottle dimensions, sketching gem patterns beforehand, and choosing a dedicated workspace with strong lighting to ensure accurate stone alignment during application.
MAIN IDEAS SECTION
Crystal Grid Vanity Pill Bottle Container
Step-by-Step Guide
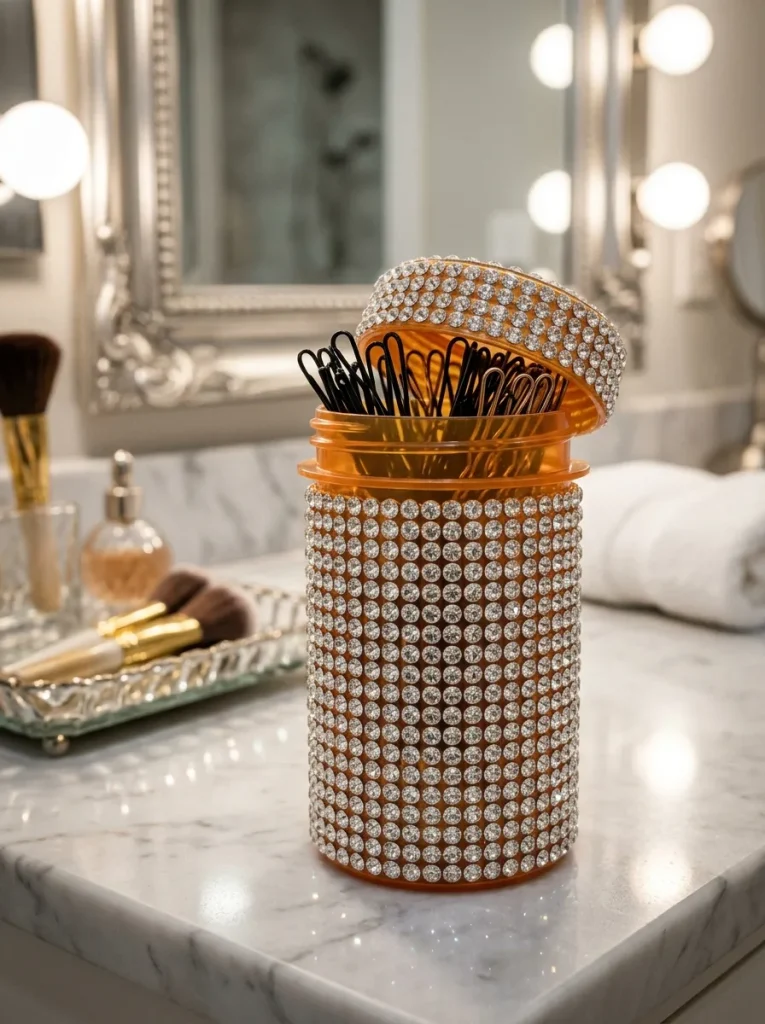
The crystal grid vanity container utilizes uniform round rhinestones laid out in precise vertical and horizontal rows to create a smooth, mirrored pave surface across the bottle exterior. This design transforms standard translucent plastic into an elegant, glittering cylinder suitable for displaying luxury bobby pins, hair elastics, or small jewelry pieces on a dressing table. The structural clarity of a grid layout emphasizes geometric symmetry, giving the finished container a sleek, high-end appearance that mimics high-end crystal perfume bottles. Selecting clear or iridescent crystal rhinestones creates maximum light refraction, converting a simple utility bottle into an attractive decor piece.
To make this container, clean and sand a standard amber prescription bottle, wiping away any residual dust with rubbing alcohol. Apply a thin, horizontal bead of industrial jewelry glue around the bottom circumference of the bottle base using a fine precision tip. Using a wax pencil or tweezers, pick up individual flatback rhinestones and press them firmly into the glue line, working in a straight, contiguous ring. Repeat this process line by line, stacking each subsequent row of gems directly above the previous layer to form a perfect grid, or offsetting them slightly for a brick-weave effect. Allow the adhesive to cure fully for twenty-four hours before filling the container with small beauty accessories and securing the lid.
       [====== Lid ======]
      | * * * * * * * * * |  <- Row 3
      | * * * * * * * * * |  <- Row 2
      | * * * * * * * * * |  <- Row 1
       -------------------
Ombre Sparkle Travel Sewing Kit
How to Create
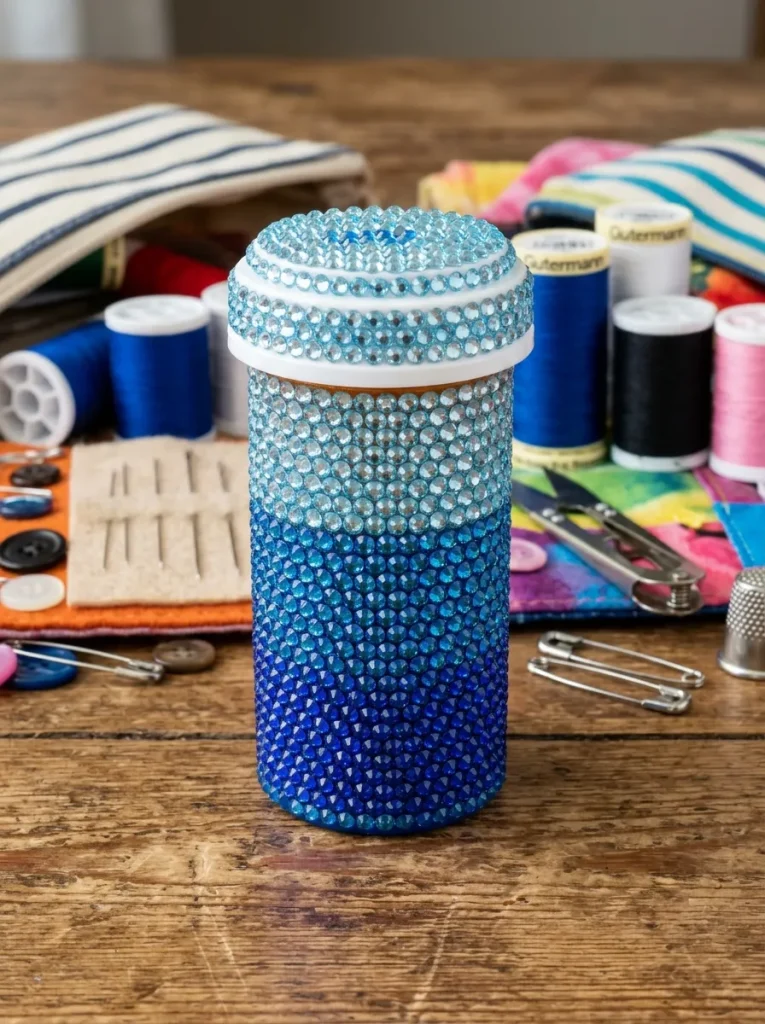
An ombre sparkle travel sewing kit combines gradient color transitions using multi-toned rhinestones to produce a sophisticated, shimmering storage vessel for emergency sewing supplies. By fading from deep jewel tones at the base to lighter pastel shades near the neck, this design achieves a dynamic visual sweep across the container. The compact plastic shell provides ideal protective housing for needles, small thread spools, safety pins, and buttons, preventing sharp items from piercing fabric travel bags. The color gradient disguises the internal contents completely, turning an industrial medicine holder into a stylish, portable repair kit.
Begin the creation process by selecting three complementary shades of flatback rhinestones in identical sizes, such as dark blue, medium sapphire, and pale ice blue. Prepare the plastic bottle surface by lightly abrading the exterior with sandpaper and painting it with a thin layer of matching acrylic craft paint to mask any background plastic color. Starting at the bottom third of the container, apply adhesive and attach the darkest rhinestone shade in tightly packed concentric rings. Transition to the medium color shade across the center section, interspersing a few dark and light stones along the boundary line to blend the gradient smoothly. Finish the top third with the lightest gems, wrapping the bottle neck securely and letting the assembly set undisturbed until hardened.
Pearl and Rhinestone Bridal Emergency Cylinder
Execution Process
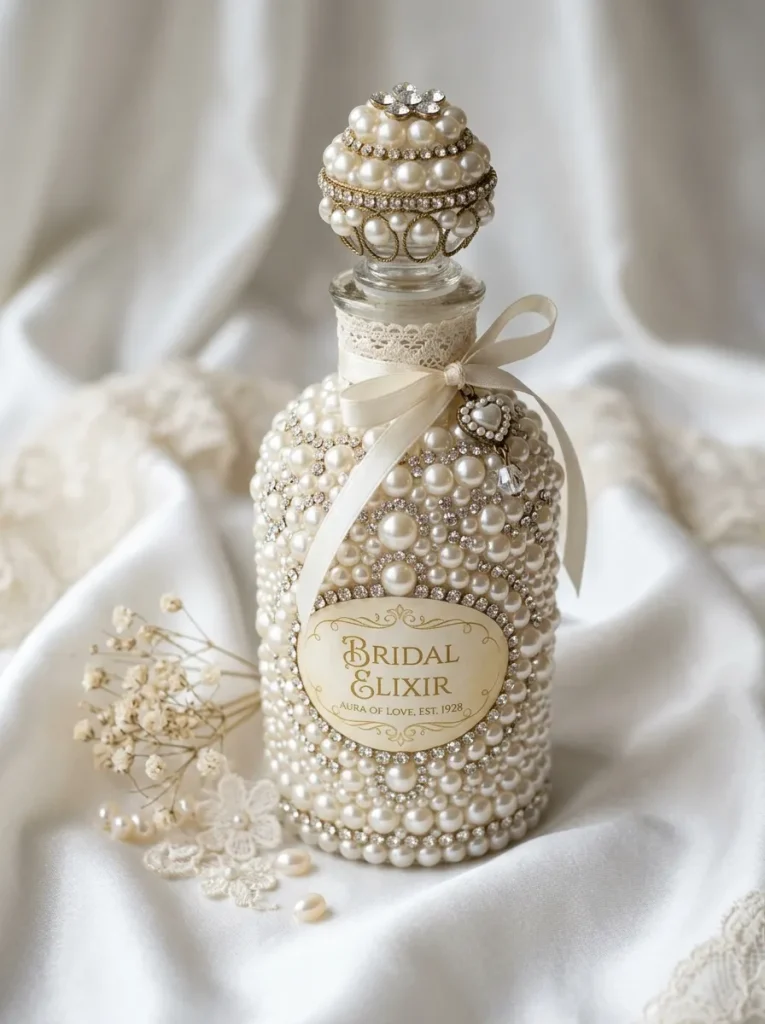
The pearl and rhinestone bridal emergency cylinder merges smooth cream-colored half-pearls with sparkling clear gems to yield a classic, vintage-inspired storage capsule. Designed to hold emergency items such as safety pins, earring backs, fashion tape, and mints, this embellished holder fits discreetly into bridal purses or vanity kits. The contrast between smooth, satin-finish pearl domes and faceted crystal rhinestones creates rich tactile depth and timeless elegance. Utilizing varying bead sizes prevents flat spots, covering the curved plastic surface in a dense, luxurious mosaic.
To construct this piece, gather a assortment of flatback pearl cabochons and clear crystal rhinestones ranging from three millimeters to eight millimeters in diameter. Clean the exterior of a white or clear plastic bottle, ensuring all label adhesives are entirely removed with alcohol. Dab small drops of strong gel adhesive onto the bottle, placing larger pearl cabochons across the surface first to establish primary anchor points. Fill the remaining open spaces surrounding the large pearls by embedding smaller rhinestones and tiny seed pearls into the gaps, pressing each piece flush against the plastic. Cover the outer lid rim in a single row of matching mini-pearls, allowing the entire vessel to cure completely before packing it with bridal day essentials.
Metallic Dragon Scale Travel Coin Holder
Setup Method
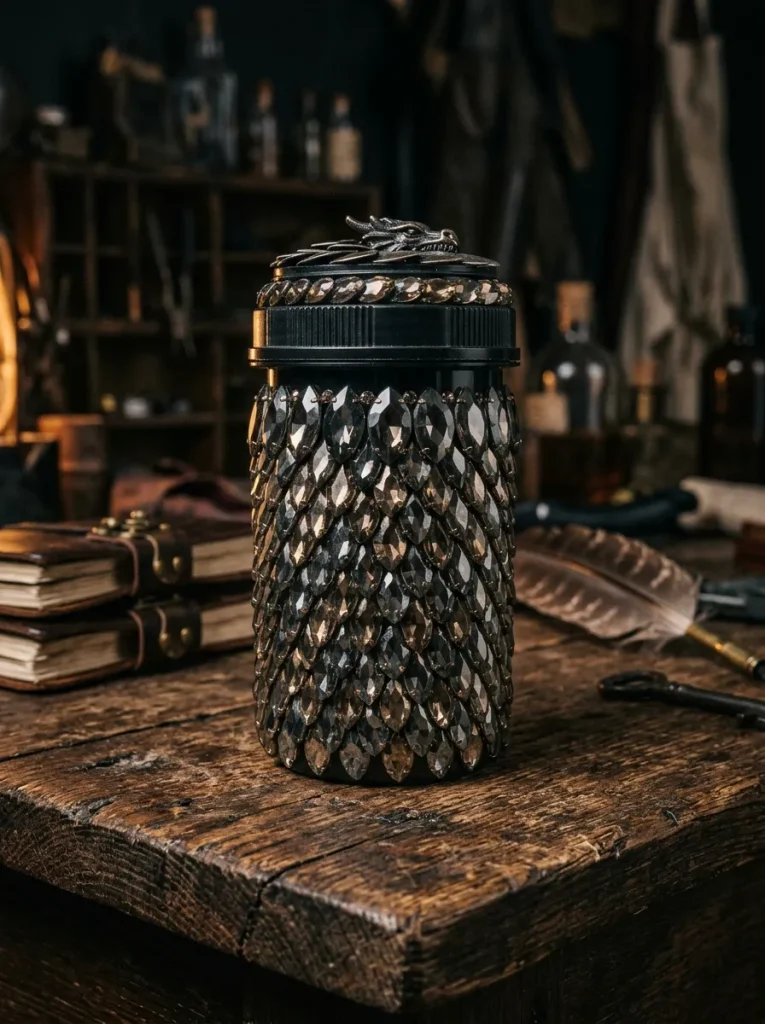
The metallic dragon scale travel coin holder incorporates overlapping metallic teardrop gems or dark rhinestone rows to produce an armor-like textured surface. This bold design provides a durable, high-grip finish that turns an old prescription container into a secure purse organizer for spare change, folded bills, or tokens. The metallic coloration—such as gunmetal, bronze, and hematite—delivers a modern, edgy aesthetic while completely obscuring the bottle contents from outside view. The rigid plastic structure protects coins from spilling, while the textured exterior ensures an easy grip when retrieving change from deep bags.
Start the setup by wiping down a large plastic medicine container and applying a base coat of dark grey or black primer paint formulated for plastics. Allow the paint to dry fully before applying a vertical strip of thick gel adhesive from the bottom base up to the top lip. Press metallic metallic-finish rhinestones or leaf-shaped cabochons into the glue, overlapping the top edge of each lower gem slightly over the bottom edge of the next to simulate scales. Work around the bottle in vertical columns, keeping the overlapping alignment consistent across the entire circumference. Finish the project by applying a protective clear coat sealer over the gems, setting the bottle aside to dry thoroughly before storing coins inside.
Neon Pop Desk Organizer for Paperclips
How to Make
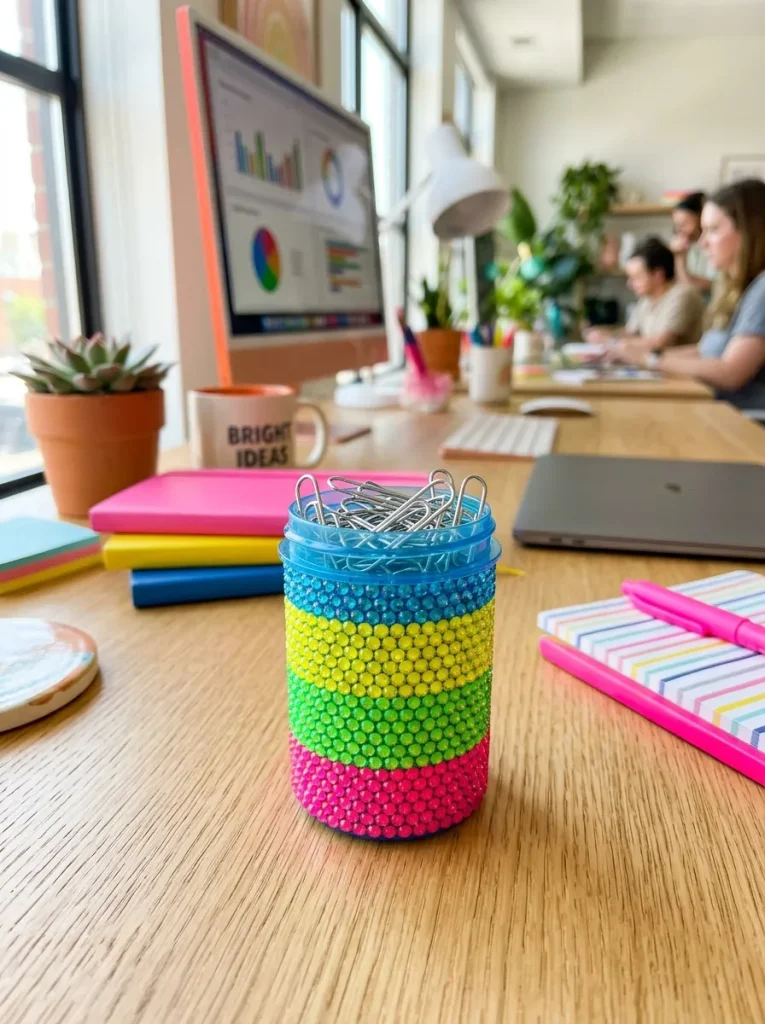
The neon pop desk organizer utilizes brightly colored fluorescent rhinestones arranged in vibrant geometric blocks to create a lively desktop storage container for office supplies. This colorful approach brightens up work areas while providing a designated home for small items like paperclips, pushpins, or eraser caps that easily clutter desks. The high-contrast neon gems completely transform the medical appearance of the plastic bottle into a playful, contemporary office accessory. Using distinct color panels makes it easy to color-code multiple bottles for systematic desktop organization.
To make this organizer, select four high-visibility neon rhinestone colors, such as fluorescent pink, electric green, bright yellow, and cyan blue. Draw simple geometric quadrant guidelines onto the cleaned bottle surface using a fine-point permanent marker to divide the area into four equal sections. Apply adhesive inside the first marked quadrant and fill the space completely with pink rhinestones, pressing them tightly together to eliminate gaps. Repeat this process for the remaining three quadrants using the different neon colors to create sharp, color-blocked panels around the cylinder. Apply a row of mixed neon gems around the top push-and-turn cap edge, allowing the glue to set fully before placing the holder on your desk.
+-------------------+
|  [Pink] | [Green] |
|---------+---------|
| [Yellow]|  [Blue] |
+-------------------+
Iridescent Mermaid Scale Toothpick Dispenser
Step-by-Step Guide
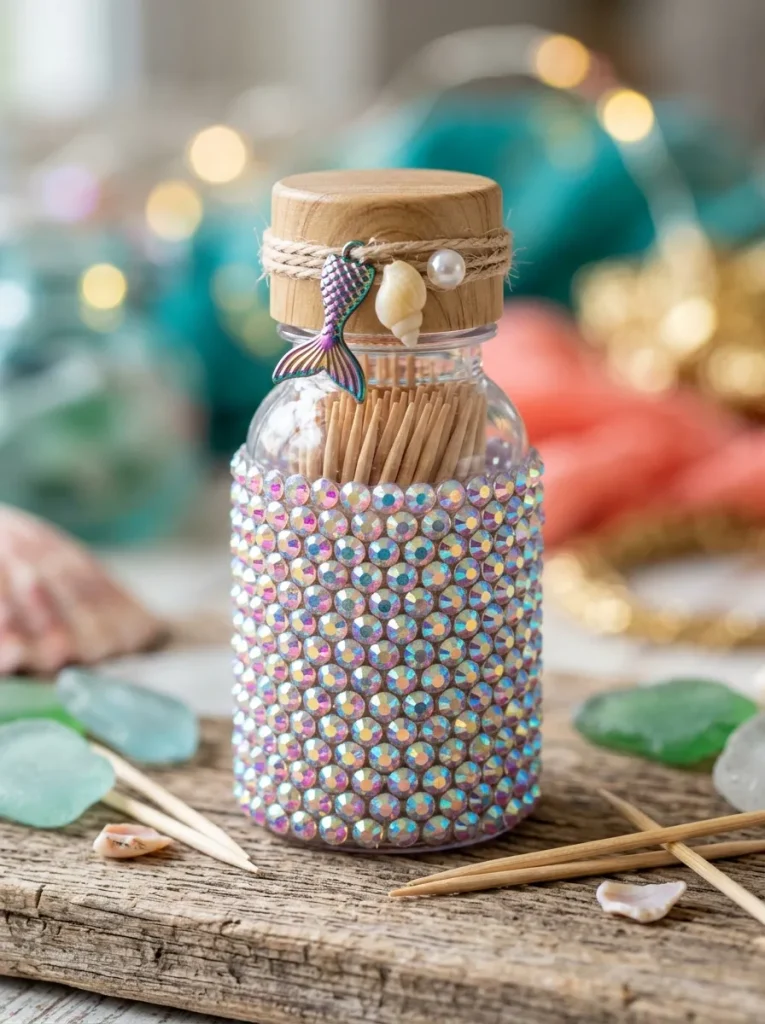
The iridescent mermaid scale dispenser uses aurora borealis (AB) coated gems that shift color in different lighting conditions to create an aquatic, shimmering surface. This eye-catching vessel serves as a clean, portable dispenser for toothpicks, interdental brushes, or cotton swabs during travel or dining outings. The reflective surface treatment gives off pink, blue, and gold flashes, concealing the utilitarian nature of the underlying plastic bottle completely. The compact, moisture-proof snapping cap preserves hygiene while adding a decorative element to dining tables or kitchen counters.
Begin by acquiring a narrow plastic prescription bottle and a supply of iridescent AB flatback rhinestones in mixed sizes. Clean the container thoroughly with warm soapy water, dry it completely, and lightly sand the exterior surface to promote strong glue adhesion. Apply a flexible craft glue to a small three-centimeter patch on the lower half of the bottle. Using a wax picker tool, place the iridescent gems in a tight mosaic pattern, nestling smaller round stones between larger ones to cover every millimeter of background plastic. Continue gluing and setting gems in small sections moving upward until the entire bottle body is coated, then embellish the top lid surface in a concentric spiral pattern.
Pastel Candy-Coated Earbud Capsule
Execution Process
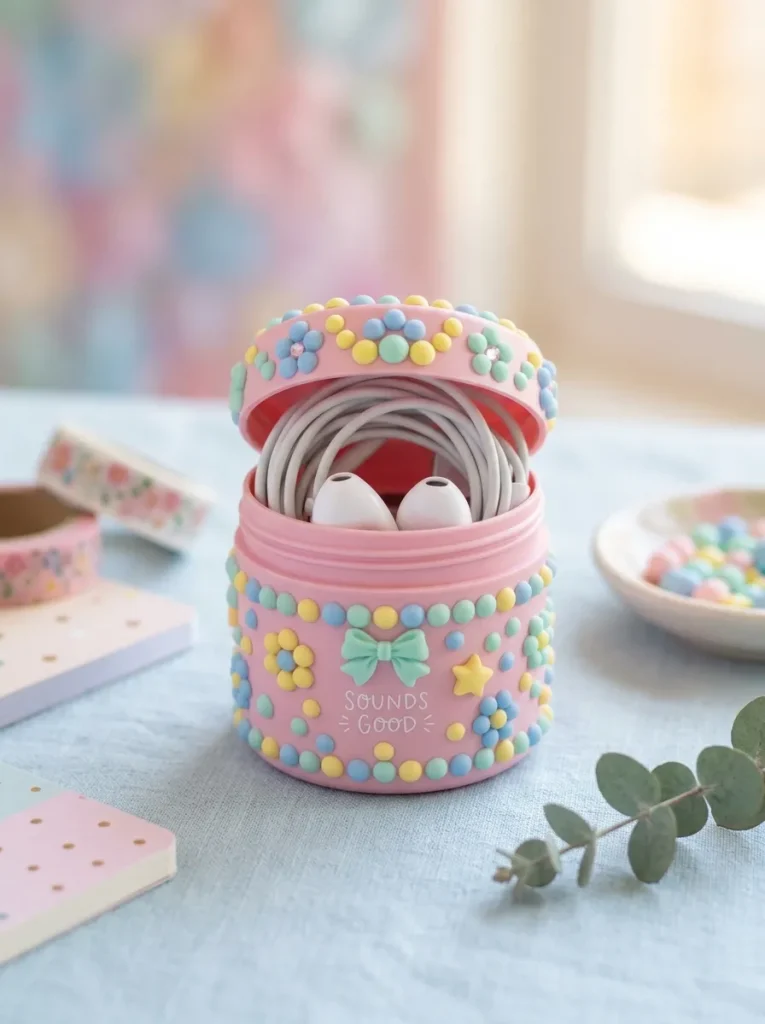
The pastel candy-coated earbud capsule features soft, matte-finish pastel rhinestones and flat resin cabochons arranged in a sweet, tactile pattern across a compact bottle. This protective enclosure keeps delicate wired earbuds or charging cables coiled safely without tangling or suffering crushed wires inside pockets and backpacks. The smooth, chalky texture of pastel gems gives the container a playful, confectionary appearance that looks like decorative candy packaging. The sturdy plastic walls guard internal electronic accessories against moisture, dust, and accidental impacts during daily commutes.
To create this capsule, select a small, pocket-sized prescription bottle and a assortment of matte pastel flatback gems in mint, lilac, soft yellow, and sky blue. Wash the bottle clean, dry it thoroughly, and coat the exterior with a pastel pink acrylic spray paint suitable for plastics to establish a soft background color. Once the paint is dry, apply small dots of clear silicone adhesive or heavy-duty craft glue across the upper section of the bottle. Press pastel gems randomly into the adhesive, mixing colors and shapes to achieve a scattered confetti effect across the entire surface. Allow the adhesive to cure completely over twenty-four hours before coiling your earbuds inside and snapping the child-safe cap shut.
Gothic Velvet and Black Crystal Pill Vault
Setup Method
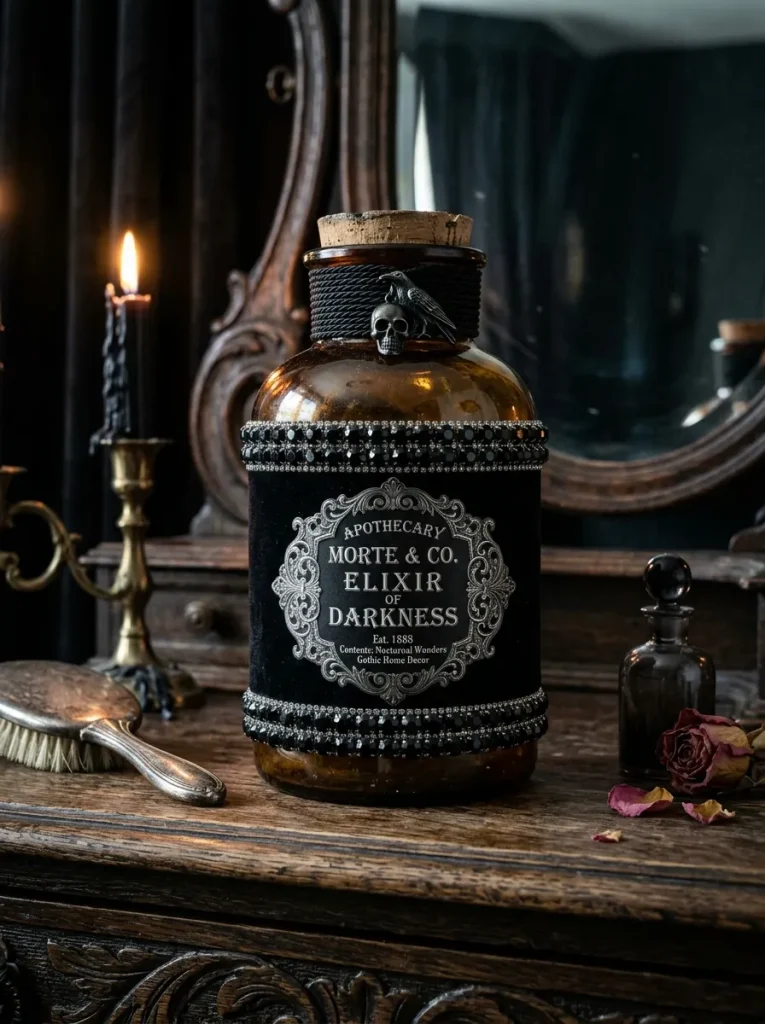
The gothic velvet and black crystal vault pairs dark matte velvet ribbon accents with jet-black faceted rhinestones to produce a moody, dramatic container for small trinkets. This design utilizes deep black textures and high-shine dark crystals to create a mysterious, antique-looking pill box or ring holder. The combination of soft fabric texture with hard, faceted glass creates a rich sensory contrast that transforms cheap plastic into an ornate keepsake chest. The dark color scheme fits seamlessly onto gothic vanities, dark wood bookshelves, or alter spaces as an understated storage piece.
Start the setup by measuring the central section of a medium-sized amber plastic bottle and cutting a strip of black velvet ribbon to fit around the middle. Coat the backside of the velvet ribbon with fabric glue and wrap it securely around the center of the bottle, smoothing out any wrinkles or air pockets. Apply lines of clear industrial adhesive directly above and below the velvet ribbon border onto the exposed plastic surfaces. Press jet-black glass rhinestones into the glue, forming dense dark borders that frame the center velvet band cleanly. Top off the design by gluing a large, faceted black glass gem to the center of the top lid, letting the vessel dry fully before using it for storage.
Glitzy Keyring Pill Container for Medication
How to Make
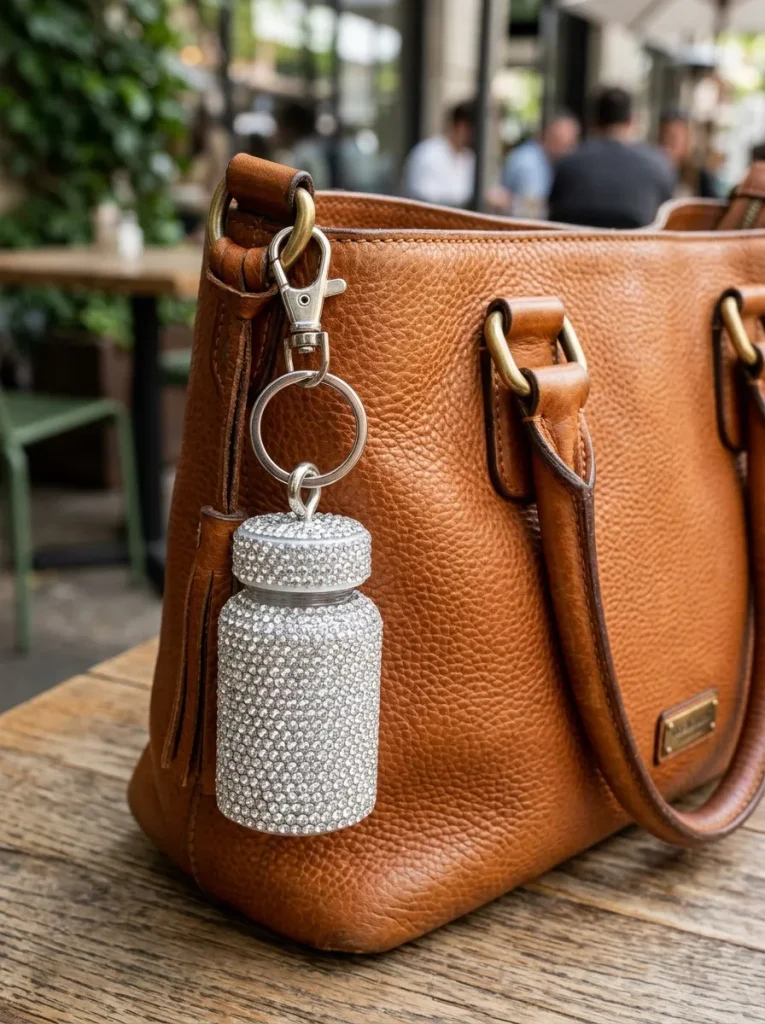
A glitzy keyring pill container combines full-coverage rhinestone embellishment with a secure key ring attachment, turning a daily medication holder into a portable fashion accessory. Covering the exterior in high-grade silver or gold rhinestones turns a personal medical item into a stylish purse charm or key fob. Adding a sturdy key ring to the cap ensures that critical daily tablets or emergency medications remain attached to house keys or bag straps for quick access. The durable plastic construction remains waterproof and airtight, protecting daily dosages from crushing or moisture exposure while on the go.
To construct this keychain holder, drill a small hole through the center of a heavy-duty press-and-turn prescription bottle cap using a micro drill bit. Thread a metal screw-eye hook through the drilled hole, securing it on the underside of the cap with a small washer and nut sealed with waterproof epoxy. Clean and sand the bottle exterior, then apply a layer of strong waterproof craft glue across the plastic body. Press rows of metallic gold or silver rhinestones into the glue, covering the entire bottle surface up to the cap threads. Attach a split keyring and carabiner clip to the top screw-eye hook, allowing the entire assembly to cure for two days before attaching it to your keys.
       (  Keyring  )
            ||
       [=== Cap ===]
      | * * * * * * |
      | * * * * * * |  <- Rhinestone Body
      | * * * * * * |
       -------------
Retro Disco Ball Herb and Spice Jar
Step-by-Step Guide
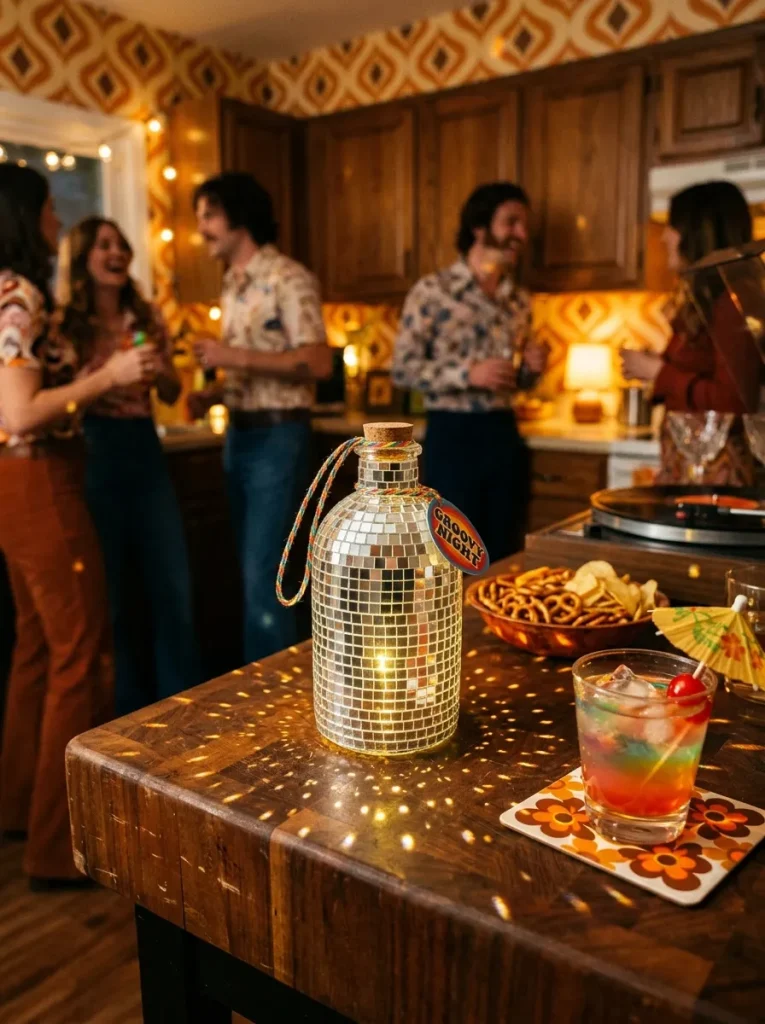
The retro disco ball jar uses silver square mirror tiles or square rhinestones to recreate the iconic reflective pattern of a classic party ball. When light hits the mirror facets, the container casts tiny sparkling reflections across the surrounding room, turning simple storage into an entertaining decorative element. This compact, airtight container works exceptionally well for storing small quantities of kitchen spices, dried herbs, or specialty salts, as the opaque glass-like exterior protects contents from light degradation. The geometric precision of square tiles yields a clean, grid-like finish that brings a nostalgic retro flair to kitchen counters or bar carts.
Begin by obtaining a clean, dry prescription bottle and a sheet of self-adhesive mini glass mirror tiles or square silver rhinestones. Wipe the bottle down with rubbing alcohol to remove all grease and dust, ensuring a pristine surface for maximum adhesive contact. Peel a strip of square mirror tiles from the backing sheet and apply them horizontally around the bottom base of the cylinder, pressing firmly to secure the bond. Continue wrapping consecutive rows of mirror tiles upward toward the neck, trimming excess tiles at the end of each ring with heavy-duty scissors to maintain aligned vertical grid lines. Cover the top cap with a circular patch of mirror tiles, then wipe the reflective surface clean with a microfiber cloth to remove fingerprints.
Common Beginner Mistakes and How to Avoid Them
Creating durable bedazzled plastic containers requires avoiding several frequent technical mistakes that undermine adhesive bonds and visual appeal. A primary mistake among beginner crafters is failing to sand or scuff the smooth plastic surface of the prescription bottle before applying glue. Smooth polypropylene plastics resist glue attachment, causing rhinestones to pop off easily during daily handling unless the surface is mechanically abraded with fine-grit sandpaper. Another common error is using standard hot glue or basic school glue, which lacks the flexibility and chemical bonding power needed to grip non-porous plastic permanently. Always select specialized industrial craft adhesives, jewelry glues, or silicone-based resins designed specifically for bonding glass or metal to plastic surfaces. Additionally, applying excessive adhesive causes glue to squeeze up between gems, clouding the faceted surfaces of rhinestones and creating a messy finish. Apply glue in controlled, thin lines or small dabs using precision applicator tips to keep the rhinestone surfaces clean and brilliant. Finally, avoid placing gems over the bottle cap threads, as this prevents the lid from closing securely and compromises the airtight seal of the container.
| Common Mistake | Practical Impact | Corrective Action |
| Skipping Surface Sanding | Gems detach easily from smooth plastic | Abrade plastic with 220-grit sandpaper before gluing |
| Using Hot Glue or School Glue | Poor bond strength and brittle failure | Use industrial craft glues rated for plastic |
| Over-Applying Adhesive | Glue overflows and dulls gem shine | Use precision applicator tips and small glue dabs |
| Placing Gems on Cap Threads | Lid fails to seal or lock properly | Stop gem application below the screw thread line |
Practical Tips for Better Results
Achieving professional-looking results with upcycled bedazzled containers relies on attention to prep work, precise tool handling, and disciplined finishing steps. Always work on a clean, level surface covered with a non-stick silicone craft mat to catch stray gems and prevent glue drips from damaging furniture. Utilize a specialized wax-tipped pick-up pencil or vacuum pen rather than standard tweezers when placing small rhinestones, as wax tips allow for faster, more accurate placement without scratching delicate gem coatings. When designing complex patterns or gradients, lay your rhinestones out on a flat tray beforehand to test color arrangements and calculate how many gems are required per row. If you are using clear translucent amber bottles, painting the exterior with an acrylic primer that matches your rhinestone color prevents the orange plastic background from showing through gaps between round gems. To increase the lifespan of your project, apply a thin layer of water-based clear sealer or spray varnish over acrylic gems after the primary glue has cured, locking them in place without reducing their reflective sparkle. Allow all completed bottles to cure fully for at least twenty-four to forty-eight hours before introducing them to regular daily use or placing them in travel bags.
Styling, Presentation, or Organization Ideas
Displaying embellished upcycled containers effectively involves coordinating color schemes, grouping complementary sizes, and organizing practical interior contents systematically. Arrange multiple bedazzled bottles in clusters of three on mirrored vanity trays, acrylic risers, or decorative shelving to create balanced visual focal points in bedrooms or bathrooms. Group containers by color palette—such as pairing silver, clear crystal, and pearl bottles together—to maintain an intentional, curated aesthetic across your storage displays. From a practical organization perspective, use different gem colors to identify bottle contents instantly without needing text labels; for example, store sewing pins in a red gem bottle, hair bands in a blue bottle, and safety pins in a silver container. Label the bottom underside of containers using a small circular sticker or permanent marker if precise text identification is necessary for medical or craft organization. Incorporate these glittering cylinders into travel kits by packing them inside clear cosmetic bags, where their reflective surfaces make them easy to locate quickly in deep luggage. Combining practical internal storage with striking visual exteriors allows these upcycled creations to function as both efficient organizers and stylish decor accents throughout the home.
Budget or Time Planning
Executing bedazzled bottle projects efficiently involves managing craft expenses wisely and scheduling construction tasks into manageable timeframes. From a financial perspective, upcycling empty prescription bottles eliminates container costs entirely, making this an extremely affordable craft with low material overhead. A basic embellishment project typically costs between five and fifteen dollars for rhinestones, specialized craft glue, and basic applicator tools, with bulk gem packs providing enough supplies to complete multiple containers. Time investment per bottle ranges from one to three hours depending on the density of gem coverage, rhinestone size, and the complexity of the chosen pattern.
Phase 1: Label Removal & Sanding (20 Mins) ──> Phase 2: Painting & Prep (20 Mins) ──> Phase 3: Gem Application (1-2 Hours)
To optimize your workflow, complete bottle preparation—such as label soaking, glue removal, surface sanding, and base painting—in batches of three or four bottles at once. Dividing the project into distinct phases allows base paints and cleaning agents to dry completely before you begin the meticulous gem application process. Planning short fifteen-minute adhesive curing breaks every few rows prevents gems from shifting out of alignment while you work up the cylindrical body of the container.
Creative Expansion and Advanced Inspiration
Once you master basic rhinestone application on plastic cylinders, exploring advanced embellishment techniques allows for continuous artistic variation and functional upgrades. Experiment with incorporating mixed-media elements onto your containers, such as embedding metal charms, filigree stampings, vintage jewelry pieces, or resin cabochons alongside flatback gems. Upgrade the structural utility of your bottles by attaching small neodymium magnets to the interior back wall with epoxy, allowing embellished containers to stick securely to metal bulletin boards, refrigerators, or workshop tool panels. Advanced crafters can create themed gift sets by matching bedazzled bottles with coordinating embellished compact mirrors, nail files, or travel hairbrushes packaged in decorated gift boxes. Consider exploring resin encapsulation techniques, applying a thin coat of clear UV resin over bedazzled surfaces to lock gems permanently into a smooth, glass-like outer shell that withstands heavy daily wear. Expanding your projects to include custom color palettes tailored for seasonal holidays, wedding party favors, or personalized gifts turns simple plastic waste into meaningful, handcrafted treasures that combine environmental utility with lasting decorative appeal.