
10 Bedazzled Pill Bottle Designs
Transforming everyday prescription packaging into decorative containers offers a unique avenue for personal expression, home organization, and upcycling. Bedazzling plastic medicine containers with rhinestones, flatback gems, and metallic embellishments converts basic medical storage into eye-catching decor for vanity tables, travel bags, and craft desks. This comprehensive guide delivers ten complete, original bedazzled pill bottle concepts designed to enhance personal storage while keeping small items organized. Readers will learn practical techniques for surface prep, gem placement, adhesive selection, and protective sealing tailored for plastic bases. Whether you are creating a sparkly travel sewing kit, a glam earbud holder, or a gem-encrusted coin container, these step-by-step instructions provide clear guidance for makers of all skill levels. Master how to work with acrylic rhinestones, glass crystals, pearls, and metallic studs to disguise plastic prescription containers completely. By following structured planning protocols, using appropriate non-toxic adhesives, and applying uniform setting patterns, anyone can produce durable, high-shine accessories. Discover how modest materials and creative ideas combine to create functional, handmade organizational storage that elevates daily routines.
Why This Idea Is Trending or Useful
Bedazzled plastic pill bottle crafts are rapidly gaining popularity across visual inspiration platforms like Pinterest because they merge practical storage utility with high-shine glam aesthetics. Standard prescription bottles are manufactured from durable plastics designed to block moisture and preserve structural integrity over long periods. Instead of discarding these sturdy cylinders, upcycling them with sparkling embellishments gives them a second life as decorative personal accessories. The practical value of these creative ideas lies in custom organization; bedazzled containers make organizing small items like mints, safety pins, jewelry, and daily vitamins easy while on the go. Beginners appreciate how accessible and forgiving crystal embellishment can be, as simple geometric patterns and dense rhinestone clusters mask surface imperfections effortlessly. Furthermore, bedazzling provides a relaxing, detail-oriented DIY project that requires minimal physical space and modest initial material costs. Transforming clinical packaging into sparkling decor items allows individuals to display personal accessories proudly on dressers, nightstands, and office desks. This trending approach proves that upcycling basic household plastic waste yields functional, aesthetic accessories tailored to modern personal styles.
Materials and Preparation
Achieving a long-lasting, professional finish on bedazzled prescription containers requires systematic surface preparation, safe adhesives, and proper stone application tools. Standard plastic medicine bottles feature smooth polypropylene or polyethylene surfaces that resist adhesives unless prepped thoroughly beforehand. Begin by removing original paper labels completely, soaking the containers in warm soapy water mixed with rubbing alcohol to dissolve adhesive residue. Lightly scuff the entire exterior wall of each bottle using fine-grit sandpaper; this crucial step creates microscopic mechanical grooves that allow glue to anchor securely. Recommended materials for these projects include flatback glass or acrylic rhinestones in various sizes, multi-surface craft adhesives or industrial gem glues, precision tweezers, wax gem picker pens, shallow sorting trays, and clear protective sealers. Work in a clean, well-lit space equipped with a flat craft mat to catch stray crystals during assembly. Planning your design layout and organizing gems by color and size in sorting trays before opening adhesive containers ensures an efficient, stress-free crafting session with clean, precise results.
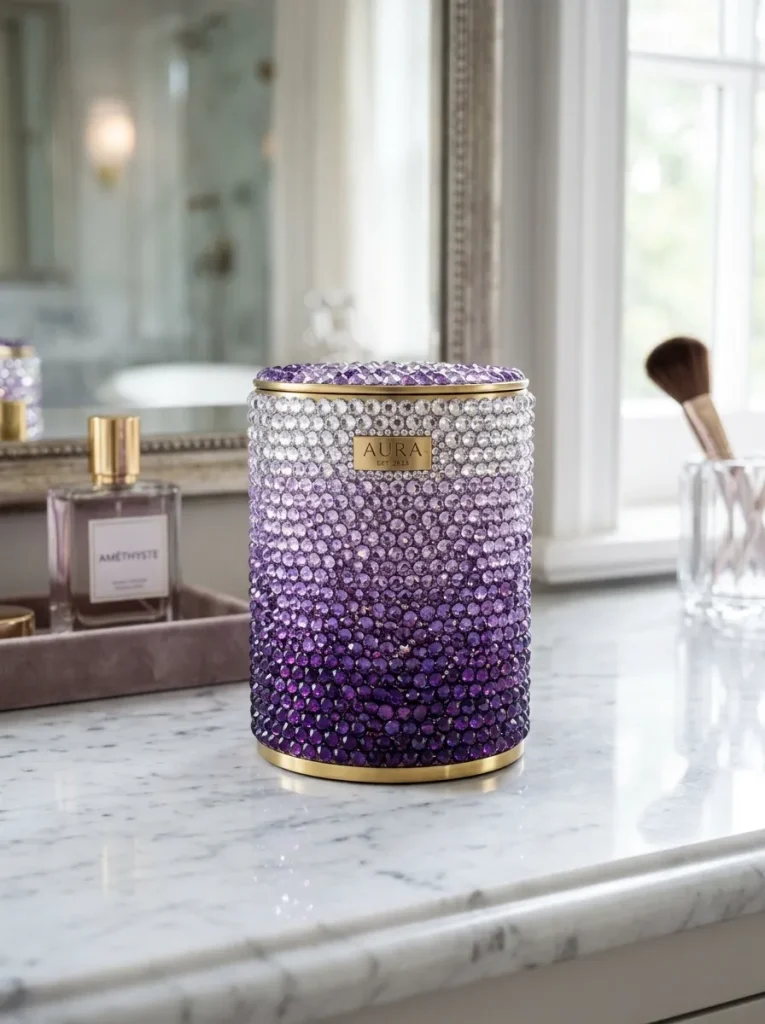
Monochromatic Crystal Gradient Cylinder
Ombre Sparkle Concept
The monochromatic crystal gradient cylinder utilizes rhinestones of a single color family transitioning from dark to light shades to establish a sophisticated ombre effect. This design covers the plastic bottle entirely with tightly packed flatback crystals, creating a seamless metallic or jewel-toned surface that conceals the original container underneath. By placing darker rhinestones at the base and gradually shifting to pastel or clear crystals near the cap, the vessel gains dynamic visual height and depth. The ombre pattern works exceptionally well on cylindrical bases, turning simple storage containers into elegant vanity accents suitable for holding delicate jewelry, hair ties, or small office supplies.
Step-by-Step Guide
Prepare a clean, sanded prescription bottle by applying a thin coat of acrylic paint that matches the darkest rhinestone color shade along the bottom half. Starting at the base edge, apply a narrow horizontal bead of multi-surface gem adhesive around the lower perimeter of the container using a fine nozzle tip. Using a wax picker pen, press dark-toned flatback rhinestones firmly into the glue line, working in a tight, continuous horizontal ring around the base. Continue adding horizontal rows upward, gradually mixing in medium-toned crystals on the middle third of the bottle body to blend the color shift smoothly. Finish the upper third with the lightest crystal shades, ensuring all stones sit flush against adjacent gems without gaps before leaving the container to cure undisturbed for twenty-four hours.
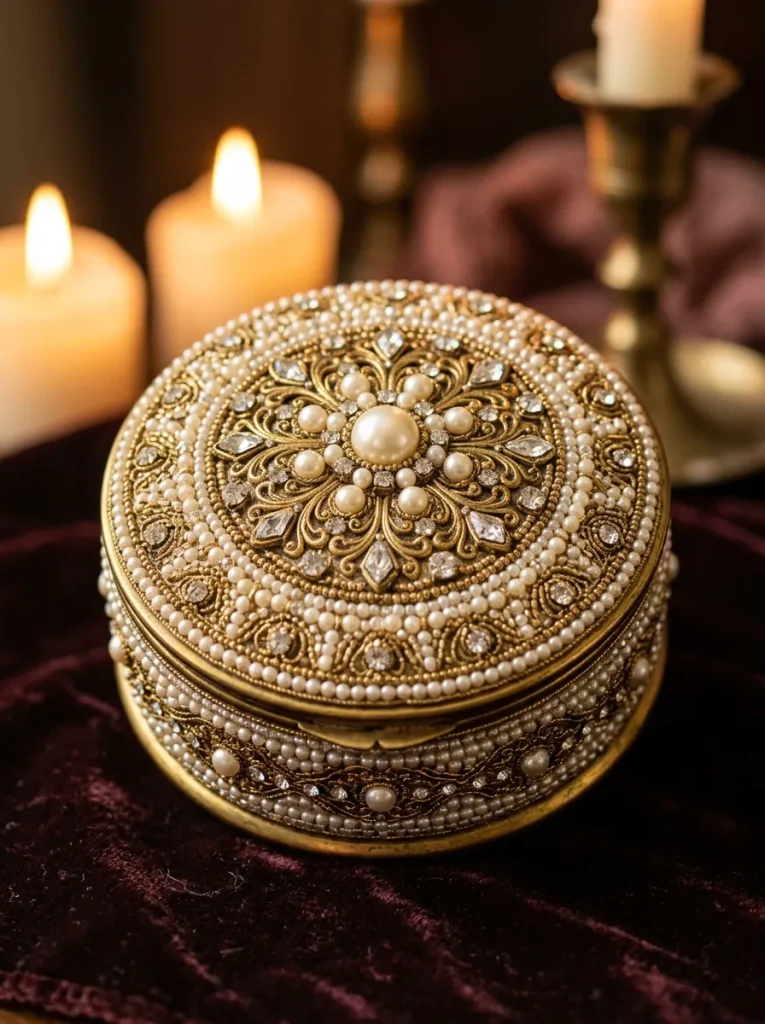
Pearl and Crystal Vintage Medallion
Regal Baroque Aesthetic
The pearl and crystal vintage medallion design combines ivory flatback pearls with clear crystal rhinestones to form intricate, antique-inspired geometric patterns across the bottle surface. Incorporating rounded pearl cabochons alongside faceted glass gems introduces contrasting textures that reflect light differently, evoking classic luxury jewelry aesthetics. The central medallion pattern serves as a prominent focal point on the front wall, while smaller pearl clusters decorate the remaining sides and cap perimeter. This design transforms plain plastic into an opulent trinket holder ideal for display on vintage dressers, vanity trays, or nightstands.
Setup Method
Draw a simple diamond or circular medallion outline directly onto the front of a prepped, sanded plastic bottle using a fine-point pencil or permanent marker. Apply a small dab of heavy-duty craft glue to the center of your sketched outline and set a large pearl cabochon firmly in place as the anchor. Surround the central pearl with a tight ring of small clear rhinestones, pressing each gem into the adhesive frame using precision tweezers. Extend outward from the central motif by gluing teardrop or marquise-shaped pearls radially around the core ring to complete the detailed medallion pattern. Fill the surrounding open background area with uniform micro-rhinestones or leave clean painted space, finishing by edging the bottle cap with a row of matching mini pearls.
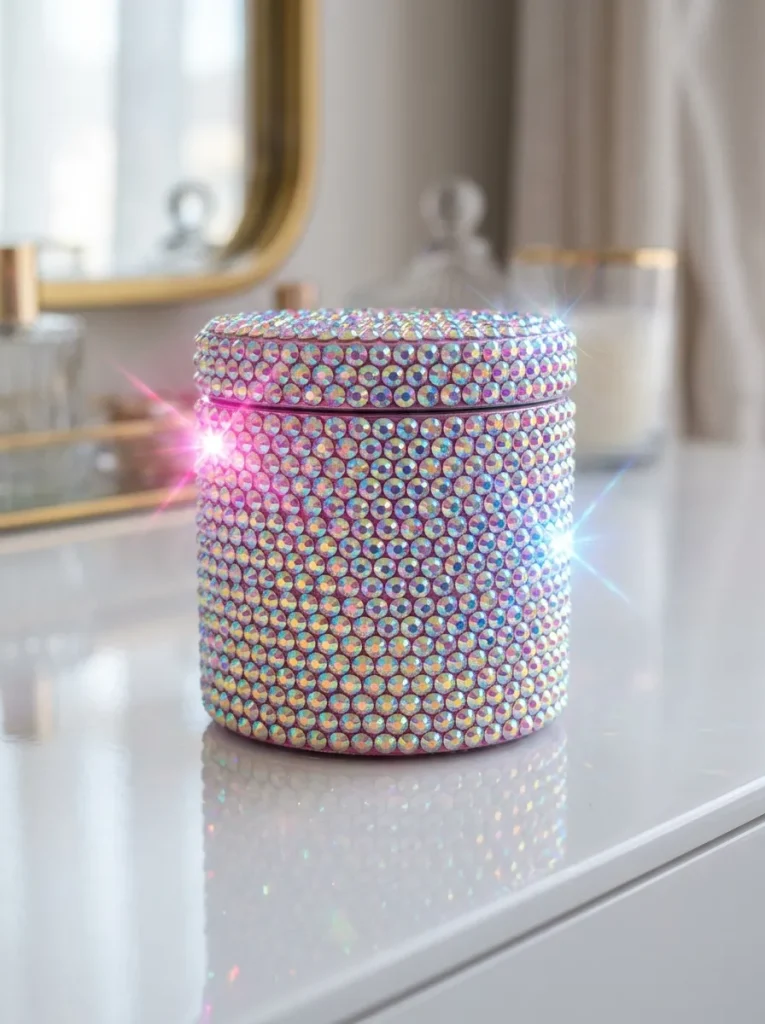
AB Crystal Rainbow Prism Wrap
Iridescent Color Reflections
An Aurora Borealis (AB) crystal rainbow prism wrap uses iridescent coated rhinestones that reflect shifting spectral colors as light hits the container from different angles. Covering a clear or white plastic bottle completely with AB crystals creates a mesmerizing holographic visual effect that catches attention on any display shelf. The iridescent coating projects flashes of pink, blue, yellow, and green across the surface, making the bottle look like a solid cut-gemstone cylinder. This eye-catching style offers a playful, modern aesthetic that turns portable item storage into a dazzling personal fashion accessory for handbags and travel totes.
Execution Process
Cover the sanded plastic bottle with a smooth base layer of white or silver metallic spray paint to enhance the light-reflecting properties of the translucent AB gems. Apply a one-inch band of clear gem adhesive around the bottom section of the cylinder, allowing the glue to become tacky for thirty seconds. Using a wax pick-up tool, set AB rhinestones of mixed sizes ranging from two millimeters to five millimeters in a honeycomb lattice pattern to minimize empty space between stones. Continue applying adhesive bands and setting crystals upward in overlapping rows until the entire cylindrical body is covered in a dense rainbow matrix. Wrap the plastic cap perimeter in matching AB crystals, allow the adhesive to set fully, and seal with a clear topcoat.
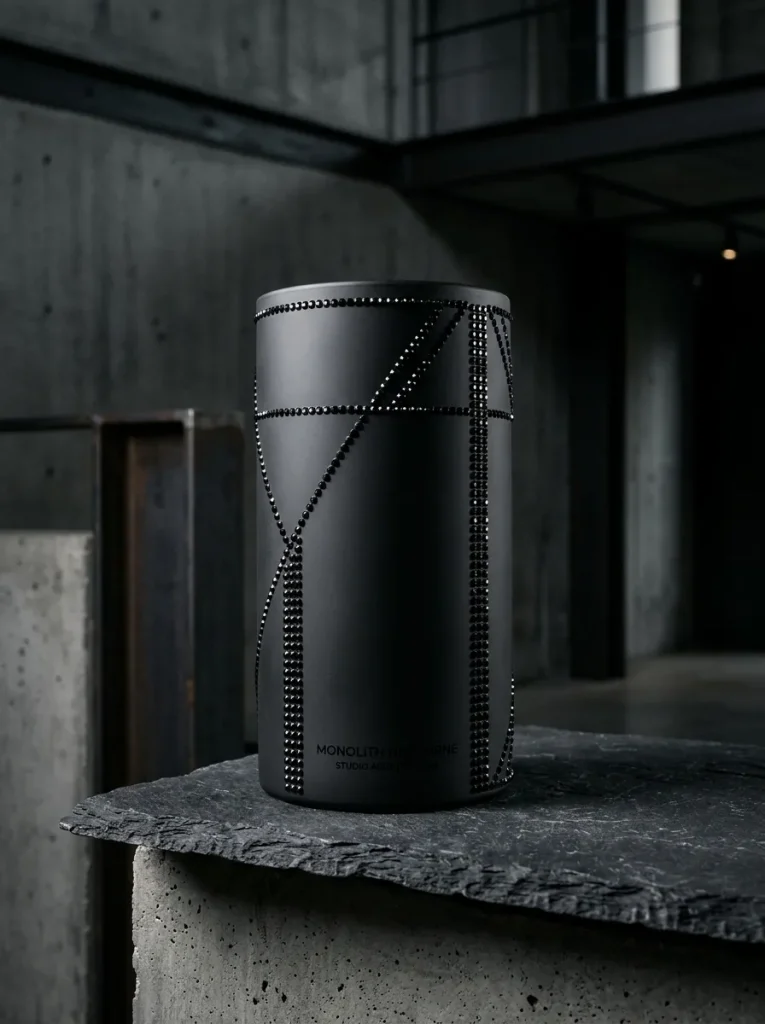
Matte Black and Jet Rhinestone Contrast
Sleek Gothic Minimalism
The matte black and jet rhinestone contrast design pairs a velvety matte black painted surface with glossy, light-absorbing jet black crystals for a moody, modern aesthetic. Rather than covering the entire plastic surface with gems, this concept relies on negative space and strategic crystal lines to create sharp geometric patterns. The contrast between the light-absorbing matte background and the glossy faceted jet black stones delivers a subtle, sophisticated shimmer that feels elevated and minimalist. This design works exceptionally well for sleek desk organizers, pill carriers, or travel containers tailored for contemporary, industrial interior decor styles.
How to Make
Coat a thoroughly cleaned and sanded medicine bottle with two thin coats of matte black acrylic spray paint, allowing it to dry completely for two hours. Plan a geometric pattern—such as chevron stripes, vertical lines, or diagonal grids—by lightly marking guidelines onto the matte surface using a soft graphite pencil. Trace along your pencil guidelines with a thin bead of black-tinted craft adhesive or clear gem glue using a precision applicator tip. Place uniform jet black glass rhinestones along the glue lines using tweezers, spacing them evenly to keep the geometric lines crisp and defined. Leave generous panels of the matte black painted background exposed to accentuate the visual contrast between the glossy black gems and the smooth matte base.
Glam Gold Metallic Stud Grid
Industrial Chic Texture
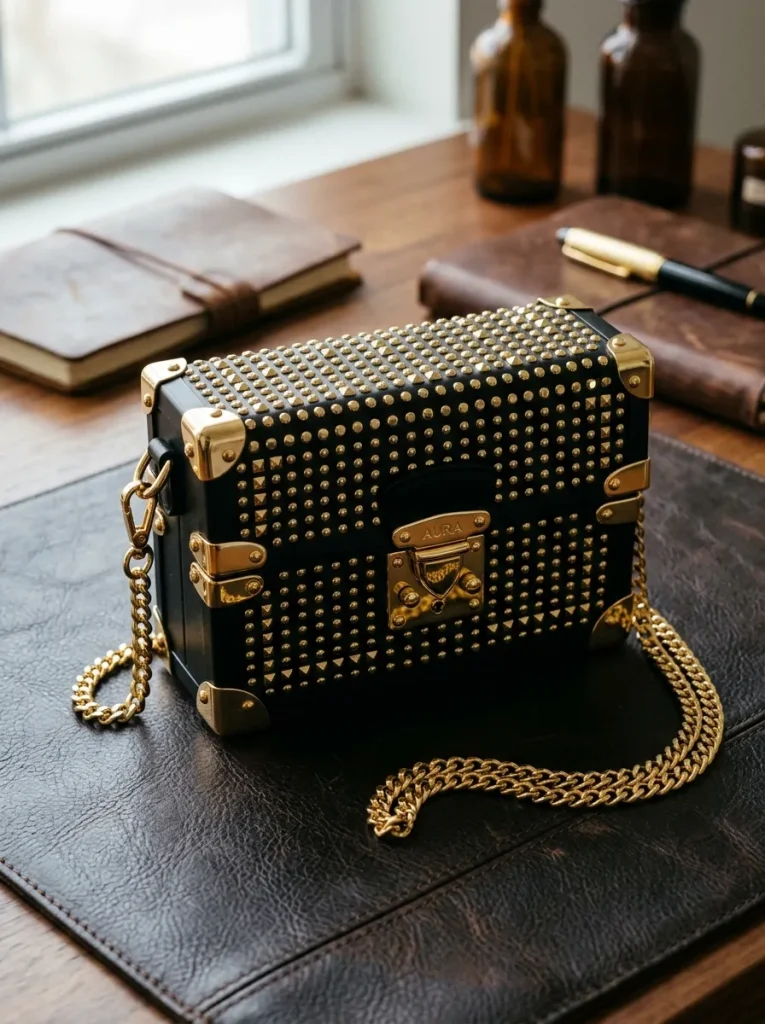
The glam gold metallic stud grid replaces traditional glass crystals with metallic gold dome studs, pyramids, and flat metal discs arranged in a structured grid pattern. This design gives repurposed plastic containers an edgy, industrial-chic aesthetic reminiscent of luxury designer leather goods and hardware. The uniform metallic studs create a heavy tactile grip around the cylinder body, making the bottle easy to handle while providing exceptional durability against daily wear. This compact, stud-covered storage container functions perfectly as a crush-resistant earbud case, coin holder, or travel sewing kit for individuals who prefer metallic textures over sparkly rhinestones.
Step-by-Step Guide
Paint the prepared plastic container using a metallic gold or rich bronze spray paint base coat to ensure any gaps between studs match the hardware tone. Use a flexible measuring tape and pencil to mark evenly spaced vertical and horizontal grid intersection points across the painted cylinder body. Apply a drop of heavy-duty multi-surface adhesive onto each marked grid point, working in small horizontal sections to prevent the glue from drying prematurely. Press flatback gold metallic studs or metal pyramid cabochons firmly onto the glue spots using tweezers, ensuring all stud facets align symmetrically. Continue setting metal studs systematically until the grid covers the entire container, then finish by placing a single large decorative metal emblem on top of the cap.
Pastel Candy Crush Embellished Jar
Playful Kawaii Styling
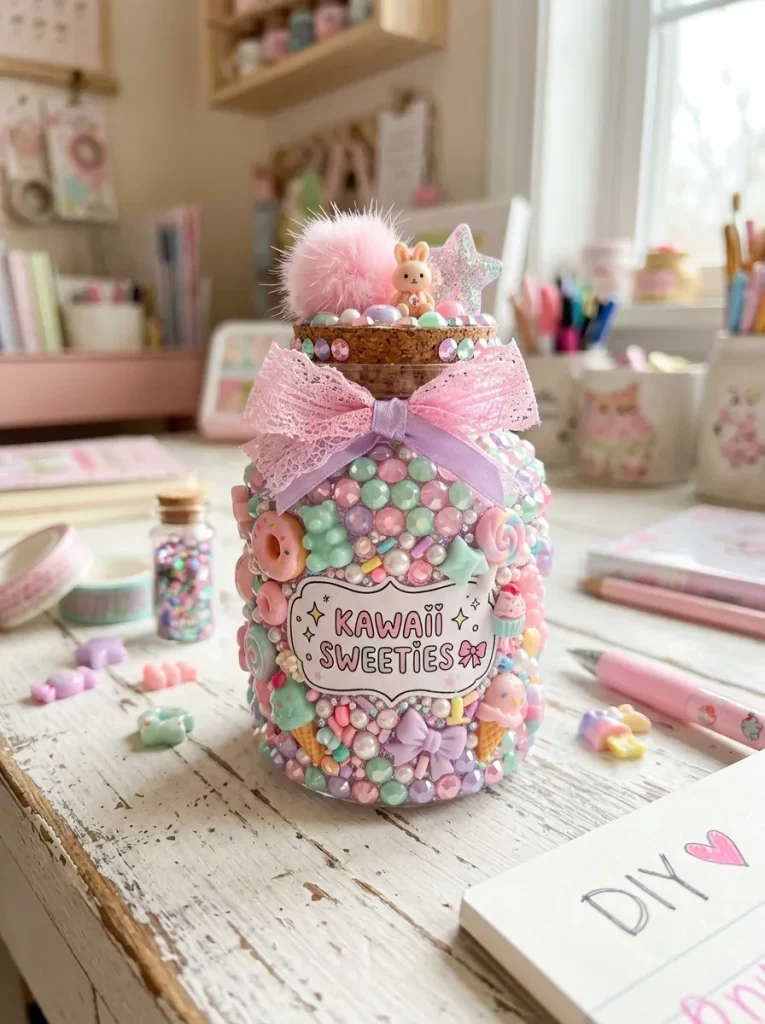
The pastel candy crush design utilizes soft pastel-colored rhinestones, resin candy cabochons, and faux pearl sprinkles to create a whimsical, dessert-inspired decorative container. Featuring pastel shades like baby pink, mint green, lavender, and butter yellow, this playful concept turns utilitarian medicine packaging into sweet, dreamy decor. Combining dimensional resin charms—such as mini donuts, stars, and hearts—with smooth pastel rhinestones yields a rich, tactile 3D surface reminiscent of Japanese decora art. This fun, beginner-friendly craft project is ideal for organizing small craft supplies, desk beads, or hair accessories in vibrant bedrooms and creative studios.
Setup Method
Spread a generous layer of white multi-surface adhesive or lightweight modeling paste over the front half of a prepped plastic prescription bottle body. Press several small resin candy charms—such as miniature hearts, flowers, or bowknots—into the wet adhesive base to form your primary raised cluster motifs. Fill the open spaces around the central resin charms by embedding pastel pink, mint, and lavender rhinestones into the wet glue using a wax picker. Scatter tiny white faux pearls and pastel micro-beads between the larger gems to simulate dessert sprinkles, pressing them down gently to anchor them. Allow the front side to dry completely for twelve hours before repeating the adhesive and embellishment process on the back and cap surfaces.
Celestial Sun and Moon Crystal Cluster
Mystical Night Sky Design
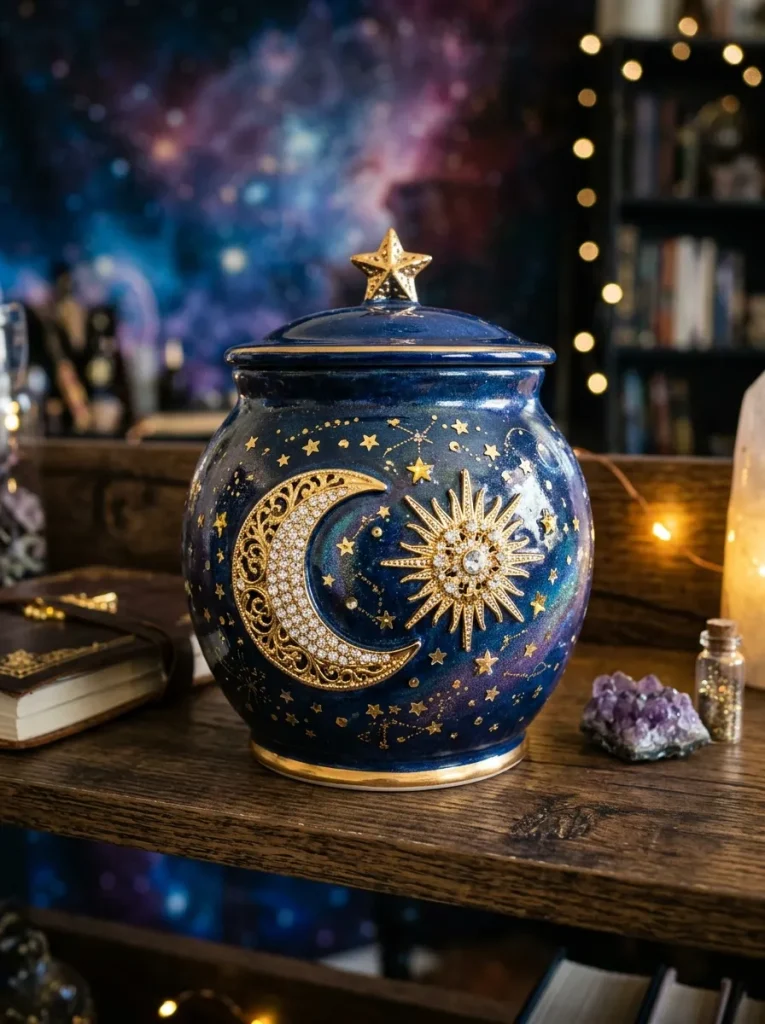
The celestial sun and moon crystal cluster features dark navy blue, gold, and crystal clear gems arranged into celestial motifs like crescent moons, stars, and sunbursts. A deep sapphire or midnight blue background mimics the night sky, providing a rich canvas for gleaming gold stars and shimmering moon shapes. Combining metallic gold star studs with icy clear rhinestones creates a magical, celestial aesthetic that feels artistic and whimsical. This bedazzled storage container functions as an enchanting vanity jar for small keepsakes, rings, or daily vitamins, adding a touch of cosmic charm to personal spaces.
Execution Process
Paint the prepped plastic container with two coats of deep midnight blue or dark navy acrylic paint, letting it dry completely for one hour. Trace a slender crescent moon shape onto one side of the bottle body and a sunburst motif on the opposite side using a silver gel pen. Fill the crescent moon outline with tightly packed gold and clear rhinestones of varying sizes, gluing them down securely with clear craft adhesive. Outline the sunburst motif using pointed golden marquise rhinestones for the sun rays and a large round crystal for the central core. Scatter small star-shaped metallic sequins and micro clear rhinestones across the remaining dark blue background to simulate distant galaxies, drying for twenty-four hours before use.
Rose Gold Floral Filigree Bottle
Delicate Botanical Elegance
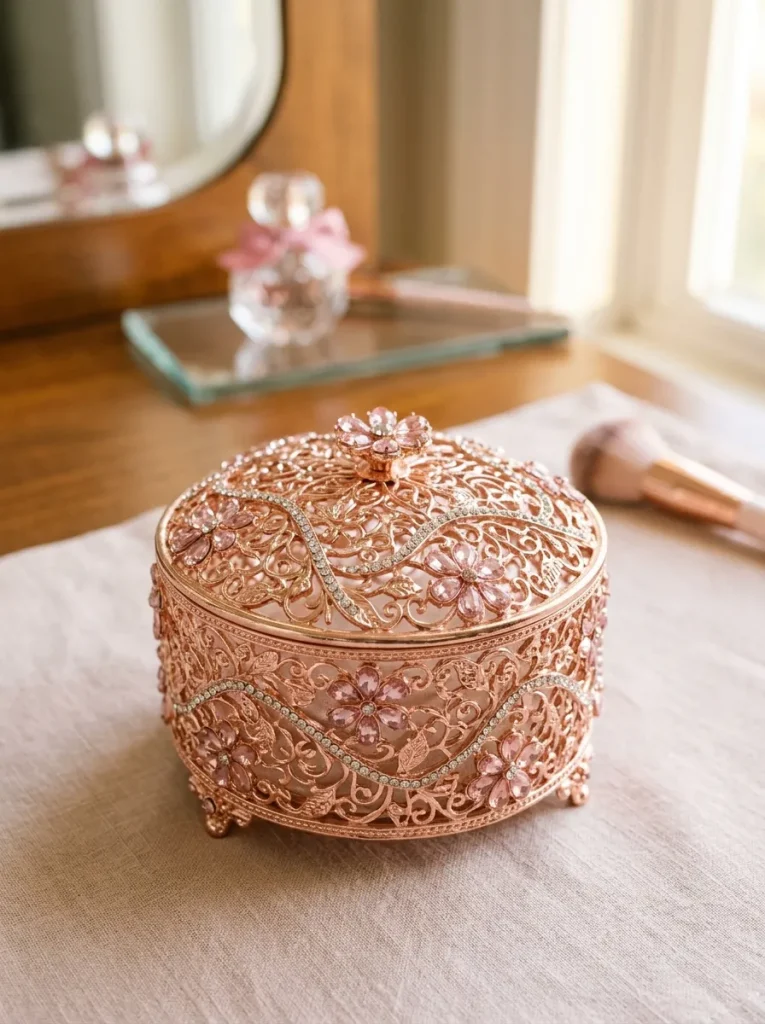
The rose gold floral filigree design utilizes rose gold rhinestones, metallic leaf charms, and delicate pink crystals to create sophisticated botanical vine patterns around the bottle. Curved lines of small rose gold gems mimic trailing garden vines, while pointed pink stones form blooming flower petals along the stems. The soft metallic rose gold palette delivers a warm, feminine aesthetic that blends seamlessly into modern minimalist and romantic home decor schemes. This delicate embellished jar serves as a luxurious container for small vanity items, safety pins, or travel essentials, bringing subtle floral elegance to dressers and desktop spaces.
Step-by-Step Guide
Paint the plastic container with a soft blush pink or warm nude base coat, allowing the paint to cure completely before applying embellishments. Draw thin, curving vine lines winding diagonally up and around the bottle body using a fine-point pencil guide. Apply a thin line of clear gem glue along the traced vine paths, placing small rose gold rhinestones sequentially along the curves using a wax picker. Attach small rose gold metal leaf charms at various curve intersections, pressing them firmly into small dabs of heavy-duty adhesive. Create tiny flower clusters by grouping five teardrop-shaped pink rhinestones in a circle around a central rose gold gem, allowing the completed floral vine structure to dry thoroughly for one day.
Monogrammed Initial Rhinestone Keepsake
Personalized Luxe Storage
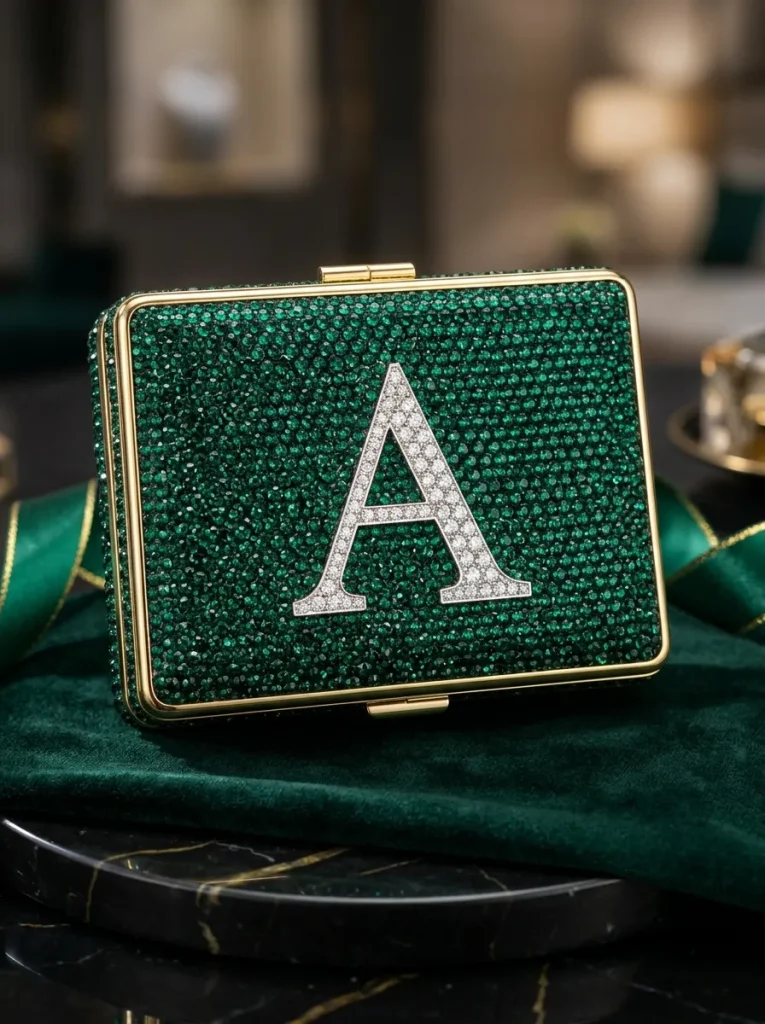
The monogrammed initial rhinestone keepsake features a bold personalized letter encrusted in clear crystals set against a densely bedazzled colored background. Personalizing the front of the bottle with a sparkling monogram converts simple plastic packaging into a custom keepsake container tailored for gifts or personal use. Using contrasting rhinestone colors—such as clear diamonds for the initial against a backdrop of deep emerald or ruby gems—makes the letter pop vividly. This customized storage vessel provides a stylish, secure way to transport personal items, daily mints, or jewelry while traveling, ensuring your container remains easily identifiable.
How to Make
Coat a prepped plastic bottle with a background paint color of your choice, such as dark emerald green or deep burgundy, allowing it to dry. Print a bold block letter or cursive initial sized to fit the bottle’s front wall, cutting it out to use as a tracing stencil. Position the letter stencil on the front of the bottle and trace its outer border lightly with a silver or white gel pen. Outline and fill the interior of the initial shape with clear, high-shine glass rhinestones using clear craft adhesive and a wax picker pen. Fill the remaining background space around the initial with contrasting dark green or red gems, packing them tightly up to the letter border to highlight the personal monogram.
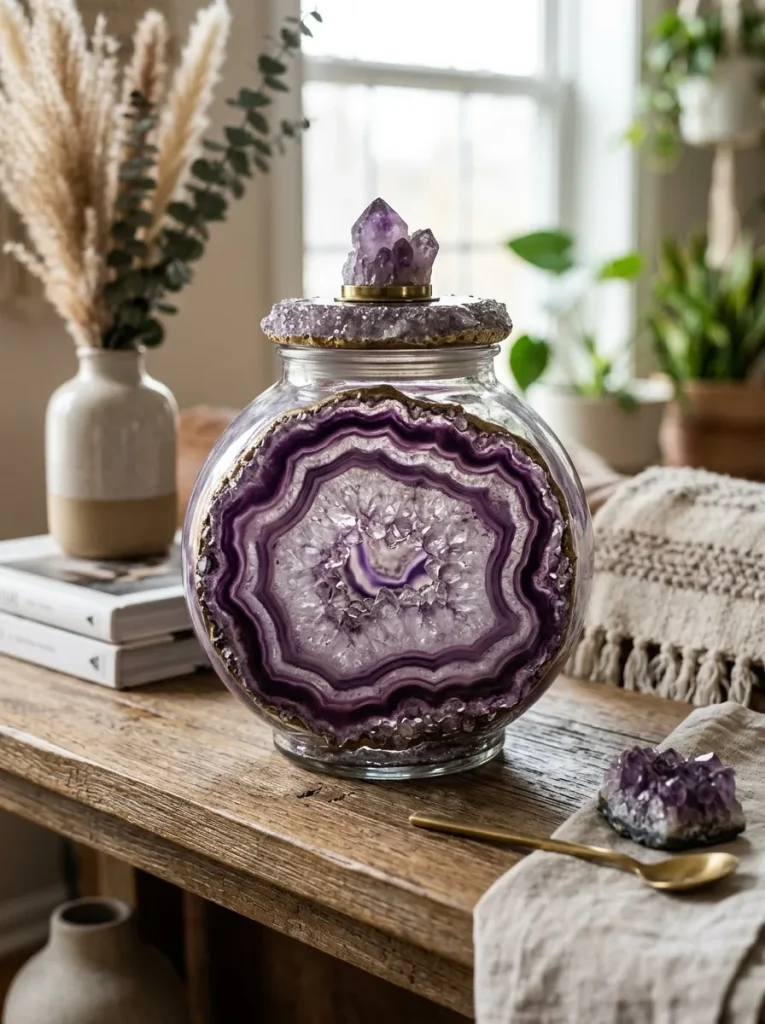
Geode Agate Slice Inspired Crystal Jar
Natural Stone Organic Textures
The geode agate slice design replicates the organic, crystalline rings found inside natural geode stones by layering bands of multi-shaded rhinestones in concentric curves. Utilizing rings of glitter, crushed glass, and varied rhinestone sizes, this craft project captures the raw, sparkling texture of natural mineral formations. Shades of amethyst purple, teal, or agate brown curve organically around the cylindrical body, creating a striking geological visual effect. This sophisticated craft project elevates plastic upcycling into fine art home decor, turning simple medicine containers into eye-catching mineral-inspired accents for bookshelves and coffee tables.
Setup Method
Apply a thin layer of white craft primer over the prepped plastic bottle base, letting it dry completely to ensure strong paint and glue adhesion. Draw organic, wavy concentric rings that mimic the natural cross-section of a sliced geode stone around the front and sides of the cylinder. Paint each ring band in a different tone of your chosen color family—such as light lavender, medium violet, and deep purple—to establish a tonal base. Apply clear gem glue along the innermost ring band, placing micro-rhinestones and fine glitter to form the dense crystalline core of the geode. Work outward band by band, gluing medium and large rhinestones in irregular wavy rows that follow the painted guidelines until the organic stone pattern covers the bottle.
Common Beginner Mistakes and How to Avoid Them
| Common Execution Mistake | Potential Impact on Project | Practical Prevention Strategy |
|---|---|---|
| Skipping Surface Sanding | Rhinestones and glue peel off smooth plastic bases in whole sheets after drying. | Always scuff smooth plastic exteriors using fine-grit sandpaper before applying adhesives. |
| Using Incompatible Glues | Hot glue or instant super glues cause fogging, brittle bonds, and rapid stone detachment. | Utilize multi-surface craft adhesives or industrial gem glues engineered for plastic and glass. |
| Applying Too Much Adhesive | Excess glue squeezes up between gems, clouding crystal facets and ruining shine. | Apply small, controlled glue beads using fine applicator tips, setting gems gently without squeezing. |
| Ignoring Drying Times | Handling wet containers causes stones to slide out of alignment and smear wet glue. | Allow glued containers to cure completely undisturbed for twenty-four hours before touching. |
| Incomplete Glue Cleanup | Dried glue strings and hazy residue obscure the sparkling facets of finished rhinestones. | Clean stray glue strings immediately using precision tweezers or rubbing alcohol on cotton swabs. |
Practical Tips for Better Results
Achieving professional, long-lasting bedazzled projects from repurposed plastic containers depends on technical discipline, tool selection, and careful setting methods. Always work in a well-lit area, using a desktop task lamp to illuminate fine detail lines and catch misaligned gems early. Utilize a wax pick-up pen rather than standard metal tweezers when handling small flatback rhinestones; wax tips hold gems gently on their top facets without scratching or dropping them during placement. When designing full-coverage patterns, work in small horizontal bands rather than applying glue over large open areas, as gem glues skim over quickly and lose tackiness. Apply a gentle downward press on each stone after setting to ensure full contact with the adhesive bed without forcing glue up the sides of the crystal. Finally, if using acrylic rhinestones, avoid applying harsh solvent-based spray sealers over top, as solvent chemicals dull the plastic facet edges; instead, use water-based clear gloss sealers applied lightly with a soft brush around stone bases.
Styling, Presentation, or Organization Ideas
Displaying Embellished Containers
Presenting bedazzled storage containers thoughtfully enhances their visual appeal within home decor setups. Group several bedazzled bottles of varying heights together on a decorative mirrored tray, marble slab, or wooden riser to create a cohesive vanity vignette. Place sparkling containers near gentle light sources, such as sunny windowsills or bedside lamps, to highlight the light-refracting properties of glass crystals. Using color-coordinated bedazzled jars to hold everyday items—like cotton swabs, hair pins, or desk paper clips—keeps surfaces organized while turning utility items into attractive decorative displays.
Gift Packaging and Portable Storage
Bedazzled prescription containers make charming, personalized gift vessels for small presents like jewelry, gift cards, or handmade accessories. Package an embellished bottle inside a sheer organza drawstring bag or a small rigid gift box lined with tissue paper to protect the rhinestone work during transport. When using bedazzled bottles as portable purse accessories, store them inside soft fabric pouches to prevent abrasive contact with keys or loose items inside your bag. Personalizing containers with initial monograms or favorite color palettes turns simple upcycled crafts into memorable, custom presents for friends and family.
Budget or Time Planning
Project Cost Breakdown and Savings
| Material Category | Typical DIY Investment | Smart Budget Strategy |
|---|---|---|
| Plastic Pill Bottles | $0.00 (Upcycled household item) | Collect clean, empty containers from personal use, friends, or family over time. |
| Rhinestones & Cabochons | $5.00 – $12.00 (Multi-packs) | Purchase bulk assortments of flatback glass or acrylic gems online or at craft stores. |
| Gem Adhesive & Applicators | $4.00 – $8.00 | Invest in a single tube of quality multi-surface gem glue that lasts across multiple projects. |
| Wax Picker & Sorting Trays | $3.00 – $6.00 | Re-use basic craft tweezers and small plastic food lids as gem sorting dishes. |
| Base Paint & Clear Sealant | $4.00 – $8.00 | Utilize leftover acrylic paints and clear craft sealers from previous home projects. |
| Total Project Investment | $16.00 – $34.00 total | Creates multiple custom bedazzled containers for a fraction of store decor costs. |
Time Management and Workflow Schedule
Executing a bedazzled pill bottle project efficiently requires a clear, step-by-step time schedule to manage preparation, adhesive application, and curing phases. Dedicate the first thirty minutes entirely to surface prep, soaking off paper labels, sanding plastic exteriors, and painting base coats. Spend one to two hours placing rhinestones methodically, working in small sections to ensure precise gem alignment and uniform spacing. Allow at least twelve to twenty-four hours of curing time for the glue to harden completely before applying protective topcoats or packing items inside. Planning your crafting sessions across two short afternoons ensures a relaxing experience while guaranteeing durable, high-quality results.
Creative Expansion and Advanced Inspiration
Once you master basic rhinestone application techniques, explore advanced creative variations that push your upcycled bottle projects further. Combine bedazzling with mixed-medium art techniques, such as applying textured decoupage papers, velvet fabric wraps, or sculpted polymer clay accents beneath crystal borders. You can also experiment with embedding small battery-operated LED fairy lights inside translucent bedazzled containers, turning upcycled medicine bottles into glowing ambient nightlights or holiday table decorations.
Advanced crafters can explore creating full matching vanity suites, bedazzling coordinating items like hand mirrors, perfume atomizers, and tissue box covers to match their crystal pill bottles. Incorporating rare vintage brooches, metallic charms, or reclaimed jewelry pieces onto bottle caps adds historical texture and unique artistic character to your creations. Transforming basic plastic waste into sparkling, functional art demonstrates how imagination and practical crafting techniques can convert daily disposables into cherished home decor accessories.