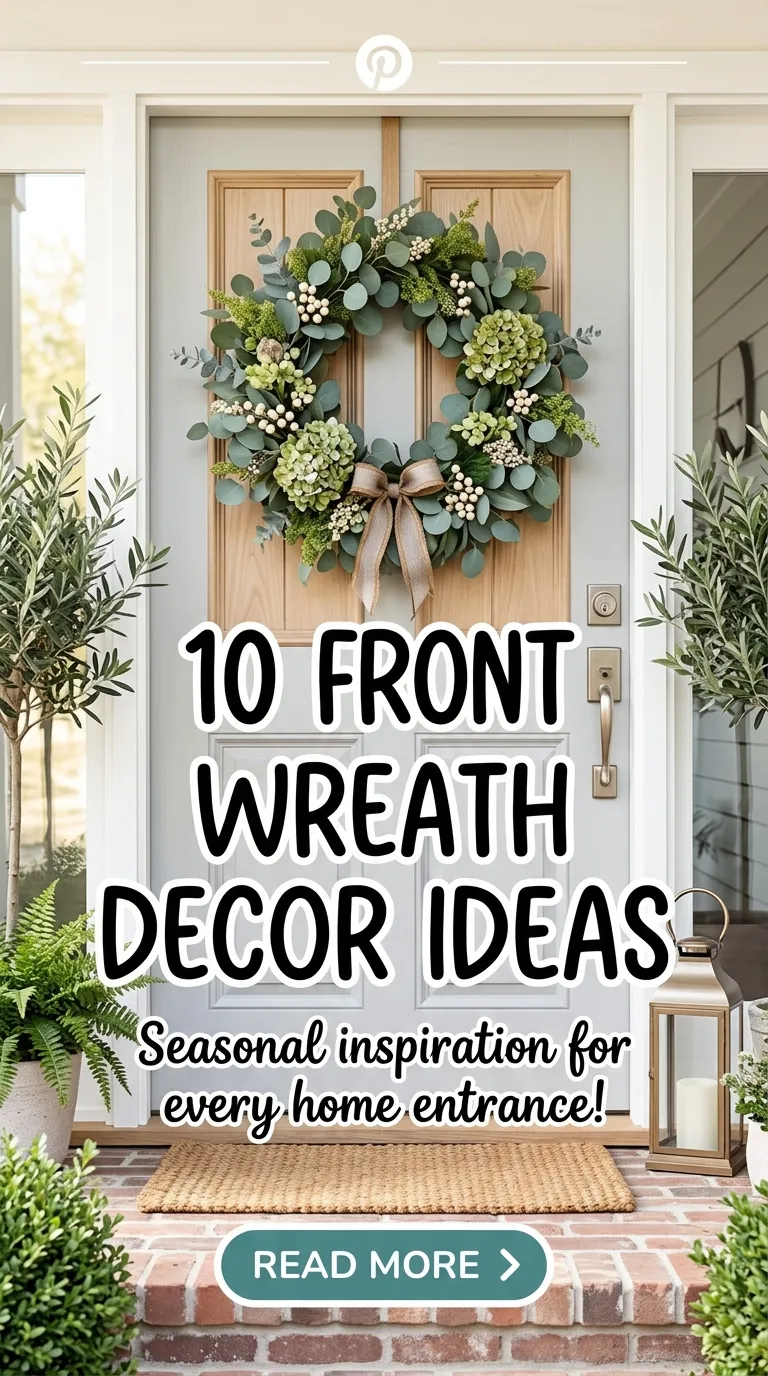

10 Summer Door Hangers DIY Cute Ideas

Summer is a season associated with brightness, warmth, and relaxed outdoor living. One of the simplest ways to reflect that seasonal atmosphere at home is by decorating the front door with a handmade summer door hanger. These decorative pieces act as both a visual welcome and a seasonal statement. On Pinterest, DIY summer door hangers have become a popular creative project because they combine functionality with aesthetic design. A well-designed door hanger immediately signals the season and creates a welcoming entrance for guests, neighbors, and family members. The appeal of these projects lies in their accessibility. Most designs require basic craft supplies, simple construction techniques, and beginner-friendly steps that allow almost anyone to participate in the process. From bright citrus shapes to beach-inspired decorations, the variety of creative directions allows homeowners to match their door décor with personal style, outdoor themes, or seasonal color palettes. Handmade projects also offer flexibility in size, material, and design details, allowing each door hanger to be customized to the specific door or entryway. Creating these decorative items can be approached as a weekend craft activity, a family project, or a seasonal decorating routine. With thoughtful design and careful material selection, DIY summer door hangers can remain durable throughout the season while providing a cheerful and visually balanced entryway display.
Why Summer Door Hanger Ideas Are Trending on Pinterest
Seasonal DIY projects regularly gain traction on Pinterest because they offer a combination of inspiration and practical execution. Summer door hangers in particular are trending due to their visibility and versatility. The front door is one of the most prominent exterior features of a home, making it an ideal location for decorative expression. Pinterest users often search for seasonal door décor because it provides an easy way to update home aesthetics without requiring major renovations or large investments. A single decorative hanger can transform the appearance of an entryway while aligning with current seasonal themes such as coastal inspiration, floral arrangements, fruit motifs, or minimalist summer colors. The popularity of these projects also comes from the visual impact they provide in photographs and inspiration boards. Bright colors, handmade textures, and creative shapes photograph well and inspire others to recreate similar designs. Another factor contributing to the trend is the growing interest in handmade décor and DIY creativity. Many people prefer creating personalized decorations rather than purchasing mass-produced items. This approach allows individuals to experiment with color palettes, lettering styles, and structural designs while developing crafting skills. Additionally, DIY summer door hanger projects fit well within budget-friendly home décor planning. Materials are often inexpensive and reusable, making the project accessible for beginners or casual hobbyists. The combination of creativity, affordability, and visual appeal explains why Pinterest continues to feature a wide range of trending summer door hanger ideas each season.
Materials and Preparation for DIY Summer Door Hangers
Preparing the right materials is an important step before beginning any DIY door hanger project. A well-organized material selection ensures smoother execution and a cleaner final result. Most summer door hangers are built using a base structure made from wood rounds, lightweight plywood, thick cardboard, or pre-cut craft boards. Wood is often preferred because it provides durability and a solid surface for painting, gluing, and attaching decorative elements. Once the base is selected, surface preparation becomes essential. Light sanding helps remove rough edges and allows paint or adhesive materials to adhere more effectively. Acrylic paint is commonly used for these projects due to its quick drying time and strong color coverage. Basic colors such as yellow, turquoise, coral, white, and light green work particularly well for summer themes. Brushes of different sizes allow both broad background painting and small decorative details. Additional decorative materials may include artificial flowers, ribbons, twine, felt shapes, fabric strips, or small wooden cutouts. These elements help create texture and depth in the final design. Adhesives such as strong craft glue or hot glue are typically used to attach decorative components securely. For hanging mechanisms, twine loops, ribbon handles, or small metal hooks can be attached to the top portion of the door hanger. Preparing all materials in advance helps maintain workflow and prevents interruptions during the crafting process. A clean workspace, protective table covering, and organized supply layout contribute to a more efficient and enjoyable DIY crafting experience.
Sunflower Welcome Door Hanger

How to Create
A sunflower welcome door hanger is one of the most recognizable and cheerful summer decorations. The design typically features a large circular base that represents the center of the sunflower, surrounded by bright yellow petals. To begin this project, select a round wooden base that measures approximately twelve to sixteen inches in diameter. Sand the surface lightly and apply a base coat of warm brown paint to represent the center portion of the flower. Once the paint dries completely, the sunflower petals can be created using either wooden cutouts, layered cardstock, or foam craft shapes. Each petal should be painted in vibrant yellow shades to capture the brightness associated with sunflowers during summer. The petals are arranged around the outer edge of the wooden base and attached securely using strong craft adhesive. After the structural flower shape is complete, the center portion can be decorated with textured paint dots or small seed-like brush strokes to mimic the natural appearance of sunflower seeds. A simple welcoming message such as “Hello Summer” can be painted across the center using white or cream paint for contrast. A sturdy twine loop is attached to the top back portion of the hanger for easy placement on the door. The finished decoration creates a bold and friendly entrance display that captures the warmth and brightness associated with summer garden themes.
Watermelon Slice Door Decoration

Step-by-Step Guide
The watermelon slice door hanger is a playful and visually striking summer decoration that reflects the fresh fruit imagery commonly associated with warm weather. This project begins with cutting a semi-circular shape from a wooden board or thick craft panel to represent the classic watermelon slice. The bottom section of the slice should be painted green to represent the rind, followed by a thin white stripe above it to create a natural layered effect. The large interior portion is painted a vibrant watermelon red or pink color. Allow the paint layers to dry thoroughly before adding details. Small black oval shapes can be painted across the red surface to represent watermelon seeds. These seed shapes should be distributed evenly but randomly to create a natural look rather than a rigid pattern. To enhance the design, a short phrase such as “Sweet Summer” or “Fresh Days Ahead” can be hand-painted across the center of the slice using contrasting white lettering. Decorative additions such as a small green bow or fabric ribbon can be attached at the top of the hanger to add texture and dimension. The watermelon slice shape naturally creates a balanced design that fits well against a neutral colored door. This DIY project is especially popular for its bright color contrast and playful seasonal symbolism.
Tropical Flamingo Door Hanger

Execution Process
A tropical flamingo door hanger brings a coastal and vacation-inspired theme to summer entryway décor. The main feature of this design is a stylized flamingo silhouette mounted onto a sturdy base panel. Begin by preparing a rectangular or oval wooden board as the background surface. This base can be painted in a soft turquoise or light blue shade to evoke tropical sky or ocean tones. Once the background paint dries, the flamingo shape can be created using a separate cutout piece of wood, thick craft foam, or layered cardstock. The flamingo should be painted in shades of pink with subtle variations to create dimension in the wings and body. A thin black line can be used to define the curved neck and beak details. After painting, the flamingo shape is attached firmly to the center of the base panel using strong adhesive. To enhance the tropical theme, artificial palm leaves, small hibiscus flowers, or textured greenery can be arranged around the lower portion of the design. These decorative accents create a layered appearance that makes the door hanger visually engaging. A short seasonal phrase such as “Stay Tropical” or “Summer Vibes” can be painted near the bottom of the board. The final result is a bright and welcoming decoration that reflects tropical summer inspiration.
Lemon Citrus Summer Door Hanger

How to Make
A lemon-themed door hanger represents freshness and brightness, making it an ideal choice for summer décor. The project begins with a circular wooden base that is painted in a soft white or pale yellow color to create a clean background surface. Lemon slice shapes can then be crafted using foam sheets, wooden cutouts, or thick cardstock. Each slice is painted in bright yellow with thin white lines extending outward from the center to replicate the segmented interior of a real lemon. The outer edges of the slices can be outlined with a slightly darker yellow to create depth and visual contrast. These lemon pieces are arranged across the surface of the base panel, either clustered together or spaced evenly to create a balanced pattern. Once the slices are securely attached, green leaf shapes made from felt or painted wood can be added between the lemons to simulate natural citrus branches. A cheerful message such as “Fresh Summer Days” can be hand-painted across the center using a contrasting color like soft gray or deep green. A wide ribbon loop or braided twine handle can be attached to the top portion for hanging. The completed door hanger presents a clean, refreshing design that reflects citrus garden inspiration commonly seen in summer Pinterest décor ideas.
Flip-Flop Summer Welcome Sign

Setup Method
The flip-flop themed door hanger captures the relaxed atmosphere of beach days and summer vacations. This project uses oversized flip-flop shapes as the main decorative structure. The shapes can be cut from lightweight wood boards or thick craft foam. Two large flip-flop shapes are typically layered slightly overlapping to create a visually interesting arrangement. Each flip-flop is painted in bright summer colors such as coral, turquoise, yellow, or mint green. After the base colors dry, decorative patterns such as polka dots, stripes, or floral shapes can be painted on the surface to enhance the playful theme. The flip-flop straps can be simulated using narrow fabric strips, braided ribbon, or painted curved lines across the upper portion of the shapes. These elements give the design a recognizable sandal appearance. Once the decorative painting is complete, the flip-flops are attached securely to a thin wooden backing panel that provides structural stability. A welcoming phrase such as “Welcome to Our Summer” can be painted across the bottom portion of the hanger. Decorative elements such as small seashells, raffia bows, or textured ribbon can be added to reinforce the beach theme. The final result creates a fun and colorful entrance decoration that reflects summer relaxation and coastal inspiration.
Beach Bucket and Sandcastle Door Hanger

How to Create
A beach bucket and sandcastle themed door hanger reflects classic seaside imagery often associated with summer family activities. This project begins with a shaped wooden base that resembles a sandcastle tower or beach bucket. The base can be painted in soft sand tones such as beige or light tan to replicate beach sand. After the base layer dries, small details such as brick lines or sand texture patterns can be painted lightly to give the structure more visual depth. Decorative elements representing beach tools can be added to the design. Small wooden cutouts shaped like miniature shovels, buckets, or starfish can be painted in bright summer colors and attached to the surface of the hanger. To enhance the beach theme further, a few small seashells or textured rope accents can be glued around the edges. These elements create a layered coastal appearance. A welcoming message such as “Life Is Better at the Beach” can be painted across the center of the sandcastle structure. When attaching the hanging loop, strong nautical rope or twisted twine works well because it complements the beach theme. This DIY door hanger creates a playful seaside display that instantly communicates summer vacation inspiration at the front entrance of a home.
Bright Summer Flower Basket Door Hanger

Step-by-Step Guide
A flower basket door hanger introduces vibrant color and garden inspiration to the entrance area during summer months. The base structure of this project is typically shaped like a basket or simple rectangular panel. The surface is painted in warm brown tones to represent woven basket texture. Thin brush strokes can be used to create cross-pattern lines that simulate natural wicker weaving. Once the basket base is complete, artificial flowers become the main decorative element. Bright summer flowers such as daisies, sunflowers, and wildflowers are arranged in a clustered bouquet above the basket portion. The flowers can be attached securely using hot glue, ensuring that the stems are hidden behind the decorative elements. Adding small green leaves or fern pieces around the flowers helps create a full, balanced arrangement. The floral cluster should extend slightly outward to create a dimensional effect rather than appearing flat against the board. A ribbon bow tied at the center of the basket enhances the visual structure and provides a focal point for the arrangement. A short welcoming phrase can be painted near the bottom edge of the hanger. This floral project provides a natural and colorful entryway decoration that aligns well with garden-inspired Pinterest décor trends.
Pineapple Summer Welcome Hanger

Execution Process
The pineapple shape has become a widely recognized symbol of hospitality and tropical summer style. A pineapple door hanger uses this iconic fruit shape as the main decorative structure. The project begins by cutting a large pineapple silhouette from a wooden board. The lower portion of the fruit is painted in warm golden yellow tones. A crisscross pattern is then painted across the surface using slightly darker yellow or light brown lines to simulate the textured pineapple skin. The top section of the pineapple consists of layered leaf shapes that are painted in rich green shades. These leaves can be created using separate wooden cutouts that are glued to the top edge of the pineapple base. Once the structural elements are assembled, a friendly greeting such as “Welcome” or “Hello Sunshine” can be painted across the center of the fruit using white paint for strong contrast. Small decorative additions such as raffia bows or tropical fabric ribbons can be attached beneath the leaf section to enhance the tropical theme. A sturdy hanging loop made from twine or braided rope is attached at the back. The pineapple door hanger produces a bold summer statement while maintaining a clean and simple design that works well with many exterior door colors.
Nautical Anchor Door Hanger

How to Make
A nautical anchor door hanger introduces maritime inspiration into summer home décor. The anchor symbol is strongly associated with seaside culture and coastal living, making it a natural decorative element for summer entryways. To begin the project, cut an anchor silhouette from a wooden board using a simple stencil or printed template. The surface is then sanded lightly to remove rough edges before applying paint. Classic nautical colors such as navy blue, white, and light gray work well for this design. The anchor shape can be painted navy blue while the background board remains white to create strong contrast. After the base paint dries, decorative rope can be wrapped loosely around the center of the anchor to mimic the appearance of nautical ship rope. This rope detail adds both texture and authenticity to the design. Small accents such as miniature starfish or seashell decorations can be attached to the lower portion of the hanger to strengthen the ocean theme. A simple phrase like “Seaside Welcome” can be painted across the top or bottom of the board. When attaching the hanging mechanism, thick rope or twine enhances the nautical aesthetic. This project creates a calm coastal entrance decoration that reflects maritime summer inspiration.
Summer Ice Cream Cone Door Hanger

Setup Method
An ice cream cone door hanger introduces a playful and colorful theme that reflects popular summer treats. The design typically features a large cone shape topped with a rounded scoop of ice cream. Begin by cutting the cone shape from a wooden board. The lower cone section is painted in warm tan or caramel tones. Thin diagonal lines can be painted across the surface to simulate the waffle cone texture. The upper scoop portion is painted in bright pastel colors such as strawberry pink, mint green, or vanilla cream. Additional paint dots or small decorative sprinkles can be added to represent candy toppings. These colorful accents give the project a cheerful and energetic appearance. Once the paint dries, the scoop and cone sections can be outlined lightly with darker shades to create dimension. A short phrase such as “Sweet Summer” can be painted across the scoop portion using contrasting lettering. Decorative ribbon bows or small pom-pom accents can be attached near the top for added visual interest. A sturdy ribbon or twine loop is attached at the back for hanging. The final result is a whimsical summer door decoration that captures the joyful atmosphere associated with warm weather desserts.
Common Beginner Mistakes and How to Avoid Them
Many DIY door hanger projects appear simple at first, but beginners often encounter small mistakes that affect the final appearance or durability of the decoration. One of the most common issues is inadequate surface preparation. When wooden boards are not sanded properly, paint may appear uneven or fail to adhere correctly. Taking time to smooth the surface before painting creates a cleaner final result. Another frequent mistake involves using too much adhesive when attaching decorative elements. Excess glue can create visible residue or cause decorations to shift during drying. Applying small controlled amounts of adhesive and allowing proper drying time helps maintain structure and alignment. Beginners also sometimes overcrowd the design with too many decorative pieces. A balanced composition usually looks more visually appealing than a cluttered arrangement. Planning the layout before gluing elements into place helps maintain symmetry and spacing. Paint layering is another area where errors occur. Applying a second layer before the first coat dries can lead to streaking or peeling. Allowing each paint layer to dry fully prevents these issues. Finally, weak hanging mechanisms can cause door hangers to fall or tilt unevenly. Reinforcing the hanging loop with secure knots or additional adhesive ensures that the decoration remains stable on the door throughout the summer season.
Practical Tips for Better DIY Results
Improving the quality of DIY door hanger projects often comes down to thoughtful planning and careful technique. One effective tip is to sketch the design layout before starting the crafting process. A simple outline helps determine where decorative elements will be placed and ensures the design remains balanced. Using painter’s tape to mark lettering areas can also improve precision when adding text or greetings. Another helpful technique is working in layers rather than attempting to complete the design all at once. Painting the base first, then adding shapes, followed by decorative accents, allows each stage to dry properly and reduces mistakes. Selecting a limited color palette can also improve the visual cohesion of the project. Too many unrelated colors may make the decoration appear chaotic rather than coordinated. Protective finishing is another important step that is sometimes overlooked. Applying a clear protective sealant over the finished hanger can protect the paint from sunlight, moisture, and dust exposure. Proper lighting in the workspace also contributes to better results, particularly when painting small details or lettering. Finally, maintaining patience throughout the crafting process improves accuracy and durability. Rushing through painting or assembly steps often leads to visible flaws that could easily be avoided with careful attention.
Styling and Display Ideas for Front Door Presentation
The presentation of a summer door hanger can significantly influence the overall appearance of the home’s entrance. While the hanger itself is the central decorative feature, coordinating surrounding elements can enhance the visual impact. One effective approach is matching the color palette of the door hanger with nearby porch décor. For example, if the hanger features bright yellow or tropical colors, incorporating similar tones into doormats, porch planters, or outdoor cushions can create a cohesive visual theme. Positioning also plays an important role. The hanger should be centered vertically and horizontally on the door to create balanced proportions. If the door includes a window panel, placing the hanger slightly lower can prevent obstruction while still maintaining visibility. Seasonal wreath hooks or removable adhesive hangers can help position the decoration securely without damaging the door surface. Lighting conditions should also be considered when choosing colors and materials. Bright colors tend to stand out better against darker doors, while pastel shades work well on lighter backgrounds. Entryway greenery, such as potted plants or hanging baskets, can complement floral or tropical themed door hangers. When thoughtfully styled, the combination of decorative elements can transform the entrance into a welcoming seasonal display.
Budget and Time Planning for DIY Door Hanger Projects
Creating DIY summer door hangers can be approached as a low-cost creative activity when materials and planning are managed carefully. Many projects can be completed using affordable craft supplies or materials already available at home. Wooden boards or craft panels serve as reusable bases that can be repainted for different seasons, reducing the need to purchase new materials each time. Planning the design in advance also helps avoid unnecessary purchases of decorative items that may not ultimately be used. Time planning is equally important for successful project completion. Most door hanger designs can be completed within a few hours, but drying time for paint and adhesives should always be considered. Dividing the project into stages can make the process more manageable. For example, painting the base layer on one day and adding decorative elements the following day allows materials to set properly. When crafting multiple door hangers, preparing several base boards at once can improve efficiency. Using shared paint colors and decorative materials across multiple designs also helps reduce cost. DIY door hanger projects can therefore remain both budget friendly and time efficient when organized thoughtfully. This approach allows seasonal decorations to be updated regularly without requiring large investments in materials or extended crafting sessions.
Creative Expansion and Advanced Inspiration
Once the basic door hanger techniques are mastered, many creative expansions become possible. More advanced designs may involve layered wooden cutouts that create dimensional effects across the surface of the hanger. Combining multiple shapes such as flowers, fruit motifs, or beach objects can produce more complex compositions while still maintaining a summer theme. Hand lettering techniques can also enhance the overall visual quality of the project. Practicing brush lettering allows creators to incorporate elegant seasonal messages that complement the decorative design. Another creative direction involves incorporating mixed materials such as fabric strips, burlap ribbons, or textured rope to create depth and tactile contrast. For those interested in more intricate crafting methods, wood burning tools can be used to add engraved outlines or patterns to wooden door hangers before painting. Seasonal adaptability is another advanced strategy. A base board can be designed with interchangeable decorative pieces that attach using small hooks or removable adhesive strips. This allows the same base hanger to be updated throughout the year with different seasonal decorations. These advanced ideas provide opportunities for continuous creativity while expanding the artistic possibilities of DIY summer door hanger projects.